
Yakumo’s accessory system works like a lightweight charm loadout: each item consumes a set number of slots, but the game opens with just one. The option to increase that capacity doesn’t appear until a specific story beat, and it’s easy to miss amidst early combat upgrades.
Increase accessory slots (Chapter 4 and later)
The first expansion to your accessory capacity is a paid upgrade that becomes available in Chapter 4: Pilgrim’s Windswept Path. Visit a DarkNest Terminal and summon Tyran (his raven perches at terminals) to access his Combat Skills shop. There you’ll find a new entry:
| Skill | Where it appears | Cost | Effect |
|---|---|---|---|
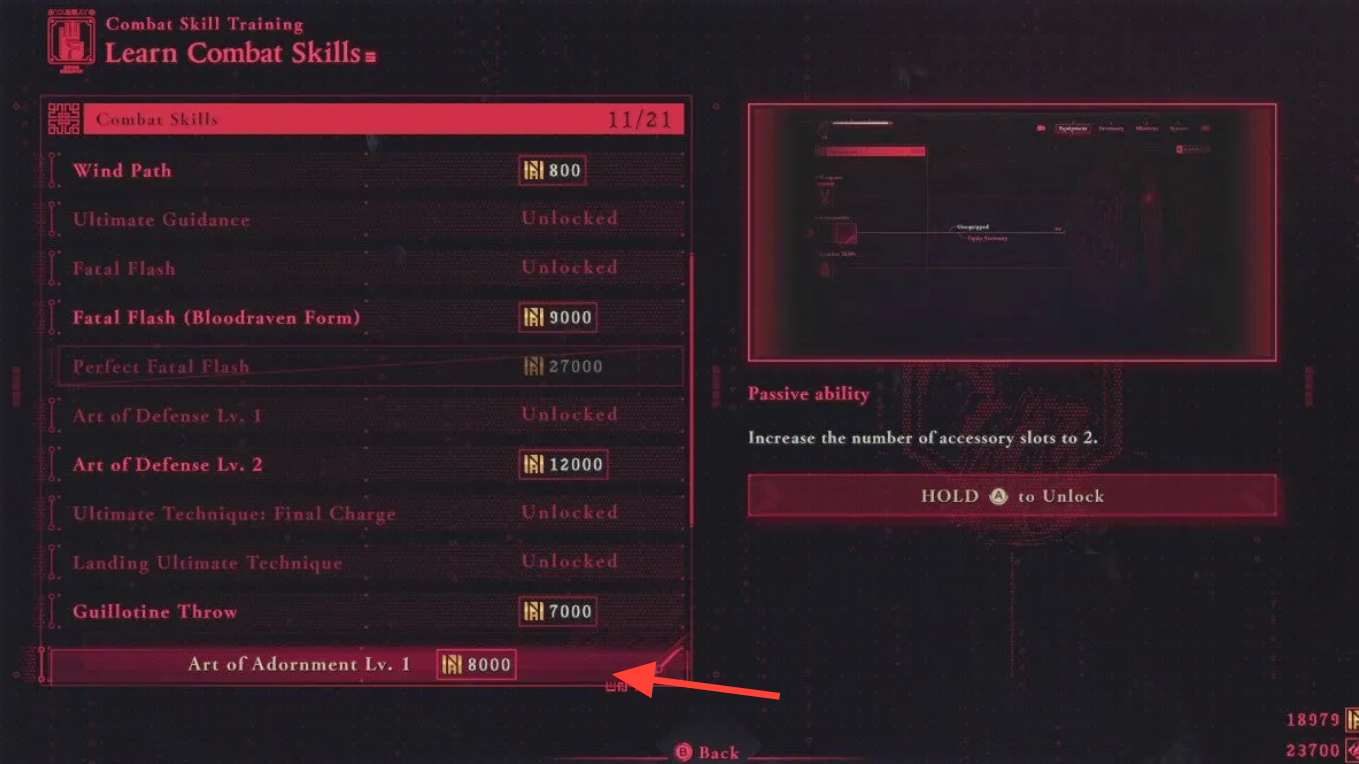
| Act of Adornment Lv. 1 | Tyran’s Combat Skills (Chapter 4) | 8,000 NinjaCoin | Adds +1 accessory slot |
| Higher levels (Act of Adornment) | Tyran as you progress | Varies | Further increases accessory slots |
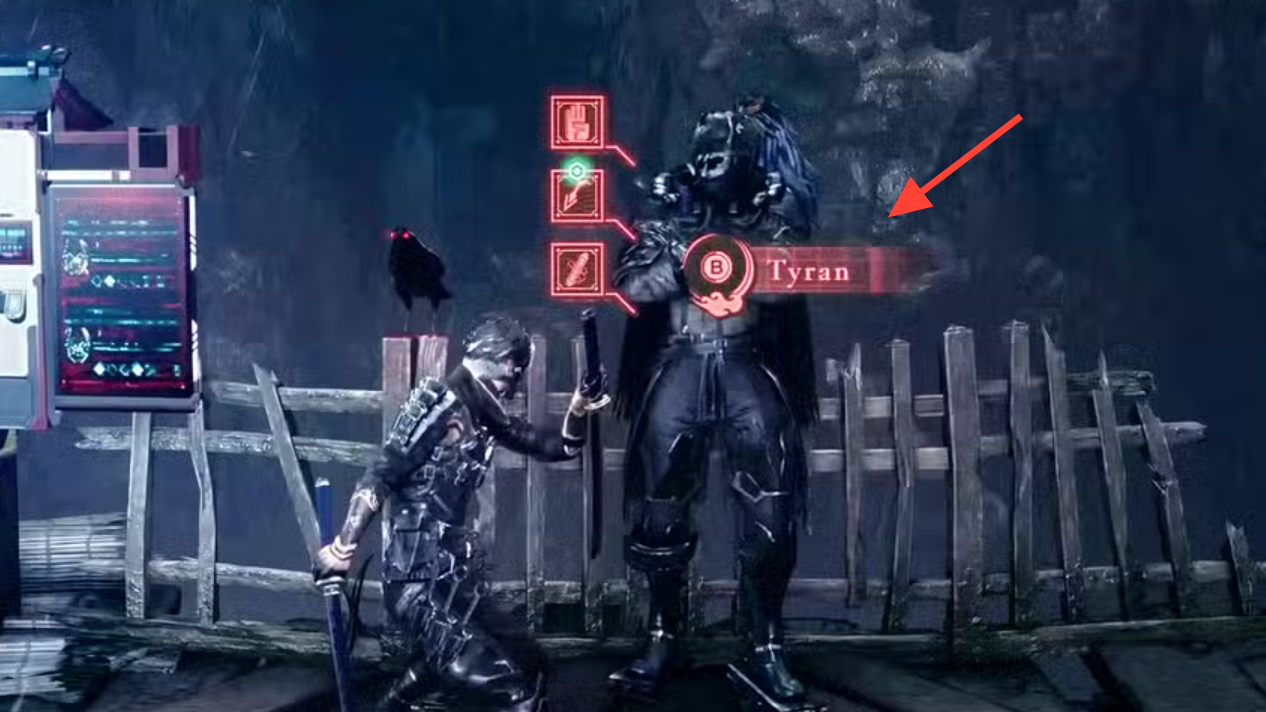
Where to find Tyran and how to buy
- Look for a DarkNest Terminal (save/mission hub). A raven marks the spot where you can summon Tyran.
- Open Tyran’s “Combat Skills.” Before Chapter 4 he only sells active combat skills; from Chapter 4 onward, utility entries like Act of Adornment appear.
- Pay in NinjaCoin. Accessory capacity upgrades do not use Weapon EXP.
Why more slots matter
The game steadily hands out accessories through chests, side missions, and late‑game shops. With only one slot, you’re forced to specialize; with more, you can stack utility and combat perks. Some items also enable efficient post‑game grinding, so having spare capacity lets you swap between farming and fight‑ready loadouts quickly.
| Accessory | How you obtain it | Notes |
|---|---|---|
| Cobalt Ring | Chapter 1 chest off the main path (Sky City Tokyo) | Early accessory found in a dead‑end alley chest. |
| Ashen Pipe | Chapter 4 temple bell puzzle (Fuuhaku Sanctum) | Appears after ringing sequence; grabbed from a spawned chest. |
| Crimson Ring | Chapter 4 Dragonfly Glider route to a side ledge | Requires a detour to a chest on a platform. |
| Cultivation Omamori | Chapter 4 chest on a high platform after side mission minerals | Accessible only via consecutive Glider sections. |
| Fortune Omamori | Chapter 12 chest behind cargo near laser hallway | In a side nook before progressing the main route. |
| Focus God’s Orb | Chapter 12 chest on a floor with triangular steel beams | Visible in the open; easy to miss if rushing. |
| Strife God’s Orb | Chapter 19 chest atop a shipping container | In the same room as a late Gourdy collectible. |
| Enlightenment Omamori | Umi’s shop, post‑game | Converts NinjaCoin you earn into Weapon EXP; costs 8,000 NinjaCoin. |
| Enrichment Omamori | Umi’s shop, post‑game | Converts Weapon EXP you earn into NinjaCoin. |
Each accessory lists its slot requirement in its description. Extra slots let you pair general‑purpose rings with situational omamori orbs, or reserve space for post‑game farming tools without sacrificing fight utility.
Budgeting NinjaCoin vs. Weapon EXP
Ninja Gaiden 4 separates economy into two buckets: NinjaCoin covers items, accessories, and universal skills (including accessory capacity), while Weapon EXP fuels weapon skill trees. Slot upgrades always use NinjaCoin.
- If you’re short on slots in Chapter 4, prioritize Act of Adornment Lv. 1 before buying non‑essential skills or consumables.
- After finishing the story, consider picking up the Enlightenment Omamori from Umi to convert NinjaCoin gains into Weapon EXP while you replay enemy‑dense chapters. When you need currency instead, swap to Enrichment to flip the conversion.
Quick setup once you unlock more slots
- Keep at least one slot free when entering new chapters; you’ll frequently pick up mission reward trinkets worth testing.
- When grinding post‑game upgrades, equip Enlightenment Omamori; before tough bosses, swap in your preferred combat accessories instead.
- Revisit Tyran in later chapters to add more Adornment levels as they appear, increasing your flexibility further.
The path to more accessories is simple once it appears: reach Chapter 4, buy Act of Adornment from Tyran, then keep checking back for higher levels. With extra slots, the growing list of rings and omamori becomes a real loadout system rather than a one‑item choice.