Of Ash and Steel treats basic survival as seriously as its combat. Hunger, thirst, and fatigue are always ticking in the background, and a single fish can be the difference between limping back to camp or dying in a ditch. That makes understanding the fishing system essential, especially early in the game when supplies are scarce.
Fishing is more than pressing a button and waiting. It’s a quick reaction mini-game built around line durability, success chance, and very limited bait. Once you know how those pieces fit together, it becomes a reliable way to feed Tristan, heal up, and stock trade goods.
Where to start fishing in Of Ash and Steel
Tristan’s first real opportunity to fish appears at the start of Act 1, right after the prologue.
Step 1: After waking in Nerest’s hut and finishing his initial chores, walk out of the hut and turn left. Follow the path down to a small pond. This area functions as your first hub and includes a dedicated fishing spot.
Step 2: At the pond, look for a fishing rod already set up at the water’s edge and a box or small stash of bait nearby on the ground. Pick up the bait first; early on, every piece matters.
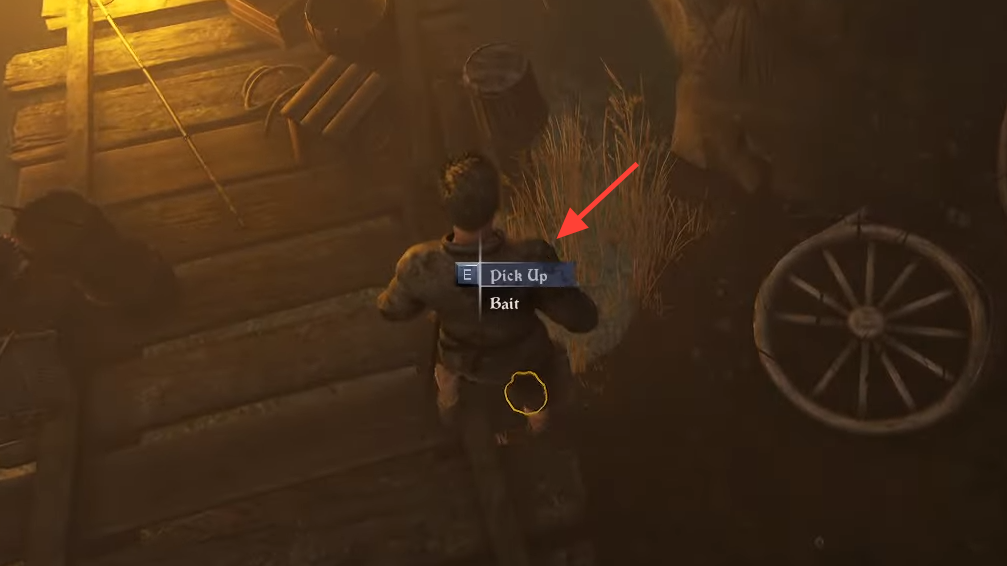
Step 3: Interact with the rod to begin fishing. In Of Ash and Steel, rods stay at the water; you don’t add them to your inventory. Anywhere you see a rod stuck in the ground next to water, you’ve found a fishing spot.
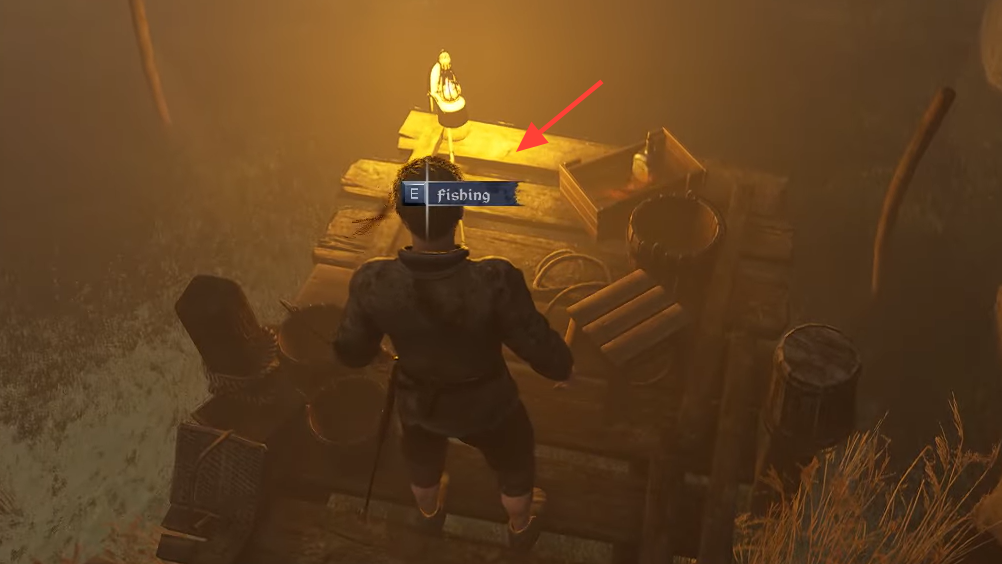
Fishing spots appear along ponds and rivers throughout the world. The pattern is always the same: a rod placed at the shoreline, often with a small container of bait nearby. Some spots may be occupied by NPCs; in at least one case, a hostile NPC has already used the bait, but you can take any fish and money from their body if you defeat them.
Fishing controls and UI basics
Once Tristan starts fishing, the UI explains most of what matters, but it’s easy to misread under pressure.
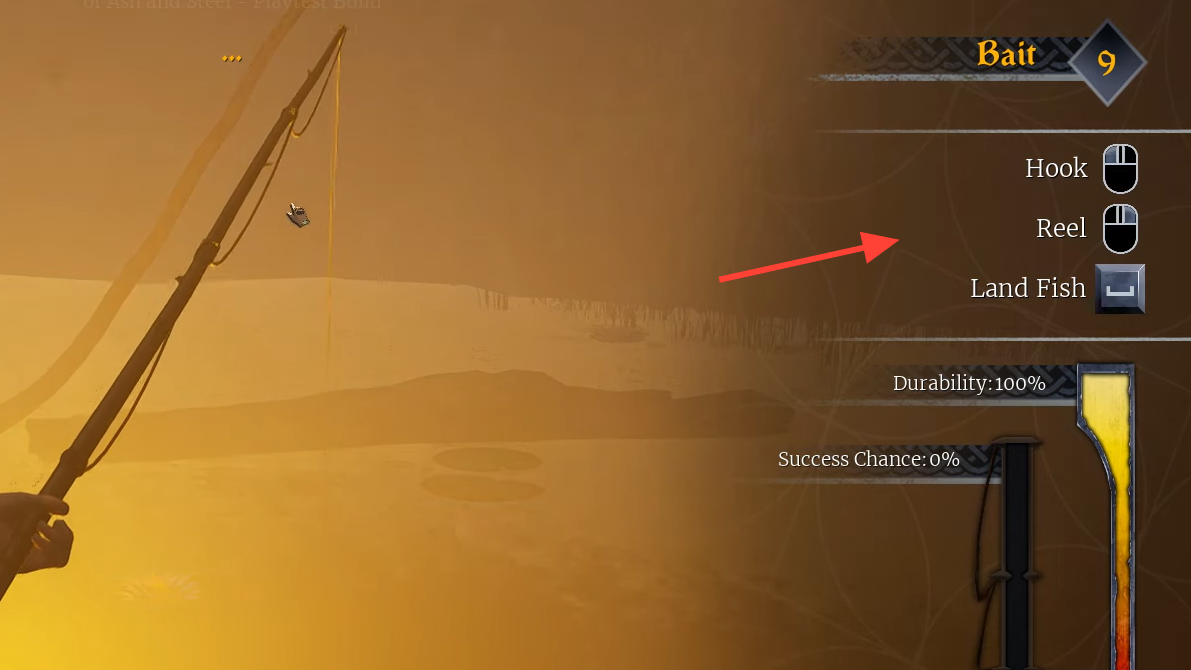
You’ll see three possible actions and two important bars:
- Actions
- Hook – PC: left mouse button; Controller: LB/L1.
- Reel – PC: right mouse button; Controller: RB/R1.
- Land Fish – PC: Space; Controller: A/X.
- Bars
- Durability bar – Shows the condition of the rod and line. If it empties, the fish escapes and you lose your bait.
- Success chance bar – Shows how likely you are to land the fish. You want this high before you attempt to land.
Hook and Reel behave differently:
- Hook is a single tap.
- Reel is a press-and-hold action, not repeated tapping.
The game will display prompts at the top of the screen that say “Hook” or “Reel” and, when the time is right, “Land Fish.” Reading those prompts correctly and reacting with the right input is the core of the mini-game.
How the fishing mini-game works
Fishing in Of Ash and Steel revolves around three things: reacting to prompts, managing durability loss, and timing the final “Land Fish” input.
Step 1: With bait in your inventory and Tristan holding the rod, wait for a bite. You’ll usually hear an audible “plop” or see the line/bobber react. When the “Hook” prompt appears, quickly tap the Hook button once.
Step 2: After a successful hook, watch for the “Reel” prompt. When it appears, hold the Reel button down until the prompt disappears. Do not mash or repeatedly click; a steady hold is enough.
Step 3: When prompts disappear, stop pressing anything and wait. The mini-game alternates between windows where you either Hook again, Reel again, or simply hold still. Each correct input pushes the success chance bar higher and generally keeps durability loss under control.
Step 4: Repeat this cycle of Hook–Reel–wait as the game prompts. Rushing, guessing, or pressing the wrong button is punished: the line durability bar drops sharply when you react incorrectly.
Step 5: Only when the success chance bar is high will the “Land Fish” prompt appear. At that point, press the Land Fish button (Space/A/X). If your success chance is high enough and durability has not hit zero, Tristan pulls in the fish.
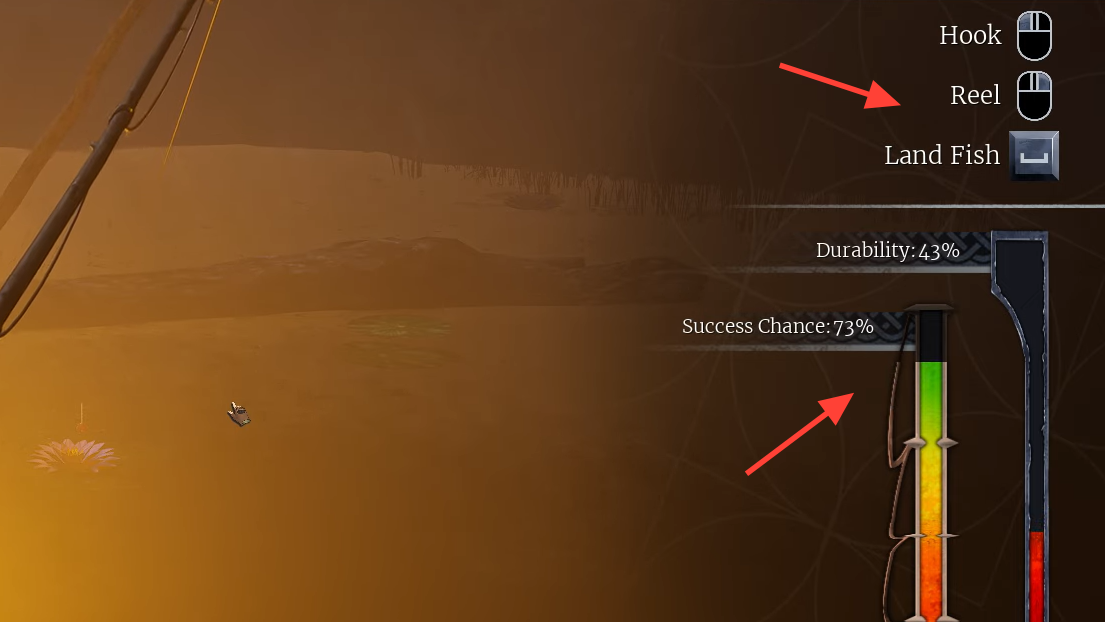
Misreading even one prompt can be the difference between a catch and a lost bait. A wrong input at low durability often ends the attempt immediately.
Durability vs. success chance: what they actually mean
The two bars to Tristan’s right represent a tradeoff you manage in each attempt.
- Durability: The line’s health. It ticks down slowly over time and drops harder when you press the wrong input or try to force the fish at the wrong moment. If it reaches zero, the fish escapes, and one bait is consumed.
- Success chance: A probability meter for landing the fish. It increases when you respond correctly to Hook and Reel prompts and generally plateaus if you miss inputs or hesitate too long.
Effective fishing is about pushing success chance high before durability runs out. You don’t control the fish’s behavior directly, but you control whether you’re losing durability for no benefit.
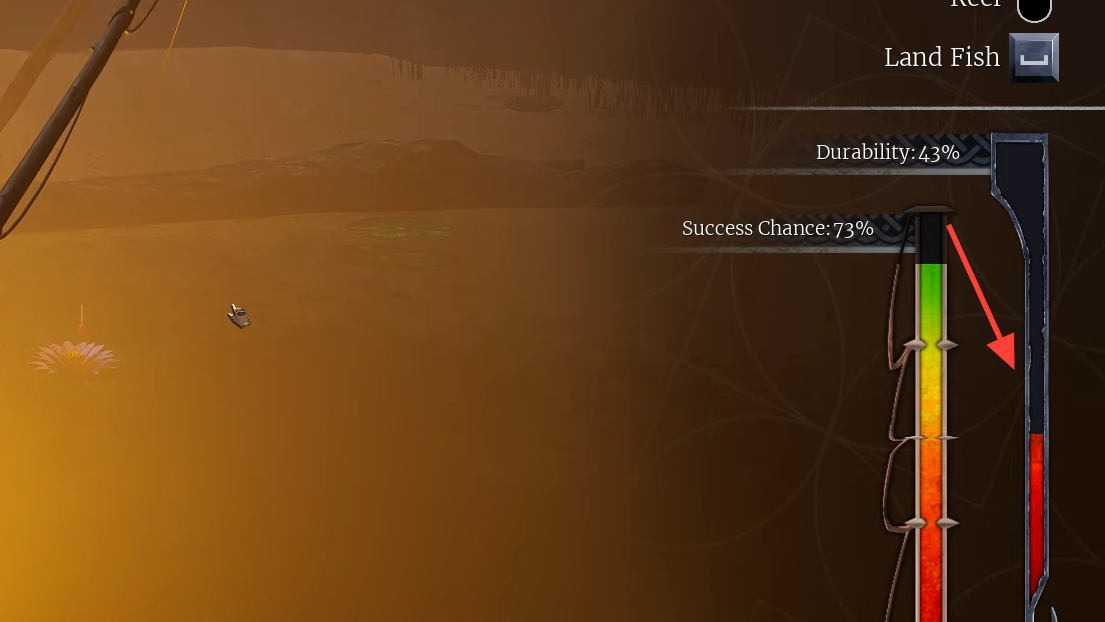
Key points to keep in mind:
- Correct action = controlled durability loss. You might still lose a small amount of durability over time, but nowhere near what you lose by pressing the wrong button.
- Wrong action = heavy durability hit. Pressing Hook when the game wanted Reel, or vice versa, chunks the durability bar and can instantly end an attempt late in a fight.
- Low success chance + Land Fish = likely failure. Even if durability looks okay, trying to land with a low success bar often costs both the fish and the bait.
Sometimes, even with good reactions, durability can drop before the success chance reaches a comfortable range. That’s part of the system: not every attempt is winnable, and bait is always at risk.
How to stop wasting bait
Bait is intentionally limited, especially in the first hours. Treat every piece as valuable.
Step 1: Before you start, grab all the bait around a fishing spot. If multiple pieces are lying on the ground or in a box, collect them; they don’t weigh much and will all be used eventually.
Step 2: Once you’re fishing, slow down your reactions. Look at the prompt text before pressing anything. It is better to be late and right than fast and wrong.
Step 3: Ignore “Land Fish” until the success chance bar is clearly high. If the bar is only partially filled, wait for another cycle of Hook/Reel prompts to push it higher.
Step 4: Accept that sometimes the best outcome is backing off early. If durability is already low and the success chance is still poor, you’re in a losing situation; trying to force a Land Fish attempt at that point usually means losing the bait for nothing.
Finding more fishing spots and bait
The starting pond near Nerest’s hut is not the only place to fish. As you explore:
- Look for bodies of water—ponds, lakes, and stretches of river—with a stationary fishing rod planted at the edge.
- Check the ground nearby for loose bait or containers; some spots restock over time.
- Be cautious around fishing rods near hostile NPCs; in at least one case, an enemy has already used the bait there, but you can loot their caught fish and coins after a fight.
Bait at these locations is limited, but multiple fishing spots across the map mean you can keep restocking gradually as you travel. Treat them as renewable but slow-growing food nodes rather than an infinite resource; you can camp forever in one place.
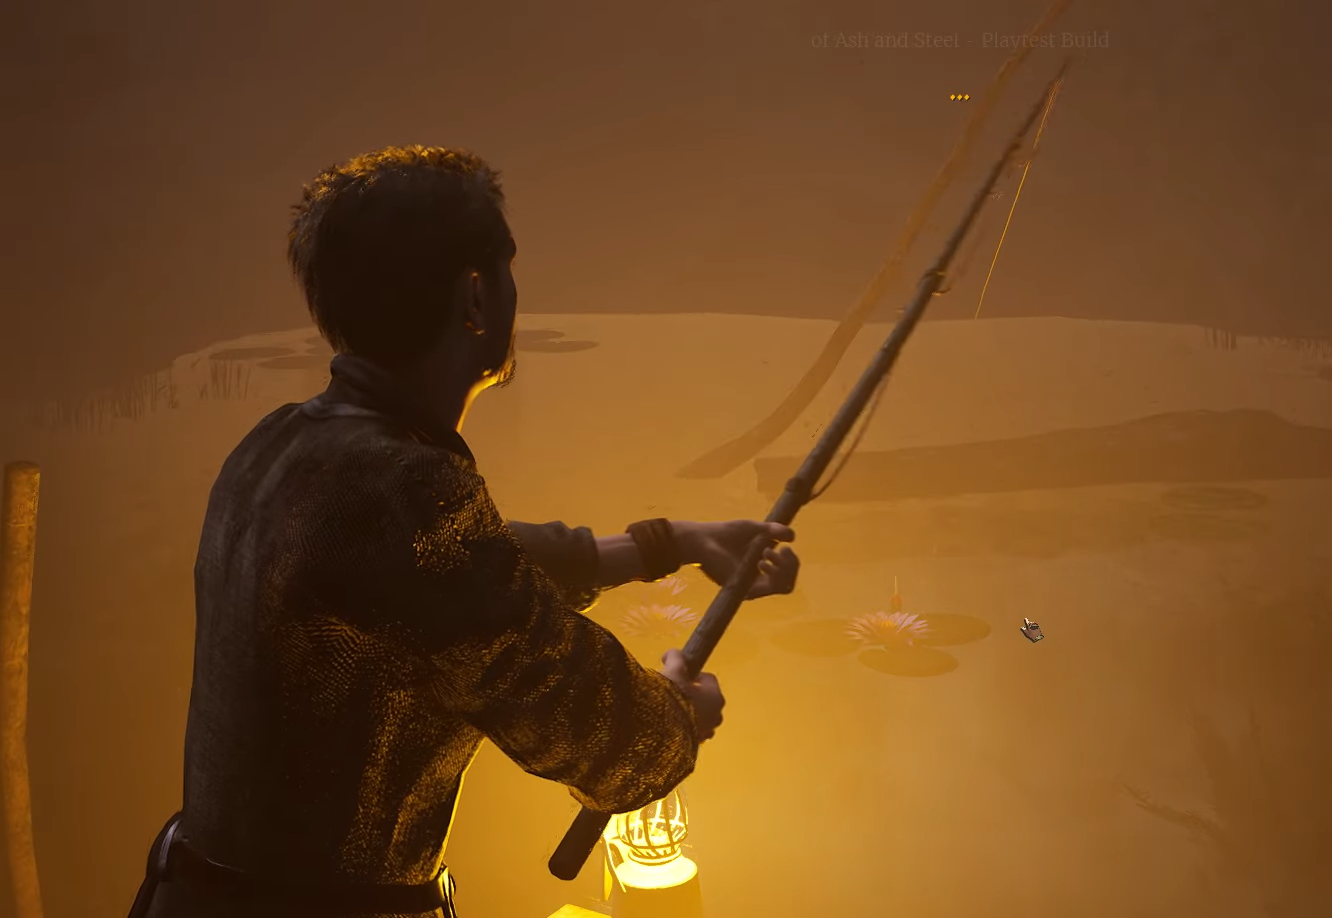
What to do with the fish you catch
Fish are more than hunger filler. They’re flexible survival tools and trade goods.
- Cooking: Raw fish can be cooked at campfires and other cooking points. Cooked fish typically restores hunger and a solid chunk of health, with some recipes also applying additional health regeneration over time.
- Healing consumables: Early on, cooked fish can function as reliable healing items, sitting on your hotbar alongside potions and bandages.
- Trading: Vendors will buy fish, turning a quiet afternoon at the pond into a small pile of gold.
- Quests: Some NPC side quests can ask for fish, so holding a few in reserve is often safer than selling or eating everything immediately.
Cooking also helps stretch your food supply. A cooked fish that restores both hunger and health replaces separate items you would otherwise need to carry.
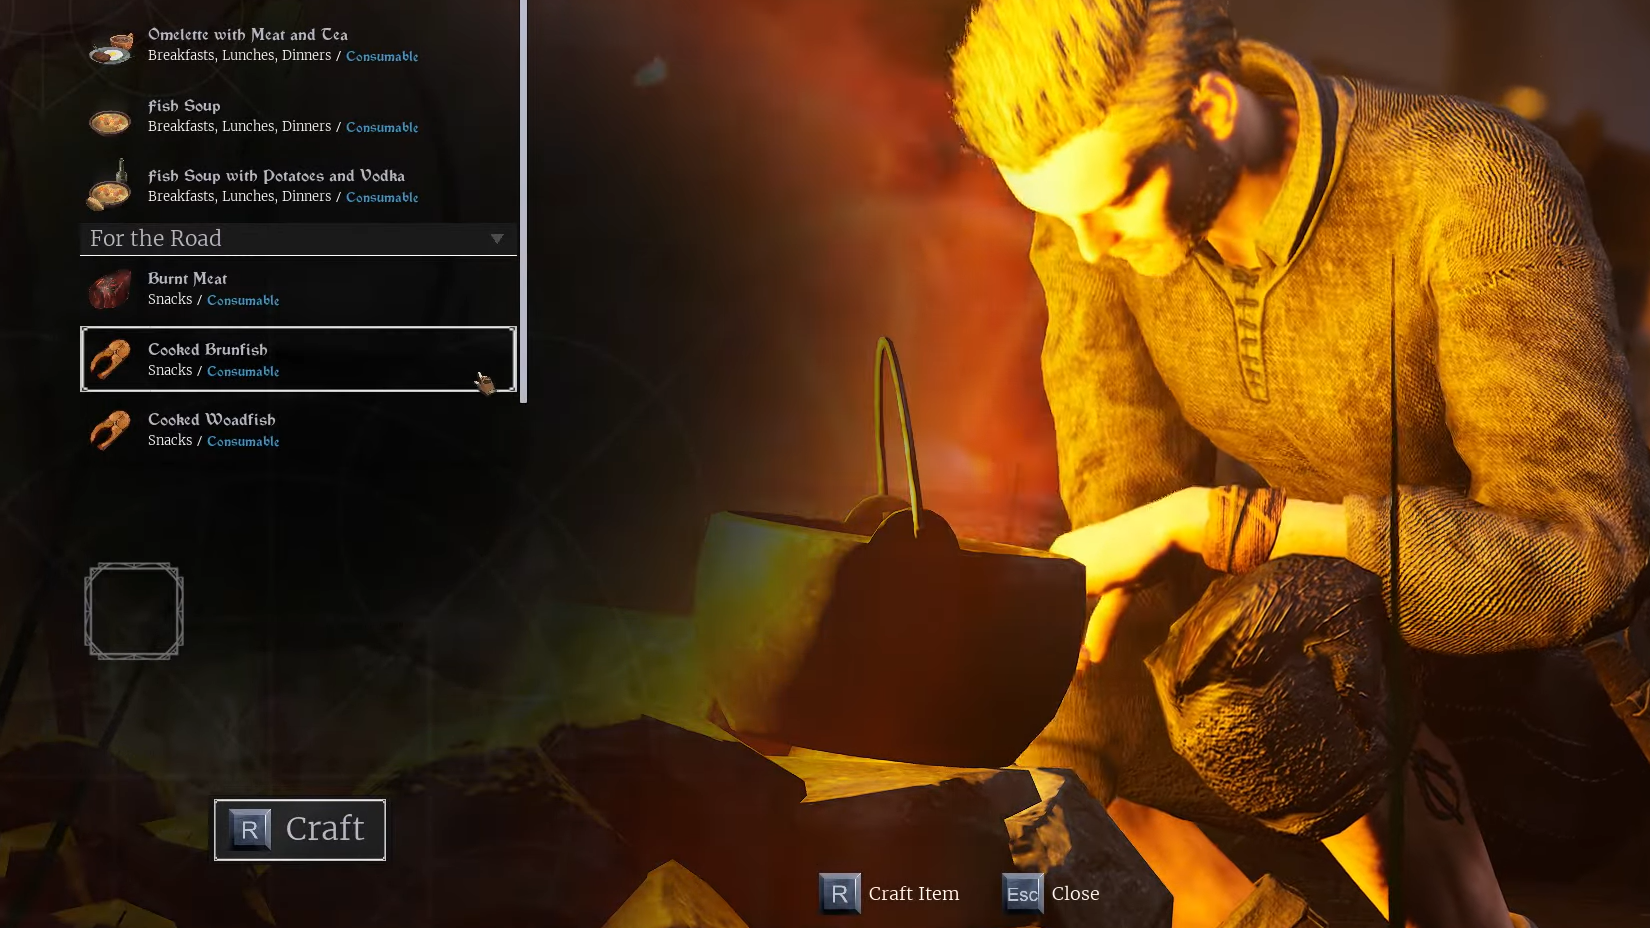
How fishing fits into Of Ash and Steel’s survival loop
Fishing is one piece of a broader survival system made up of hunger, thirst, fatigue, and wounds.
- Hunger and thirst reduce maximum health and stamina when ignored.
- Fatigue cuts into combat performance if you skip sleep.
- Wounds accumulate from fights and accidents.
Against that backdrop, fishing does three important things:
- Provides a renewable food source tied to geography rather than merchants.
- Supports healing through cooked fish, reducing dependence on crafted or bought potions.
- Generates low-risk trade goods when you need extra gold.
Pair fishing with controlled resting. Sleep is restricted to valid beds (such as the starter cabin, inn beds, or marked campfire sites once you unlock the first Survival skill), so planning routes that pass by known fishing spots, safe rest locations, and fires for cooking keeps Tristan healthier for longer expeditions.
Once the mini-game clicks, a pond with a single rod and a few pieces of bait stops being a confusing distraction and becomes one of the most reliable lifelines in Of Ash and Steel’s harsh world.

