
The Secret Bunker in Chapter 6 of Reanimal hides both a collectible poster and the “Secret Bunker” trophy/achievement behind a four-button light code. That code is fixed for every playthrough, but it is first hinted at in an optional area much earlier in the story.
Secret Bunker code value and effect
The Secret Bunker code you must enter on the four-light panel in Chapter 6 is:
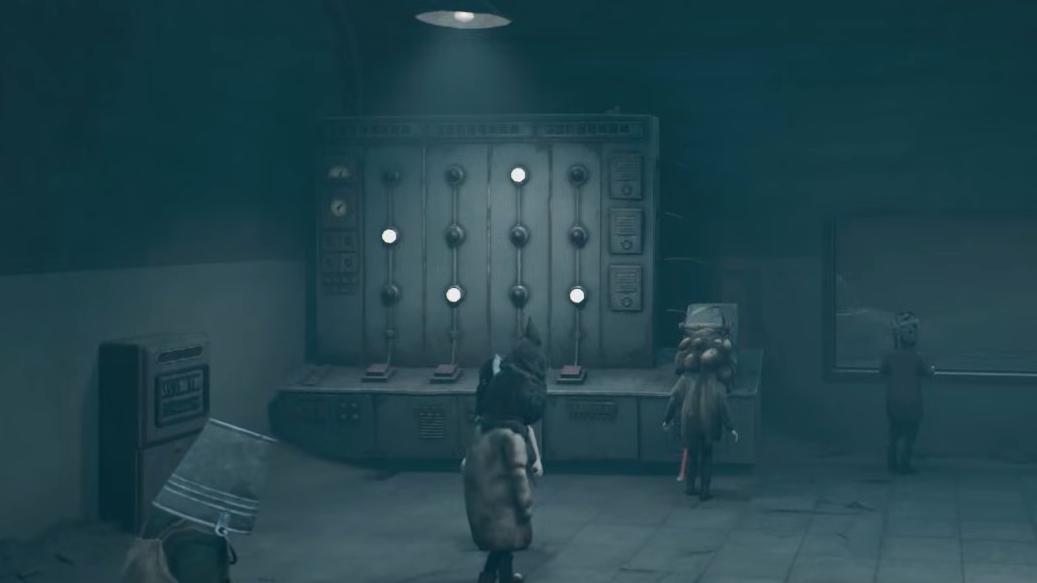
Middle → Bottom → Bottom → Middle
Each input corresponds to the vertical position of the lit dot in one of the four columns on the bunker’s control panel. Setting the lights in this order and then pulling the lever does two things simultaneously:
- It triggers the Secret Bunker trophy/achievement.
- It opens the wall receptacle to the left of the panel, revealing a hidden propaganda poster collectible (Poster #14 for the A Proper Gander trophy).
This code is the same for every game instance; it does not change between saves or platforms.
Where the Secret Bunker code is hinted in Chapter 1
The in-game hint for the Secret Bunker code is found in Chapter 1 “Dead in the Water,” in a side area off the handcart courtyard at the mill.
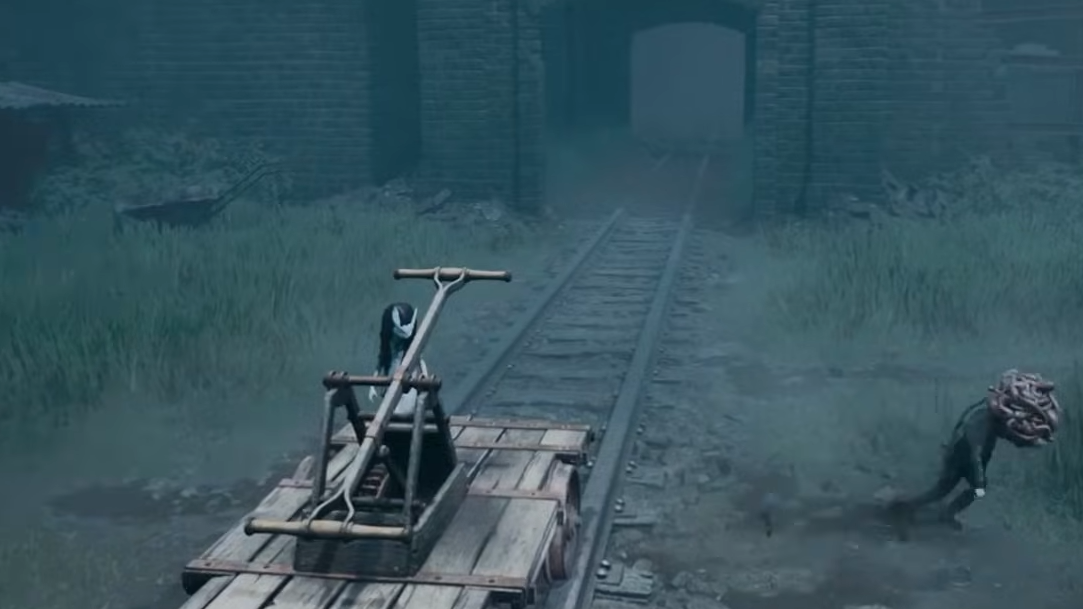
Step 1: Reach the outdoor rail yard where you first encounter the handcart that is missing wheels. Before restoring the cart, focus on the doors on the right side of this courtyard.
Step 2: Enter the darker, unlit door on the right-hand side (the lower-right door in this area). Inside, follow the metal walkway and go through the next doorway into an additional mill section.
Step 3: Climb the catwalk up into the small office at the end. On the floor lies the Conch Head mask, and to the right are stacked cardboard boxes marked with a pattern of four white dots arranged vertically in columns.
That pattern of four dot positions is the visual clue for the Chapter 6 Secret Bunker code. It corresponds directly to the middle–bottom–bottom–middle light configuration on the later control panel.
How to reach and power the Secret Bunker panel in Chapter 6
The Secret Bunker panel becomes usable early in Chapter 6, “Nobody Left Behind,” immediately after the car crash sequence.
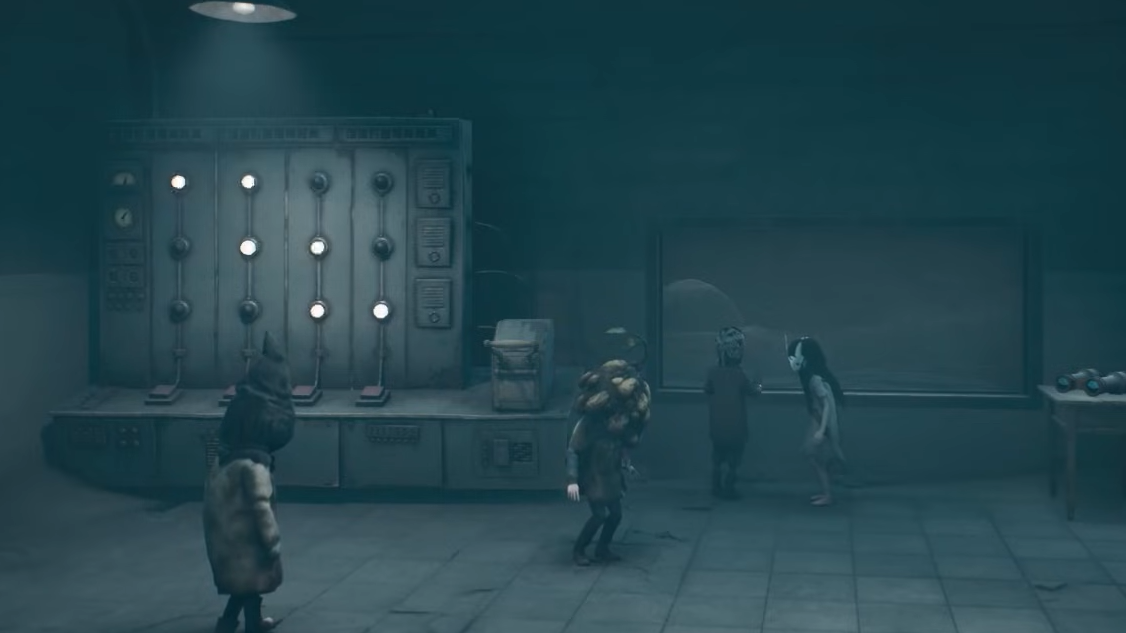
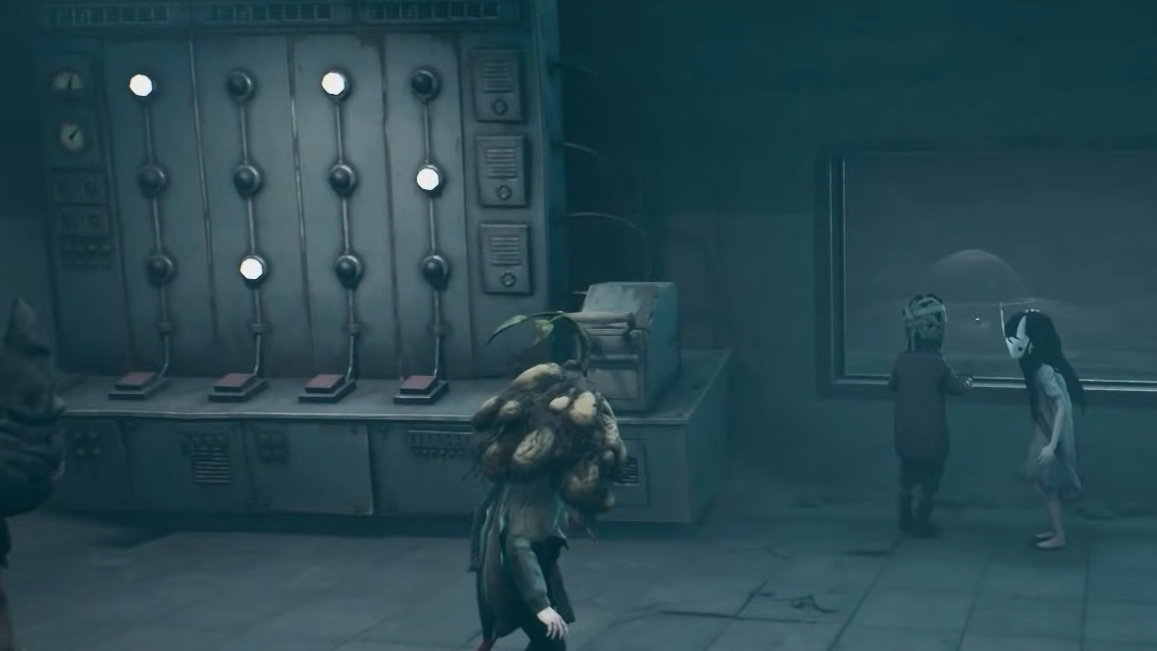
Step 1: After the crash, follow the linear tunnel until you enter the old underground bunker control room. You will see a large machine with four vertical light columns and a lever, but the room is still without power.
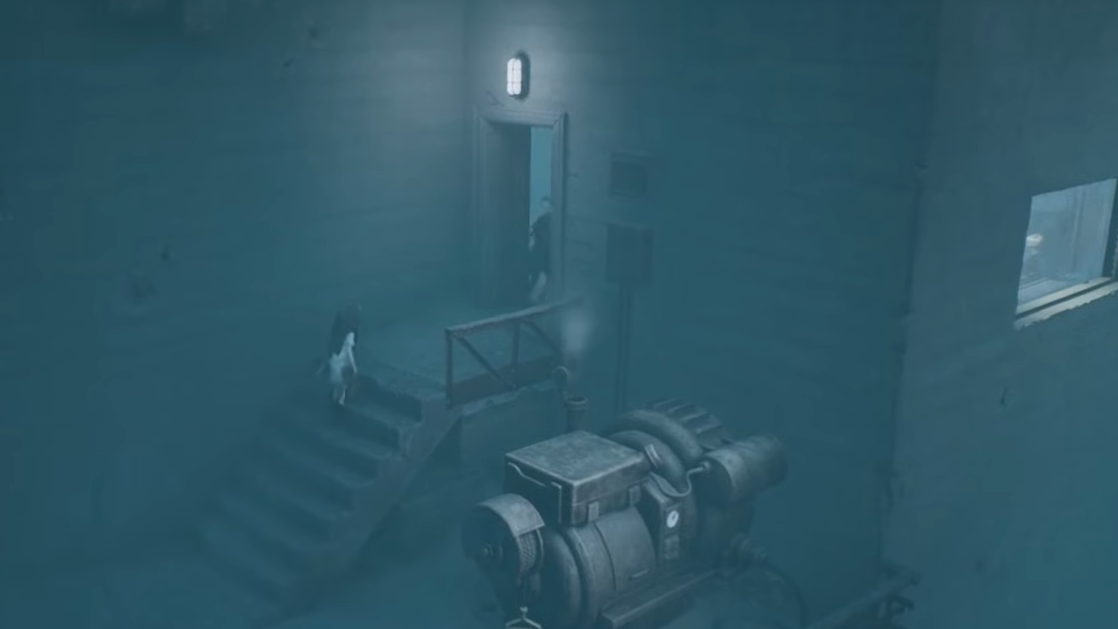
Step 2: Exit through the door on the right side of the control room. Outside on the platform is a generator. Interact with the generator to start it and restore electricity to the bunker.
Step 3: Return to the control room. With the lights now on, approach the panel to activate the interaction prompts for the four column buttons and the main lever.
First story code vs. Secret Bunker code
The control panel is used twice in quick succession, first for story progression and then for the hidden poster and achievement.
Step 1: After power is restored, interact with the binoculars in the bunker to look out toward Cannon Island. You will see a crate or box marked with a four-dot pattern. This represents the story supply-drop code.
Step 2: On the panel, use the buttons to match that first pattern. The pattern is, from left to right: Bottom → Middle → Top → Bottom. Once the dots are in that order, pull the lever to call in a crate of cannon shells needed to continue Chapter 6.
Step 3: After the crate is delivered, do not leave the bunker. Use the panel again, this time entering the Secret Bunker code from the earlier hint: Middle → Bottom → Bottom → Middle. Pull the lever a second time to resolve the secret.
How to confirm the Secret Bunker code worked
You can verify that the input succeeded in two clear ways:
- The Secret Bunker trophy/achievement unlocks immediately after the lever is pulled with the middle–bottom–bottom–middle pattern set.
- The metal hatch or receptacle on the wall to the left of the control panel opens automatically, exposing a red propaganda poster that can be torn down and added to your poster collection.
If neither of these triggers, the code was not set correctly, or the lever was pulled before all four columns matched the intended positions. Re-adjust the lights and try again.
Common reasons the Secret Bunker unlock fails
When the achievement or poster does not appear, it is usually due to one of these mistakes:
- Incorrect order of lights: The four columns must be set exactly to middle, bottom, bottom, middle from left to right. Any other combination, even if it uses the same positions, will not count.
- Lever pulled too early: The code only registers when the lever is pulled after all four lights are already in the correct positions.
- Confusing the codes: The Cannon Island crate code (bottom–middle–top–bottom) is only for summoning shells and does not unlock the poster or achievement.
Once the Secret Bunker code has been accepted, it does not need to be re-entered on that save, and the poster remains collected permanently for that profile.