
Storage shortages often appear after upgrading Windows 11 to a new version, especially when the system retains backup files from your previous installation. These files, typically stored in the C:\Windows.old folder, allow you to revert to an earlier version if something goes wrong. However, they can occupy 12GB, 20GB, or even more, which is significant for users with limited SSD space. Deleting these leftovers not only recovers valuable storage but also prevents update failures or slowdowns due to low disk space.
Remove Previous Windows Installation Files Using Settings
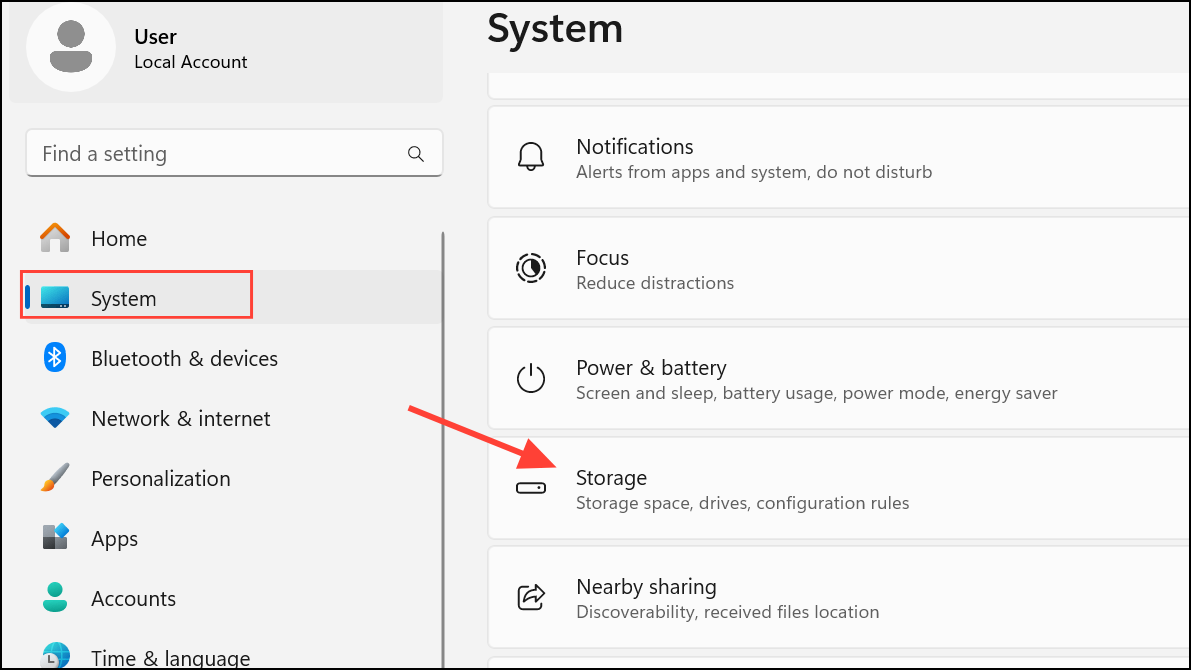
Step 1: Open the Settings app by pressing Windows + I or selecting it from the Start menu. Navigate to System and then click on Storage. The Storage section provides an overview of disk usage and options for managing files.
Step 2: On the right side, select Temporary files. Windows will scan your drive for files that can be safely removed, including old installation files, temporary system data, and cached items.
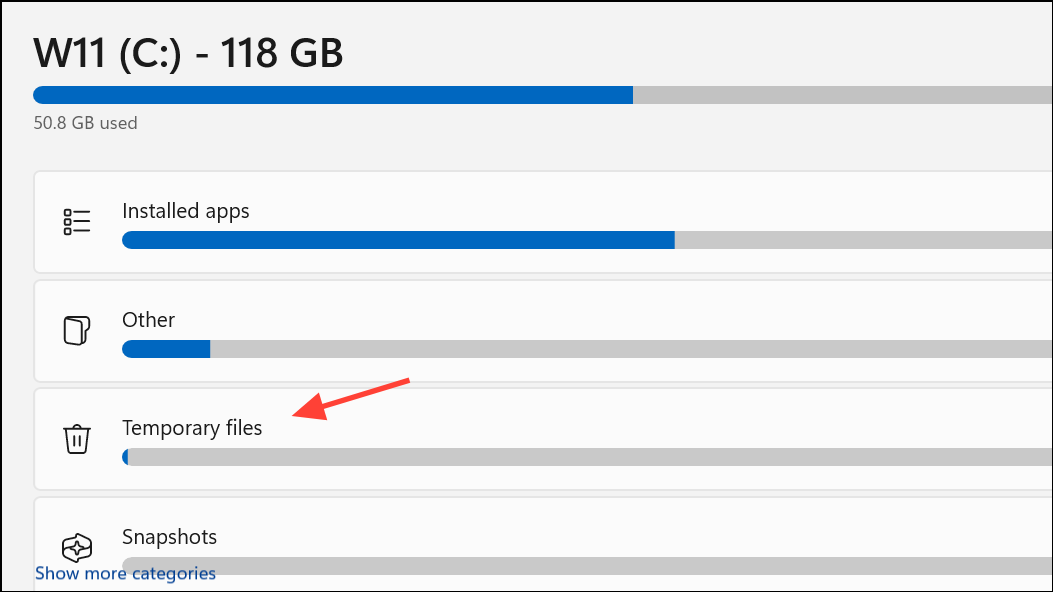
Step 3: Review the list of detected file types. Clear any preselected checkboxes if you do not want to remove those categories. Locate and check the box labeled Previous Windows installation(s). This entry refers specifically to the Windows.old folder, which contains backup files from your prior system version.
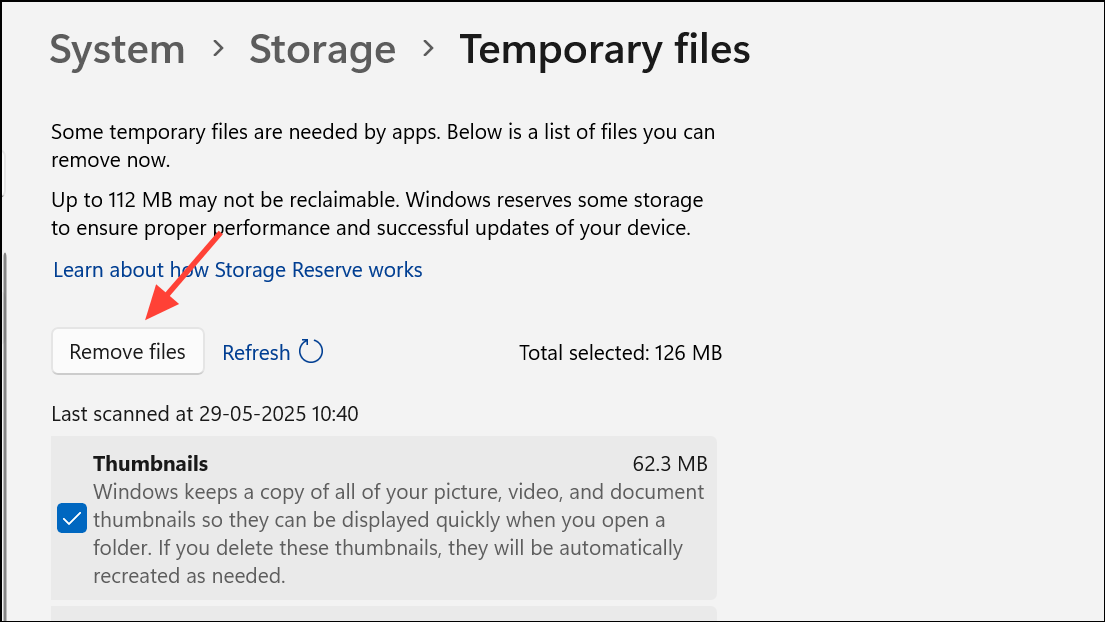
Step 4: Click Remove files. The system will permanently delete the selected files, immediately freeing up space. Note that after this action, you will no longer be able to roll back to the previous Windows version using the built-in recovery options.
Delete Previous Installation Files Using Disk Cleanup
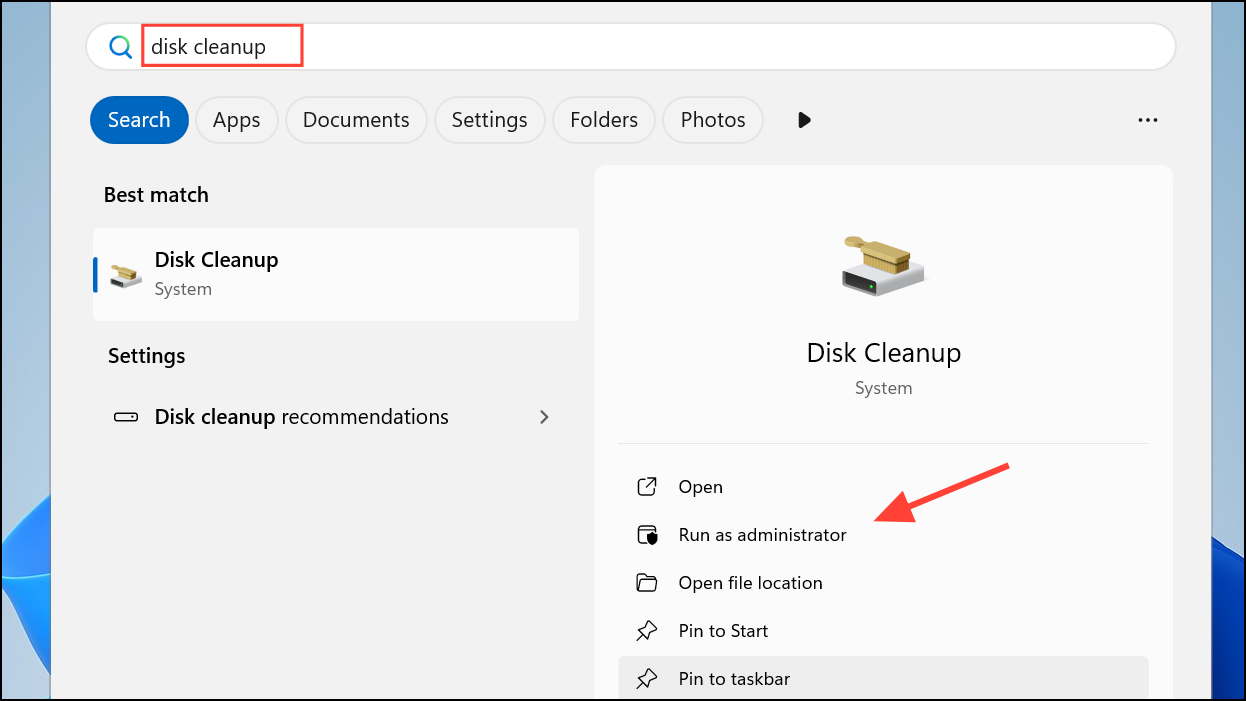
Step 1: Open the Start menu, type Disk Cleanup, right-click the result, and select Run as administrator. This ensures the tool can access protected system files.
Step 2: In the Disk Cleanup dialog, select your system drive (commonly C:) and let it calculate potential space savings. Once loaded, click Clean up system files to rescan and include system-level items like previous Windows installations.
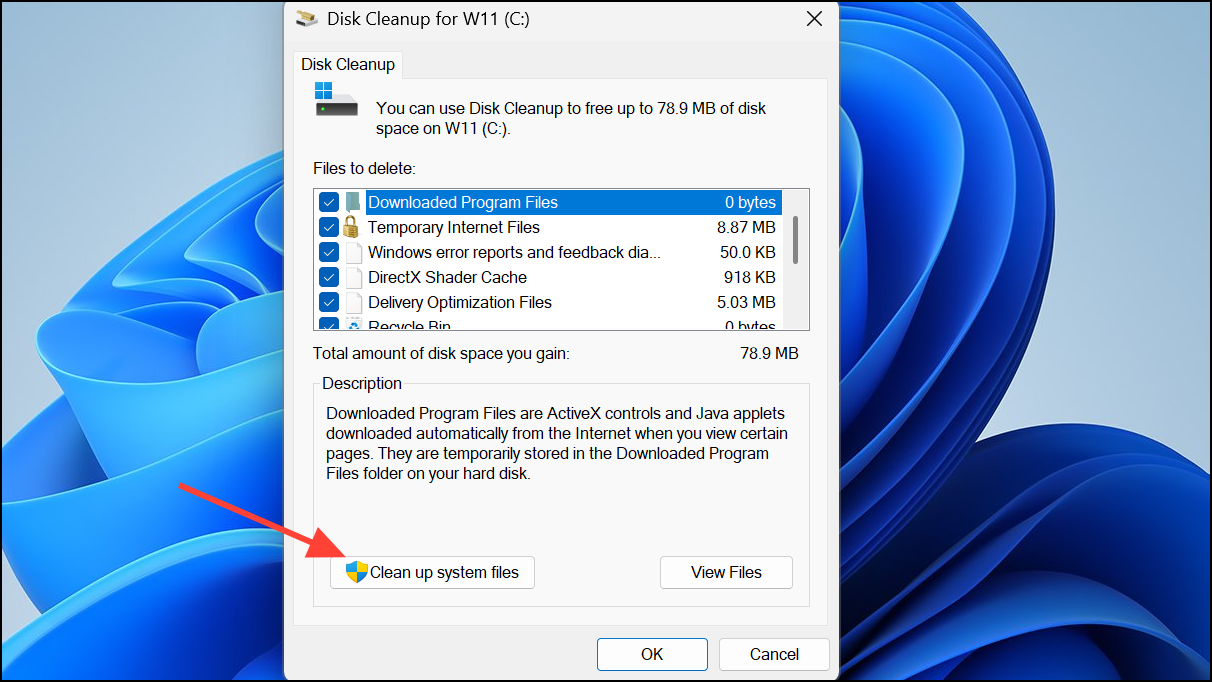
Step 3: After the scan, look for Previous Windows installation(s) in the list. Check this box. Optionally, select other categories such as Windows Update Cleanup or Delivery Optimization Files to free up even more space. Be cautious with the Downloads option—unchecking this prevents accidental deletion of files in your Downloads folder.
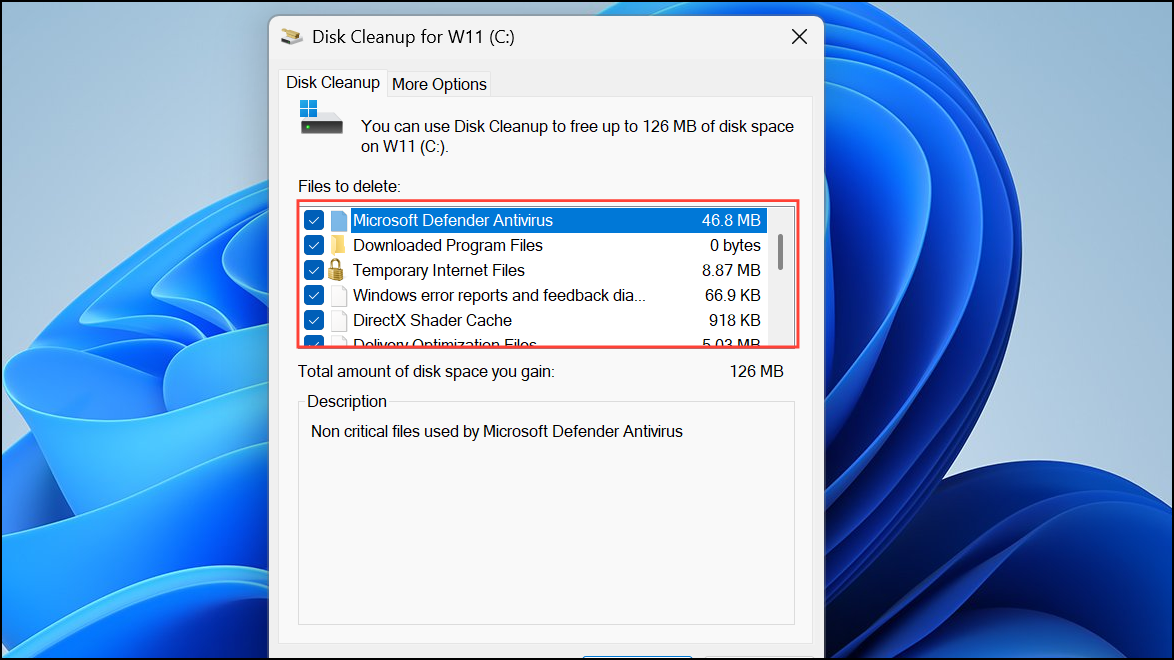
Step 4: Click OK, then confirm by selecting Delete Files. Disk Cleanup will remove the selected items, including the Windows.old folder, and restore storage space on your main drive.
Free Up Space Using Storage Sense
Step 1: Open Settings and go to System > Storage. Scroll down and enable Storage Sense. This feature automates disk cleanup by removing temporary files, emptying the Recycle Bin, and deleting old system files at regular intervals.
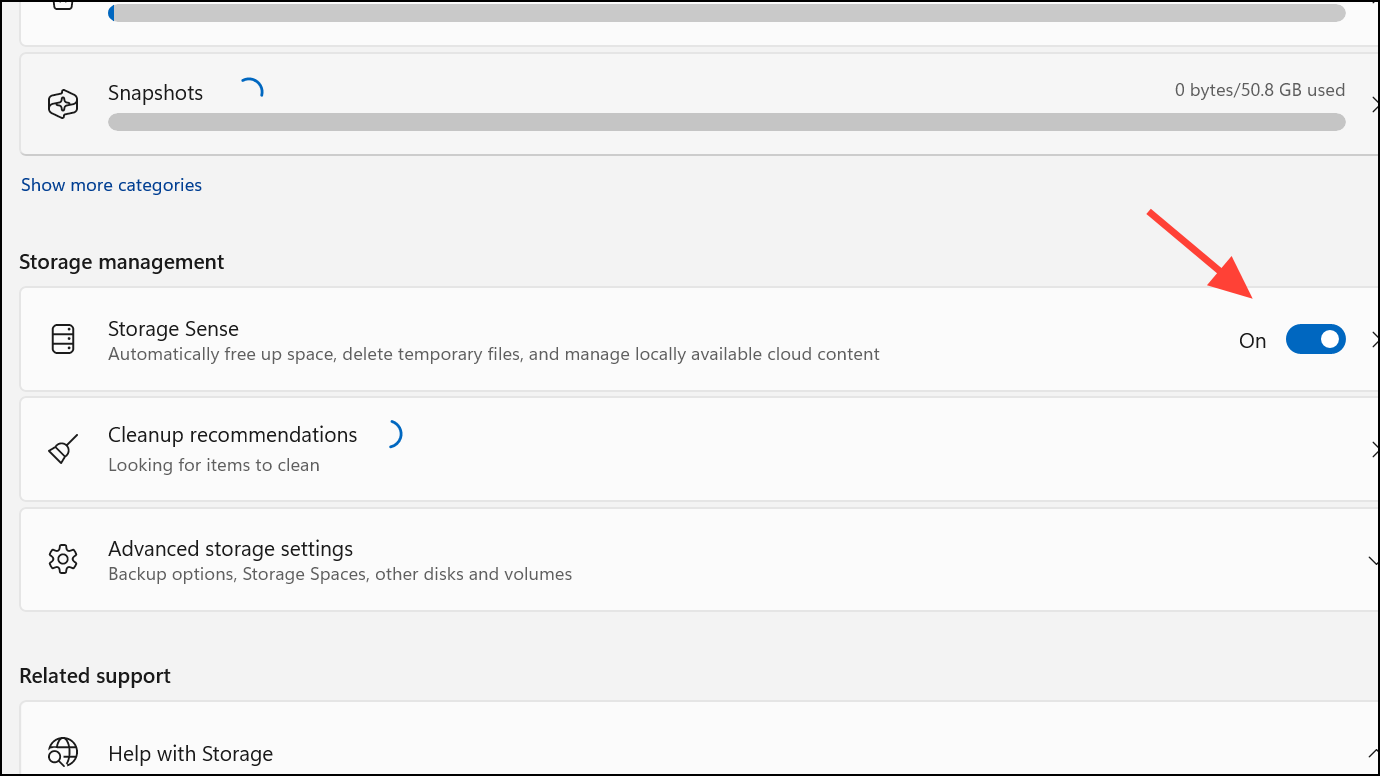
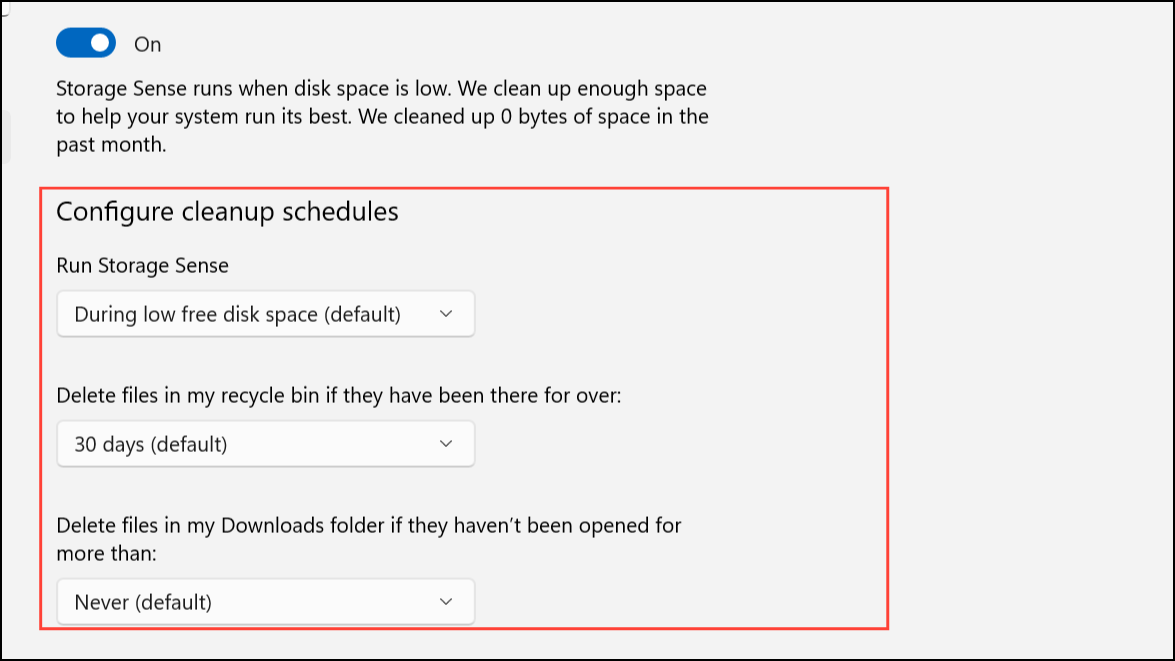
Step 2: Click on Storage Sense to adjust its configuration. You can set how often it runs, how long files stay in the Recycle Bin before removal, and whether it deletes files in the Downloads folder. Storage Sense will also handle old Windows installation files if they are eligible for deletion.
Delete Windows Update Download Files (If Update Not Installed)
Sometimes, downloaded update files occupy space even before installation. To clear these:
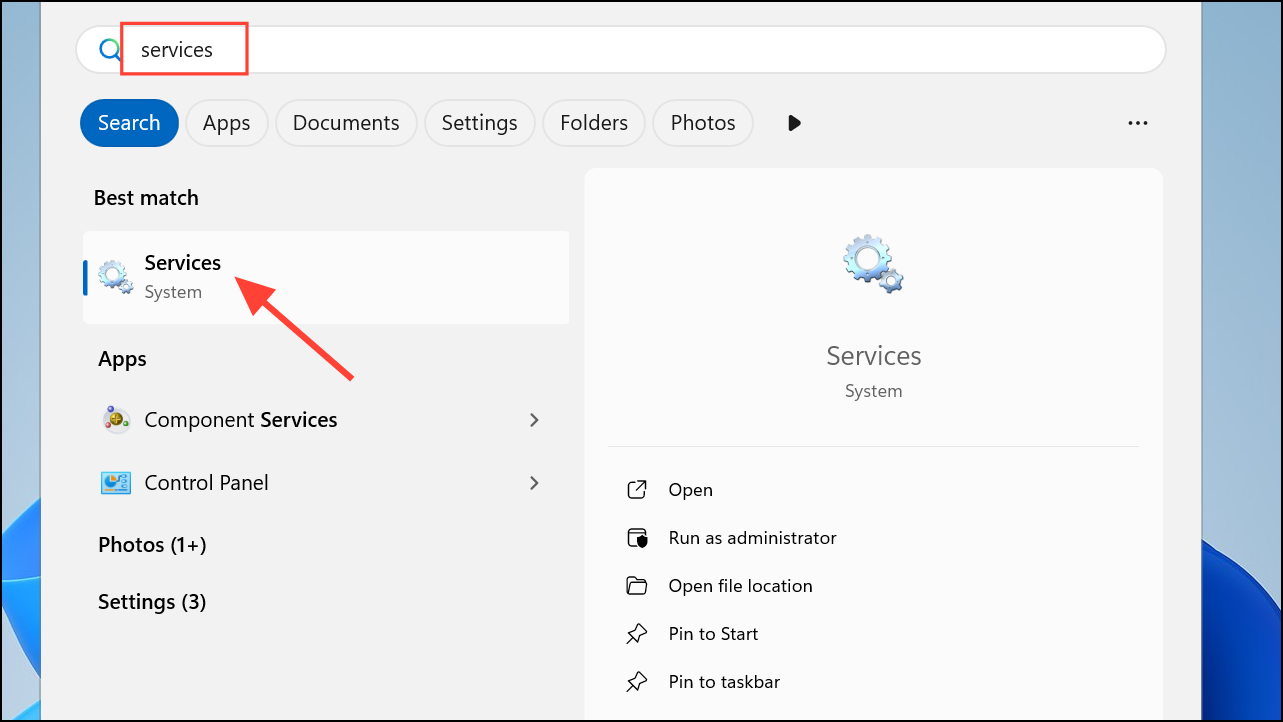
Step 1: Open the Start menu, type Services, and press Enter.
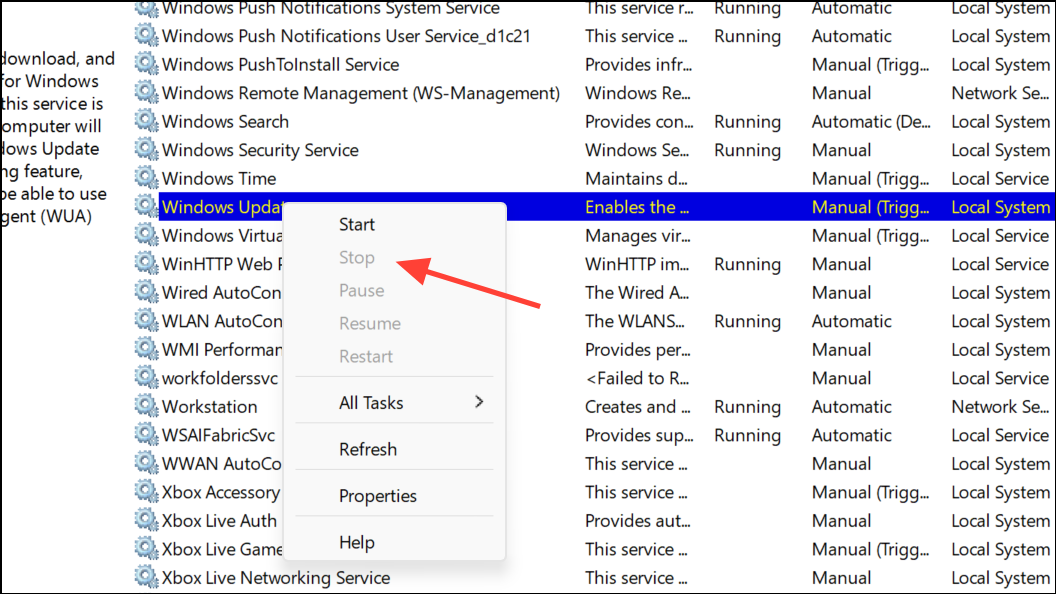
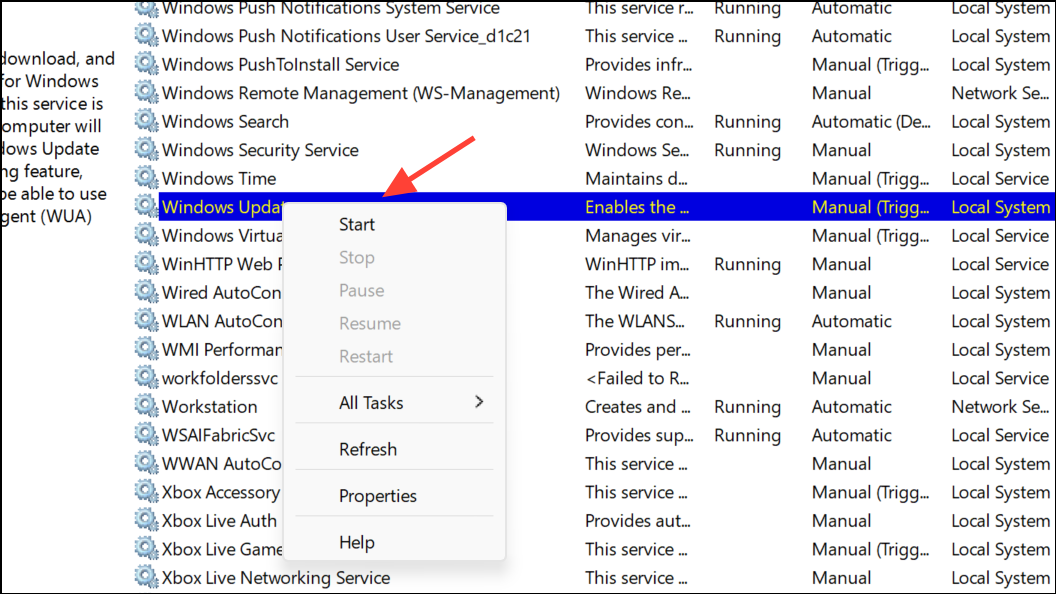
Step 2: In the Services window, find Windows Update, right-click, and select Stop.
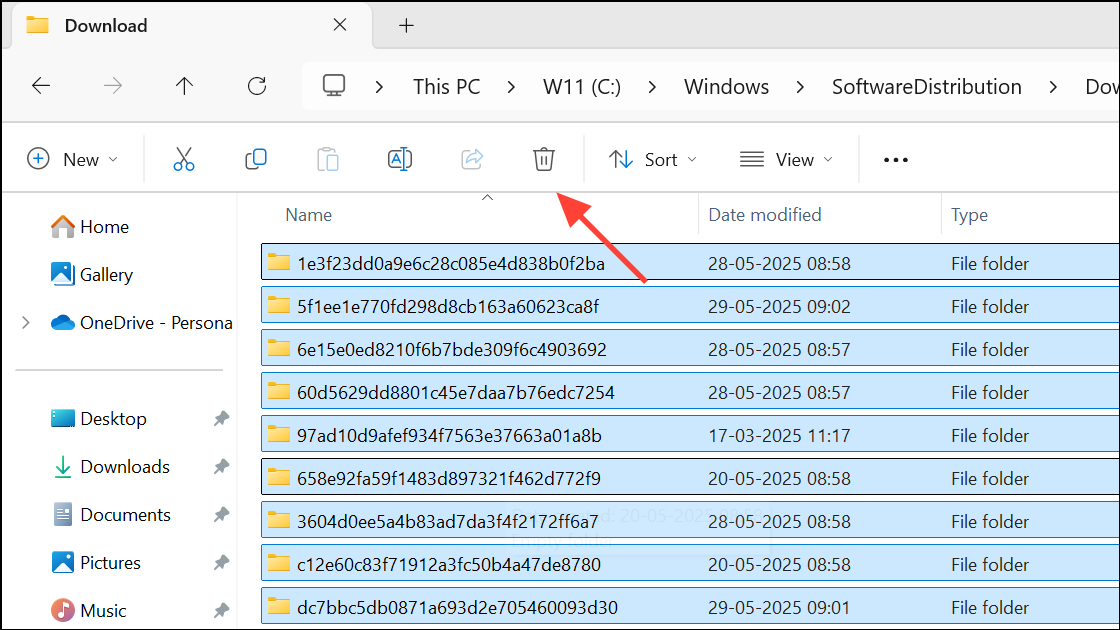
Step 3: Open File Explorer and navigate to C:\Windows\SoftwareDistribution\Download. Delete all files in this folder to clear out pending update downloads.
Step 4: Return to the Services window, right-click Windows Update, and select Start to resume update services. This method is safe and does not affect your ability to boot or use Windows, but it will remove uninstalled update files, requiring Windows to redownload them if needed.
Move or Delete Large Personal Files
Large files such as videos, photos, and downloads can consume significant space. To identify and manage them:
- Open
File Explorer, selectThis PC, and review folders likeVideos,Pictures, andDownloads. - Switch to
Detailsview and sort bySizeto locate the largest files. - Delete files you no longer need, or move them to an external drive or cloud storage. Remember to empty the Recycle Bin to finalize space recovery.
Additional Tips and Cautions
- The option to delete previous Windows installations is available for up to 10 days after an upgrade. After this period, Windows will automatically remove these files.
- Once you delete the
Windows.oldfolder, you cannot revert to the earlier version using standard recovery options. If you anticipate needing to downgrade, consider creating a full system backup before deletion. - Third-party disk analysis tools, like WizTree or WinDirStat, can help visualize what is taking up space if built-in tools do not reveal the culprit.
- If low disk space persists, consider increasing your system drive’s capacity or performing a clean installation to remove hidden or corrupted files.
Clearing out old Windows installation files and managing personal data restores valuable storage, prevents update errors, and keeps your system running efficiently after each upgrade.