Resizing photos on Windows 10 can be challenging since the default Photos app lacks a direct resizing feature. Fortunately, there are straightforward methods available using built-in Windows tools that allow you to adjust your images without installing any additional software. Below, we'll explore effective ways to resize your photos using Microsoft Paint and Microsoft Office Photo Viewer.
Resize photos using Microsoft Paint
Step 1: Right-click on the image you wish to resize. Hover over Open with and select Paint from the list of available programs.
Step 2: Once the image opens in Microsoft Paint, click on the Resize button located in the Home tab of the top toolbar.

Step 3: In the "Resize and Skew" dialog box, choose whether to resize by Percentage or Pixels. Enter your desired dimensions in the horizontal and vertical fields, then click OK to apply the changes.
Step 4: To save the resized image, click on File and select Save or Save as if you wish to create a new file without overwriting the original.
Resize photos using Microsoft Office Photo Viewer
Step 1: Right-click on the image you want to resize and hover over Open with. Click on Microsoft Office 2010 to open the image in Microsoft Office Photo Viewer.
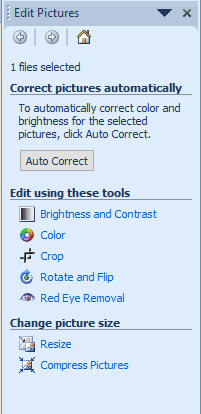
Step 2: With the image open, click on the Edit Pictures... option located in the top toolbar.

Step 3: A panel will appear on the right side of the window. Under the Change Picture Size section, click on Resize.

Step 4: Enter your desired image dimensions or choose from predefined settings. Once done, click OK and then save the resized image by clicking on File and selecting Save or Save as.
These methods allow you to easily resize your photos on Windows 10 without the need for third-party applications. Until Microsoft introduces a resizing feature in the Photos app, you can use these built-in tools to adjust your images to your preferred dimensions.

