
The error message Windows Resource Protection found corrupt files but was unable to fix some of them signals that Windows 11’s built-in System File Checker (SFC) utility detected corrupted system files but could not repair all of them. This typically means the local cache used for repairs is itself damaged, or that deeper system issues are interfering with automated fixes. When this occurs, system stability, updates, and certain Windows features may stop working as expected. Addressing this error promptly helps prevent further complications and ensures your device operates reliably.
Run the Deployment Image Servicing and Management (DISM) Tool
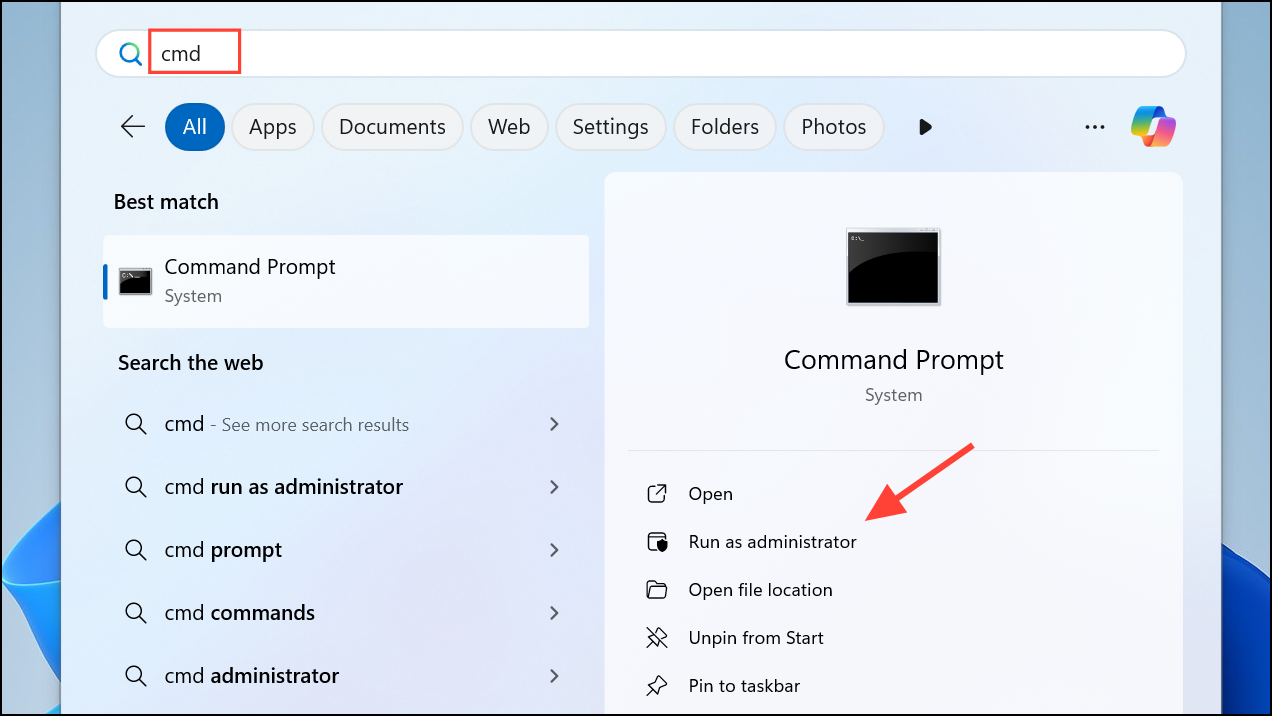
Step 1: Open an elevated Command Prompt. Press Windows + S, type cmd, then right-click Command Prompt and select Run as administrator. This launches a terminal window with the permissions needed to repair system files.
Step 2: Enter the following command to check and repair the Windows image:
DISM /Online /Cleanup-Image /RestoreHealth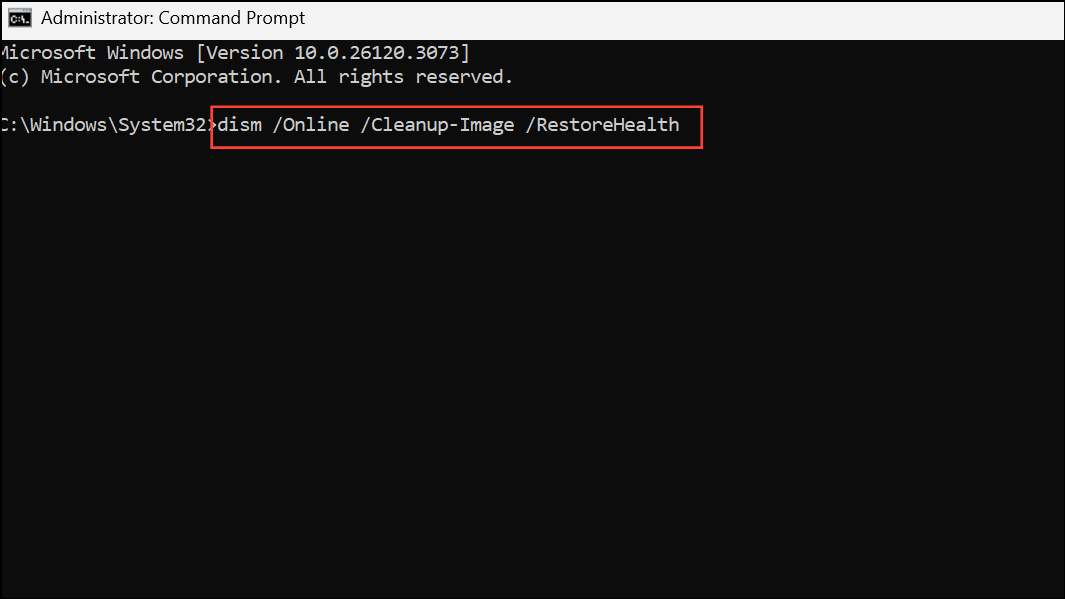
DISM will scan your system for corruption and, if necessary, download clean files from Microsoft’s servers to replace damaged ones. This process may take several minutes, especially if your internet connection is slow or your system image is severely damaged.
Step 3: Once DISM completes, restart your computer. After rebooting, open Command Prompt as administrator again and run:
sfc /scannow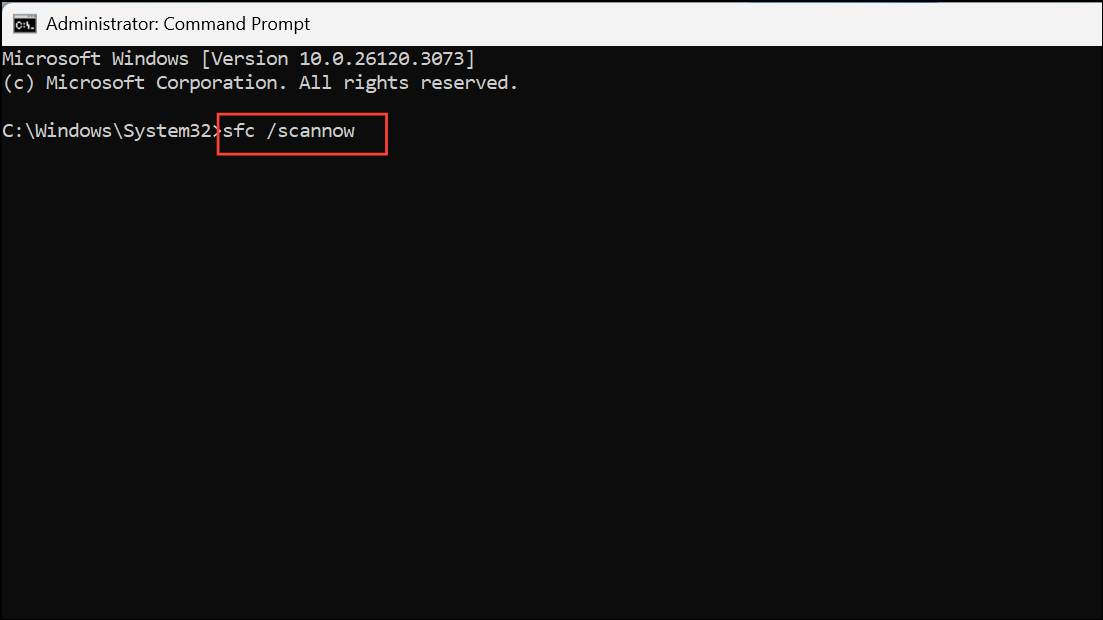
This command will attempt to repair system files using the now-updated system image. If SFC reports that all files were successfully repaired, the issue is resolved.
Check and Repair Disk Errors with CHKDSK
File system corruption or failing disk sectors can prevent SFC and DISM from repairing files. Running a disk check helps identify and fix these underlying problems.
Step 1: Open Command Prompt as administrator, as described above.
Step 2: Type the following command, replacing C: with the letter of your Windows drive if it is different:
chkdsk C: /f /r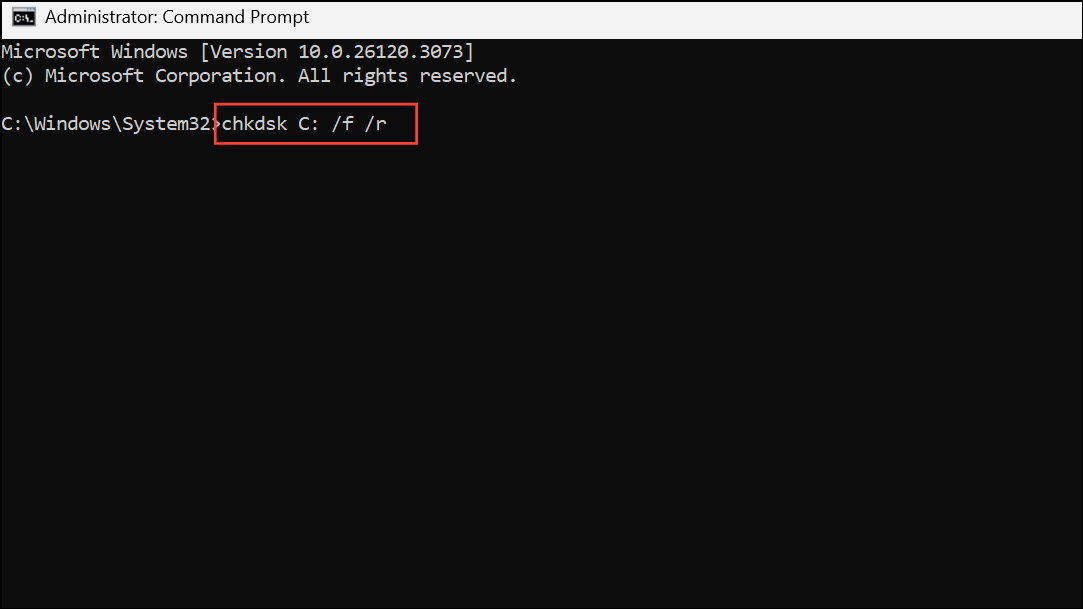
This command scans for file system errors (/f) and bad sectors (/r), then attempts to repair them. If prompted to schedule the scan at next restart, type Y and press Enter.
Step 3: Restart your PC to allow CHKDSK to run and complete repairs. Afterward, rerun sfc /scannow to check if corruption issues remain.
Perform SFC and DISM Scans in Safe Mode
Interference from third-party drivers or background processes can block system repairs. Safe Mode loads Windows 11 with only essential drivers and services, minimizing these conflicts.
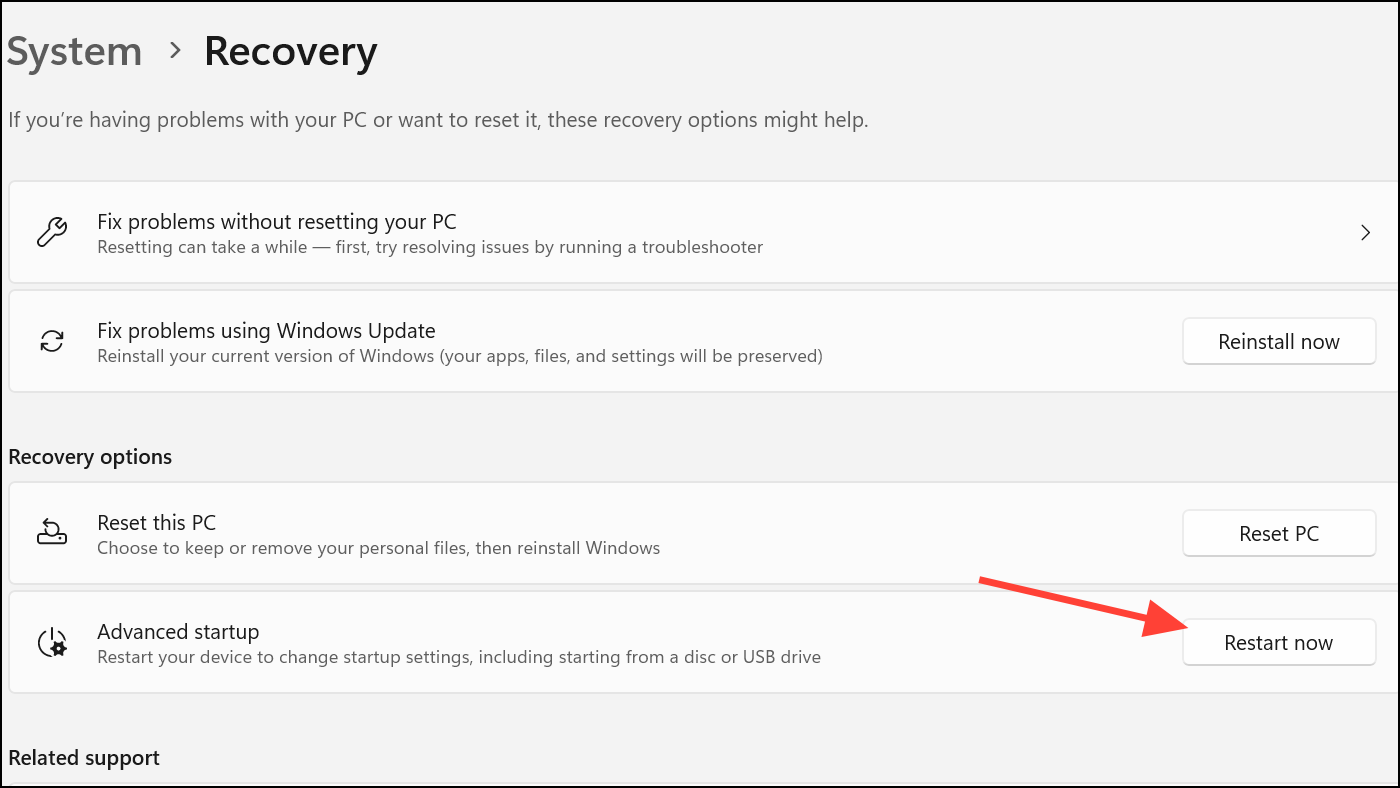
Step 1: Open Settings by pressing Windows + I. Go to System > Recovery, then click Restart now under Advanced startup.
Step 2: After your PC reboots to the Windows Recovery Environment, select Troubleshoot > Advanced options > Startup Settings, then click Restart.
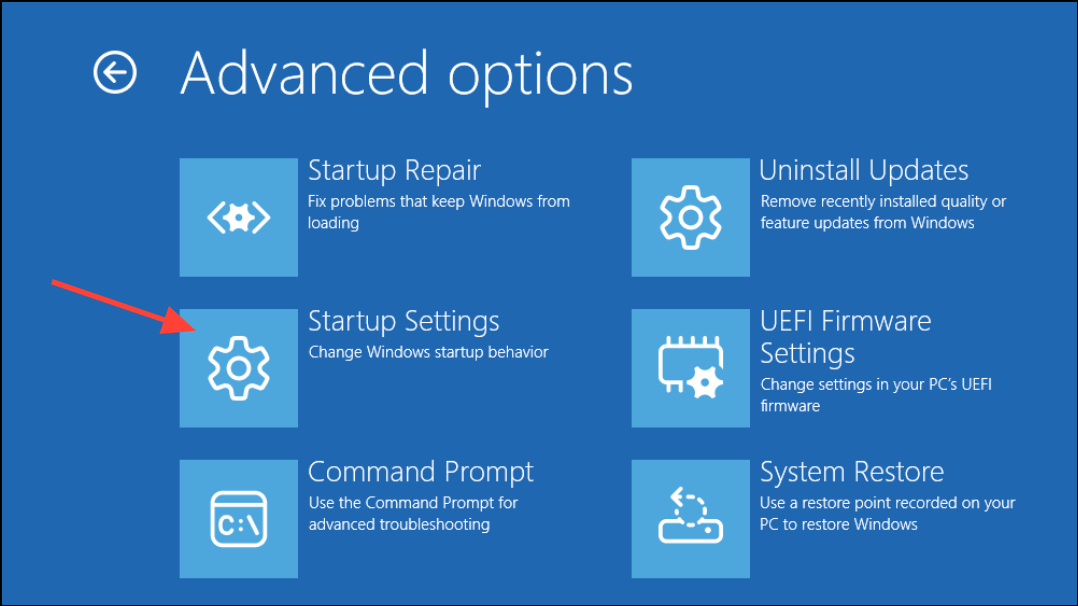
Step 3: On the Startup Settings screen, press 6 to enable Safe Mode with Command Prompt.
Step 4: In Safe Mode, run the DISM /Online /Cleanup-Image /RestoreHealth command, then follow with sfc /scannow as described previously. Running these tools in Safe Mode often bypasses interference that prevented successful repairs in normal mode.
Run SFC from the Windows Recovery Environment (WinRE)
When Windows cannot boot normally or system files are too damaged for repairs within the OS, running SFC from WinRE can help.
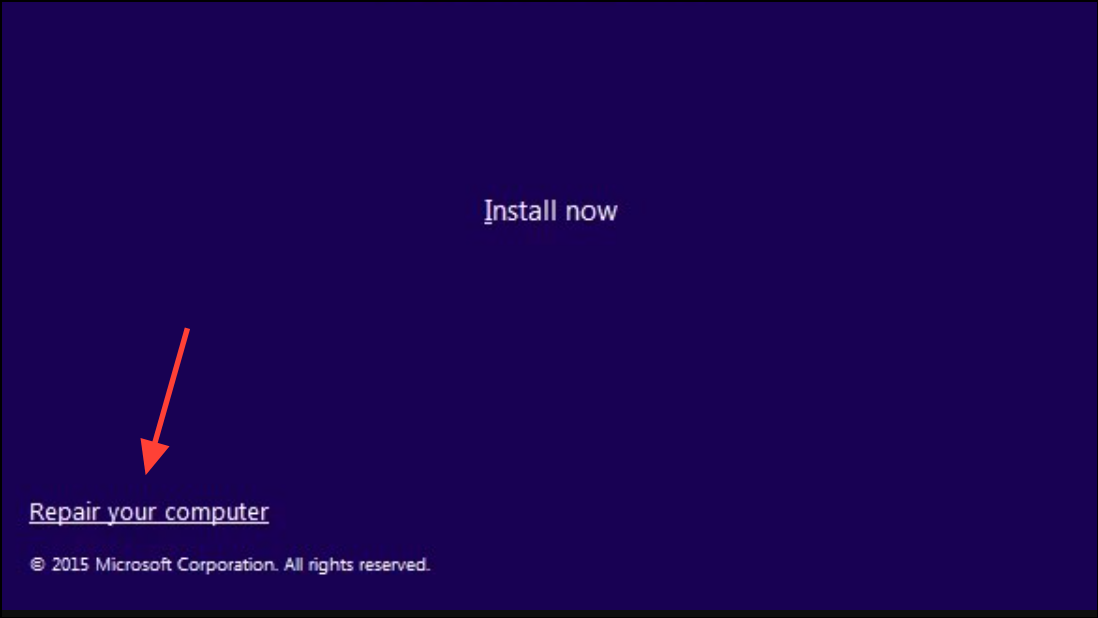
Step 1: From the sign-in screen, hold Shift and click Restart. Alternatively, boot from Windows 11 installation media and select Repair your computer.
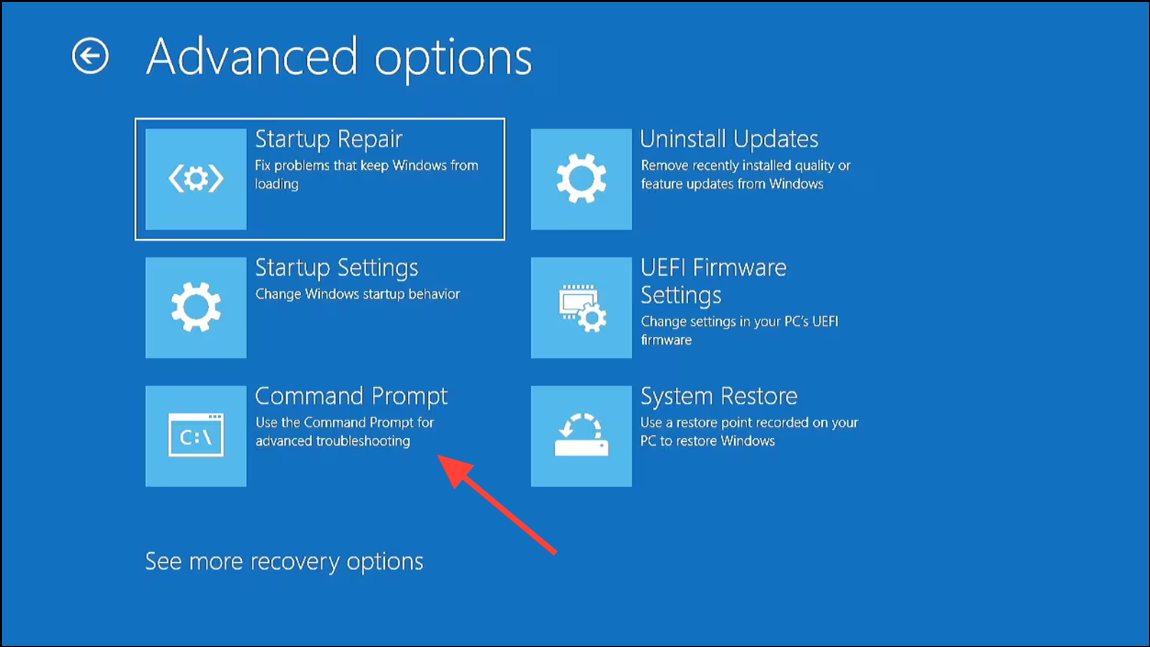
Step 2: In WinRE, choose Troubleshoot > Advanced options > Command Prompt.
Step 3: In the Command Prompt, type:
sfc /scannow /offbootdir=C:\ /offwindir=C:\Windows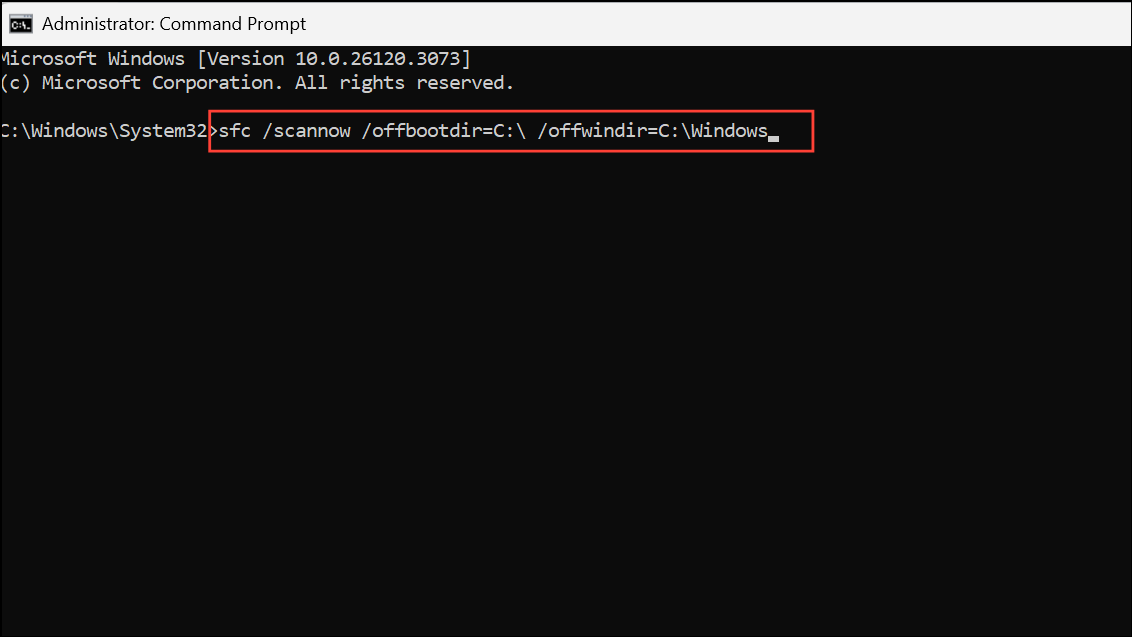
Adjust C: if your Windows installation is on a different drive. This command checks and repairs system files offline, which can succeed when online repairs fail.
Restore Windows 11 Using System Restore
System Restore can roll back your system files and settings to a previous state before the corruption occurred, without affecting personal files.
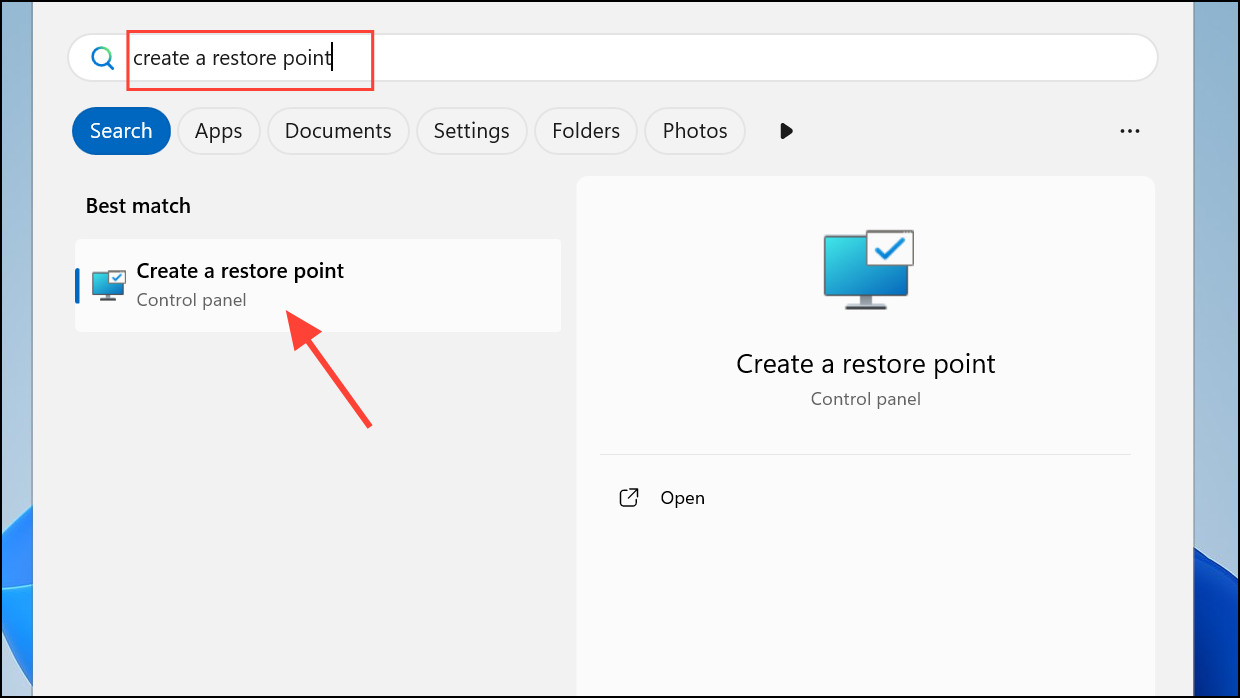
Step 1: Open the Start menu and search for Restore. Select Create a restore point, then click System Restore in the System Properties window.
Step 2: Follow the prompts to select a restore point dated before you noticed the corruption error. Confirm your selection and allow Windows to restart and restore your system.
Step 3: After the process completes, rerun sfc /scannow to verify that system file integrity has been restored.
Reset Windows 11 as a Last Resort
If none of the above methods resolve the corruption, resetting your PC reinstalls Windows 11 while giving you the option to keep or remove personal files. This process replaces all system files with fresh copies.
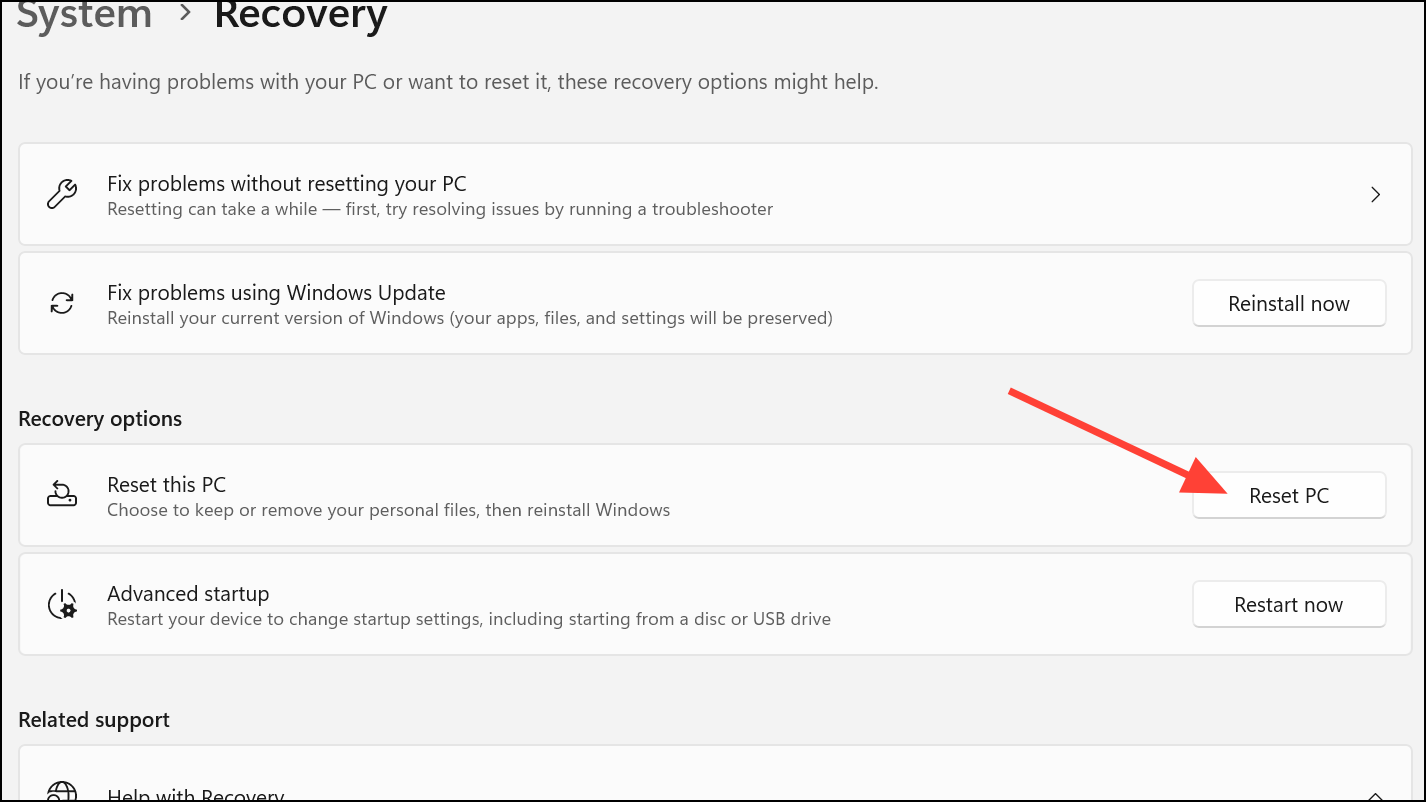
Step 1: Open Settings > System > Recovery. Under Recovery options, click Reset PC.
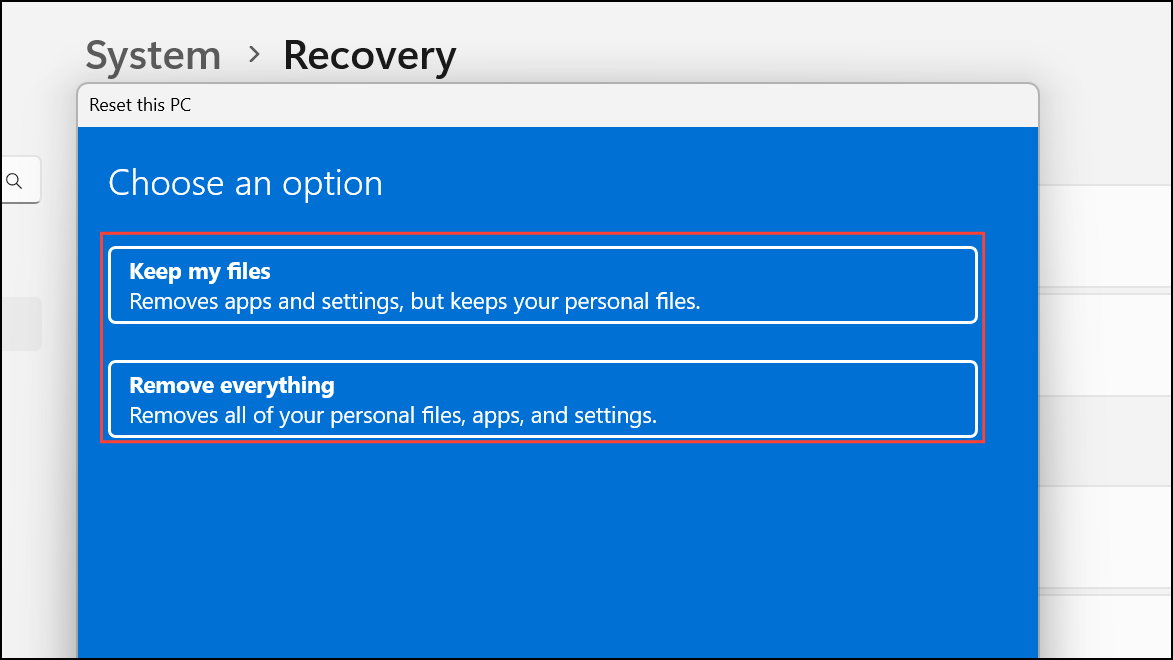
Step 2: Choose Keep my files to retain personal documents, or Remove everything for a clean slate. Follow the on-screen instructions to complete the reset. Your device will reboot several times during this process.
Step 3: Once Windows 11 is reset, system file corruption should be fully resolved, and you can restore any necessary applications or settings.
Addressing the "Windows Resource Protection found corrupt files but was unable to fix some of them" error in Windows 11 requires a combination of built-in repair tools and, in some cases, recovery options. Regularly updating Windows and creating restore points can help prevent future system file issues.