
The Jump Pad in RIVALS is a free utility weapon that only unlocks after you collect nine hidden Jump Shards scattered across the lobby and several maps. It started life as a fairly weak mobility tool and has since been buffed with more ammo and higher launch power, but it still sits in a very specific niche: light movement, area denial, and contract farming rather than game-breaking verticality.
Jump Pad basics and recent buffs
The Jump Pad is listed as a Standard utility weapon in the RIVALS loadout. Its description is simple: place a pad that any player can step on to be launched upward.
| Stat | Value |
|---|---|
| Ammo (current) | 3 pads per round |
| Movement speed while held | Normal |
| Cooldown between uses | 0.5 seconds |
| Key cost | 0 (unlocked only via Jump Shards) |
On release, the Jump Pad had just one charge and a low launch height, which made it feel underpowered compared with mobility tricks from the Scythe, Subspace Tripmine, grenades, or RPG self-boosts. Later updates increased its max ammo from 1 to 2, then to 3, and raised launch velocity by about 20 percent. Even with those buffs, the pad still launches you much lower than the pads in the Shooting Range, and it remains a situational tool rather than a core movement option.
One important limitation is that the Jump Pad has no way to deal damage, so it cannot earn weapon-elimination charms. It does, however, have its own contract lines tied to time used and the number of players bounced, which is where it becomes more interesting for long-term progression.
How to unlock the Jump Pad in Roblox Rivals
The Jump Pad is not purchasable with Keys or bundles. The only way to obtain it is by collecting all nine Jump Shards and then equipping it in the weapons menu.
Key rules before you start:
- Jump Shards do not spawn in private servers. You must be in public matches (including public 1v1 queues).
- There are 9 total shards: three in the lobby and six on specific maps.
- Touching a shard is enough, even if you immediately die or fall out of bounds afterward.
- Mobility items like the Scythe and, for Docks, the Warhorn make several shards much easier to reach.
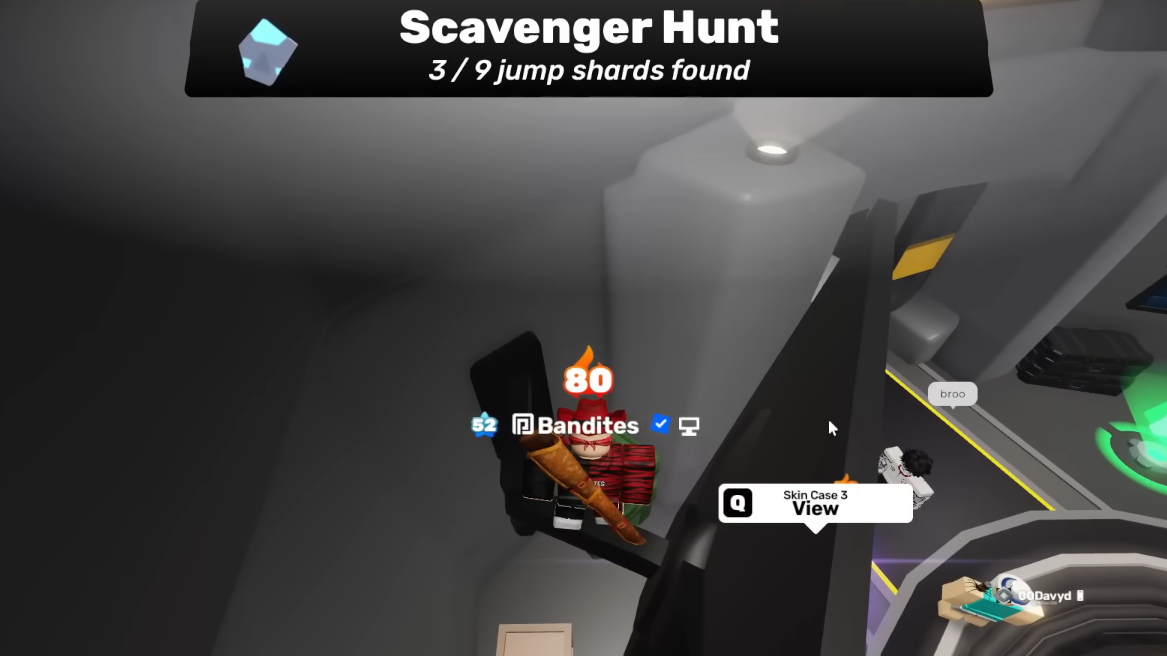
Lobby Jump Shard locations (3/9)
All three lobby shards are always present while you’re in the main hub, so they are the easiest to collect.
Lobby shard 1 – Weapons room
Move to the room where the Nosniy NPC and weapon showcases are located. In one corner, behind a stack of crates/boxes, sits the first Jump Shard. Walk into it to collect it.
Lobby shard 2 – Behind the winstreak board
Find the large leaderboard or winstreak board in the lobby. Walk around the back side of that screen; the shard is tucked directly behind it.
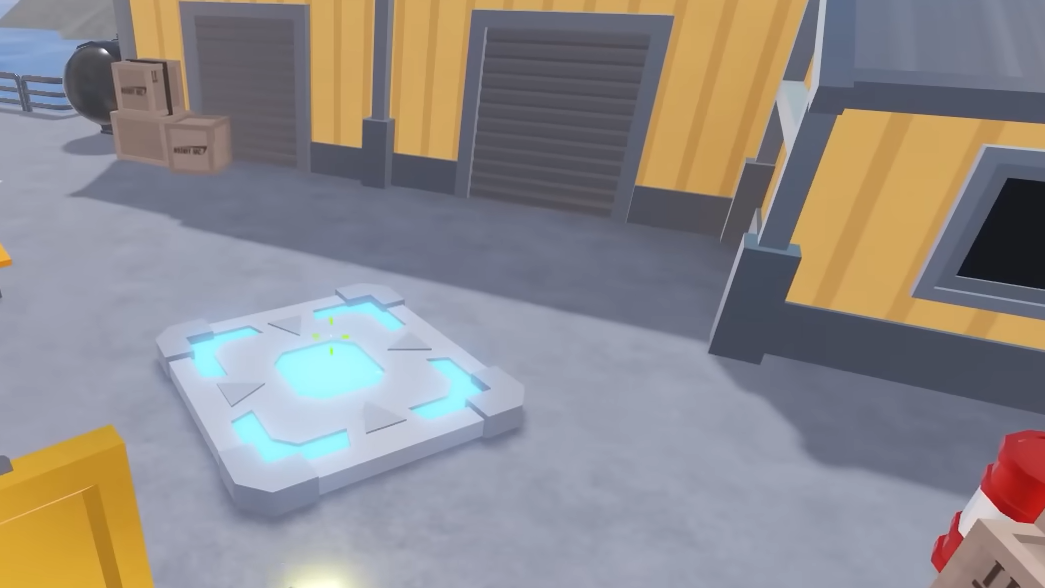
Lobby shard 3 – Near the 3v3 queue pads
Head to the section of the lobby that holds the 3v3 matchmaking pads. Walk down the lane with the pads and look along the sides; the shard is placed near this strip, sitting in a corner off to the side.
Map Jump Shard locations (6/9)
The remaining six shards appear only during matches on specific maps. These runs are much easier in low-population or arranged 1v1 lobbies, but they must still be public matches.
Jump Shard on Construction
Location: On the very tip of the tall crane.
Step 1: Queue into a match on Construction and equip a loadout with the Scythe. Move toward the central crane structure that snipers often climb.
Step 2: Use the Scythe’s dash to reach the crane arm, then climb along it toward the outermost edge, pointing toward mid. The shard sits on the very tip; carefully walk over it to collect before you slip off.
Jump Shard on Crossroads
Location: Out of bounds behind a gray rock structure on the map’s side wall.
Step 1: Load into Crossroads with a Scythe in your melee slot. Move toward the edge of the map where a large gray rock formation meets an outer wall.
Step 2: Dash from solid ground toward the back of that rock. The shard is tucked behind it, technically out of the playable area. You may fall off the map, but as soon as you touch the shard, it will count.
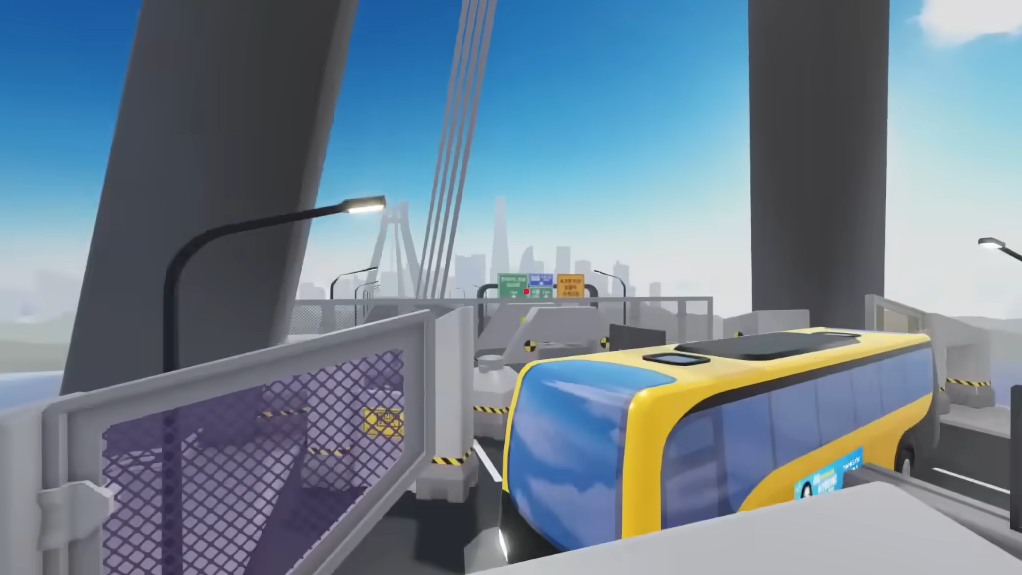
Jump Shard on Bridge
Location: On the top of the right-side pillar on the Nosniy INC side, out near the bus.
Step 1: Queue Bridge and head toward the bus that faces a pair of tall pillars on the Nosniy INC side.
Step 2: Climb the structure next to the pillar (the bus-facing side helps for alignment) and use a Scythe dash to get up onto the right-hand pillar. The shard is on top; step onto it to collect.
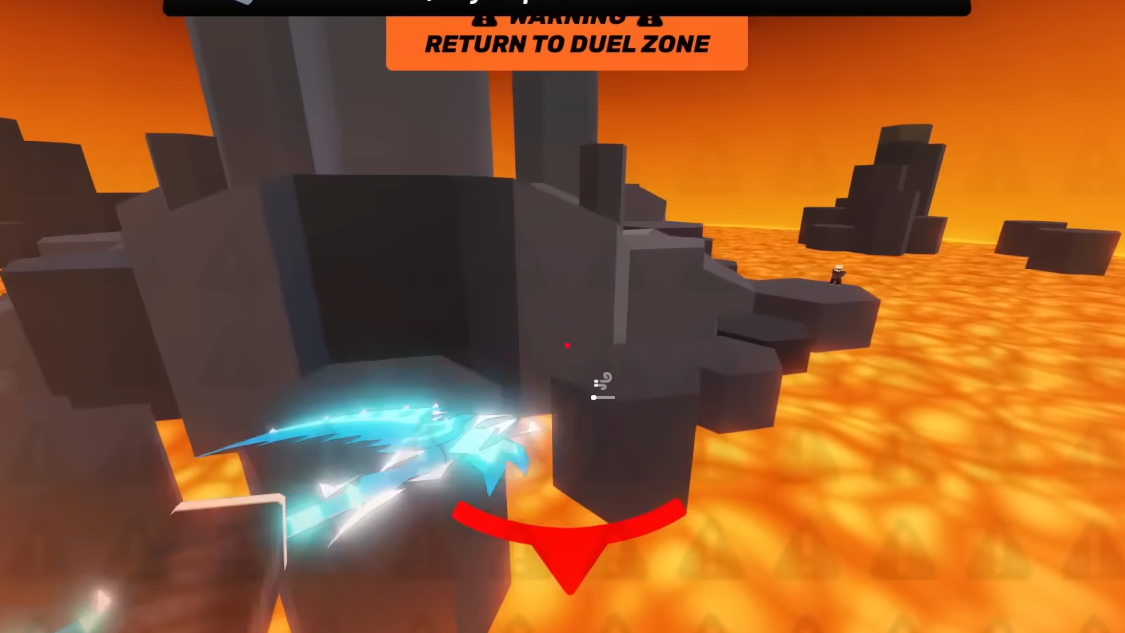
Jump Shard on Onyx
Location: In the large lava pool, held by a sinking ShadowTrojan character.
Step 1: On Onyx, move toward the huge central lava area. Look out over the lava and you should spot a ShadowTrojan-like figure sinking into it, holding a glowing shard.
Step 2: Use your Scythe dash to launch toward the figure. You will almost certainly die in the lava, but you only need a single touch on the shard for it to unlock.
Jump Shard on Station
Location: In a far map corner next to a fence, effectively out of bounds.
Step 1: In a Station match, navigate toward the extreme edge of the map where an old spawn used to be located. Look for a fenced corner that doesn’t see much normal combat.
Step 2: Push into that corner; the shard is placed right beside the fence. In many cases, you’ll fall through or out of the map right after touching it, which is normal.
Jump Shard on Docks
Location: Far out of bounds behind one of the green crates.
This is the trickiest shard because of how far it sits from the playable area.
Step 1: Queue into Docks with both the Scythe and Warhorn equipped. Move toward the area with stacked green shipping containers at the map’s edge.
Step 2: Activate Warhorn for a speed boost, then sprint out toward the out-of-bounds zone behind those green crates, chaining a Scythe dash as needed. The shard is hidden behind one of the crates, well outside the safe zone, so you are aiming to barely reach it before the game kills you. A brief touch is enough for it to register.
Equipping and testing the Jump Pad after collecting all shards
Once all nine shards are collected, the Jump Pad becomes available in the weapons menu as a zero-cost Standard utility. It typically appears near the bottom of the utility list.
Step 1: Open the weapons or loadout menu from the main lobby and switch to the Utility category.
Step 2: Scroll down until you find Jump Pad. Select it and assign it to a utility slot in one or more loadouts.
The Jump Pad can also be demoed from the inventory before you unlock it, using a built-in demo button next to the item. This lets you feel its bounce height and general behavior without committing to the full scavenger hunt.
How the Jump Pad behaves in matches
The Jump Pad is a placeable object that works for everyone. Teammates and enemies can step on it, and it affects movement control while a player is being launched.
- Placement flexibility: Pads can be attached to floors, walls, ceilings, and sloped surfaces. This opens up some creative angles, especially on compact maps.
- Limited air control: While the pad launches a player, their ability to strafe or correct their trajectory is heavily reduced. They become a predictable arc, which is useful for setup plays and traps.
- Despawn behavior: Pads do not stay forever. They last temporarily, then disappear, so they are best used for short windows of control or a single planned rotation.
- Shared access: Because enemies can use your pad, careless placement can hand them free mobility or an escape route.
The bounce height is noticeably lower than the Shooting Range pads. In many situations, a Scythe dash, Subspace Tripmine self-boost, grenade hop, or RPG jump will send you farther or higher than a single Jump Pad use.
Practical Jump Pad strategies
Despite its modest power, the Jump Pad has some clear use cases when placed deliberately.
Using Jump Pad for movement
On its own, the pad provides a small vertical or directional boost, enough to reach short ledges, containers, or spots that are just above your normal jump height. It becomes more interesting when combined with certain weapons and abilities.
- Wall pads with double jumps: Placing a pad on a wall and then using a double-jump melee like Fists, Daggers, or the Bow lets you stack the pad’s launch with your second jump. This can send you significantly higher than either action alone, especially on smaller maps.
- Synergy with mobile primaries: Pairing this setup with versatile guns such as the Assault Rifle or Sniper allows quick repositioning to off-angle perches or unexpected lines of sight.
- Small-map emphasis: Tight arenas like Arena benefit more from short, repeatable bounces than wide, vertical maps where traditional movement tech dominates.
Using Jump Pad for area denial and control
The Jump Pad also works as a soft control device, steering opponents into predictable lines or away from certain routes.
- Doorway disruption: Putting a pad sideways across a doorway forces players who charge straight through to be bounced off-course, often into exposed sightlines. Because the pad has no collision from behind, it does not hard-block the door, but it can still confuse and slow pushes.
- Ladder denial: A pad placed on top of a ladder can make climbing it almost impossible to do cleanly, knocking players away as soon as they crest the lip. It’s a niche tactic but can shut down a single key ladder route.
- Predictable arcs for easy shots: Since air control is limited during a bounce, anyone who steps on your pad is essentially “on rails” for a moment. Pre-aiming those arcs with hitscan weapons, or timing explosives, can turn an otherwise weak utility into a reliable setup tool.
Jump Pad contracts and long-term rewards
The Jump Pad has its own contract tracks for both Players Bounced and Playtime. These reward Keys, Charm Capsules, and several wraps as you keep the item equipped and actively used.
| Players Bounced | Reward |
|---|---|
| 1 | 1 Key |
| 5 | 1 Charm Capsule |
| 25 | 1 Charm Capsule |
| 120 | 1 Wrap Box 1 |
| 1500 | Gold Wrap |
| 4500 | Diamond Wrap |
| Playtime with Jump Pad | Reward |
|---|---|
| 5 minutes | 1 Key |
| 20 minutes | 1 Charm Capsule |
| 1 hour | Olo Wrap |
| 6 hours | 1 Charm Capsule |
| 12 hours | 1 Wrap Box 1 |
| 24 hours | Dawn Wrap |
The mileage varies per player, but if you enjoy contract grinding, equipping the Jump Pad consistently can passively unlock Keys and cosmetic wraps over time, even if it is not always the most powerful utility pick for winning rounds.
Collecting all nine Jump Shards to unlock the Jump Pad is a one-time challenge. Once you know the exact locations and bring the right mobility tools, the actual runs are fairly quick. The reward is a free, flexible utility that trades raw power for creative plays, map-specific movement options, and a set of long-tail contracts that quietly pay out as you bounce teammates and enemies across the arena.