
After a feature upgrade to Windows 11 or Windows 10, two large hidden folders often sit on the root of your system drive: $Windows.~BT and $Windows.~WS. They are temporary directories created by Windows Setup during the upgrade, and they can quietly hold several gigabytes. The $Windows.~BT folder is commonly around 625MB, while $Windows.~WS regularly reaches 5.6GB or more.
What $Windows.~BT and $Windows.~WS contain
Both folders exist to support the upgrade process and a possible rollback. Once you commit to the new version and no longer need to go back, they serve no day-to-day purpose.
| Folder | Typical size | What it holds |
|---|---|---|
| $Windows.~BT | ~625MB | Temporary upgrade files, recovery data, setup logs, and backup files used to roll back to the previous Windows version. |
| $Windows.~WS | ~5.6GB | Temporary Windows Setup files, installation files, rollback data, and setup logs from the upgrade. |
Note that deleting either folder removes the option to return to the earlier build. If you try to roll back afterward, Windows shows the message "We're sorry, but you can't go back."
Show the hidden folders in File Explorer
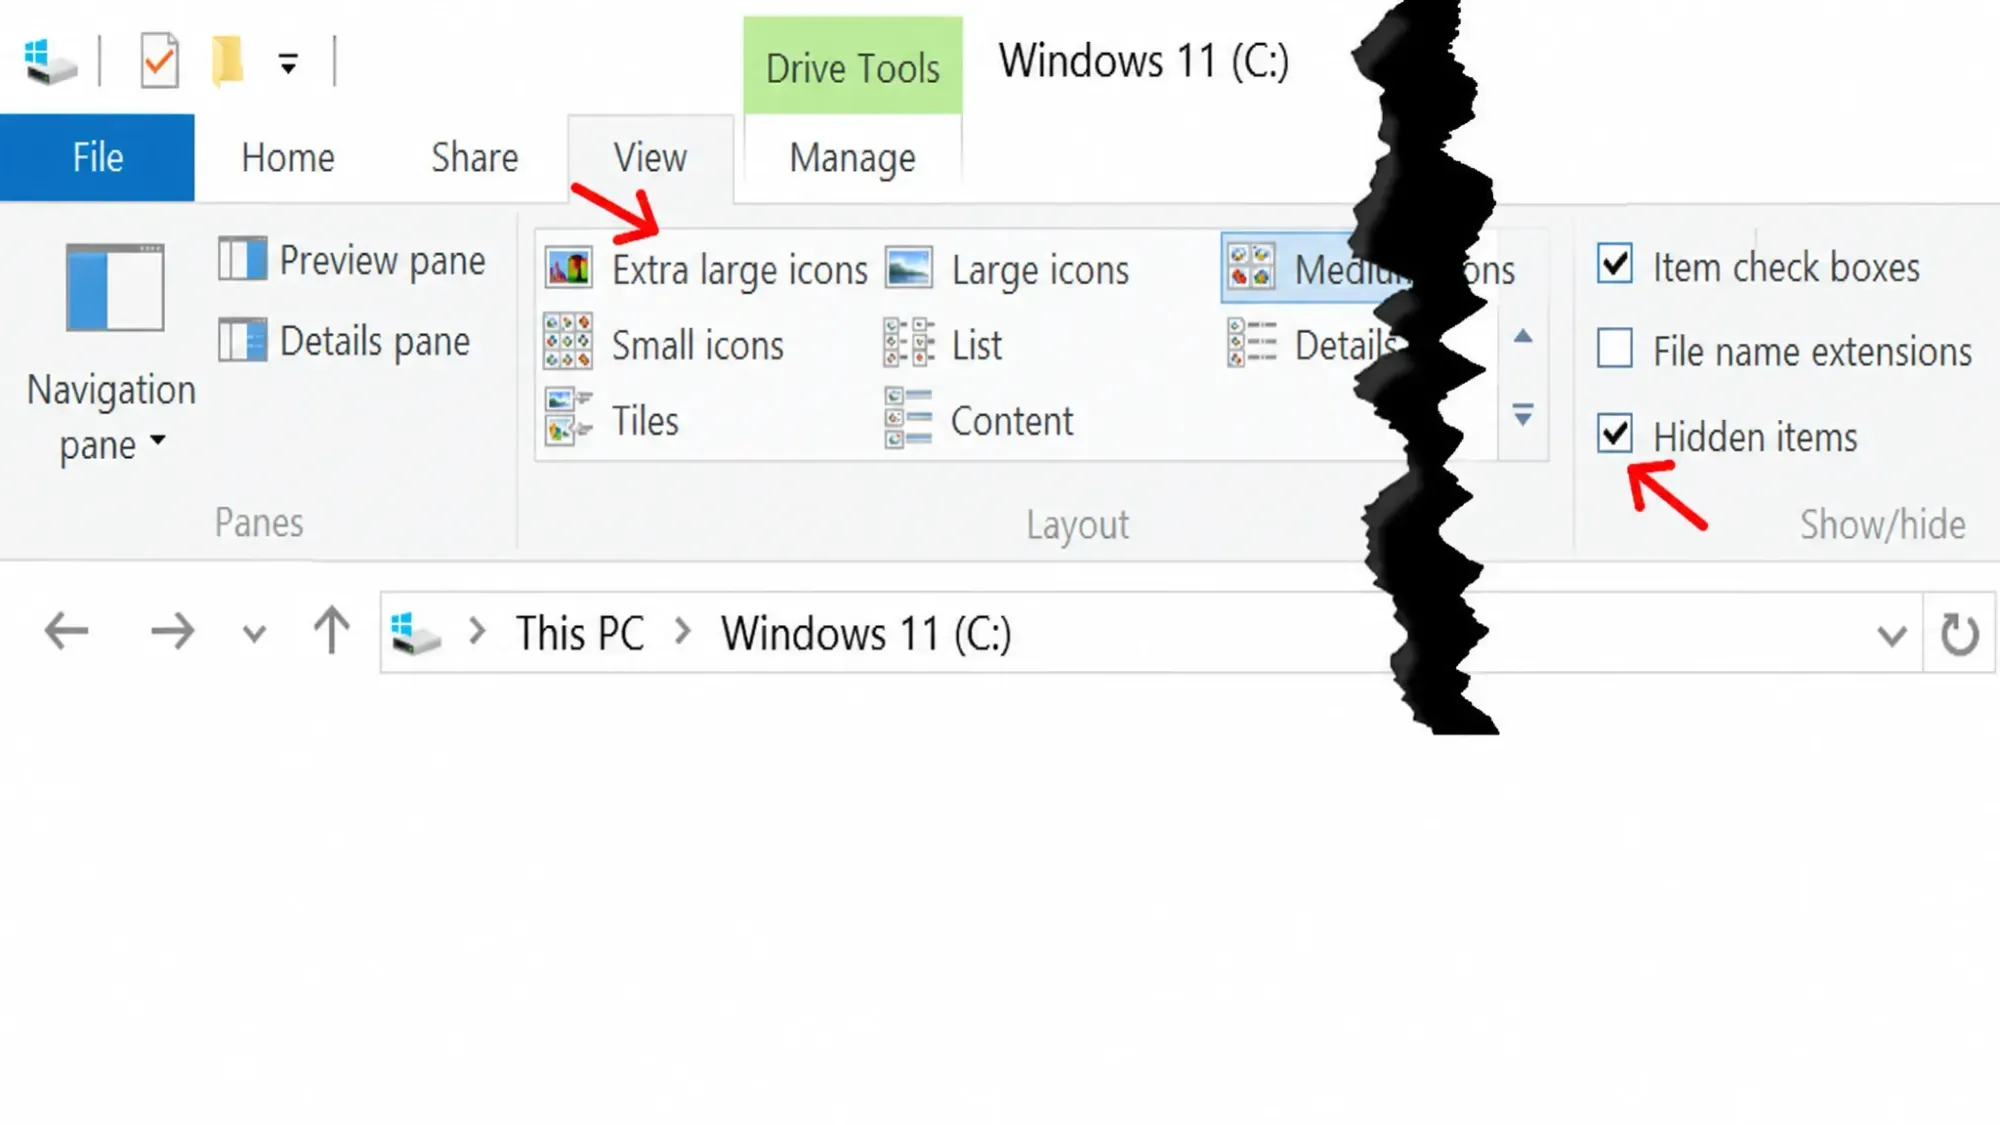
Both directories are hidden by default, so you need to reveal them before you can see or delete anything. Open File Explorer and go to your system drive, which is usually C.
Step 1: Open File Explorer and select the C drive.
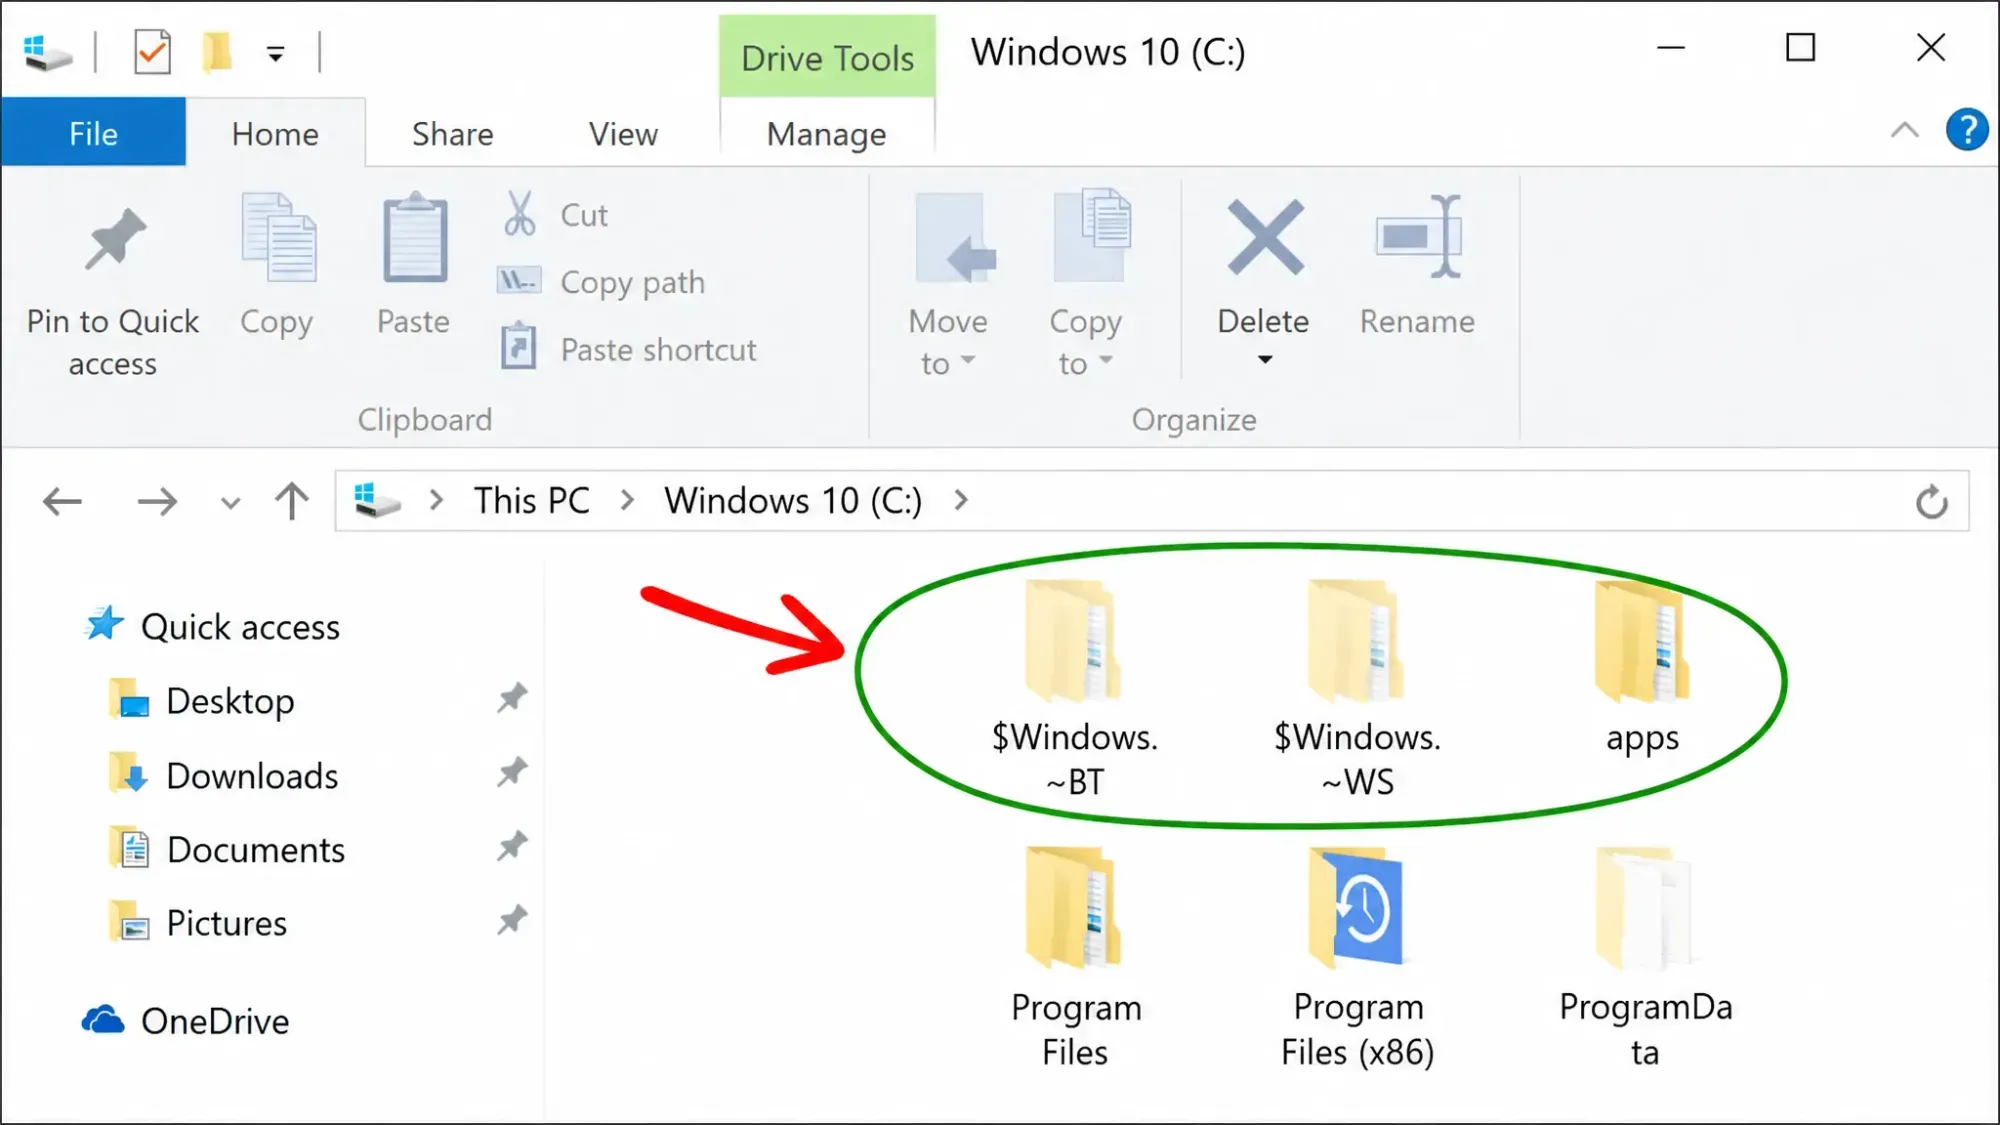
Step 2: Open the View tab and turn on the option to show hidden items. The two folders then appear at the root of the drive.
Step 3: Right-click each folder and choose Properties to confirm how much space it is using before you remove it.
Force-delete the folders with Command Prompt or PowerShell
A direct delete in File Explorer often fails with a permissions error. Taking ownership first lets you remove both folders cleanly. Open an elevated Command Prompt by right-clicking the Start button and choosing Command Prompt (Admin), or use PowerShell (Admin).
Step 1: Run these three lines one at a time, pressing Enter after each, to clear the $Windows.~BT directory.
takeown /F C:\$Windows.~BT\* /R /A
icacls C:\$Windows.~BT\*.* /T /grant administrators:F
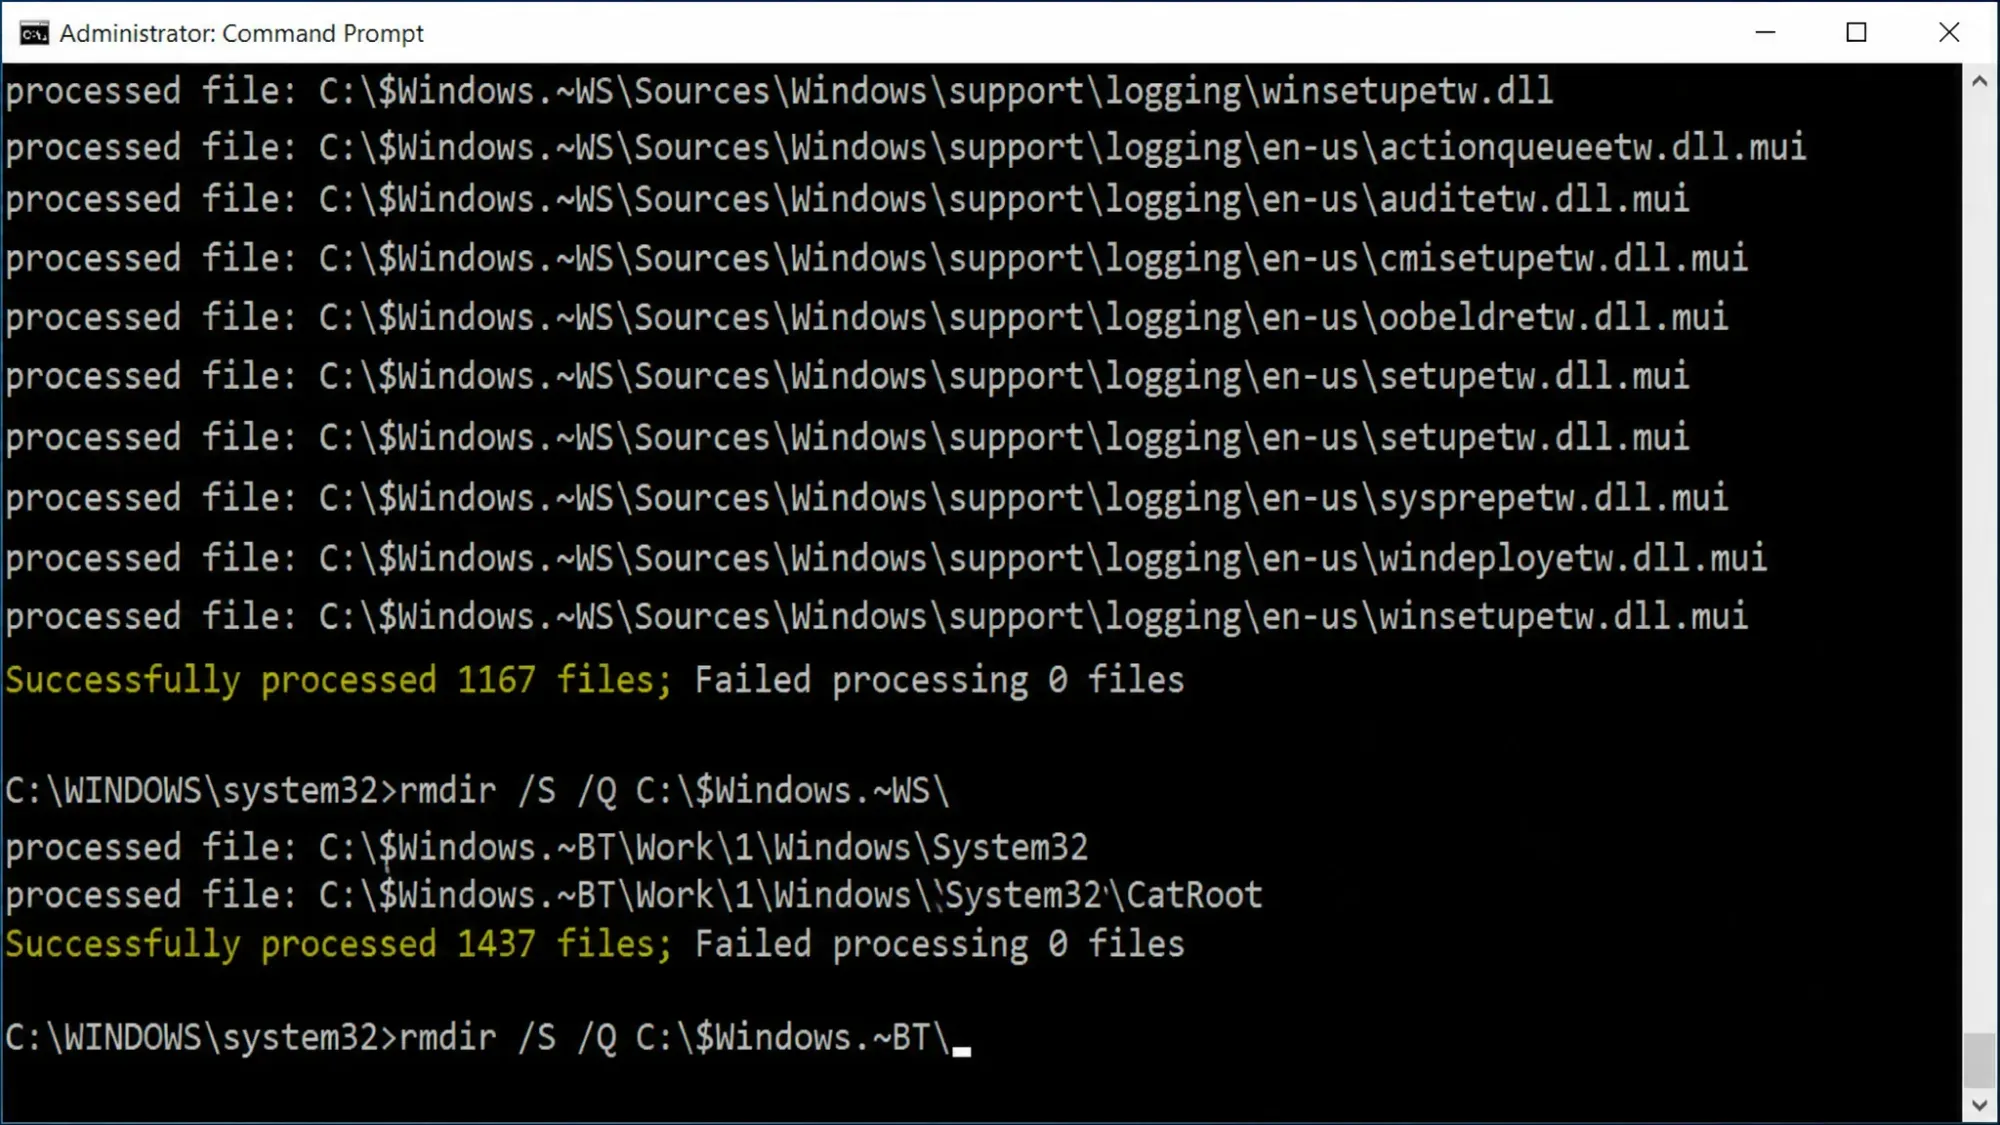
rmdir /S /Q C:\$Windows.~BT\Step 2: Run the same three commands for the $Windows.~WS directory.
takeown /F C:\$Windows.~WS\* /R /A
icacls C:\$Windows.~WS\*.* /T /grant administrators:F
rmdir /S /Q C:\$Windows.~WS\
Step 3: Watch the output. A "Successfully processed" message means the operation worked and the folders are gone.
Remove them with Disk Cleanup
If you prefer a graphical tool, the built-in Disk Cleanup utility handles most of this without commands. It clears the previous Windows installation along with the leftover setup files.
Step 1: Search for Disk Cleanup, right-click it, and choose Run as administrator.
Step 2: Select Clean up system files, then tick Previous Windows installation(s) and Temporary Windows installation files.
Step 3: Click OK and confirm. The tool deletes the Windows.old folder and $Windows.~BT, then clears the setup files tied to $Windows.~WS.

Selecting Previous Windows installation(s) removes the Windows.old folder and the $Windows.~BT folder. The $Windows.~WS folder is cleared through the Temporary Windows installation files option instead, so make sure both boxes are checked if you want everything gone.
When to delete and how to confirm it worked
Wait until the upgraded system has run smoothly for a few days and you have confirmed there are no pending updates under Settings > Update & Security > Check for Updates. Holding the folders for that short window keeps your rollback option open in case a feature update needs reversing.
You will know the cleanup succeeded when the folders no longer appear at the root of the C drive with hidden items shown, or when Command Prompt reports "Successfully processed." Reclaimed space ranges from a few hundred megabytes to well over 6GB, depending on the size of the upgrade. Keep in mind that Windows recreates these folders on the next feature upgrade, so the same steps apply again whenever they reappear.