
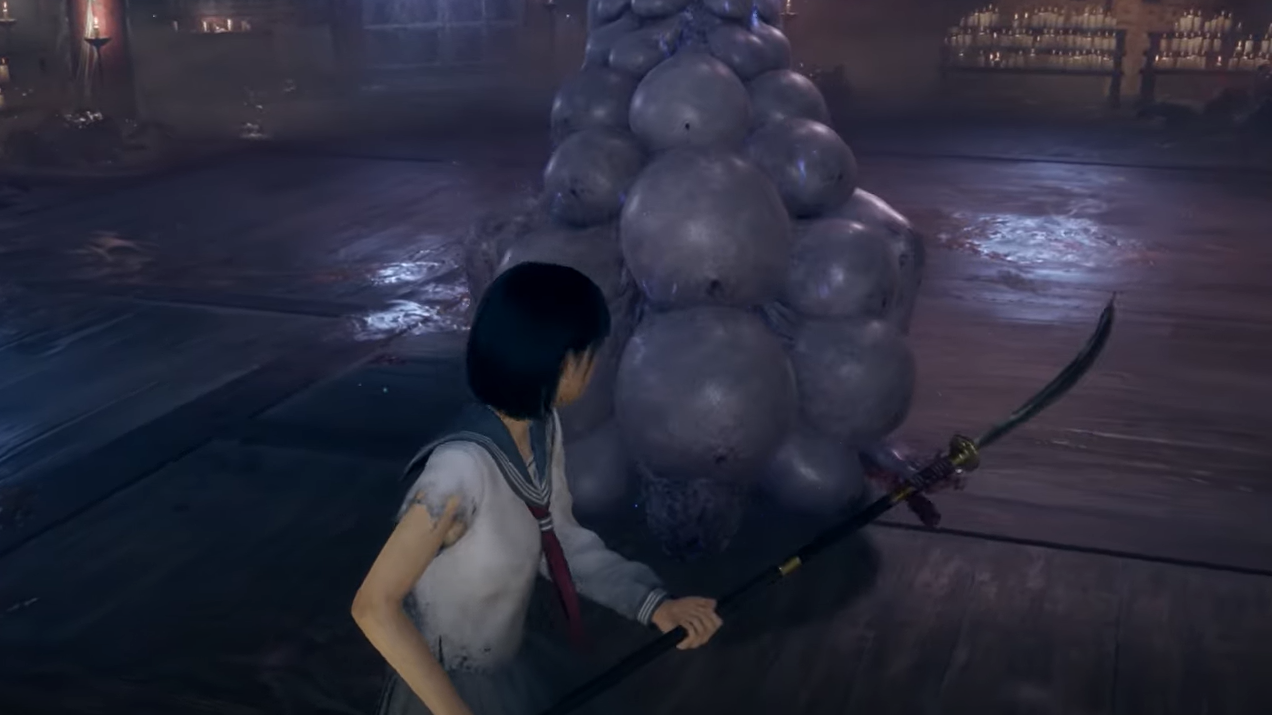
Silent Hill f’s Birthing Monster is built to overwhelm. It’s a slow, tanky spawner whose entire kit revolves around denying your space, forcing mistakes with a stun, and snowballing the fight with adds. You first meet it as a mini‑boss in the Dark Shrine Worship Hall, then face it repeatedly as a regular enemy through the Shrine’s later wings, Iwashimizu, and the Shimizu Residence. Here’s how its moves work, what actually stops the cocoons, and the safest ways to clear mandatory encounters without draining your inventory.

Birthing Monster overview (what it is and where it shows up)
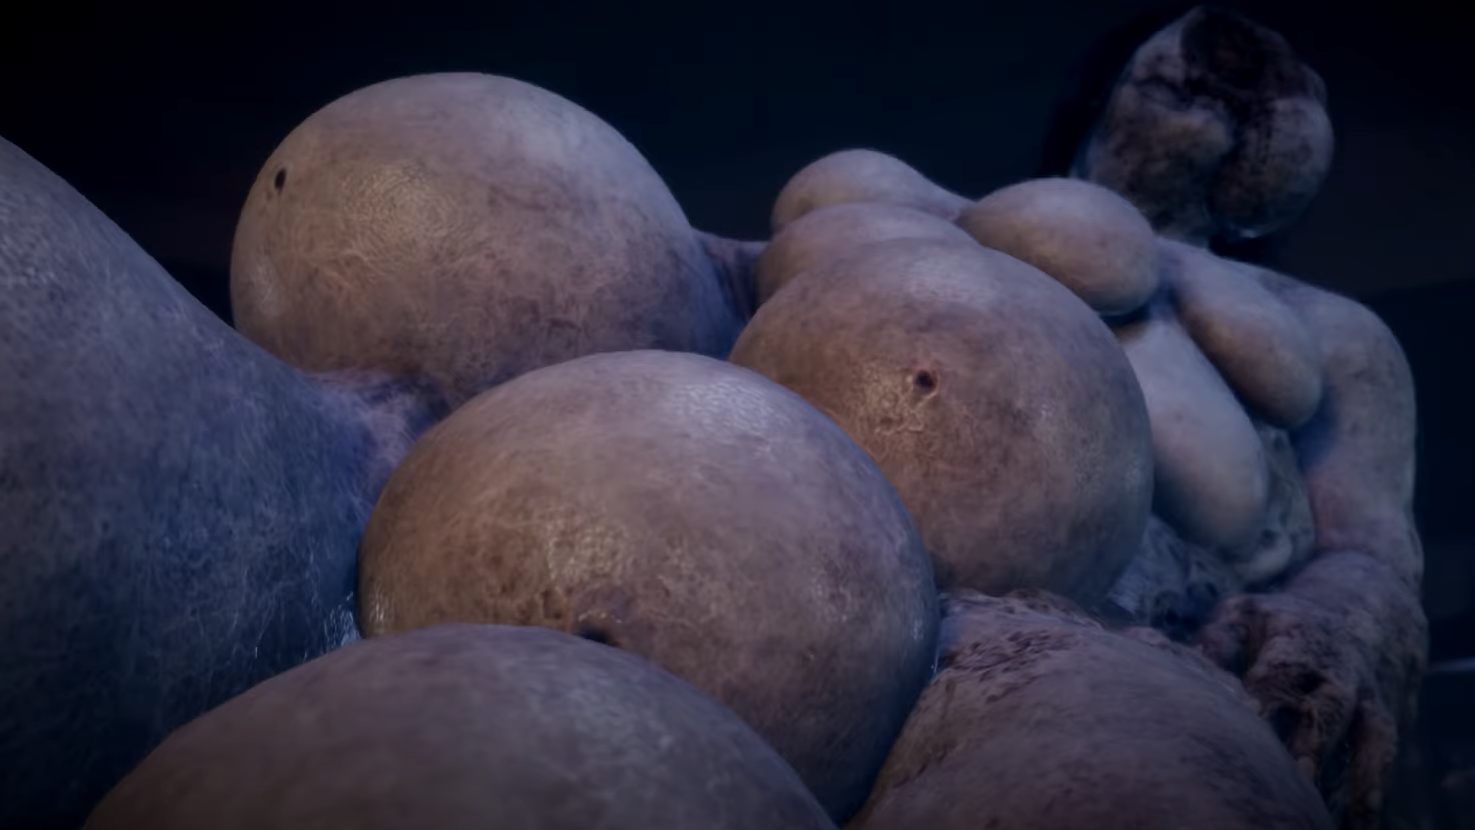
This creature carries a torso with several swollen bellies on its back, and those pulsating mounds are the point: they produce cocoons that hatch into more threats if you don’t intervene. It debuts as a set‑piece fight in Chapter 7’s Dark Shrine Worship Hall, then reappears later as a standard encounter in the Dark Shrine Main Hall, Dark Shrine Rooms, the Dark Shrine Final Path, Iwashimizu, and the Shimizu Residence. Late‑game routes can stack multiple spawns in close succession, so plan for repeat engagements.
Attack patterns, telegraphs, and punish windows
| Attack | Telegraph | What it does | How to avoid | Punish window |
|---|---|---|---|---|
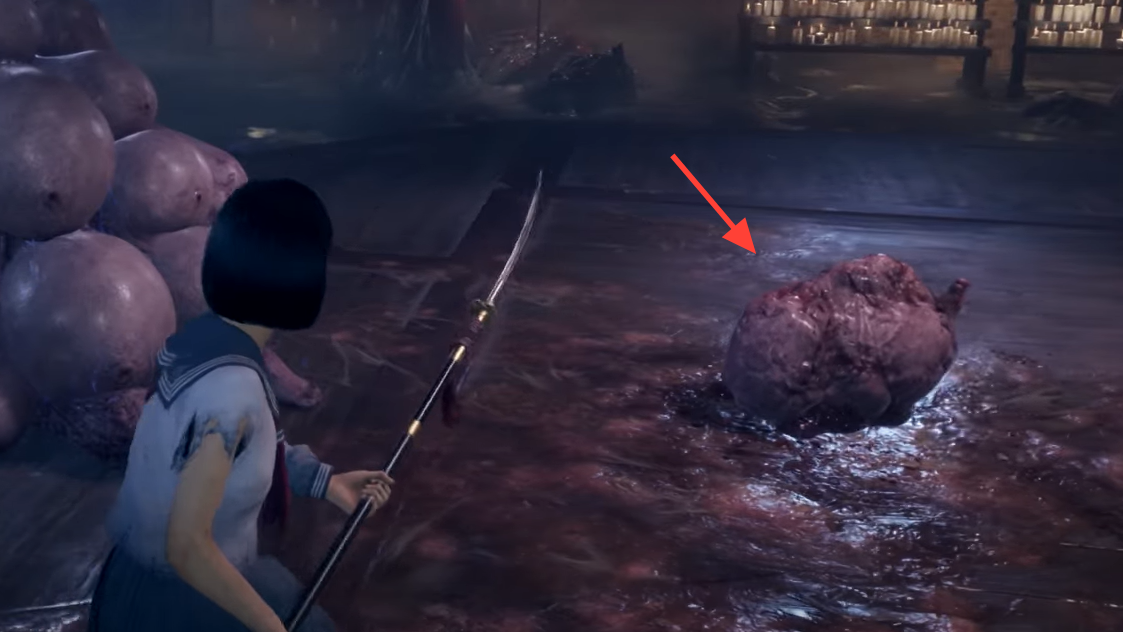
| Cocoon spawn | Retching, spits a fleshy mound to the floor | Cocoon quickly hatches into an aggressive add | Close distance and destroy the cocoon immediately | After destroying a cocoon, you often have time for 1–2 hits on the boss |
| Spit projectile | Gurgling noise; blood/coughing at the face | Arcing spit that damages on impact | Side‑step or roll as the retch completes | Short: dash in for a quick strike or reset spacing |
| Stunning scream | Head arches back, brief inhale | Short stun if you’re close; can leave you open to adds | Back out when you see the head rear; don’t get greedy | Brief vulnerability after the scream; only commit if adds are cleared |
| Two‑swipe/tackle | Violent shake and roar, weight shifts side‑to‑side | Close‑range body swipes/tackle | Perfect dodge through or away from the second motion | Prime counter window: a heavy counter can stun the monster |
Two cues matter most: the gurgle for the spit and the head‑tilt for the scream. Recognize them and you’ll retain control of the arena instead of burning resources on recovery.
How to beat Birthing Monster consistently
Prioritize in this order: cocoons, adds, then the boss. That single rule keeps the fight from snowballing.
- Destroy cocoons on sight. The hatch time is short. Sprint or dodge in and break them before they unwrap. If one slips through, immediately switch to the spawned enemy and clear it so you don’t get flanked during a stun or spit.
- Pressure it to limit spawns. The monster tends to drop cocoons when it’s left alone. Staying close and actively attacking reduces the windows it uses to spawn adds.
- Bait the counterable melee. Its two‑swipe combo is the only reliable stagger window. When you see the violent shake, ready a heavy counter; a successful counter stuns it long enough for a small combo.
- Respect the scream. When you’ve landed a few safe hits up close, back out before the head‑tilt. Getting stunned next to active adds is how runs unravel.
- Fight adds away from the boss. If a cocoon hatches, drag that enemy to the edge of the space so the Birthing Monster’s spit doesn’t snipe you mid‑finisher.
Loadout and resource management that actually help
- Carry a fast weapon for cocoons and a medium/heavy hitter for punishes. Quick one‑handers excel at deleting cocoons on reaction; swap to a pipe, bat, axe, or sledgehammer for the counter‑stun punish window.
- Save tool kits for durable weapons. Mandatory multi‑room sequences can chew through durability, so repair only the pieces that carry you through multiple arenas.
- Spend Sanity (Focus) deliberately. Use Focus‑based heavy counters on the two‑swipe; avoid blowing Sanity on chip damage while cocoons are active.
- Stamina first. If you’re choosing upgrades, more stamina makes perfect dodges and repositioning to cocoons dramatically safer.
Positioning by arena: open space vs tight corridors
In open courts, circle wide and fight adds toward the perimeter. You’ll see cocoons form and have clear lanes to delete them. In tight Shrine rooms and residential halls, create diagonals: angle past the monster’s front to a corner, then pivot through the center only to reach cocoons. Avoid standing in the same lane as both the boss and a cocoon; that’s where the spit will catch you mid‑swing.
Late‑game reality: repeat encounters and gauntlets
After its Chapter 7 debut, Birthing Monster returns often, including stacked fights late in the Dark Shrine and in town routes. Plan your kit with repeat spawns in mind: keep at least one fresh fast weapon for cocoon duty, a heavier option for stun punishes, and enough healing to tank a mistimed scream without spiraling. If a route funnels you through consecutive arenas, don’t overcommit on finishing blows—reset spacing and protect stamina so you can react to the next cocoon immediately.
Quick reference: where you meet Birthing Monster
| Area | Context | What to expect |
|---|---|---|
| Dark Shrine Worship Hall | First encounter (Chapter 7) | Tutorial for cocoons, spit, scream, and counter window |
| Dark Shrine Main Hall | Regular enemy | Mixed rooms with other foes; cocoons pressure the space |
| Dark Shrine Rooms | Regular enemy | Tight corridors; prioritize diagonals and fast cocoons clears |
| Dark Shrine Final Path | Regular enemy (late‑game) | Stacked arenas; conserve durability and Sanity between rooms |
| Iwashimizu | Regular enemy | Outdoor lanes make spit easier to dodge; don’t chase long |
| Shimizu Residence | Regular enemy | Narrow sightlines; kill adds away from the boss’s lane |
Troubleshooting common failures
- “I always get stunned and swarmed.” You’re staying too close after a short combo. Land a few hits, then back out before the head‑tilt. Clear any adds before re‑engaging.
- “Cocoons keep hatching off‑screen.” Stay on the boss’s flank, not directly behind. From the side you can see the ground in front of it and sprint to the cocoon on reaction.
- “I never see a big punish window.” Bait the two‑swipe: hover just inside melee range, then perfect dodge and answer with a heavy counter to force a stun.
- “I run out of stamina chasing cocoons.” Don’t roll to the cocoon unless a spit is mid‑air. Sprint or quick‑step, then save a dodge for the retch or a nearby add.
Once you treat cocoons as the real boss and reserve aggression for the two‑swipe counter window, the Birthing Monster turns into a controlled loop: delete spawns, bait a punish, reset before the scream, repeat. That mind‑set scales from its first Shrine fight to the stacked arenas at the end—no heroics, just clean priorities and stamina discipline.