
Hollow Knight: Silksong’s Far Fields is the first real test of vertical traversal — a sprawling, lava-laced zone that gates a major movement upgrade behind a short quest and a boss. If you’ve just pushed east past the docks and defeated Lace, this is where you’ll learn to float, ride updrafts, and open the air elevator to the lands above. New to Silksong? You’ll find the game’s product page on Steam.
What you’ll do here
- Buy the Far Fields map from Shakra (50 Rosaries).
- Unlock a Bench and the Bellway hub to the north.
- Reach Pilgrim’s Rest and meet Mort (break his door mechanism to enter for free later).
- Find a hidden Tool: the Warding Bell (shields you during Bind).
- Accept the Seamstress’s wish to collect 25 Spine Cores.
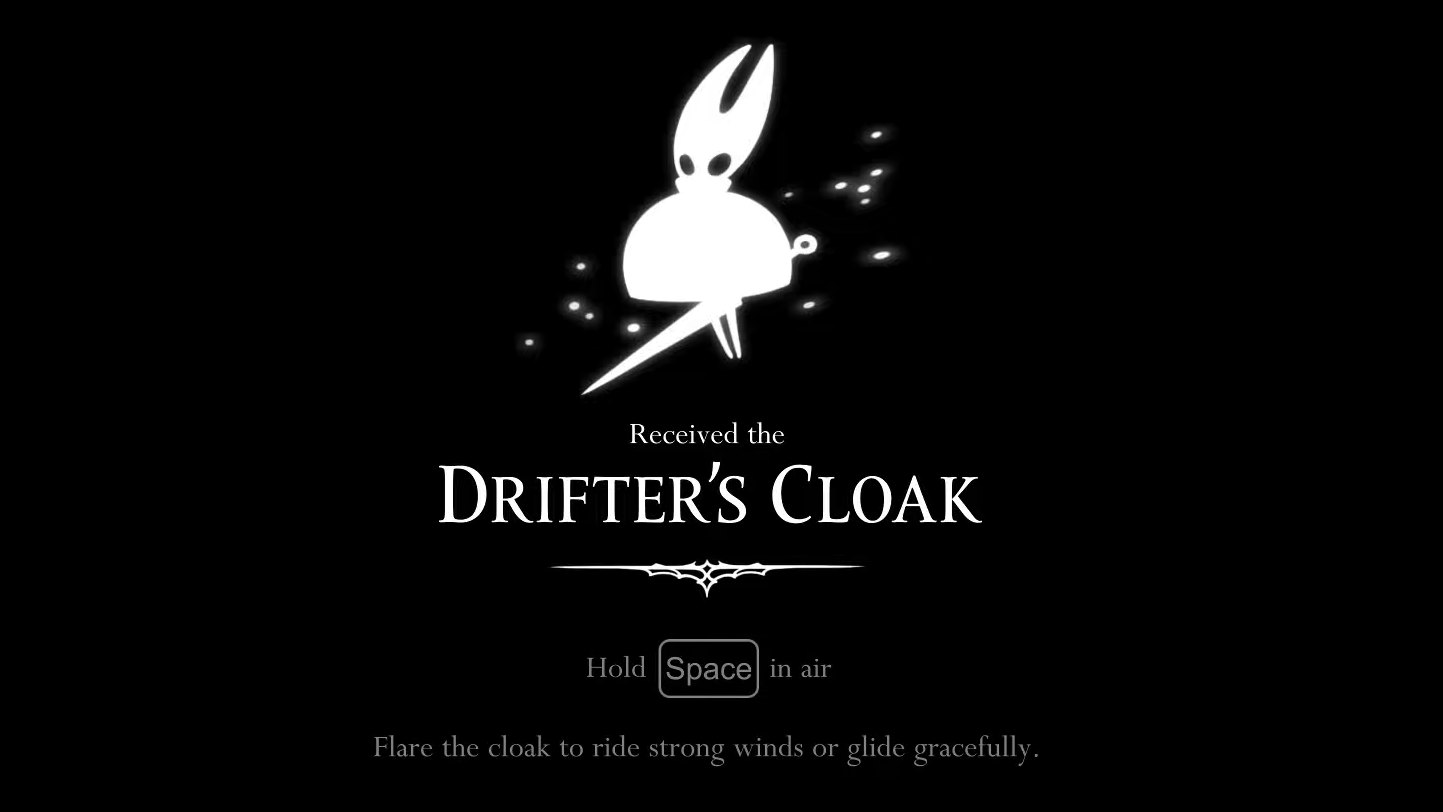
- Turn in for the Drifter’s Cloak to glide and ride wind currents.
- Grab a Mask Shard via a short updraft puzzle.
- Defeat the Fourth Chorus and open the route to Greymoor.
Getting set: map, Bench, Bellway
From the Far Fields entry, head right to a vertical shaft. Duck into the small alcove across the chasm to meet Shakra and purchase the local map. Back in the shaft, take the upper path to a signposted rest area. Spend Rosaries to unlock the Bench (recommended first) and the Bellway (fast travel).

Northwest of the shaft, climb into a wide chamber with branching ledges. Keep exploring upward to reach Pilgrim’s Rest. Outside, the Weary Pilgrim sits alone; inside, Mort sells useful tools at a premium. Tip: smack the small mechanism above Mort’s doorway — otherwise you’ll pay a fee to enter every time.
Drop the shaft: vents, lava, and a hidden Tool
Return to the central shaft and descend. You’ll see orange growths embedded in rock; breaking these opens vents you’ll use later with your glide. At the base, watch the lava, then slip left into a dim alcove where sunlight filters down. Leap up to reveal a tucked-away room containing the Warding Bell. Equip it when you need safer heals: it shields Hornet while Binding.
There’s a secret within the secret. From the Warding Bell room, strike the left wall to open a passage that loops briefly into the docks for extra materials and a chest. It’s a short detour with bomb-tossing bell foes and a couple of ambushes — a reasonable trade for some Craftmetal before climbing back to the shaft.
The Seamstress and the 25 Spine Cores (fast method)
From the mid-right exit of the shaft, cross a lava field into a cavern dominated by a balloon-like hut. Inside is the Seamstress, who offers the Flexile Spines wish: bring her 25 Spine Cores to refit your cloak.

Head into the caves to the right. The enemies you want are the floating furballs that scatter spikes in all directions when hit. Here’s the trick that keeps this from being a grind:
- Tap a Hoker to make it fire a burst of spikes.
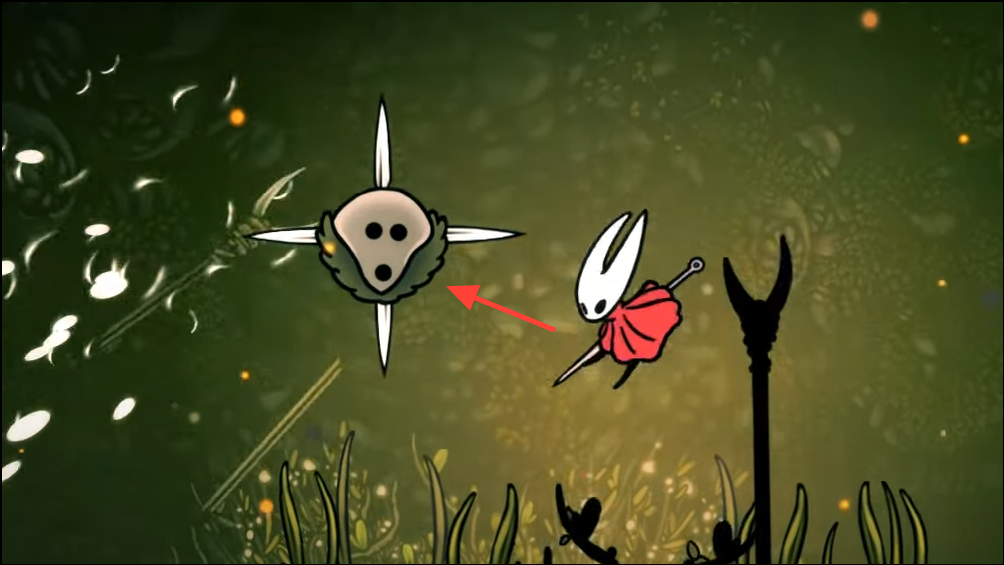
- Let the spikes stick into walls or floors, then hit the lodged spikes to collect Spine Cores.
- Don’t rush to kill the enemy — you can trigger multiple volleys to reach 25 quickly.
- If you run out of targets, step out and back in to respawn the room.
Turn the cores in to receive the Drifter’s Cloak. Hold jump to float and to ride vertical updrafts that the zone is peppered with — this is your ticket to the rest of Far Fields and beyond.
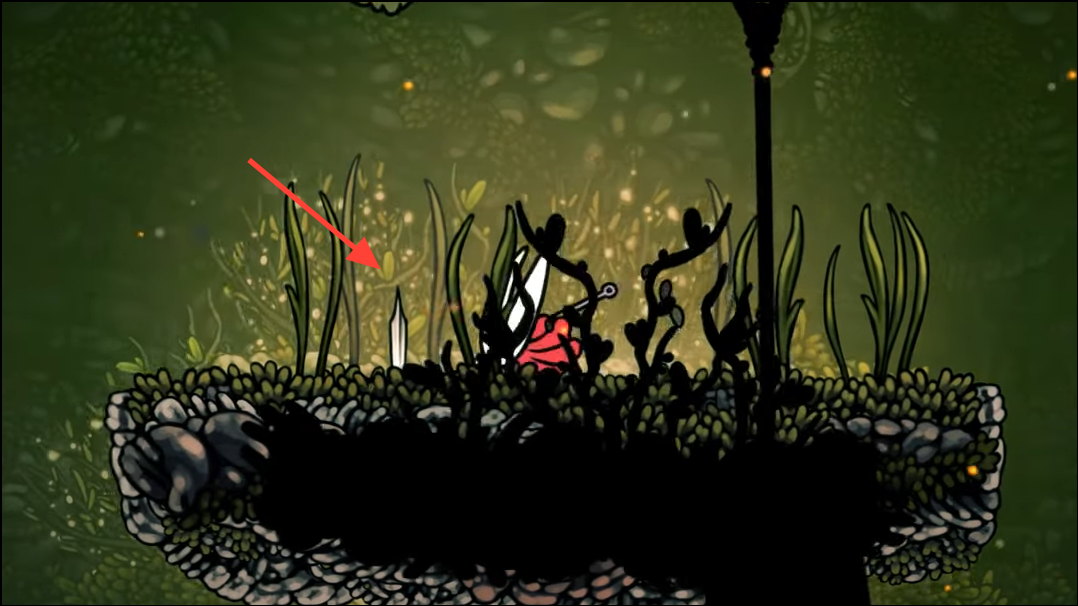
A quick Mask Shard with your new glide
Right outside the Seamstress’s hut, ride the nearby vent into a small network of currents and thorns. Break orange rocks to strengthen the airflow, float between channels, and eventually knock down a hanging magma pod to blast open a hidden compartment. The reward is a Mask Shard.

Fourth Chorus boss: float, bait, and collapse the ceiling
Return left from the Seamstress area, gliding over lava pools and taking the higher routes that your new cloak opens. A colossal figure stirs from the rock: the Fourth Chorus.
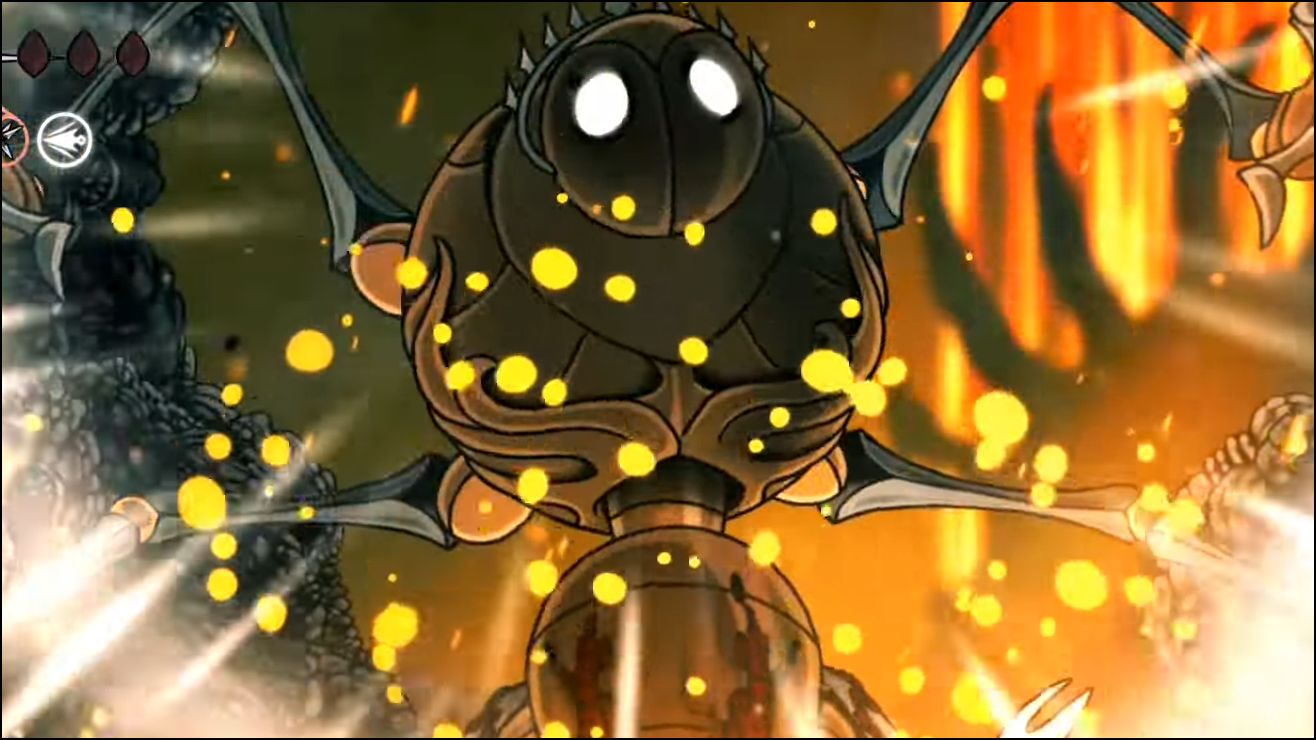
- Upper limbs telegraph a vertical slam that destroys pieces of the platform; reposition quickly.
- Lower limbs sweep horizontally; jump and float to clear them cleanly.
- Keep pressure on its head between attacks; in phase two, avoid falling magma boulders loosened by ceiling strikes.
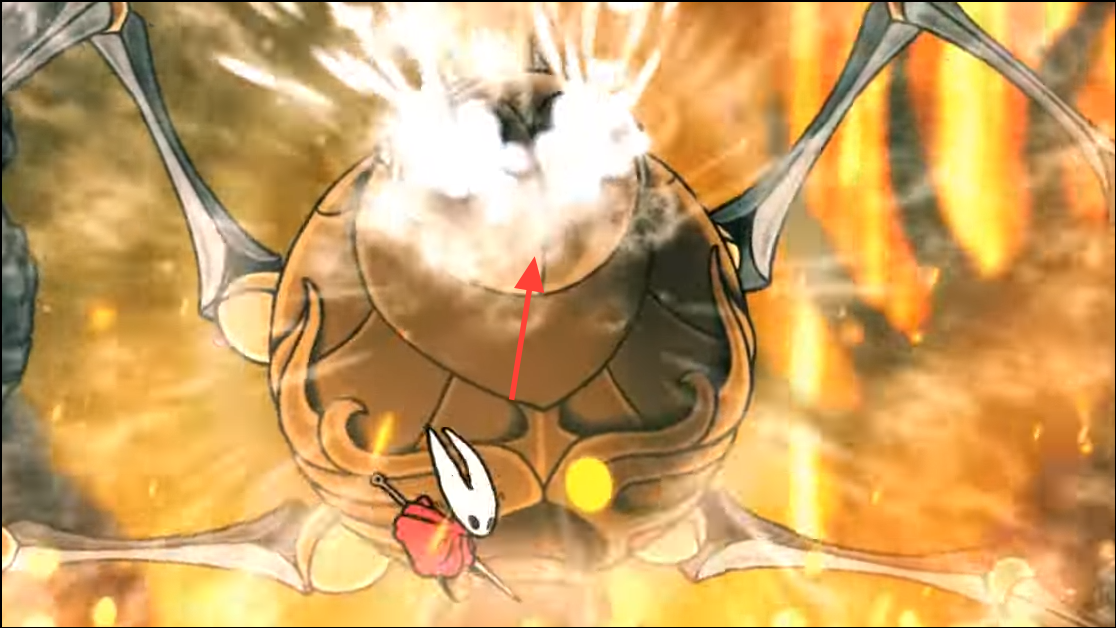
- Final phase: ride the two vents that open on either side to break orange growths in the ceiling. The falling boulders crush the boss.
Ride the elevator of air to Greymoor
With the boss down, re-enter the main shaft and use your new glide to chain vents upward. Along the way, pull levers and break more orange rocks to strengthen the updraft. At the top, a final vent becomes a towering column of air that carries you to the dreary moors above. You can peek into Greymoor now; most players prefer to mark the connection and return later.

Optional pickups and small wins you might miss
- Lost Flea: A captive Flea hangs off a side path in the northern climb before Pilgrim’s Rest. Look for pressure plates and breakable walls.
- Secret vents: Some currents hide in ceilings or behind loose walls — a brief float upward can reveal new channels or silk caches.
- Mort’s stock: Useful but pricey; consider a survivability pickup now if you’re flush with Rosaries, otherwise save for later hubs.
Common pain points (and easy fixes)
- Spine Cores not dropping? You’re meant to collect them from the spikes after they lodge in terrain, not off the enemies themselves.
- Can’t re-enter Mort’s house without paying? Break the small mechanism above the door once; you’ll enter free thereafter.
- Stuck riding vents? Watch for orange rocks to strike — each one boosts airflow or opens the next path.
Suggested order of operations
- Map from Shakra → Bench and Bellway.
- Pilgrim’s Rest → break Mort’s door mechanism.
- Drop the shaft → open vents → grab Warding Bell (left secret).
- Seamstress → 25 Spine Cores → Drifter’s Cloak.
- Mask Shard via vent puzzle west of the hut.
- Fourth Chorus boss → main shaft vents → Greymoor lift.
Why it matters: the Drifter’s Cloak changes how you move everywhere, not just in Far Fields. It turns tentative jumps into deliberate routes, opens shortcuts in earlier zones, and makes several upcoming bosses more manageable. Once the air elevator is open, you can choose to scout Greymoor or fold back into your broader wish list — either way, Far Fields has done its job.