
Savage Beastfly is an optional boss tucked inside the Chapel of the Beast in Hunter’s March, with a later rematch as a Grand Hunt in Far Fields. On paper the kit is simple; in practice it can feel like a brick wall thanks to big contact damage in a small room, unpredictable charge heights, and add spawns that snowball if you fall behind. The fight becomes manageable once you force consistent patterns and treat it as crowd control first, burst damage second.
What the boss actually does
- Horizontal charge that matches your height. The Beastfly adjusts vertically, then commits to a straight dash. If you’re mid-jump when it locks in, it often lines up at an awkward “no man’s land” that’s too high to run under and too low to cleanly hop.

- Triple slam. It rises, then slams the floor three times, briefly pausing between impacts. Those hits are your safest punish windows. In the Far Fields rematch, slams also break floor segments above lava.
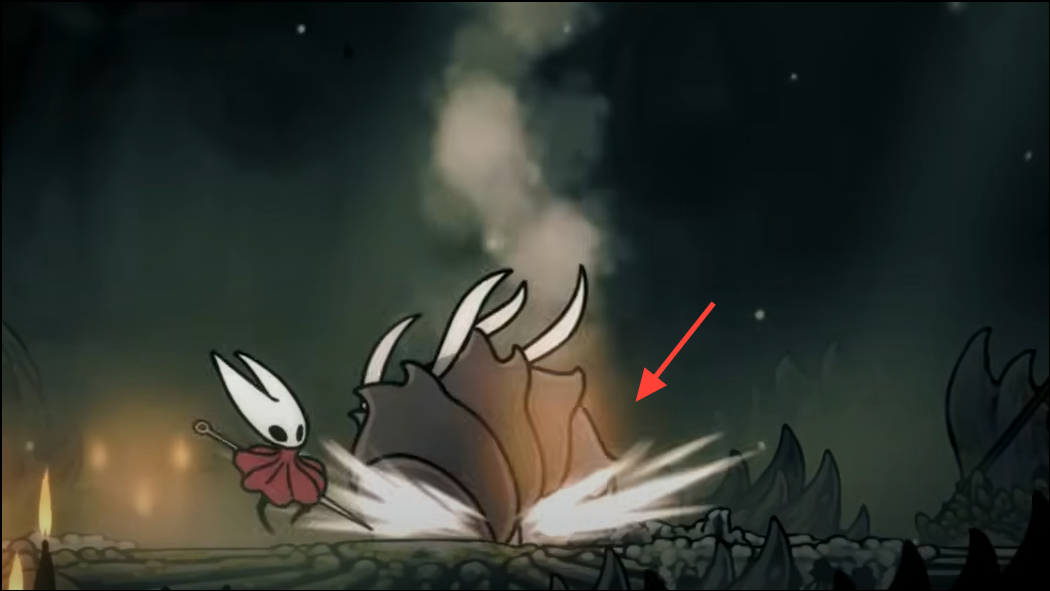
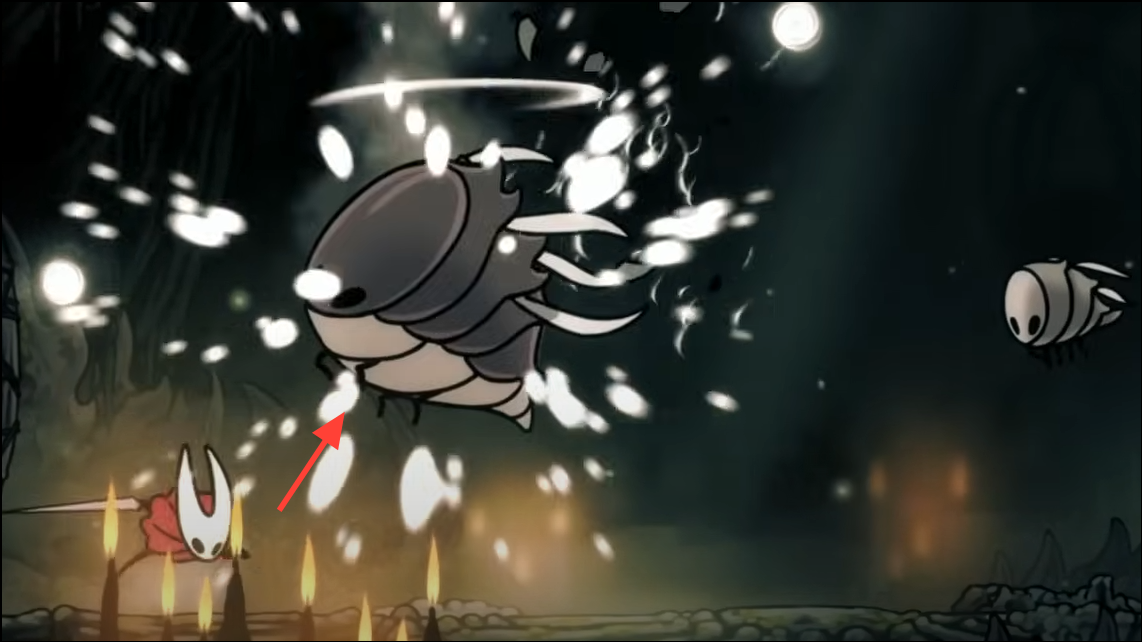
- Summons. One or two cages drop and crack open into regular enemies. It can maintain multiple adds at once. Grounded adds are crushed by a slam; airborne ones often aren’t if they’re too high or mid-attack.

In the chapel, the adds rotate between a small charger, a larger sword-fly with a radial slash, and a spiny crawler that has brief invulnerability while extended. In Far Fields, the fight swaps to fire-spitting flyers whose shots leave lingering magma on platforms, and the arena’s floor segments return and break on a cadence as the Beastfly slams.
Why it feels inconsistent
- Charge height is player-driven. Jumping early baits medium-height dashes that are hard to read. Staying grounded until the commit makes the counter more reliable.
- Contact hurts as much as attacks. The Beastfly’s body is large relative to the room, so crowded phases turn “light brushes” into real damage.
- No strict summon rhythm. The boss can call one or two adds without a predictable cooldown, so bad sequences stack pressure quickly.
- Inconsistent add clears. Slams only crush adds on or near the ground. Airborne enemies, or those in specific attack frames, can slip through the impact zone.
Stabilize the fight: fundamentals that work
- Stay on the ground for charges. Let the Beastfly pick a height while you’re planted, then react:Forcing wall bumps on the far edge creates a brief, safe poke window as it recovers.
- Dash under a low-medium dash; or
- Hop late over a true ground-hugger and downslash/pogo as it passes.
- Bait triple slams for control and damage. Back off to mid-long range to encourage the slam chain, sidestep each impact, then land 2–4 hits after each slam and a few more after the third. Reposition so grounded adds get crushed by the impacts.

- Set add priorities.
- Small flyer: delete immediately; it’s fast and space-hungry.
- Sword-fly: kite and let the slam finish it whenever possible; don’t trade into its radial slash.
- Spiny crawler: wait for its extension to finish before swinging; otherwise you’ll whiff and lose space.
- Don’t chase in mid-screen. Most deaths come from jumping early into a tracking dash while an add drifts into your landing zone. Reset to a side, wait for the commit, then move.
Loadouts that make a difference
- Silk Skill: Thread Storm. A high-uptime, omni-directional burst that shreds adds and chunks the boss after slams. Bank silk for panic clears.
- Safety while healing: a bell-type tool that grants a brief shield on heal helps you top off despite contact risk. An extra-mask tool offers margin for error.
- Ranged support: boomerang-style tools, arcing claws, or throwables clean up airborne adds without committing your hurtbox.
- Resource sustain: a crest that rewards healing or extends your poke range keeps Thread Storm and safe punishes flowing.
For the Far Fields variant, a fire/magma resistance tool reduces burn and projectile chip, buying you more platform real estate when shots paint the floor.
Far Fields rematch: new hazards, same answers
- Breaking platforms. Keep the last two segments staggered far enough apart that a slam whiffs into lava. If you eat back-to-back slams, float toward the first segment that respawns — don’t panic-jump into a charge.
- Magma spitters. Clear these quickly with ranged tools or Thread Storm, or step to the side platforms to isolate and snipe them. Leaving the central platform briefly can reset projectile pressure and create a safe heal window.
- Pace the boss down. Treat it as a DPS race with control: compress damage into slam punishes and Thread Storm bursts to prevent overwhelming add density.
Quality-of-life and route notes
- It’s optional. If you’re bleeding attempts, come back after a few core upgrades (dash, wall grip, a stronger heal pattern, and another mask).
- Reduce the runback. There’s a nearby bench in Hunter’s March that can be made safe; look for a way to disable the trap so each attempt starts fresher.
- Know the rewards. The chapel kill unlocks a Beast-themed crest. The Grand Hunt variant drops a quest item used to claim a life upgrade.
Quick checklist
- Ground yourself before charges; react late, not early.
- Bait triple slams, sidestep, and punish after each impact.
- Use slam hits to crush grounded adds; Thread Storm for the rest.
- Delete small flyers on spawn; don’t swing into spines or radial slashes.
- In lava: space platforms, equip fire resistance, retreat to side platforms to thin adds.
Why it matters: Savage Beastfly is less a duel and more a skills check on space management and tempo. Once you anchor the charge at ground level, convert slams into guaranteed damage, and reserve silk to erase add waves, the fight goes from RNG-flavored to repeatable. If it still feels joyless, skip it for now — the rest of Pharloom will be there when you’re stronger.