
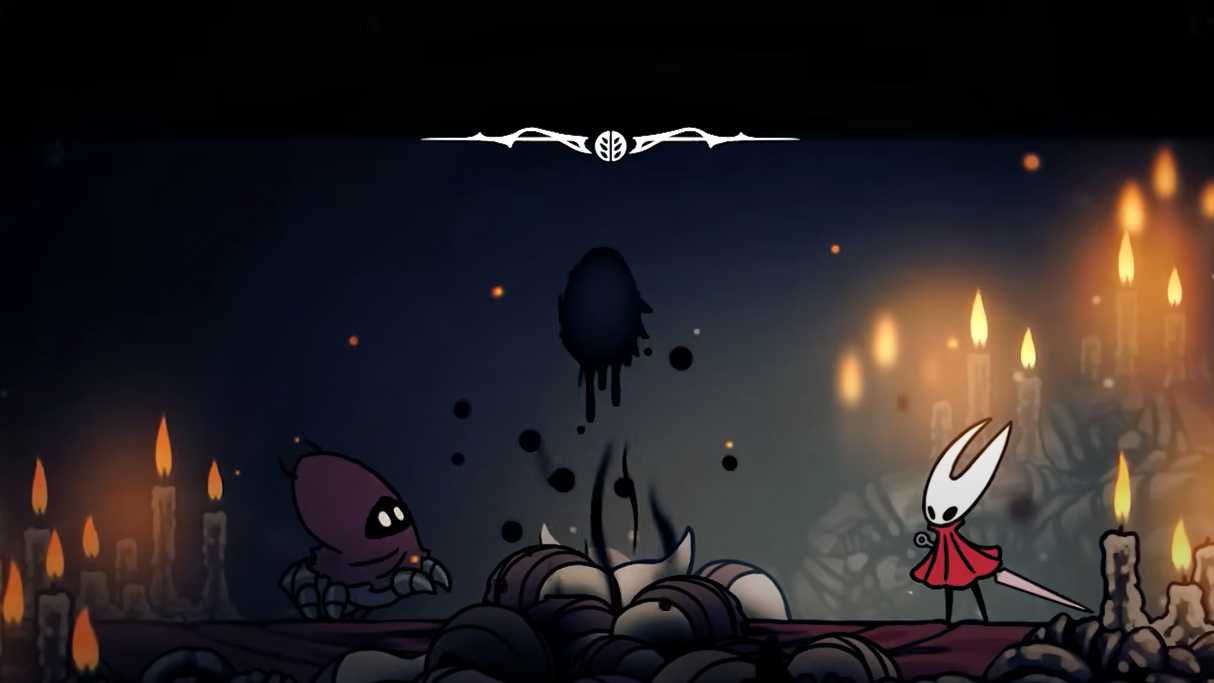
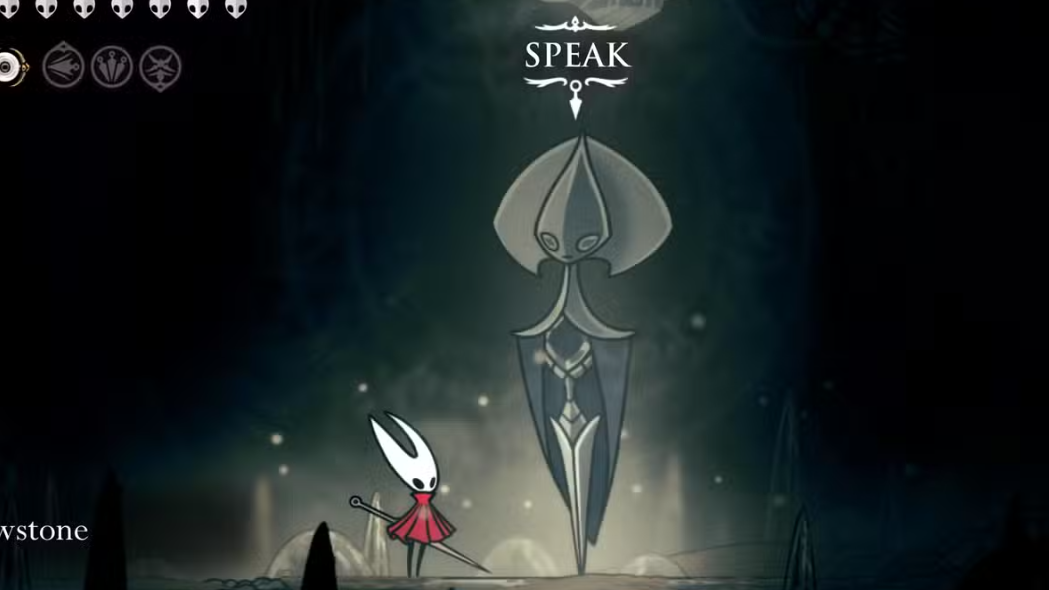
Summoned Saviour is a late-game void construct: a swelling mass of old masks and writhing tendrils that’s assembled and set upon you during a ritual. It’s not part of a standard playthrough. The fight exists only in Steel Soul Mode and sits behind a short but specific quest chain, a tucked-away arena, and a summoner who seals you in as soon as the boss materializes.
Unlock the fight (Steel Soul Mode and A Vassal Lost)
You need Steel Soul Mode enabled before anything else. During that permadeath run, pick up the “A Vassal Lost” Wish from Seer Zi in the Blasted Steps, then track down three marked resting sites. Once all three are found, head for Moss Grotto’s Bonegrave. The arena sits to the southwest, behind a breakable wall on the left side of Bonegrave. Inside, a summoner (Sula) completes the ritual; the Saviour screams, the ceiling crumbles, and the exit seals.
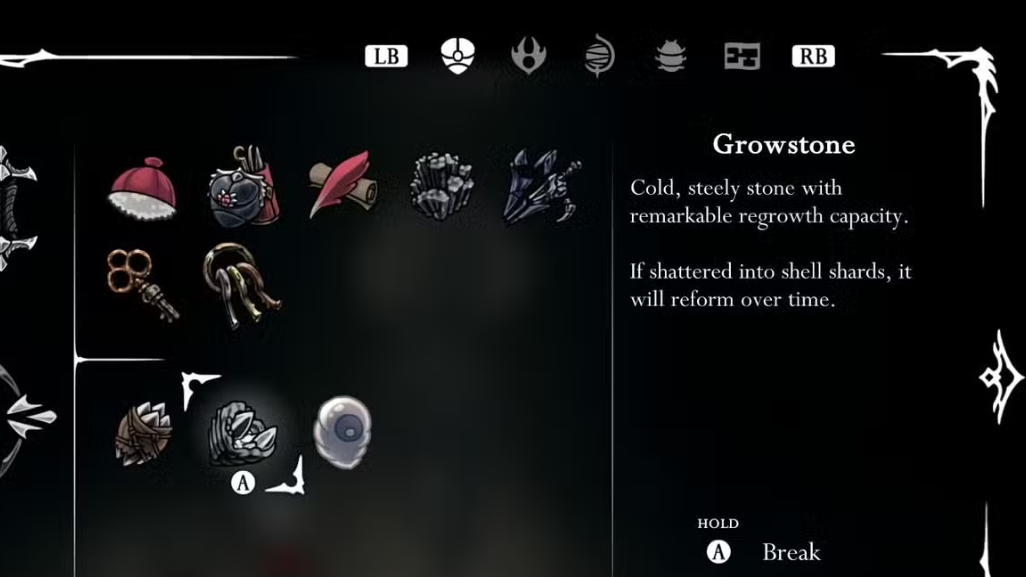
After winning, speak with the summoner, then return to Seer Zi to collect the reward tied to the Wish: a Growstone you can break for shell shards that reforms over time.
Key stats and properties
| Property | Value |
|---|---|
| Mode | Steel Soul Mode only |
| Region | Moss Grotto — Bonegrave (southwest), behind a breakable wall |
| Quest prerequisite | Complete three resting sites for the “A Vassal Lost” Wish |
| Health | 500 |
| Damage per hit | 2 Masks (all listed attacks) |
| Silk on hit | None (void enemy) |
| Hunter’s Journal | Entry gained on defeat (1 kill) |
| Needolin | No effect |
Move set and tells
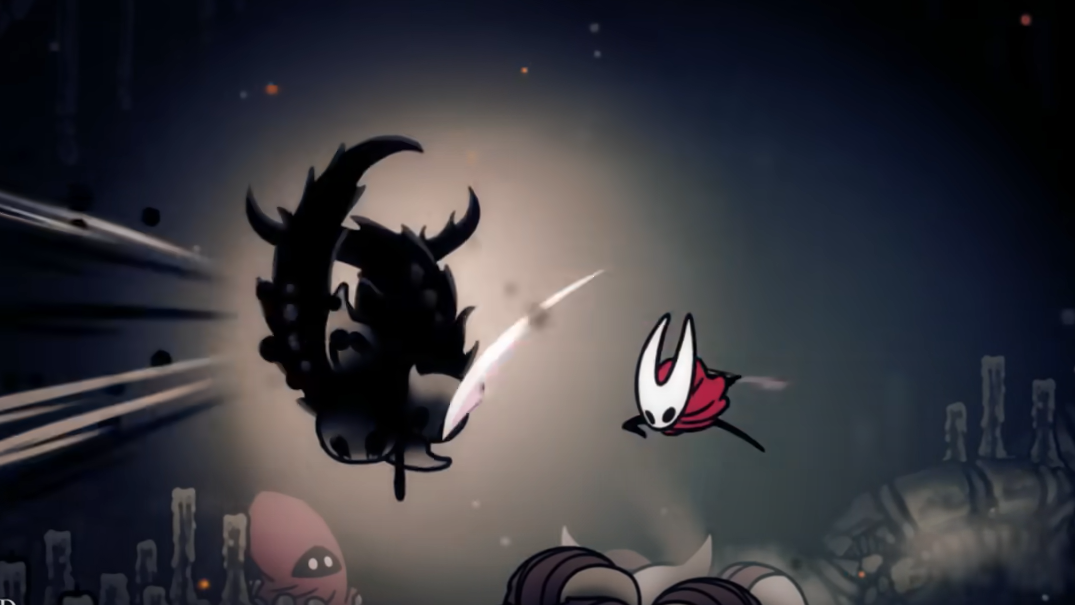
Four attacks telegraph with a brief bloom of void particles (~1 second) before they fire. One mobility action does not telegraph.
- Void Tendrils: Two tendrils charge toward Hornet’s line, then extend to roughly the length of the boss. A short-range, directional poke you can hop or dash past.
- Void Blades: A swirl of tendrils creates a large circular hazard around the boss. Get outside the ring or to its edge; do not try to squeeze through late.
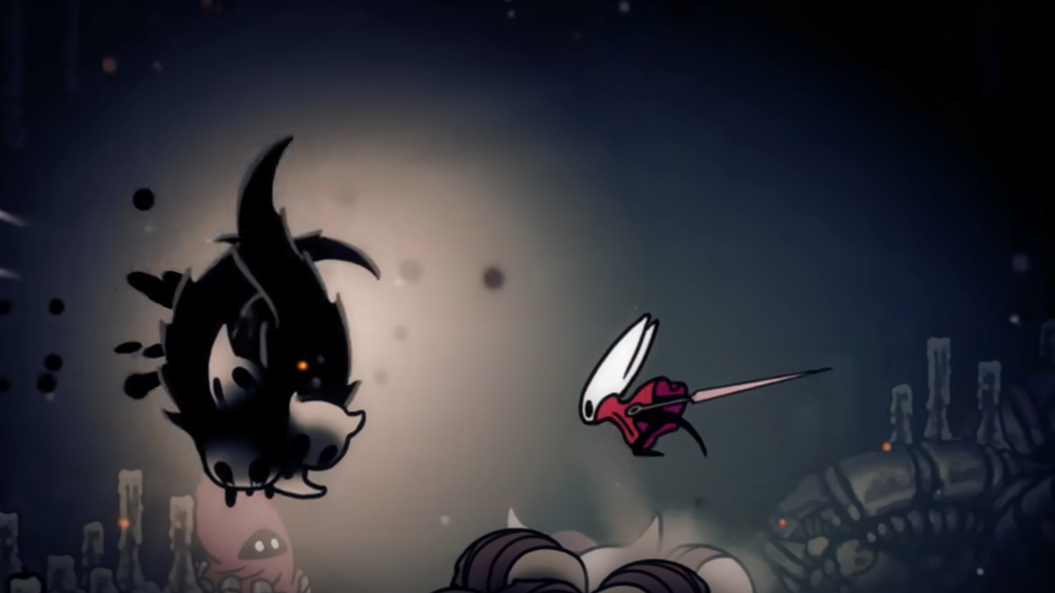
- Void Projectiles: Three consecutive shots track Hornet’s lane with a slight arc. Sidestep between volleys; jumping invites a second hit if you float too long.
- Void Blobs: Arcing blobs launch to both sides. On landing, each blob blooms a small circular slash. Treat each impact point as a temporary don’t-stand zone.
- Air Swim (dash): A quick, untelegraphed dash in a random direction between patterns. It’s a reposition — assume it can cross your line at any time.
Positioning and survival strategy
Space is your best tool in this arena. The Saviour floats and controls a wide circle when it spins blades; your plan is to fight on the edges, reset frequently, and avoid getting pinned against a wall by overlapping hazards.
- Arrive with a full Silk spool. Hits don’t generate Silk on void foes, so any bind you perform comes from what you brought in. Top off before you break the wall.
- Punish between patterns. Most attacks end with a clean neutral beat before the next tell. Step in, land a couple of safe hits, then reset to midrange.
- Respect the ring. The swirling blade AoE is the most dangerous box-in. If you’re inside when it starts, dash decisively through a thinnest point or move with it to the edge — hesitating costs two Masks.
- Keep the floor readable. With blobs seeding small slashes at impact points, don’t hover or double-jump above fresh landings. Cross quickly and wait for them to expire.
- Expect the Air Swim at any time. It has no tell and mainly exists to scramble your spacing. If the boss dashes through you, don’t turn to chase; re-center and re-evaluate the next tell.
Loadout ideas (optional)
Because your Silk is finite, builds that lean on tools and passive damage work well here. Consider:
- Homing or set-and-forget tools: Options that track or tick from midrange let you keep distance during blade rings.
- Traps and contact damage: The boss’s large hurtbox makes ground traps more reliable than usual.
- Poison coating: A poison-enabled tool pouch turns short windows into longer damage uptime.
- Faster binds and safety valves: A quicker bind band helps in tight arenas; damage-negation dice can bail a single mistake.
- Momentum damage crests: Damage that ramps while you remain unhit pairs well with a discipline-first approach — but you’ll lose the bonus on any mistake.
What you get for winning
- Quest reward: After the fight and a quick wrap-up with the summoner, return to Seer Zi to receive a Growstone, a consumable you can break into shell shards that eventually regrows.
- Journal: One defeat logs the Hunter’s entry.
That’s the entire loop: a tightly gated Steel Soul encounter, a condensed pattern set that hits for two Masks each time, and a fight that rewards composure more than aggression. Come in topped up, read the void tells, and keep resetting the space — you’ll have enough clean windows to carve through 500 HP without ever needing to gamble.