
NPCs sit at the center of progression in Solo Hunters. They hand out dungeon quests, unlock systems like codes and titles, and quietly gate your access to higher-level content behind power and level checks. Learning where each NPC stands in the Overworld saves a lot of wandering and lets you move straight from spawn to the next dungeon tier.
Solo Hunters quest NPC locations and level requirements
Quest givers are the most important characters in Solo Hunters. Each one is tied to a specific group of dungeons (“Gates”) and only becomes useful once you meet its level and power requirements.
| NPC | Dungeon area | Recommended level | How to reach from main spawn |
|---|---|---|---|
| Hunter Tim | The Subway | 0–20 | Stand in the main spawn plaza and look for the Merchant Shop. Hunter Tim waits right next to that building. |
| Rubble Doug | The Caves | 20–80 | From spawn, face the Summon Powers building. Walk behind it into the nearby construction site; Rubble Doug stands inside that area. |
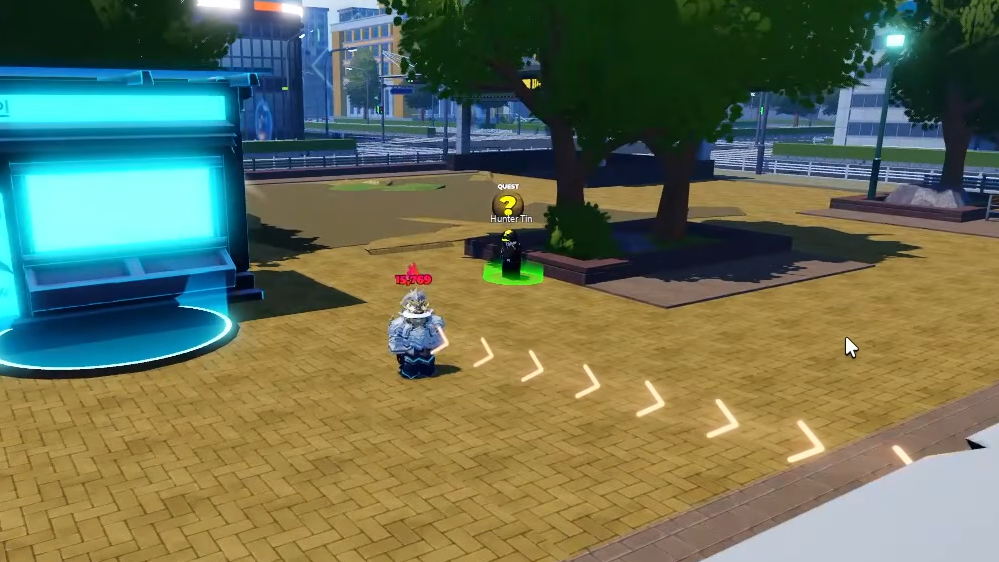
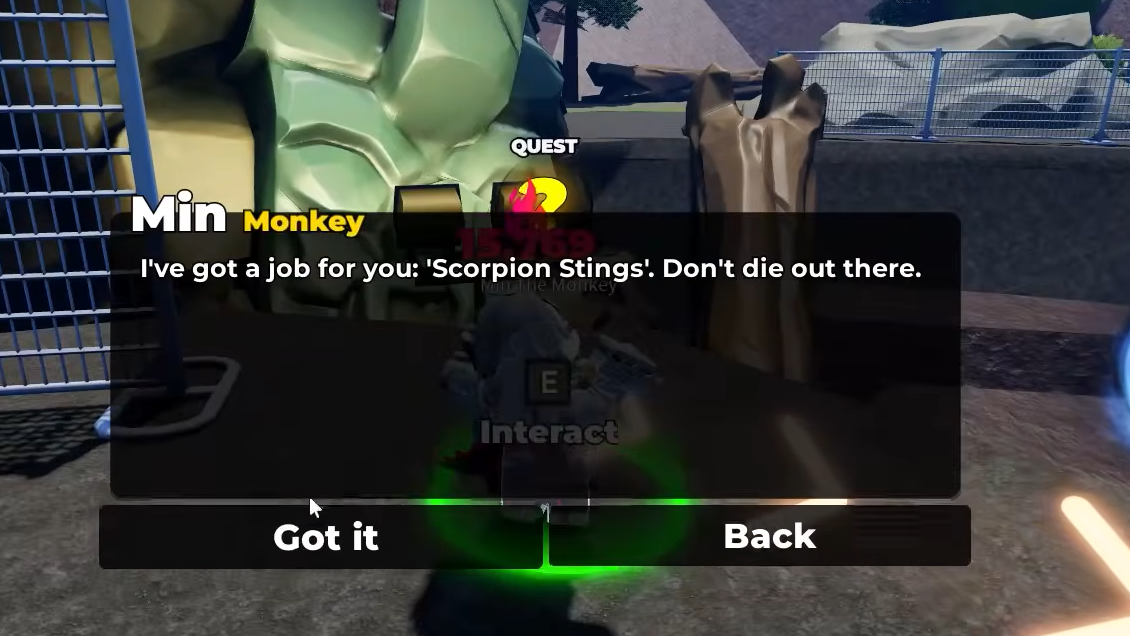
| Min the Monkey | Jungle | 80+ | From the Merchant Shop, take the left path out of the spawn plaza. Reach the road, turn left, move straight, then cross the concrete barriers into the construction zone to find Min. |
| Hunter Blaze | Desert | 200+ | Leave spawn on the path beside the Sell Shop. At the road, turn left and continue until you see the Desert Dungeon gates and a beach. Blaze stands at the base of a tree near the gates. |
| Hunter Frost John | Snow Forest | 300+ | Travel down to the ports area at the bottom of the map. Frost John stands at the entrance of one of the three hangars there. |
| Hunter Ki | Spider Cave | 380+ | From spawn, move behind the Merchant Shop and follow the road to the left. Continue along this road until Hunter Ki appears on your right, near the Spider Cave dungeons. |
How to spot quest NPCs quickly
Quest givers are visually distinct, so you do not have to memorize every face.
- Each quest NPC has a large question mark floating above their head.
- A bright green circle sits under their feet, marking their exact standing spot.
If quests seem unavailable, your character usually has not met the required level or power threshold yet. Once you reach those requirements, the quest NPCs also become trackable, making navigation easier as you move into higher Gates.
Codes NPC location (redeeming Solo Hunters codes)
All code redemption runs through a single Codes NPC at the southern docks. You cannot enter codes from a menu alone; you have to walk to him in the Overworld.
| NPC | Function | How to reach from main spawn |
|---|---|---|
| Codes NPC | Redeem Solo Hunters codes for Gems, Class Rerolls, Stat Resets, and other rewards. | From the main spawn plaza, walk straight out along the path facing the Merchant Shop until you hit the road. Turn left and follow the road all the way down to the ports. When you see containers in front of you, stop and look left: the Codes NPC stands there, near a hangar at the docks. |
Step 1: Launch Solo Hunters in Roblox and finish the opening section until your character wakes up in the Overworld city hub. The Codes NPC is not accessible before this point.
Step 2: Press M to open the map. This helps you confirm you are heading toward the southern docks rather than looping around the central roads.
Step 3: Walk to the Codes NPC at the ports using the route above. When you approach him, interact using the on-screen prompt to open the code entry bar.
Step 4: Type or paste an active code into the field and select the Redeem button. Codes are case-sensitive, so copying them exactly avoids most “invalid code” errors.
If a code fails, it is usually either expired or mistyped. Removing extra spaces before or after the code often fixes the second problem.
Titles NPC location, and how it works
Titles give your character extra identity and, in some cases, additional bonuses. Switching and equipping titles runs through a dedicated NPC near the Spider Cave Gates.
| NPC | Function | How to reach from main spawn |
|---|---|---|
| Titles NPC | View unlocked titles, equip them, and change to new ones as you earn more. | Travel toward the Spider Cave dungeons using the same road that leads to Hunter Ki. Near those dungeons, look for a building opposite Hunter Ki. The Titles NPC stands at the base of that building, across from Hunter Ki. |
Step 1: From the main spawn plaza, move behind the Merchant Shop and follow the road left toward the Spider Cave area, passing ordinary buildings and street details along the way.
Step 2: When you reach Hunter Ki on your right, stop and look across the street or square. The Titles NPC stands at the base of the facing building, slightly offset from the dungeon entrance.
Step 3: Interact with the Titles NPC to open the titles menu. Here you can see which titles you have already unlocked, read their conditions, and equip or switch between them.
Some titles require specific achievements or challenges inside dungeons. Returning to this NPC whenever you clear significant milestones helps you keep your currently equipped title aligned with your latest accomplishments.
Why some NPCs will not give you quests
Lockouts from quest NPCs usually trace back to one of two checks the game runs on your character: level and power.
- Level requirements: Each quest NPC is tuned to a level band (for example, Hunter Tim at 0–20 or Hunter Ki at 380+). If your level does not fall in or above that band, the quest dialogue either does not offer tasks or clearly blocks you.
- Power requirements: Power is a separate measure from the level that reflects your build’s strength. Some NPCs require a specific minimum power rating even if your level is high enough.
Step 1: When a quest refuses to appear, open your character stats and check your current level relative to the target NPC’s recommended band. If you are below the lower bound, focus on earlier Gates like Subway or Caves to catch up.
Step 2: If your level looks fine, review your gear, stats, and class to push your overall power higher. Upgrading armor, weapons, or powers and assigning stat points efficiently can be enough to trip the requirement.
Step 3: Return to the NPC after each upgrade burst. Once you meet both level and power thresholds, the NPC’s quests become available, and the tracking tools will start guiding you there automatically.
Where NPCs sit in Solo Hunters’ progression path
Thinking about the Overworld as a loop of NPC checkpoints makes the game’s pacing easier to read. Hunter Tim and Rubble Doug cover your early grind in Subway and Caves, Min the Monkey and Hunter Blaze pull you into midgame Jungle and Desert, while Hunter Frost John, and Hunter Ki mark the jump into late-game Snow Forest and Spider Cave. The Codes NPC at the docks feeds you regular bursts of Gems and rerolls, and the Titles NPC near Spider Cave lets you show off what you’ve already done.
Once you know where each NPC stands and what they unlock, the Overworld stops feeling like a maze and turns into a short tour between spawn, docks, and dungeon gates.