
The Base Core sits at the center of every serious setup in StarRupture. It anchors your base, defines a build radius, and, crucially, keeps structures from being wiped out when Ruptura burns the planet. Understanding how it behaves and how to place multiple cores turns StarRupture from a confusing survival sandbox into a controllable network of safe hubs.
What the Base Core does in StarRupture
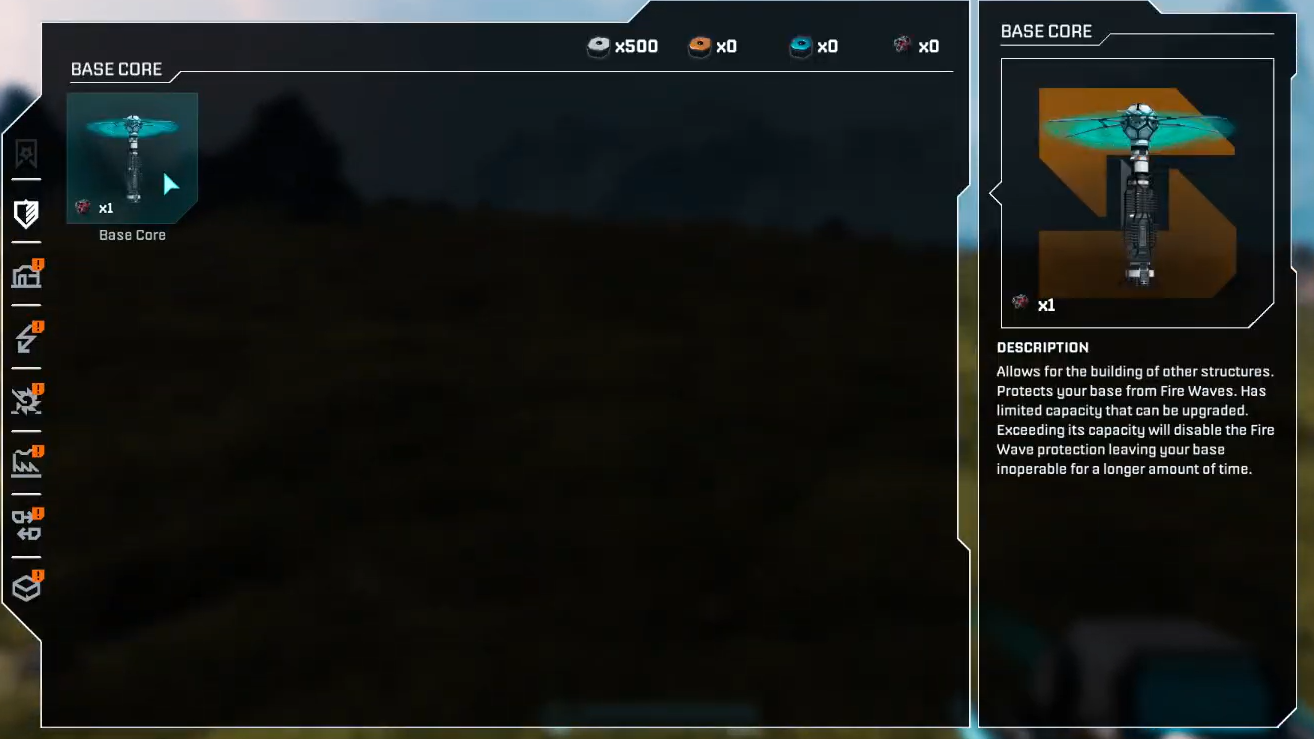
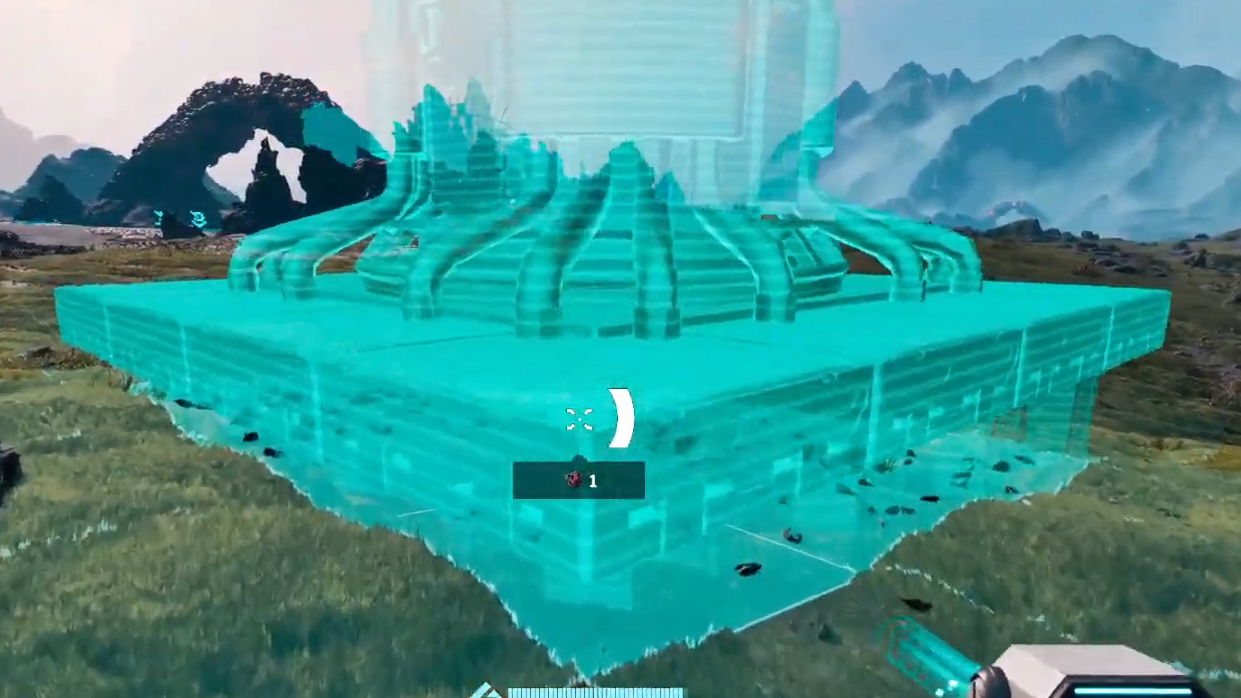
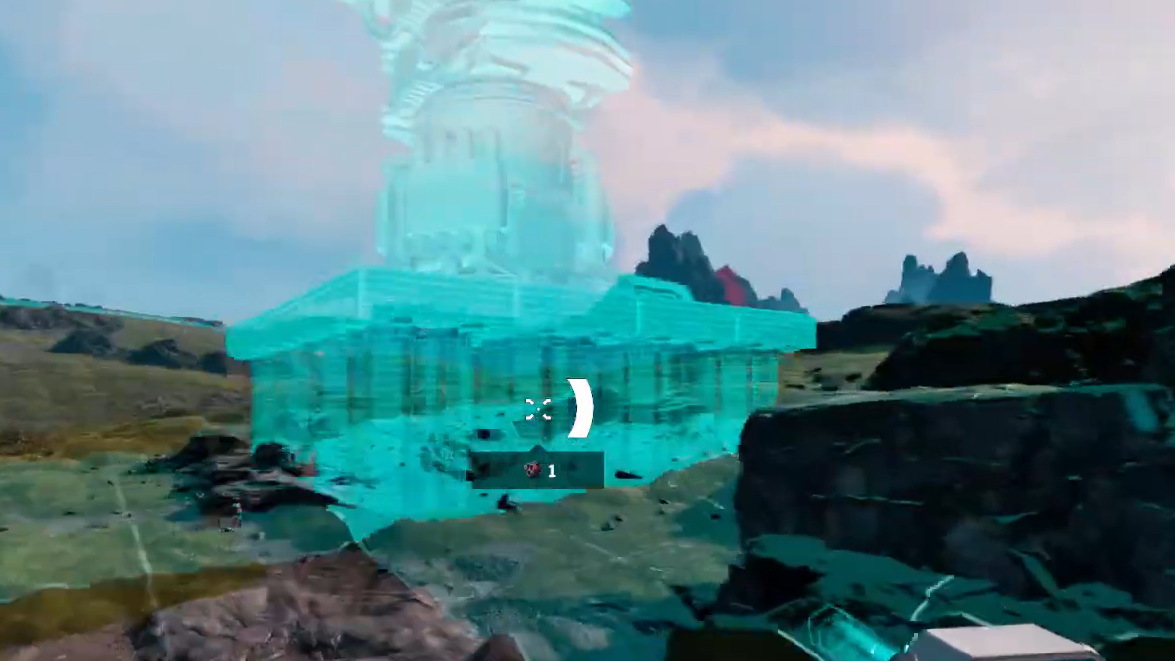
The Base Core is a structural and safety hub, not just another building.
Protection during Ruptures. When a Rupture hits and the “Wave Warning” countdown finishes, anything properly inside your base envelope can survive the incineration. The Base Core is the anchor for that protected footprint. Habitat modules, platforms, power, and production blocks tied to your base remain after the blaze, while the open world is charred and plant life disappears.
Build radius and snapping. Around each Base Core, there’s a radius where you can place core base structures and snap platforms, Habitats, and modules together. Staying within that radius keeps logistics simple and ensures that defensive turrets and power infrastructure can cover what matters most.
Network anchor for logistics. The Base Core does not move resources itself, but it defines where you can sensibly cluster Smelters, Fabricators, Storage Depots, and Orbital Cargo Launchers that tie into your rail network. Think of the core as the “city center” for a cluster of ore extractors, processing, and launch infrastructure.
Priority target for enemies. When waves of alien creatures eventually start attacking, the Base Core is one of the key objects you must keep standing alongside your Habitat. Turrets, towers, and elevated firing lines should all be positioned with the core as their primary coverage zone.
How to unlock and build your first Base Core
The early game funnels you into a basic factory loop before it gives you full control over base expansion.
Corporation unlock. The Base Core blueprint is tied to Selenian Corp. At Selenian reputation level 1, you gain access to several foundational structures in one package: the Base Core itself, Habitat, Item Printer, Ore Excavator, and Smelter. To reach that po,nt you need to start shipping basic materials through an Orbital Cargo Launcher.
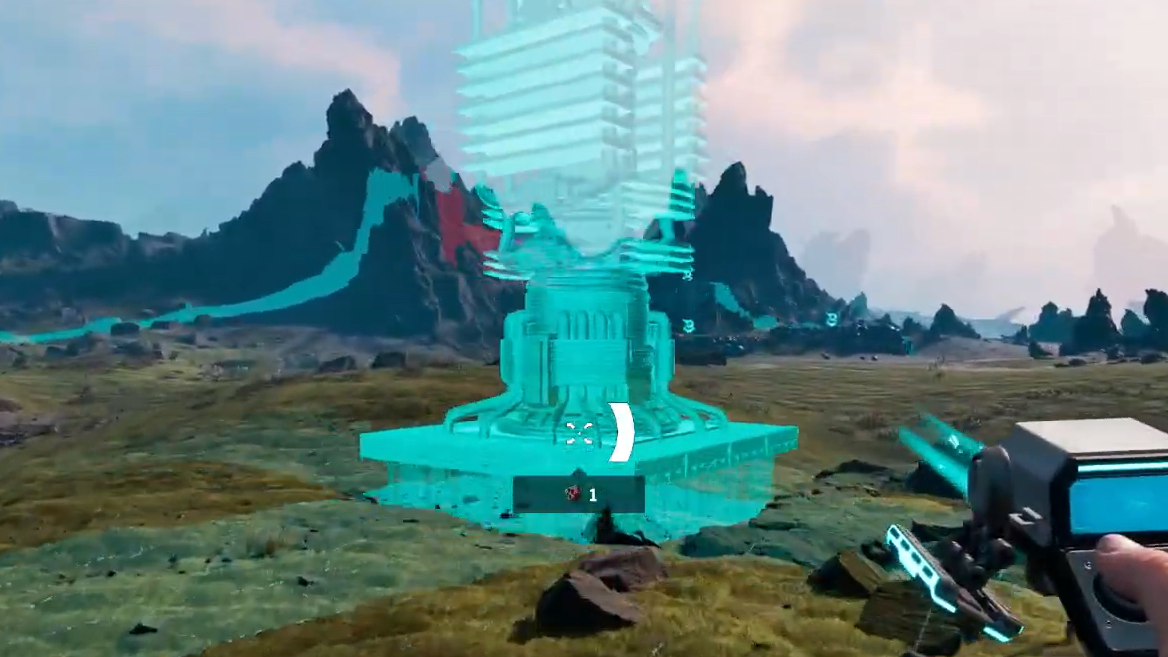
Meteorite Heart requirement. Building any Base Core requires a Meteorite Heart. This is a unique drop from meteors that land across Arcadia‑7. When you find a meteor, break it open with your Harvester or appropriate tools and loot the Meteorite Heart inside. Each new Base Core consumes one Heart.
Starter sequence. A practical early sequence looks like this:
Step 1: Land at the Orbital Lander, loot the Personal Storage crates for starter supplies, and read the mainframe terminal for your mission brief.
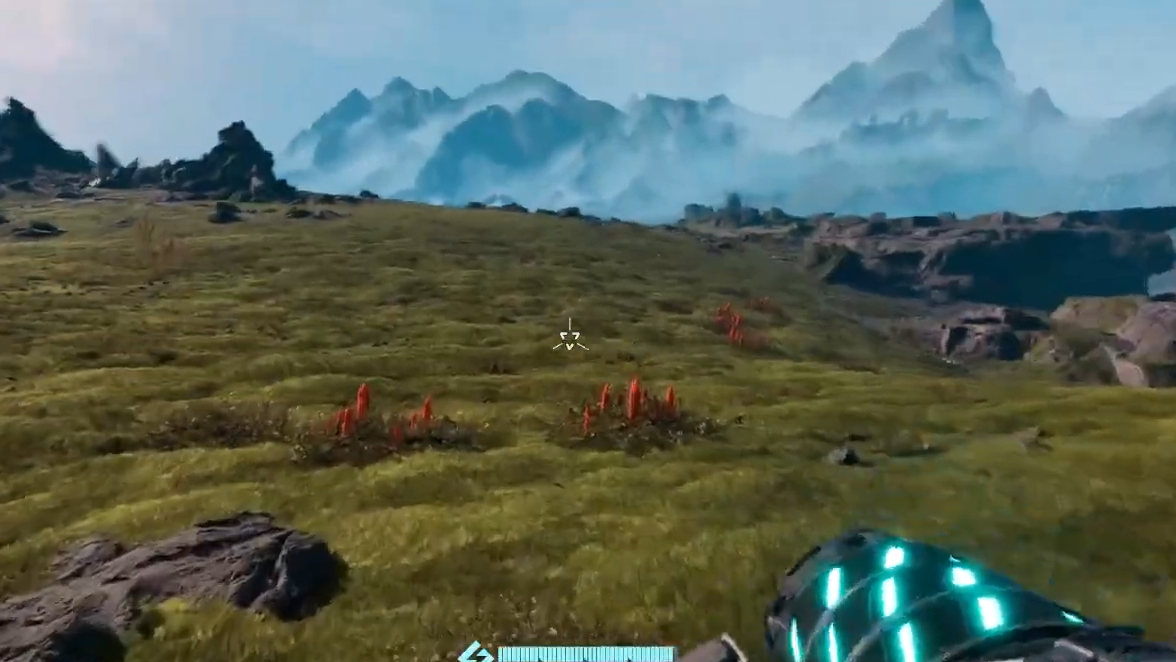
Step 2: Walk up out of the crater, find the nearby Titanium and Wolfram deposits, and mine around 50 of each ore with your Harvester.
Step 3: Use the Orbital Lander’s crafting to convert that ore into Basic Building Material so you have a small pool to work with.
Step 4: Place one Ore Excavator on Titanium and one on Wolfram, then power them and route rails through Smelters toward an Orbital Cargo Launcher.
Step 5: Configure the Smelters to turn ore into Titanium Bars and Wolfram Bars, and assign those outputs as commissions on the Orbital Cargo Launcher so your first corporation levels start ticking.
Step 6: Once Selenian Corp reaches level 1 and you have a Meteorite Heart, build your first Base Core near this starter factory and attach a Habitat and Airlock to create a safe shelter.
From that moment, you’re no longer living out of the Orbital Lander. Your Base Core and Habitat combo becomes your main refuge every time a Wave Warning appears.
Finding the best location for your main Base Core
Dropping your first Base Core “where you stand” works, but a smarter placement saves a lot of pain later. StarRupture’s planet looks open and inviting, but Ruptures, hostile wildlife, and terrain all conspire against badly placed cores.
Use natural cover. There are no walls or fences in the early game, so terrain is your only passive defense. Placing your Base Core and Habitat tight against a cliff face, a big rock outcrop, or even a tall Titanium stack blocks attacks from at least one side. That halves the number of angles you must defend and makes it easier to spot incoming creatures.
Stay near water and basic plants. Hydration and calories matter more than the game’s tutorial admits. Being close to a small lake for Hydrobulbs (hydration plants) and to flat grasslands for Polifruit (calorie-rich fruit) simplifies basic survival. One strong recommendation is to move east from the starting crater, past sulphur deposits, until you hit a small lake and settle just north of it. That area combines ready access to early and mid‑tier resources with relatively light enemy presence.
Choose flat ground for the core footprint. Rails, Smelters, platform modules, and defensive towers all behave better on flat terrain. Small slopes are workable, but heavily uneven ground causes frustration with “collision” errors and awkward rail angles. Place the Base Core on a reasonably flat patch, then stretch rails out to more rugged resource nodes instead of forcing the core itself onto a hillside.
Using vertical building to protect the Base Core
StarRupture quietly supports vertical building, and that has huge implications for Base Core safety.
Raising the core and Habitat. When placing a Habitat or Base Core, scrolling the mouse wheel moves the ghost up or down the Y‑axis. Combining this with stairwells and walkways lets you suspend sensitive structures off the ground or tuck them into rock formations. An elevated, rock‑backed Base Core is much harder for enemies to swarm directly.
Bunkering in with Habitats. In the absence of true walls, Habitats can act as a living barricade. Placing Habitats in a ring around your Base Core and linking them with Airlocks creates a shell of solid geometry that enemies must path around. You then drop turrets at the few gaps you intentionally leave. This effectively bottlenecks waves into predictable kill zones while shielding the core in the center.
Turrets on the high ground. Later, when you unlock Automatic Turrets and Defence Towers, use your vertical footprint to put them on top of Habitats overlooking the Base Core and main entry lanes. Elevated turrets enjoy clearer lines of sight and are less likely to be body‑blocked by terrain or buildings.
There is an upper limit to how high you can build, but even modest elevation combined with a rock face makes a noticeable difference in how often attackers reach the Base Core itself.
Defending the Base Core from waves and wildlife
Threats in StarRupture escalate over time. The Base Core sits at the heart of your objective, so every defensive decision should be filtered through the question: “Does this keep the core and Habitat up through the next wave?”
Prioritize core and Habitat defence. Ore Extractors, rails, and outlying structures are cheap to rebuild. The Base Core and Habitat are not. Cluster Automatic Turrets and Defence weapons around these central pieces instead of spreading them thinly over every extractor or rail spur.
Create a single main approach. With cliffs, rock walls, and Habitat “rings,” shape your base so enemies realistically attack from one broad direction. Place towers and turrets in overlapping arcs facing that approach. A narrow choke with concentrated fire is far easier to manage than creatures nibbling at the base from 360 degrees.
Keep core‑side space clear enough to move. It’s tempting to jam every machine into the central footprint, but do not wall yourself in around the Base Core. You need space to strafe, kite enemies, and repair or dismantle buildings under pressure. Aim for a clear central plaza with the core and Habitat, then ring that area with production lines and defences.
How many Base Cores you can build and why you want more
There is no single‑core limit baked into the design. You can establish multiple bases across Arcadia‑7 as long as you meet the build requirements for each new Base Core.
Requirement for additional cores. Every additional Base Core still consumes a Meteorite Heart. You do not unlock a “free” second core; you have to track meteors, break them open, and collect more Hearts before you can drop another anchor.
Role of secondary bases. Most secondary bases don’t need to be full industrial cities. Instead, they function as:
- Safety refuges in distant regions, giving you a nearby shelter from Ruptures without sprinting back to your starting base.
- Mining outposts parked on top of rich Titanium, Wolfram, Calcium, or Helium‑3 areas, with the processing line nearby and launchers shipping goods to corporations.
- Forward operating posts near tough Abandoned Bases or major points of interest, so you can respawn close and restock quickly.
Minimal template for a remote base. For a typical “stop‑gap” base in a new region, you only need a few structures:
- Base Core (with Meteorite Heart)
- One Habitat
- Airlock on the Habitat
- Regeneration Chamber for respawning
- Equipment Upgrade Station, if you plan to tinker with gear there
These light bases don’t require the same perfect terrain or heavy defences as your main hub because you’re not committing your entire factory there. If a mining outpost falls, you can rebuild it faster than a sprawling primary base.
Using Base Cores with power and corporations
The Base Core doesn’t produce energy, but it’s the place where power flows, and corporate progress converge.
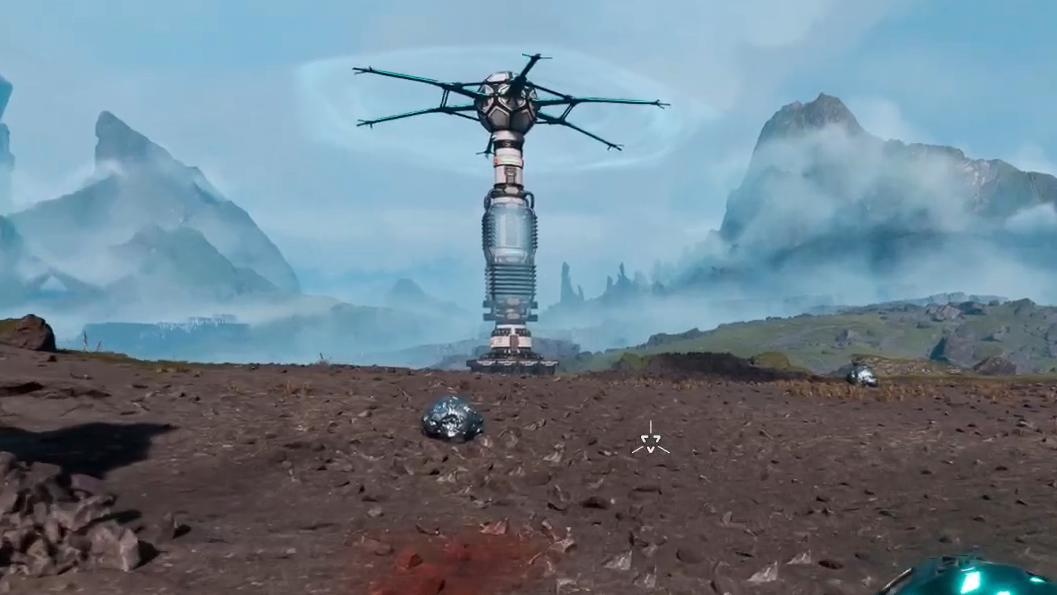
Power near the core. Early energy comes from Solar Generator V1, and later wind turbines unlocked through Moon Energy. Placing generators and power‑hungry infrastructure near the Base Core keeps cable runs short and makes it easier to adjust layouts as you unlock upgraded generators, Base Core Amplifiers, and improved turbines.
Corporation tech around each core. Several corporations directly influence how effective each Base Core can be:
- Moon Energy adds solar generators, wind turbines, the Map, and Base Core Amplifiers that boost how well a core supports your base.
- GriffithsBlue Corp supplies weaponry, turrets, and equipment upgrades that protect cores from attacks.
- Clever Robotics focuses on logistics: rails, Cargo Dispatchers and Receivers, Storage Depots, and Building Drones that make multi‑core networks manageable.
- Selenian Corp underpins basics like Habitats, the Base Core itself, and higher‑tier processing machines that often cluster around your main core.
Always queue commissions before leaving a core. Each Orbital Cargo Launcher attached to a base can run shipments while you explore. Before heading out from your main hub or a mining outpost, set at least one commission per corporation you’re targeting. That way, by the time you return, your Base Core’s surrounding tech options have expanded without you babysitting progress bars.
Surviving Ruptures with smart Base Core usage
Ruptures are the planet’s hard reset. The Base Core is your way of opting out of that reset in small pockets of safety.
Always stay within sprint distance of a core or shelter. The top‑of‑screen Rupture meter and “Wave Warning” callouts give some lead time, but not enough to cross half the map. When exploring far from your main hub, carry at least one Meteorite Heart and a stock of Basic Building Material. If a Wave Warning catches you with no friendly Base Core nearby, drop a new core, quickly place a Habitat and Airlock, and shelter inside.
Accept that the world will change; your cores persist. After each Rupture, resource nodes reshuffle and plants die off temporarily. Bases anchored by cores remain. That makes Base Cores your long‑term investments in a world that refuses to stay still. As you add more cores across the map, you gradually turn Arcadia‑7 from a hostile wilderness into a loose web of permanent footholds.
Used this way, the Base Core stops being a mysterious checkmark in a build menu and becomes what it is meant to be: the thing that makes StarRupture’s constant cataclysms survivable, and the skeleton for the industrial system you’re slowly stitching across the planet.