
Helium-3 sits in an awkward place in StarRupture’s economy. You stumble over small amounts early on, long before you can automate it, but it only becomes essential once you move into mid-game crafting like Ceramics and Glass. That combination makes it easy to either ignore too long or burn time wandering the map looking for a proper node.
Helium-3 always leaves a visual trail, though, and its larger deposits cluster in predictable parts of Arcadia-7. Once you know what you’re looking for and which direction to head from the Orbital Lander, it becomes a manageable part of your factory rather than a bottleneck.
What Helium-3 looks like in StarRupture
Helium-3 always advertises itself with purple visuals. You’ll see it in three main forms while exploring:
- Meteorites with dull purple patches – These space rocks lack the shiny metallic look of Titanium-rich meteorites or the red glow associated with Wolfram. Instead, they have matte purple blotches on the surface. Breaking them with your mining tool yields Helium-3 along with other materials.
- Small Helium-3 rocks – These are low, irregular rocks scattered on the ground that emit a constant plume of purple smoke. The smoke stands out against most terrain, so you can often spot them while traveling between objectives.
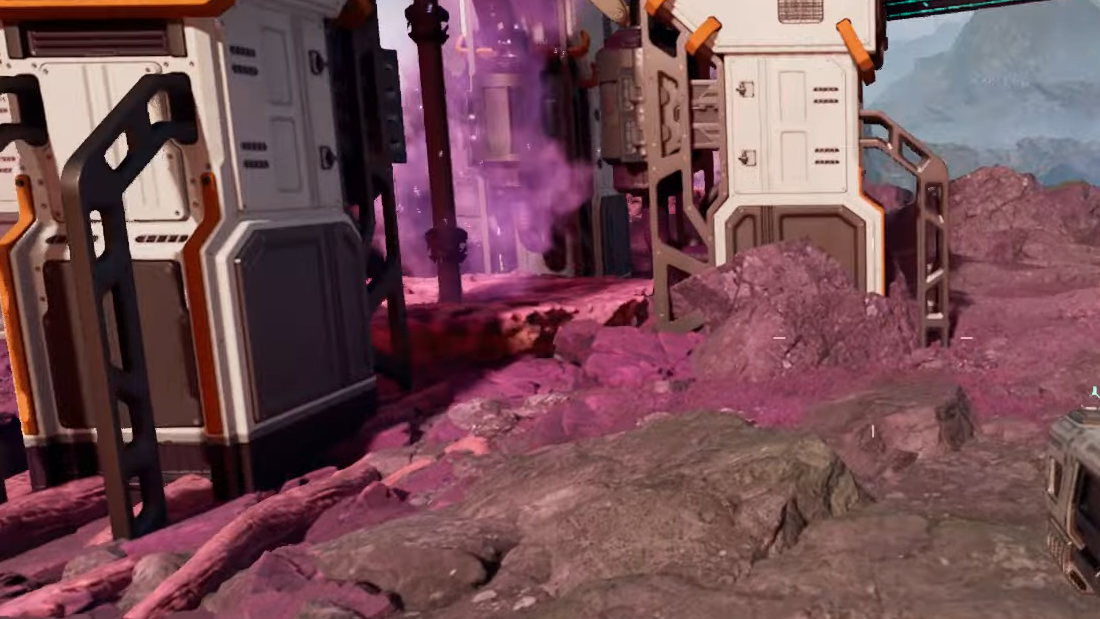
- Large Helium-3 nodes/geysers – These are flat deposits or geyser-like vents in the terrain that push out thick purple gas, tinting the nearby area in a violet tone. These are the locations that support long-term automated extraction with a Helium-3 Extractor.
In the early game, you mostly interact with meteorites and small rocks. These are worth harvesting whenever you see them, even if you do not yet have recipes that consume Helium-3. Having a stockpile ready makes the transition into mid-game crafting smoother.
Early ways to get Helium-3 (before automation)
Before you unlock the Helium-3 Extractor, you are limited to manual harvesting. That still covers a surprising amount of your early and early-mid needs.
Meteorites are the most reliable background source. Any meteorite with visible purple sections will yield Helium-3 when destroyed, and even ones without prominent purple patches can still drop some. Whenever you see a fresh meteor impact or pass near one on your way to another task, breaking it is usually worth the time.
Ground rocks with purple smoke are the other main early supply. These are much smaller than full nodes but far more common. They behave like other loose ore chunks: walk up, mine them, and move on. If you make a habit of grabbing them while exploring, you can build a respectable stash without ever detouring specifically for Helium-3.
Early on, Helium-3 does not gate core progression the way Wolfram, Titanium, or Calcium do. You can afford to passively collect it while prioritizing your main ore lines and basic infrastructure.
Where Helium-3 nodes are on the map
True Helium-3 production starts once you find the larger nodes and can place extractors on them. These are rarer than metal ore veins and tend to sit farther from the Orbital Lander.
The main patterns on Arcadia-7 are:
- Far east from the Orbital Lander – Heading straight east from the starting ship and climbing over a mountain ridge eventually brings you into Helium-3 territory. Players report multiple nodes here, including ones suitable for establishing a dedicated outpost.
- South-east corner – Another cluster of nodes sits in the south-east section of the map. This area is more dangerous: hostile creatures with ranged attacks patrol nearby, so you should arrive prepared for combat. Terrain can be tricky as well; one route involves getting onto high Titanium formations and then working your way down toward the Helium-3 vents, building steps from the top once a Base Core is established.
- Far north and far east geysers – Separate from the community callouts, Helium-3 geysers also exist in the far northern region and far to the east of the Orbital Lander. These show as purple gas vents rather than traditional ore “veins.”
- Triple-geyser formation near a large Calcium vein – Moving northeast from the lander until you hit a large, distinctive Calcium field, then heading further north from there, leads to a rare triple Helium-3 geyser site. This is one of the best long-term production spots if you are ready to defend and power it.
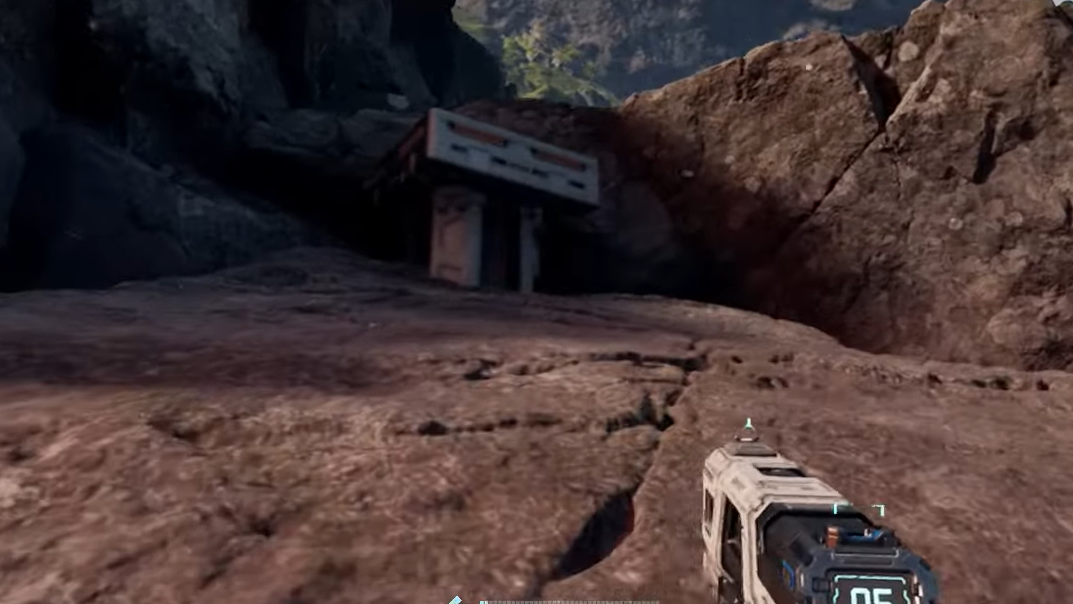
One Helium-3 location is already occupied by an abandoned base, which blocks you from placing an extractor directly there. You can still loot that base for general upgrades and materials, but you need to rely on other vents for mining.
F) while walking will reveal nearby Helium-3 nodes and mark them with icons once detected, making follow-up visits easier.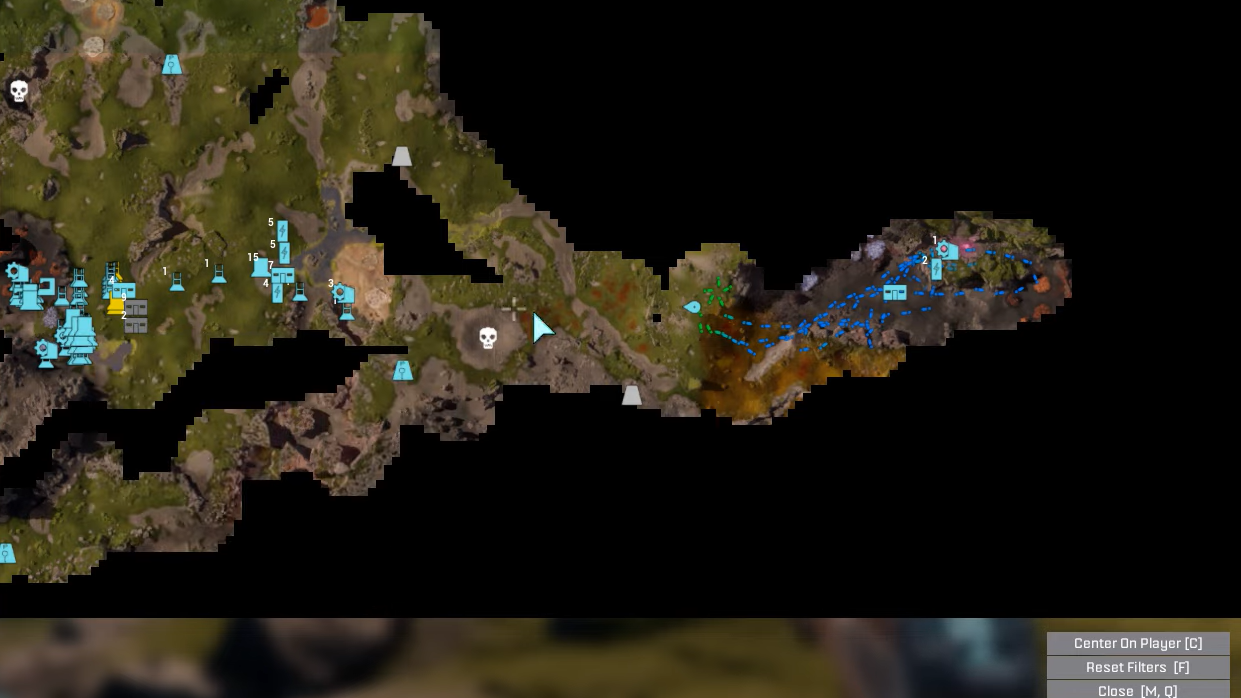
How to unlock the Helium-3 Extractor
Automated Helium-3 only starts once you unlock its dedicated extractor. That happens through corporate progression rather than story milestones.
You need to raise the Selenian Corporation to Level 6. Leveling corporations is done by sending them specific manufactured goods through the Orbital Launcher, earning corporate reputation (G). For Selenian, that means feeding it the items it requests in its contract list until you reach the required threshold for level 6.
Once Selenian hits Level 6, the Helium-3 Extractor blueprint becomes available in its tech tree. From there you can craft and place the extractors as long as you have the necessary materials and structure limits.
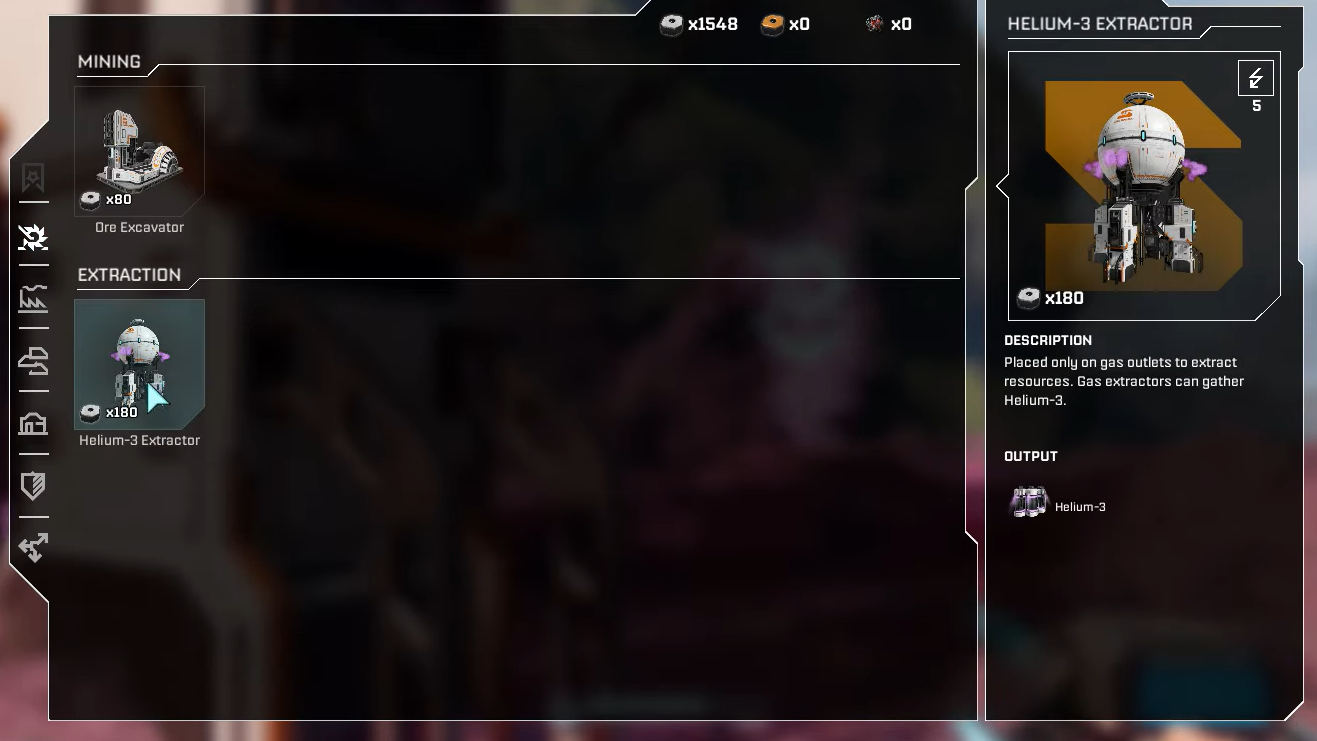
How to build and place a Helium-3 Extractor
Helium-3 extractors behave similarly to Ore Excavators, but the deposits they use are smaller and more localized. Accurate placement matters.
Step 1: Travel to a known Helium-3 node or geyser. Look for the flat vent or node surface where purple gas is strongest, and the terrain flattens slightly.
Step 2: Open your build menu and select the Helium-3 Extractor. Move the hologram over the node until it snaps to the correct position. If snapping does not occur, you are likely too far from the actual deposit or not centered on it.
Step 3: Confirm the build once the extractor snaps in place. The extractor should seat directly on top of the deposit, similar to how an Ore Excavator sits on ore veins.
Step 4: Provide power to the extractor. As with other mining structures, it needs a connected power source, which can be linked via platforms or rails. Once powered, the extractor begins pulling Helium-3 automatically.
Step 5: Integrate the output into your factory. Connect the extractor’s output to storage or processing lines that feed into your mid-game production, especially Ceramics and Glass, once those recipes are unlocked.

Combat and base-building around Helium-3 nodes
Some Helium-3 sites, especially those in the south-east, are not passive resource pads. Hostile creatures with ranged attacks often occupy the area, and larger supply bases attract more attention over time.
When you move into these regions, it is safer to first clear nearby enemies and then establish a Base Core to anchor defenses and power. Terrain can be steep, particularly if you access nodes by climbing over Titanium formations and working your way down. Building stairs or ramps from a higher plateau down toward the vents makes subsequent trips faster and safer.
One practical defensive pattern is to surround your Base Core with pillars without platforms. These vertical elements form a wall that certain insect-like enemies cannot climb over, reducing the chance of your core being overwhelmed. If your core at a remote Helium-3 base becomes disabled, inspect it closely for any damageable components. Some cores can be restored by destroying a specific vulnerable element on the side with your mining laser.
What Helium-3 is used for
Helium-3 feeds into higher-tier crafting rather than your first factory steps. Its main roles include:
- Ceramics – A processed material that shows up in more advanced structures and equipment.
- Glass – Used in mid-game items where transparent or refined materials are required.
You do not consume large volumes of Helium-3 in the opening hours, which is why the game lets you casually gather it from meteorites and rocks while your main focus stays on Wolfram, Titanium, and Calcium. Once your technology tree progresses and you start building more complex structures, Helium-3 transitions from a curiosity to a strategic resource, especially if you aim for high throughput in Ceramics and Glass production.
That is when a triple-geyser site or a well-defended eastern or south-eastern Helium-3 field pays off, turning a mid-game choke point into just another steady line in your factory layout.