
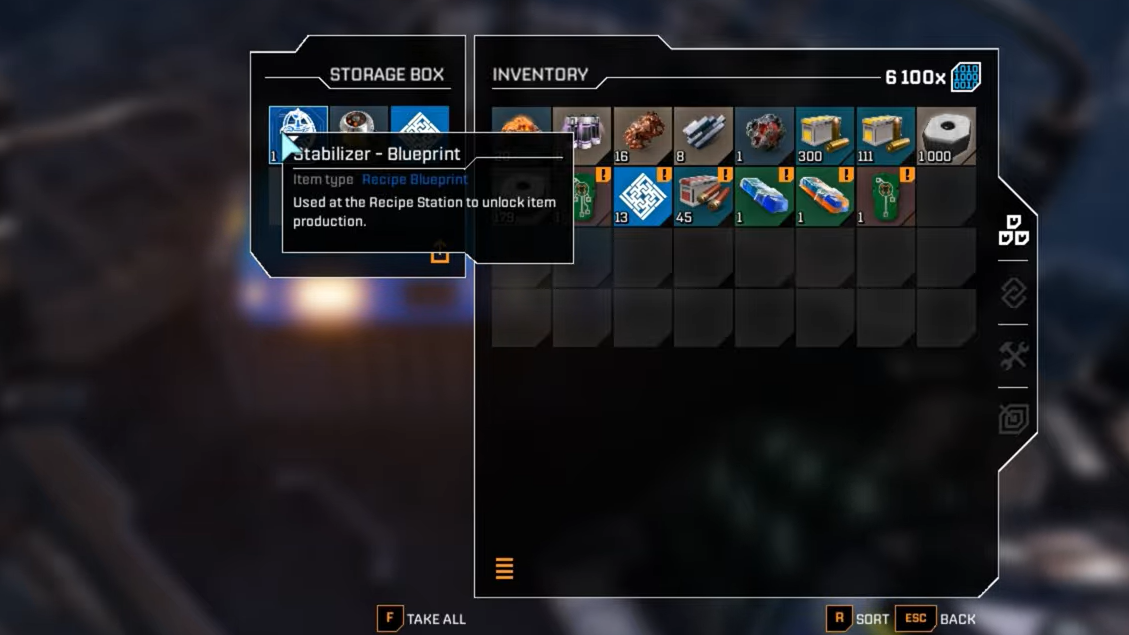
The Stabilizer Blueprint in StarRupture unlocks a core manufacturing component used to shore up structures and progress into heavier defenses like turrets. It sits in a handful of fixed locations on Arcadia‑7, but each one is tucked behind bugs, blue infection clouds, or awkward platforming.
What the Stabilizer Blueprint is used for
Stabilizers are a mid‑tier fabrication part. They are required to:
- Produce structural pieces that can survive Arcadia‑7’s harsh weather and solar burns.
- Serve as an input for more advanced machine Blueprints in the fabricator catalogue.
- Progress toward base defenses, such as turrets, which depend on Stabilizer in their material chain.
Crafting Stabilizers themselves depends on earlier component unlocks. The recipe consumes Rotors along with titanium rods and other mid‑game materials, so grabbing the Stabilizer Blueprint makes the most sense after you can already mass‑produce Rotors and basic metal parts.
Primary Stabilizer Blueprint: Claywood’s Research Outpost
The most direct Stabilizer Blueprint location is at Claywood’s Research Outpost, a Helium‑3 extraction facility built into the northeastern mountains.
How to navigate there from the crash site
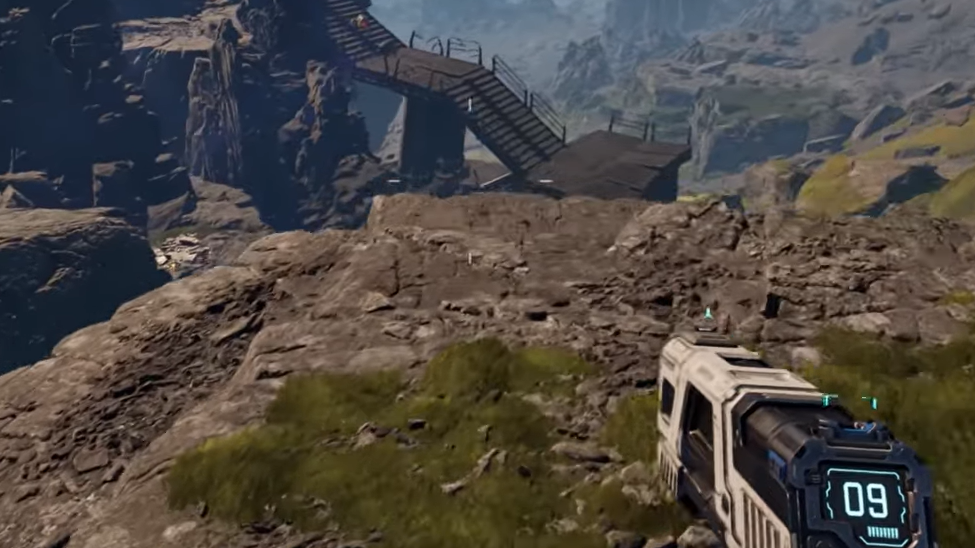
Step 1: Leave the starting crash site and orient toward the giant engine or thruster wedged between two mountain ridges to the northeast. This landmark dominates the skyline and sits roughly behind Claywood.
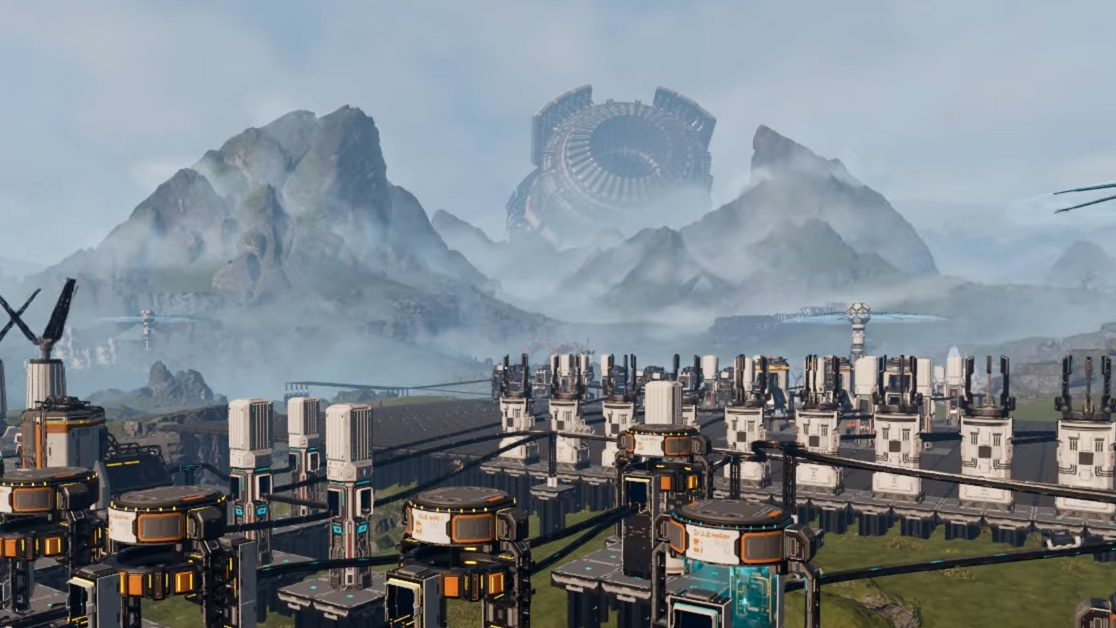
Step 2: Head toward one of the downed shuttles, nicknamed a GEO scanner on the way out. From there, cut between the two mountain peaks that frame the big central machine to move into the valley leading toward Claywood.
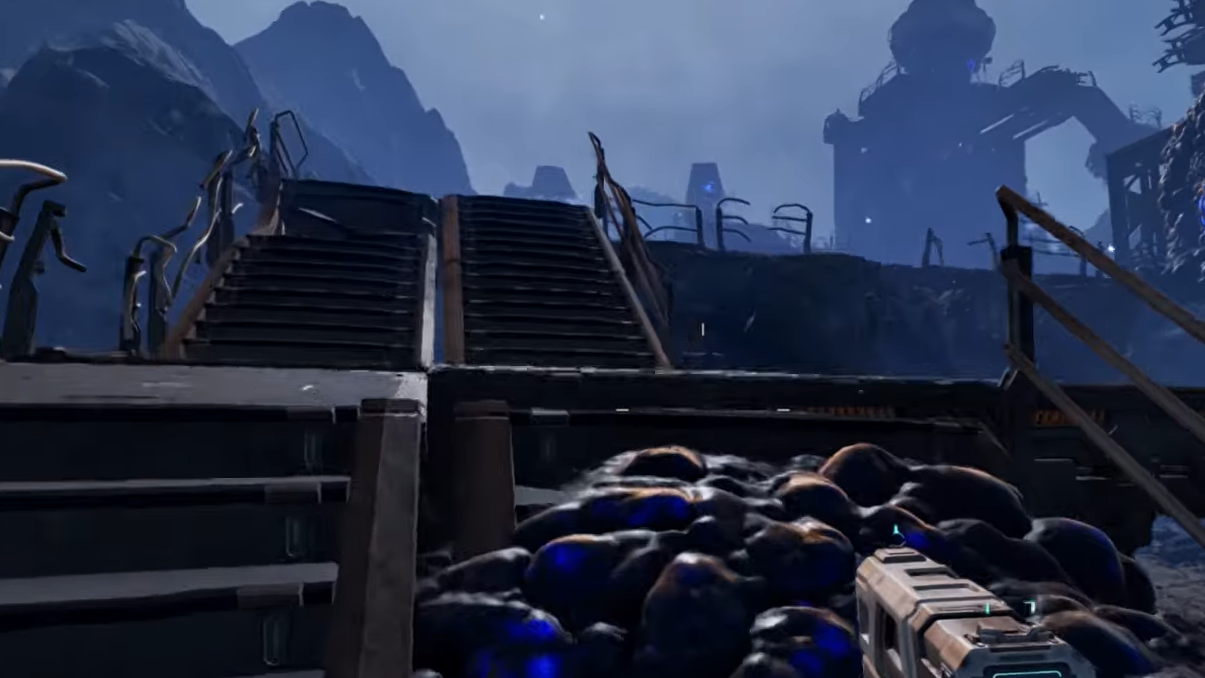
Step 3: Once you are between the mountains, angle right and climb the path that snakes up to the outpost. The facility is perched on a rocky slope with visible platforms, pipes, and a central tower.
Clearing the infection and enemies
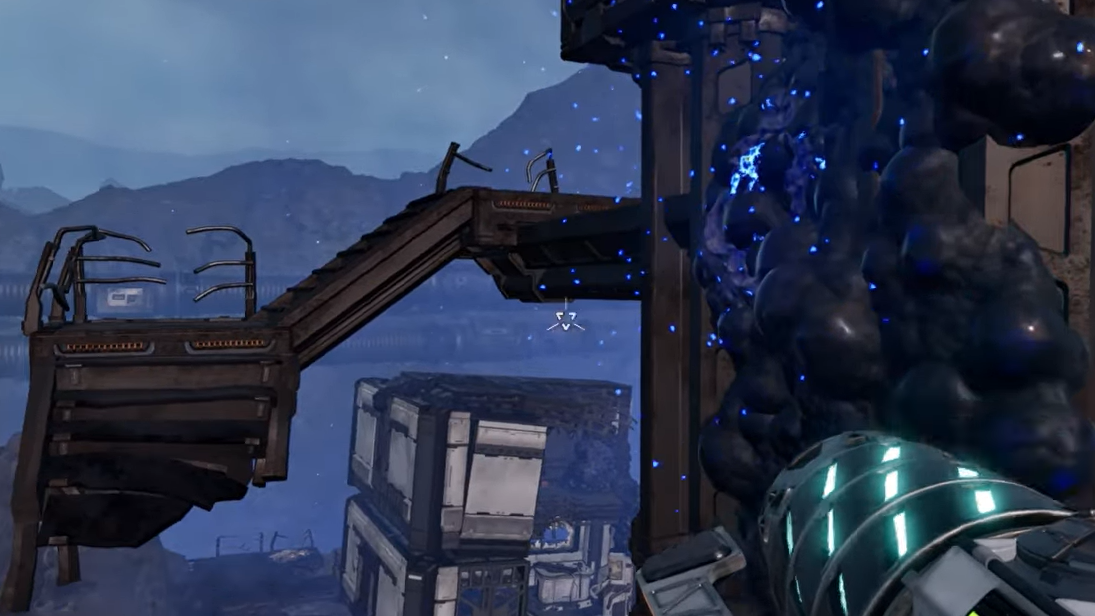
Claywood is covered in blue organic growths that continuously spawn creatures until destroyed. These glowing infection nodes cling to walls, pipes, and cliffs around the base.
Step 1: Before committing to the climb, circle the lower area and shoot every blue hive or leech‑like blob you can see. Each destroyed node reduces the number of fresh enemies pouring in.
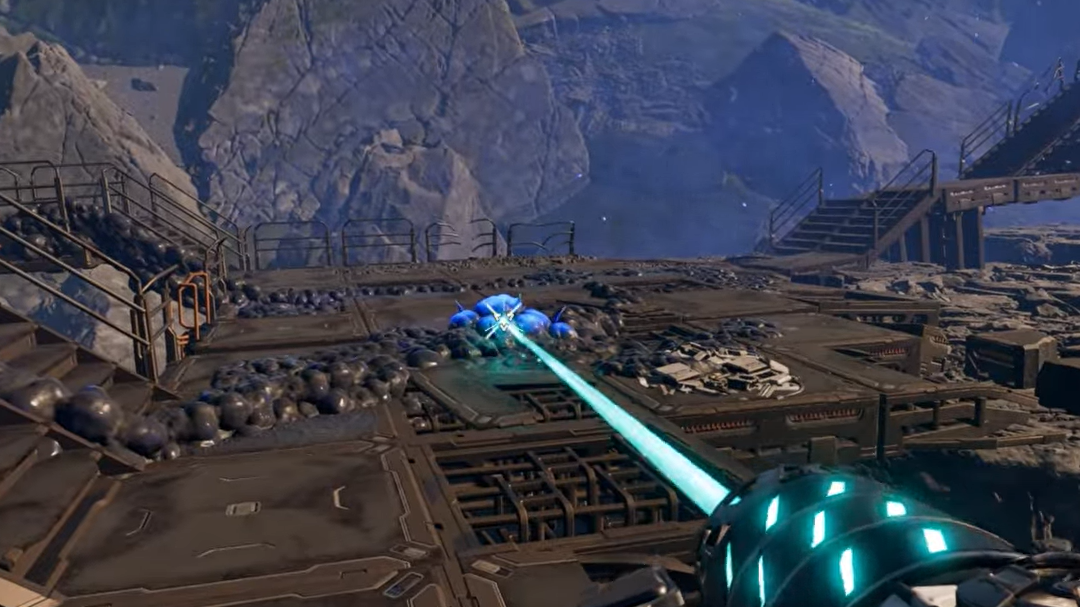
Step 2: Use ranged weapons to thin out acid‑spitting bugs on ledges and stairways. Expect to burn through several hundred rounds for a clean run, especially if you arrive before a Rupture clears ambient mobs.
Step 3: When the spawns slow down and the constant pounding ambient sound from the infection fades, finish off the remaining patrols and begin ascending the tower.
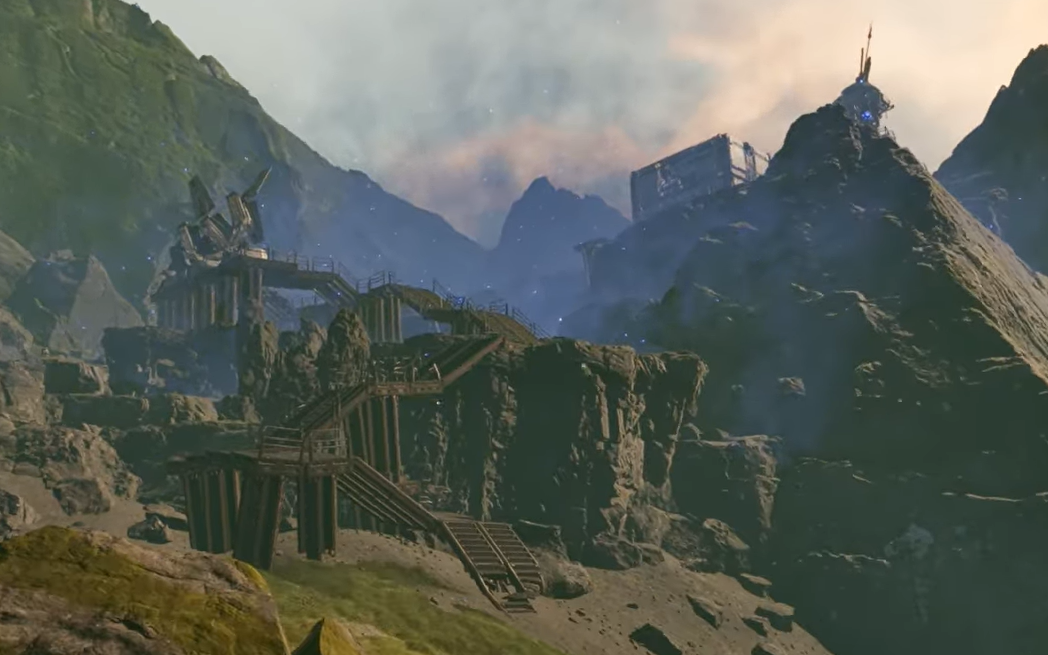
Reaching the Stabilizer Blueprint on the tower
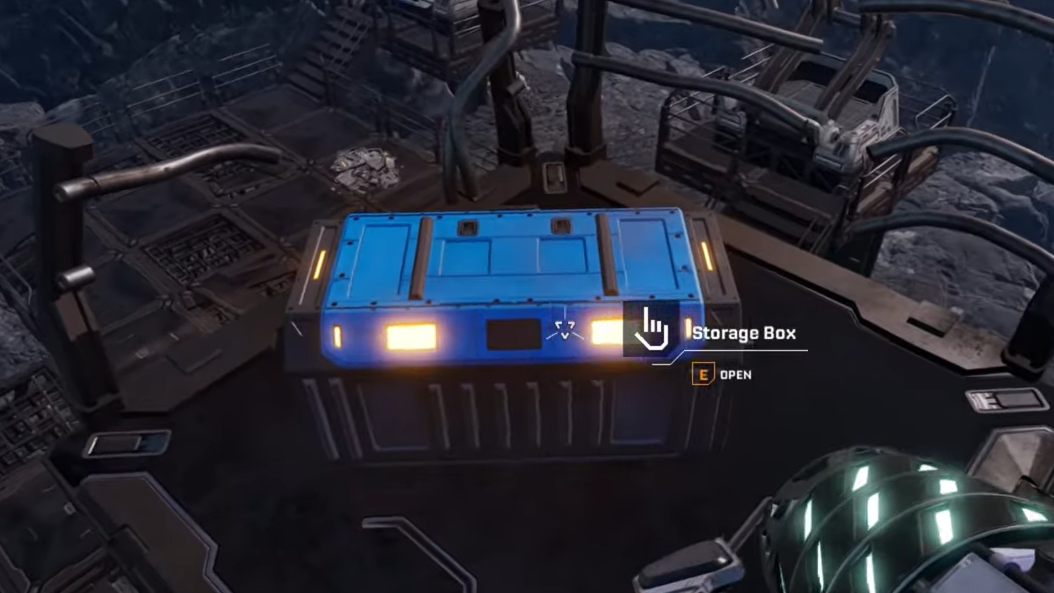
The Blueprint lives at the very top of Claywood’s central structure inside a blue container.
Step 1: Locate the staircase and platform chain on the tower’s flank. Climb each intact section, then use the broken catwalks as a parkour route where stairs are missing.
Step 2: Double‑jump between gaps where segments have collapsed. The layout is linear, but missteps can drop you back into active enemy pockets, so clear nearby bugs first.
Step 3: At the roof level, look for a blue storage crate positioned near a dead body. Interact with the crate to obtain the Stabilizer Blueprint; the corpse nearby can also yield a LEM upgrade.
Picking up the Blueprint triggers a small reinforcement wave, but once the infection nodes are gone, enemy density stays manageable, and the outpost becomes a reliable loot and corpse‑raiding spot.
Second Stabilizer Blueprint: GRRO Mythic Cry (blue infection zone)
A second Stabilizer Blueprint can be found further north at a variant of the Griffith Research Outpost called GRRO Mythic Cry, buried inside a dense blue infection cloud.
Path from spawn into the blue zone
Step 1: From the crash site, face north and walk between the same two mountain peaks you use to reach the early Griffith outpost for the stator Blueprint. This pass leads straight toward the northern blue biome.
Step 2: Pass the earlier base (Lemon Souls) and continue in a straight line until the sand starts to tint blue and the air fills with shimmering particulates. This marks the edge of the infection field.
Step 3: Skirt a calcium resource node on your left, then climb the slope into the infected facility nestled in the rocks. The complex is smaller than Claywood but much more enclosed, with tight corridors full of growths.
Finding the Blueprint box
Step 1: Methodically destroy every blue hive in and around the buildings. As with Claywood, enemies will keep respawning until every growth is purged.
Step 2: Move up toward the roof where a line of solar panels is visible. From that rooftop level, drop down into the adjacent building through an upper opening.
Step 3: The familiar blue Blueprint container sits tucked into a corner room. Loot it to gain Synthetic Silicon and an additional Stabilizer Blueprint, then clear the rest of the complex for LEMs and lore.
Grabbing this second copy does not unlock a different recipe; it simply ensures progression in case the first Stabilizer Blueprint is missed or bugged.
Claywood infection outpost near the broken engine
Several players also report securing a “missing” Stabilizer Blueprint at an infection‑covered base near the broken engine visible in the distance from spawn. This location is effectively part of the same Claywood cluster but approached from another angle.
Step 1: Move toward the giant broken engine housing you can see on the horizon, heading into the northeastern quadrant of the map.
Step 2: Look for an infection‑covered outpost built around a damaged helium extractor near that engine. The area is soaked in blue spores similar to Claywood and Mythic Cry.
Step 3: Fully clear the infection nodes and search storage containers and upper levels. A Stabilizer Blueprint can spawn here for players who never found it at the tower or blue‑zone outpost.
This redundancy explains why different players recall picking up the Stabilizer Blueprint in slightly different “northeast infection cloud” spots while still pointing to the same general region of the map.
Early playtest and Selenian’s Mine reports
During earlier co‑op playtests, some players expected to find the Stabilizer Blueprint at Selenian’s Mine northwest of spawn, a ruined dish complex that otherwise holds early Rotors and Tubes. In some runs, a corpse marker at the mine appeared to be clipped into geometry, leading to the assumption that a Stabilizer spawn had been buried.
At present, Selenian’s Mine remains a reliable location for Rotor and Tube Blueprints and several LEMs, but not for a consistent Stabilizer unlock. If a Stabilizer does drop there in a given save, it behaves as another duplicate rather than the sole source.
Why waiting for a Rupture makes Stabilizer runs safer
Arcadia‑7 periodically enters the Rupture state, followed by a planetary burn that wipes out open‑world enemies and temporarily clears blue infection clouds. Stabilizer locations that sit deep inside infection zones become much easier to tackle immediately after this burn.
Step 1: Wait for a Rupture and survive the event, making sure to bank cores and ignition beforehand. When the burn resolves, ambient creatures despawn for a limited time.
Step 2: Use this window to sprint to Claywood or GRRO Mythic Cry. With fewer active hives and no roaming swarms, you can focus on platforming and internal infection nodes.
Step 3: Once the planet stabilizes and regular spawns resume, retreat to your base or a safe outpost. The Blueprint items persist, so you only need to clear each site once.
This timing is especially useful for solo players who only have a pistol or early assault rifle and cannot comfortably handle chained bug waves while climbing a partially destroyed tower.
Pre‑requisites before chasing the Stabilizer Blueprint
The Stabilizer recipe consumes components that are awkward to supply if you rush its Blueprint too early. A smoother progression looks like this:
- Rotor Blueprint: Collect it first from the eastern tower in the gulch or at Selenian’s Mine. Rotors are a direct ingredient for Stabilizers.
- Tube and stator Blueprints: Pick these up from Selenian’s Mine and the early Griffith Research Outpost. They unlock basic fabrication chains and help round out early base needs.
- Titanium plates and rods: Set up mining and smelting for titanium and wolframite so you can maintain a steady supply of rods, wire, and housings.
Once these pieces are in place, the Stabilizer Blueprint becomes immediately valuable instead of sitting idle behind resource bottlenecks.
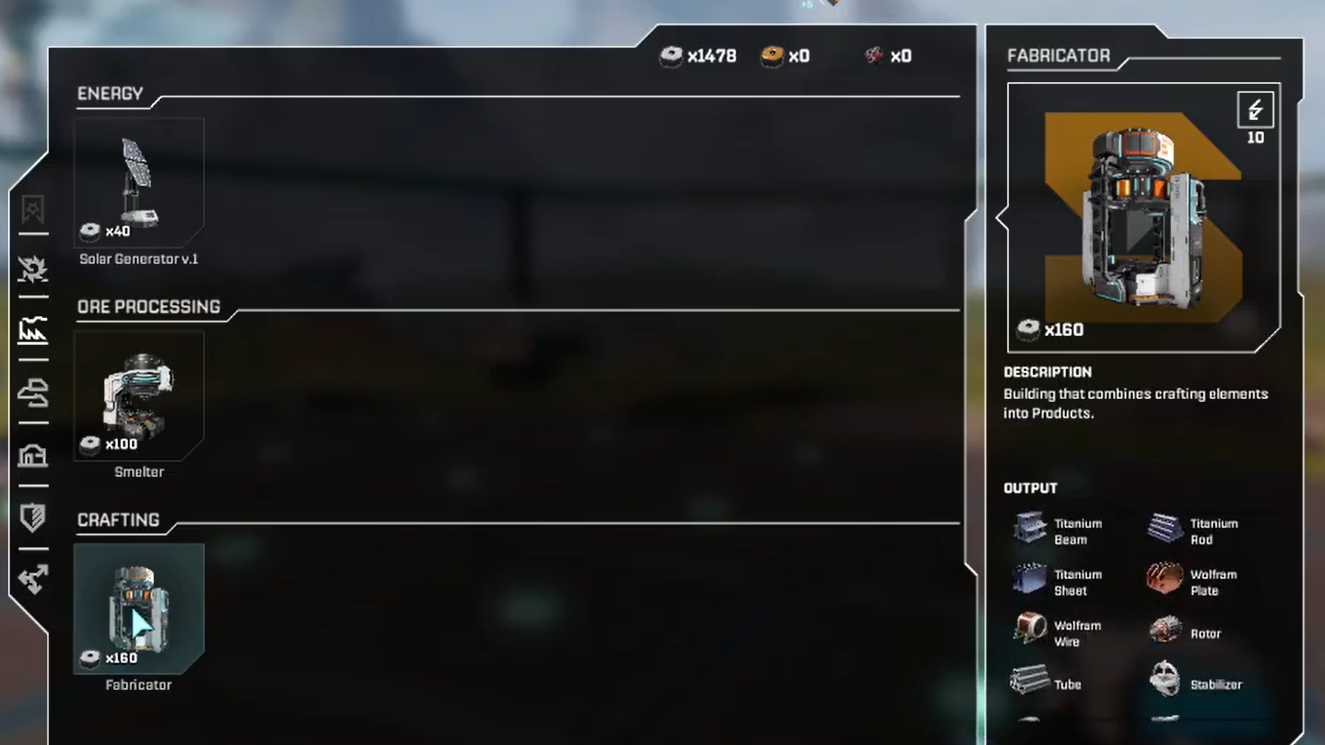
Using the Stabilizer Blueprint at the fabricator
After collecting any copy of the Stabilizer Blueprint, the recipe moves into the fabricator’s catalogue.
Step 1: Open your inventory and check the story or special items tab to confirm the Blueprint is listed. Insert it into the recipe station at your base if prompted.
Step 2: At the fabricator, locate the Stabilizer entry under machine components. The UI will show exact resource costs, including the Rotor requirement.
Step 3: Queue a small batch first to avoid draining early titanium and core‑adjacent materials, then ramp up as your mining network grows.
With Stabilizers online, multi‑level bases and heavier automated defenses become much more practical, and future Blueprints that consume Stabilizer no longer gate your progression.
Once you know to look toward the northeastern infection facilities and the Claywood tower, the Stabilizer Blueprint stops being a needle in a haystack and turns into a one‑time expedition. Grab your Rotor and stator recipes first, wait for a Rupture if you want a quieter run, then climb the tower or push into the blue cloud and secure the Blueprint that unlocks sturdier life on Arcadia‑7.