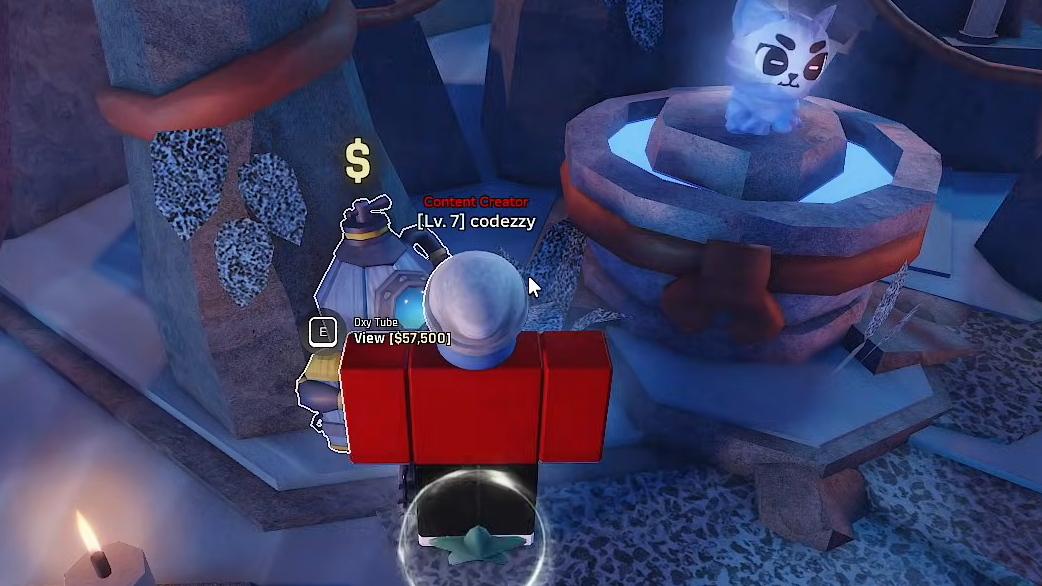
Abyss is built around four core progression levers: your race, harpoon gun, tube, and artifacts. Each one changes how far you can push into the deep, how quickly you farm cash and XP, and how safe you are when something with teeth looks back at you. The lists below rank the current standouts in each category so you can tell at a glance what is worth chasing and what is fine to skip.
Quick answer: For most players, Sea Angel or Kraken as a race, Ruined/Lost Spirit/Morveth’s Treasure among guns, Ruined Tube or Lost Spirit Tube for late-game diving, and S‑tier artifacts like Wraith Flower, The King’s Fortune, or Divine Hour Glass give the strongest overall progression.

Abyss races tier list (classes)
Races define your baseline stats and powerful passives that stay relevant from the first dive to late‑game zones. Rarity directly affects how often you see them on rerolls and how many skills they pack in.
| Tier | Race | Why it matters |
|---|---|---|
| S | Sea Angel (Mythical) | Best all‑rounder. +10% Speed, +25% Oxygen, +15% Cash and three passives that scale as oxygen drops: free sprint below 20% oxygen, bonus damage equal to 35% of movement speed, and faster catching minigame under 50% oxygen. Strong in every activity once you learn to play around low‑oxygen windows. |
| S | Kraken (Mythical) | Top progression race. +20% Weight, +15% XP, +15% Cash and a permanent damage stack (0.04% per fish up to 50%) plus an “extra life” that fully refills oxygen and deals 300% AoE damage on an 8‑minute cooldown. |
| S | Vampire Squid (Legendary) | Best sustain. +20% Oxygen, +10% XP and Blood Siphon, which restores oxygen equal to 10% of damage dealt when you catch a fish on a 15‑second cooldown, letting you stay out far longer per run. |
| A | Shark (Legendary) | High DPS focus. 20% damage, 0.4‑second cooldown reduction, plus 30% extra damage under 30% oxygen and 50% cheaper tube boost. Great burst if you can safely hover at low oxygen. |
| A | Crab (Epic) | Best defensive Epic. +15% Oxygen, +15% Weight, +5% XP and Iron Shell, which has a 25% chance to completely absorb incoming attacks. Very forgiving for newer players pushing into harder zones. |
| B | Spirit (Rare) | Beginner‑friendly safety net. 0.3‑second cooldown reduction, +8% Cash, and a 3‑minute “Last Breath” that revives you at 30% oxygen instead of dying. |
| B | Anglerfish (Epic) | Money and utility. +8% Cash, 0.2‑second cooldown reduction, +12% Damage, a 20% chance for double drops, plus permanent light in dark areas. Strong for farming, weaker for combat efficiency. |
| B | Narwhal (Rare) | Movement and weight. +8% Speed, +15% Weight and a 10% chance to deal double damage. Good for farming and bestiary progress, less balanced than A‑tier options. |
| C | Puffer (Rare) | +10% Oxygen and +15% Weight with a 20% melee damage reflect. The raw stats are fine but weight issues are usually solved by better tubes and artifacts later. |
| C | Monkey, Fish, Cyclops (Uncommons) | Early‑game stepping stones with small speed, damage, oxygen or weight bonuses. All are quickly outclassed by Rare and above. |
| D | Human, Poop, Coral, Elf | Common starter options with single 5–10% boosts to damage, oxygen, or speed, and no passives. Useful only until you secure Uncommon or better. |
Rerolls use a rarity‑based table, not individual race odds: Common 50%, Uncommon 29%, Rare 14%, Epic 5%, Legendary 2%, Mythic 0.2% on regular spins, with Lucky rerolls heavily shifting into Rare and above. The system also guarantees an Epic or better after 20 rerolls and a Legendary or better after 50, so long‑term, you will eventually land on one of the top races if you keep feeding in Star Shards.

Abyss guns tier list (harpoon guns)
Harpoon guns set your damage, shot rhythm, and how quickly you chew through fish health bars. The strongest options combine high base power with good utility and reasonable acquisition paths.
| Tier | Gun | Why it matters |
|---|---|---|
| S | Ruined Gun | Top‑end damage and scaling. Built for late‑game zones and synergizes well with high‑damage artifacts and races like Shark or Kraken. |
| S | Lost Spirit Gun | Late‑game powerhouse with very high damage output. Strong single‑target performance that pairs well with one‑shot artifact builds. |
| S | Morveth’s Treasure Gun | Premium harpoon with elite stats, designed as an endgame option when you are farming deep‑zone fish. |
| A | Plunger Gun | High damage for its bracket, good stepping stone before the S‑tier trio. Strong enough to carry you through most mid‑to‑late content. |
| A | Magroot Gun | Another strong high‑tier option, slightly behind the very best but a clear upgrade over shop guns. |
| A | Wasted Gun | Very efficient mid‑late game gun, often a first big damage spike after early story weapons. |
| B | Crossbow Gun | Reliable mid‑game gun with good precision and adequate damage, but eventually outclassed. |
| B | Air Rifle Gun | Solid but unspectacular, a safe upgrade path before you step into the specialized A‑tier options. |
| C | Advanced Gun, Beginner’s Gun | Basic early‑game weapons. They are quickly replaced; their main purpose is to bridge the tutorial into the first real upgrades. |
Abyss tubes tier list
Tubes control oxygen, max depth, carry weight, and movement speed. That set of stats defines how far out you can explore before the game drags you back through attrition.
| Tube | Tier | Oxygen / Max depth / Weight / Speed | Where it comes from |
|---|---|---|---|
| Ruined Tube | S | 380 oxygen, 650m, 480kg, 32/s | Forgotten Deep, inside Bob’s Room |
| Lost Spirit Tube | S | 300 oxygen, 600m, 370kg, 30/s | Late‑game unlock (location not yet specified) |
| Bath Tube | A | 320 oxygen, 650m, 600kg, 27/s | Forgotten Deep, inside Bob’s Room |
| Plane Tube | A | 260 oxygen, 550m, 305kg, 26/s | Diver NPC reward after five quests |
| Oxy Tube | A | 220 oxygen, 495m, 250kg, 28/s | High‑end shop or quest tube (location to be announced) |
| Rukiry Tube | B | 180 oxygen, 460m, 180kg, 24/s | Ancient Sands, top of Grumpy Hunk’s Tower |
| Zeppelin Tube | B | 150 oxygen, 375m, 155kg, 24/s | Diver NPC after five quests |
| Boat Tube | B | 130 oxygen, 275m, 120kg, 22/s | Ancient Sands, near Marcus’ shop |
| Pufferfish Tube | C | 110 oxygen, 180m, 80kg, 22/s | Forgotten Deep, David’s Tube Shop |
| Fire Tube | C | 90 oxygen, 100m, 45kg, 20/s | Forgotten Deep, David’s Tube Shop |
| Normal Tube | D | 70 oxygen, 50m, 25kg, 20/s | Forgotten Deep, David’s Tube Shop |
| Old Tube | D | 55 oxygen, 25m, 10kg, 20/s | Forgotten Deep, David’s Tube Shop |
| Wooden Tube | D | 40 oxygen, 15m, 5kg, 20/s | Starter gear |
Two mechanical points matter once you start comparing tubes:
- Oxygen is failure protection. Hitting zero instantly kills you and cuts 25% of your money and inventory. Any tube that pushes that threshold back by a large margin is functionally multiplying how many fish you can secure per run.
- Weight is hidden income. Movement slows down as you approach the weight cap, and you simply cannot carry more fish beyond it. High‑weight tubes like Bath Tube and Ruined Tube let you stay efficient instead of shuttling partial loads back to the dome.

Abyss artifacts tier list
Artifacts are permanent stat sticks. They come from cracking Geodes at Virelia and can be upgraded through three tiers, with later ranks significantly boosting bonuses or shrinking penalties. The right combination does more for your overall efficiency than micro‑optimizing most guns.
| Tier | Artifact | Key effects (min → max tier) | Role |
|---|---|---|---|
| S | Wraith Flower (Mythical) | Speed +3.5 → +5.25, Cash +9% → +16%, Damage +30% → +44% | One of the strongest all‑purpose pieces in the game. Huge damage, strong movement, and solid cash with no downside. |
| S | Infernal Eye (Mythical) | XP +7% → +13%, Cooldown penalty that improves to 0, Damage +15% → +21% | Late‑game grind engine: big XP and damage gains once the cooldown drawback is upgraded away. |
| S | The King’s Fortune (Secret) | Cash +14% → +21%, Speed +3.25 → +5, Cooldown −0.2s → −0.34s | Best dedicated money artifact. It makes runs faster and more frequent while multiplying reward size. |
| S | Divine Hour Glass (Legendary) | Speed +2.5 → +4, Cooldown −0.2s → −0.32s, Damage +6% → +12% | Core cooldown piece with strong speed and moderate damage, ideal as a backbone in many builds. |
| S | Eternal Crystal (Legendary) | Oxygen +18% → +25%, Damage −9% → +12%, Weight +30kg → +65kg | Deep‑run specialist. At high tiers the damage flips from a penalty to a bonus while oxygen and weight climb. |
| A | Demonic Hour Glass (Epic) | Speed +2.25 → +4, Cooldown −0.2s → −0.34s, XP +8% → +18.5% | Fast‑farm option when you care about XP and raw speed more than direct damage or money. |
| A | Holy Flower (Legendary) | Oxygen −7% → −1%, Speed +1.75 → +3.25, Cash +7% → +13% | Money‑centric artifact with manageable oxygen penalty that almost disappears at max tier. |
| A | Rune of Might (Rare) | Cooldown goes from +0.3s to −0.05s, Damage +20% → +34% | Huge damage amplifier that becomes neutral or slightly positive on cooldown once fully upgraded. |
| A | Crab Claw (Secret) | Oxygen +22% → +29%, Cooldown −0.14s → −0.28s, Cash +12% → +19% | High‑value mix of survivability, income, and uptime with no clear drawbacks. |
| B | Mutated Skull (Epic) | Oxygen +7% → +13%, XP −10% → −4%, Damage +9% → +13.5% | Respectable damage and oxygen gains offset by slower leveling. |
| B | Poop (Epic) | XP −5% → −2.9%, Damage +9% → +15% | Simple damage bump with a modest XP tax; workable for DPS‑focused setups. |
| B | Sea Mine (Rare) | Oxygen −15% → −6%, Damage +8% → +14% | Good for aggressive builds that accept shorter safe windows in exchange for faster kills. |
| B | Fish Bag (Rare) | Weight +8kg → +20kg | Pure utility for heavier runs with no penalties. |
| B | Feather (Rare) | Speed +2 → +3.5, Damage taken −5% → −0.5% | Movement and survivability boost; small hidden DPS loss from reduced damage dealt. |
| B | Lantern (Uncommon) | Cooldown −0.16s → −0.23s, Weight +25kg → +46kg | Hybrid of faster casts and more carrying capacity, but outscaled by S/A‑tier options. |
| C | Hour Glass (Uncommon) | Cooldown −0.1s → −0.22s | Entry‑level cooldown piece used mainly until you unlock Divine or Demonic variants. |
| C | Banana (Common) | Speed +0.75 → +1.5, Damage +1% → +1.6% | Minor early stat bump with poor scaling into mid‑game. |
| C | Tank (Common) | Oxygen +8% → +22%, Speed +1.75 → +3.5 | Decent starter survivability that becomes redundant once you get higher‑rarity artifacts. |
| C | Sea Star (Common) | Oxygen +5% → +8% | Simple oxygen padding, quickly overshadowed by S/A‑tier pieces. |
| C | Fish Crate (Uncommon) | Weight +15kg → +33kg, Speed −1.5 → −0.9 | More carry capacity but at a real speed cost, which slows down farming loops. |
| C | Cactus (Common) | Cooldown −0.12s → −0.24s | Small cooldown reduction with weak late‑game performance. |

How artifacts, races, guns, and tubes interact
The systems above are not isolated. The strongest setups lean into a shared goal so their stats reinforce each other instead of pulling in opposite directions.
- Cooldown plus damage. Races like Shark, artifacts such as Divine Hour Glass and Rune of Might, and faster guns stack into extremely high burst. This kind of build pushes for one‑shotting common fish to trigger 3‑star catches more often.
- Oxygen plus sustain. Vampire Squid’s oxygen regen, Eternal Crystal’s oxygen bonus, and high‑capacity tubes like Ruined Tube combine into very long runs where death is rare, and inventory losses are minimized.
- Cash plus weight. Kraken’s cash boost, The King’s Fortune, Holy Flower, and high‑weight tubes such as Bath Tube or Ruined Tube all exist to turn each run into more money by letting you carry more and sell it for higher values.
- Speed plus low‑oxygen passives. Sea Angel’s damage scales with movement speed and activates bonuses at low oxygen. Pairing it with speed artifacts like Wraith Flower, Demonic Hour Glass, or Feather amplifies both your damage and your ability to kite threats.
You know a setup is working when runs end because your tube weight is capped or you decide to cash out, not because your oxygen meter hit zero. When that happens consistently, the stats across your race, gun, tube, and artifacts are aligned.

