
On PC, The Outer Worlds 2 ships with its in-game developer console disabled. You can still use console commands, but you’ll need a lightweight enabler first. Once it’s in place, opening the console is as simple as pressing the tilde key (~), and most day-to-day commands for money, items, perks, and combat toggles work as expected.
Enable the console (PC)
This method requires file access to the game installation. It does not apply to console editions.
- Download the “SML and Console Enabler” package for The Outer Worlds 2.
- Locate your game folder. On Steam, right‑click The Outer Worlds 2 in your Library, select Manage, then Browse local files.
- Extract the contents of the zip you downloaded and place all files into the
~modsfolder. - Launch the game and press
~to open the console.
Create a new folder named:
~modsOpen the following path inside the game folder:
Arkansas/Content/PaksInside ~mods, a “Cheats” directory is included. It contains text files that list available commands and a “How to read cheats” note explaining syntax and data types.
~ does not open it on your keyboard layout.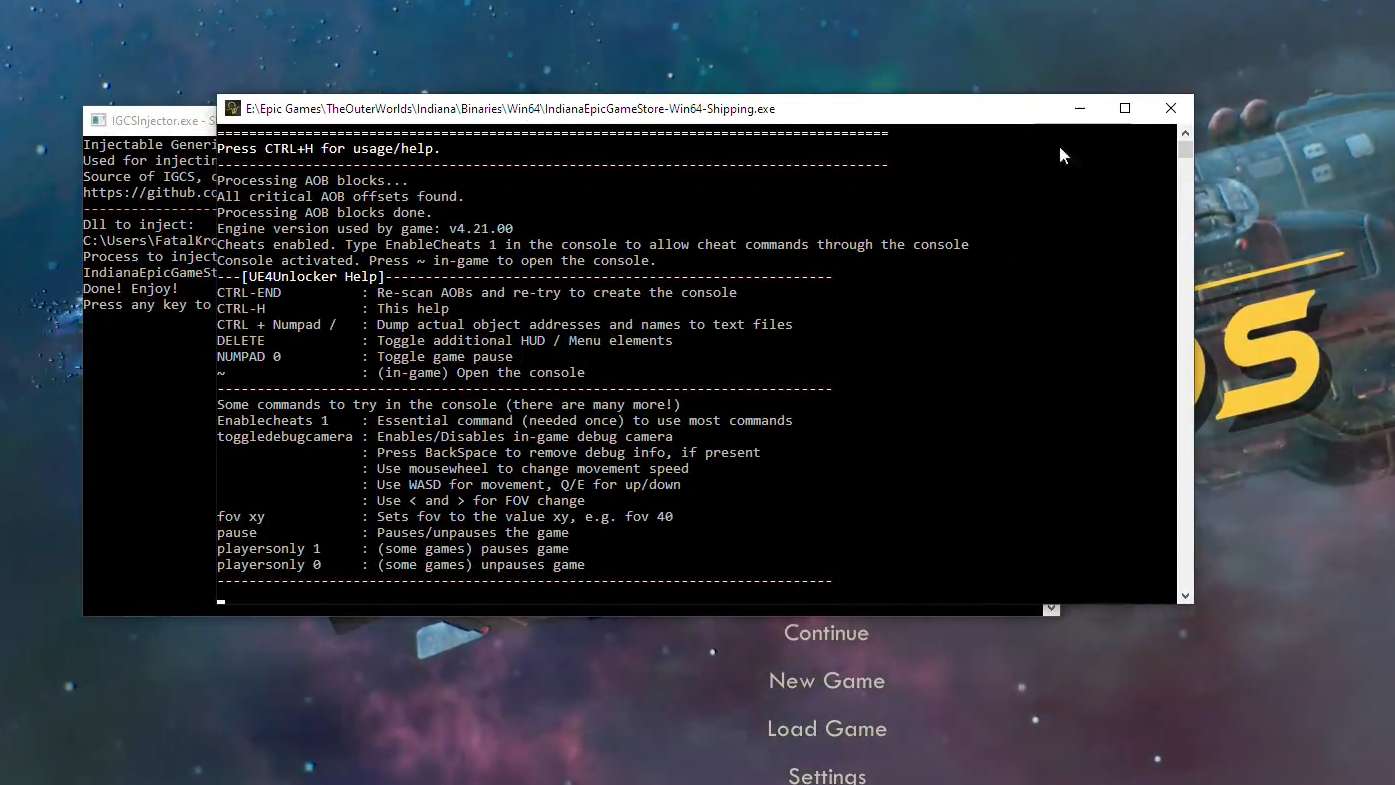
Command syntax and data types
Commands are entered as a function name followed by arguments separated by spaces. Types are simple and kept unquoted.
LootTableDebug(string LootTable, int NumTimes, int SkillDifficultyTier)
In practice, you’d type:
LootTableDebug MyTable 1 2Common value types used by these commands:
bool:TrueorFalseint32: numbers like1to9999float: numbers like0.1to2.0
Useful The Outer Worlds 2 console commands
These are representative commands that work with the enabled console. Replace placeholder values in angle brackets with your own.
| Command | What it does |
|---|---|
AddCurrency <amount> |
Adds the specified amount of bits to your character. |
AddItemDebug <ItemNameOrID> <amount> |
Spawns items into your inventory. Examples below. |
PerkPurchase <PerkID> |
Grants the specified perk. |
RemovePerk <PerkID> |
Removes a previously acquired perk. |
TraitAddDebug <TraitID> |
Adds a trait. |
TraitRemoveDebug <TraitID> |
Removes a trait. |
FlawAddDebug <FlawID> |
Immediately applies a flaw. |
FlawOfferDebug <FlawID> |
Offers a flaw as if triggered naturally. |
FlawClearDebug <FlawID> |
Clears an applied flaw. |
SetAptitudeDebug <AptitudeName> |
Sets one of the predefined aptitudes (e.g., ExConvict, Gambler, Lawbringer, Professor, Renegade, Roustabout). |
Combat.NoDamage 1 |
Prevents the player from taking damage. Use 0 to restore. |
Combat.InfiniteAmmo 1 |
Disables ammo consumption. Use 0 to restore. |
Combat.OneShotKills 1 |
Enables one-hit kills. Use 0 to restore. |
Combat.TimeDilationInfinite 1 |
Makes Tactical Time Dilation unlimited. Use 0 to restore. |
Combat.NoKillCam 1 |
Disables the kill cam. Use 0 to restore. |
CombatLog.Damage 1 |
Toggles detailed damage logging in the console. Use 0 to disable. |
WeaponFov <value> |
Adjusts weapon field of view. |
Item examples you can paste directly:
AddItemDebug InhalerCharge_Crafting 1
AddItemDebug Collectible_TossballCard_01_NathanLawter 1
AddItemDebug 0201_AL_E02 1
Find IDs and the full command archive
The “Cheats” directory bundled with the console enabler includes:
- A full archive of available commands and their arguments.
- Lists of Perks, Flaws, Traits, and item IDs usable with
PerkPurchase,RemovePerk,TraitAddDebug,FlawAddDebug, andAddItemDebug. - A “How to read cheats” note describing function signatures and the expected value types.
If a command fails with no output, first confirm the argument spelling and context (location, combat state, or progression). Many commands are context‑sensitive and only function when their target systems are active.
If the console doesn’t open
- Ensure you extracted all files from the zip—not just a subset—into
~mods. - Rebind the console key in the enabler’s readme if
~does nothing on your layout. - Launch the game without other conflicting mods if you suspect a startup crash or missing “Cheats” folder.
Verify the enabler’s files are in:
Arkansas/Content/Paks/~modsWhat won’t work (and why)
Some developer or quest-manipulation commands are disabled or require specific runtime conditions. That’s by design. Expect broad gameplay toggles (no damage, infinite ammo), inventory operations, and build edits (perks, traits, flaws, aptitude) to be reliable; story-critical triggers and deep debug tools may be blocked or inert outside the right context.
Once the console is enabled, you can tailor difficulty on the fly, test builds without respeccing, and script repeatable setups for new runs. When you want more, the same loader can host additional blueprint-based mods, including optional packages for features like god mode.