
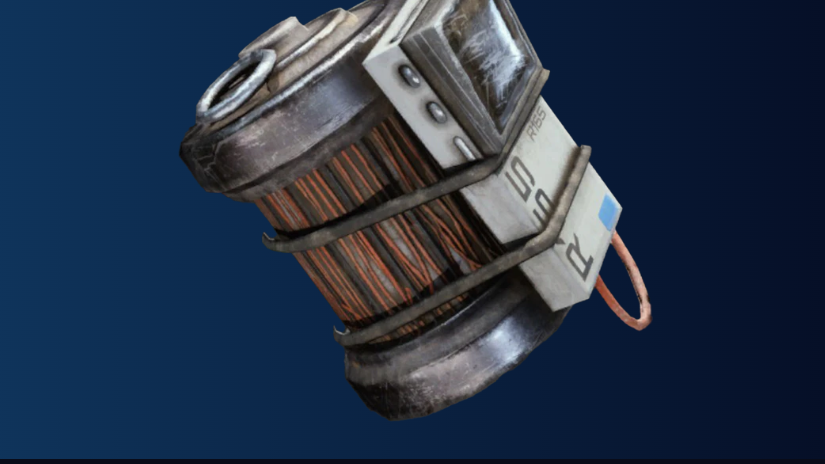
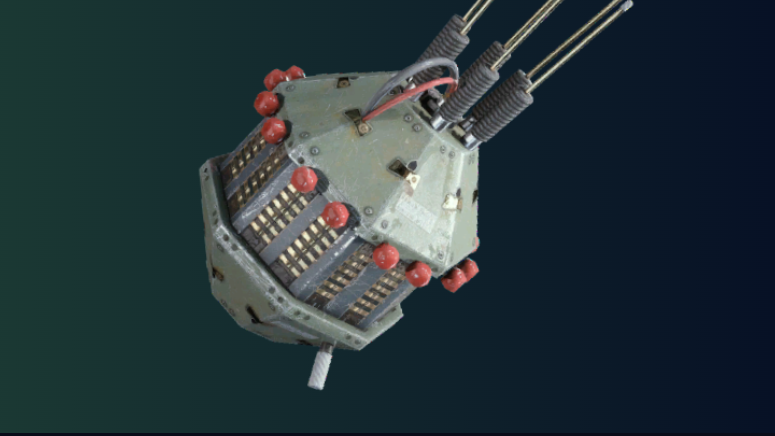
Trigger grenades in ARC Raiders hit far harder than the basic “white” grenades, but they still will not delete a full‑health Bastion on their own unless you commit a serious number of them and land them on weak spots. The same goes for Bombardiers.
There is no single fixed number that always kills these bosses, because damage depends on where grenades stick, what other explosives or weapons you chain in, and whether teammates are contributing. Even so, player testing lines up around a few practical ranges that are reliable enough to plan around.
How many trigger grenades to kill a Bastion
A full‑health Bastion will usually need a cluster of well‑placed trigger grenades plus follow‑up gunfire. Player field tests point to the following ranges:
- 6 trigger grenades on weak spots can take a Bastion to the brink, especially when stacked on the back battery area, leaving only a short burst of weapon fire to finish it.
- 7–9 trigger grenades is a safer expectation if the throws are not perfect, or if some of the explosions hit legs and armor instead of the back pack.
One player report describes killing a Bastion with 6 trigger grenades, 1 blaze grenade, and incidental damage from a stranger using impacts and ferro shots. Another test stacked 6 trigger grenades on the Bastion’s back after using a Lure grenade to turn it; that blast ripped off a leg and set it on fire, and the Bastion went down after roughly 30–40 Torrente shots into the weak spot.
From those examples, a practical rule is:
- Plan around 6–8 trigger grenades per Bastion if you are aiming them at the back battery area and bringing at least one solid primary weapon for cleanup.
- If you can only hit the legs or front armor, expect to spend more grenades or more ammo, because you will not be leveraging the highest damage multiplier.
How many trigger grenades to kill a Bombardier
Bombardiers are tanky, but their health pool is more manageable than Bastion’s if you stack explosives correctly. Experience from repeated encounters clusters around:
- 3 trigger grenades plus a high‑damage finisher being enough when everything lands cleanly.
One player describes a Bombardier kill with 3 trigger grenades into a Wolfpack grenade, suggesting that the trigger grenades brought it very low and the Wolfpack finished it. Another solo run used a heavier combo: 3 trigger grenades stuck to the Bombardier, a Showstopper grenade to stun, 3 heavy fuse grenades, then detonating the triggers and following up with two Anvil shots, which was enough to kill it and yield four Bombardier cells.
From these fights, a practical expectation is:
- 3–4 trigger grenades will do most of the work on a full‑health Bombardier if you pair them with a powerful grenade (Wolfpack, heavy fuse) or a strong heavy weapon like Anvil.
- For a pure trigger‑grenade plan without Wolfpack, budget 4–5 triggers plus weapon damage to be safe.
Because Bombardiers move more and are often surrounded by other Arcs, getting consistent weak‑spot stacks is harder than with a stationary Bastion. A stun such as Showstopper makes it much easier to guarantee that multiple grenades stick before you detonate.
Why the exact number of trigger grenades changes
The wide range of “it died in 3” vs. “it took 7–9” comes down to how ARC Raiders calculates damage and how messy real fights are.
- Weak‑spot multipliers are enormous. Bastion’s yellow battery pack on its back takes dramatically more damage than its front hull or even its leg joints. Trigger grenades stuck to this area are worth more than the same grenades on the chest or side armor.
- Armor and angle matter. Explosions landing on armored plates or the front turret are partially wasted compared with blasts centered on exposed mechanics.
- Team damage stacks fast. A single extra Wolfpack, Blaze, impact grenade, or LMG spray from a teammate can erase a chunk of health, making it look like fewer trigger grenades did all the work.
- Partial health is common. Many Bastions and Bombardiers enter a fight with chip damage from other squads, drones, or environmental hazards, which lowers the apparent grenade count.
Because of all this, it is more accurate to think in terms of “trigger grenades needed for a winning setup” instead of hunting for one perfect number.
Recommended Bastion loadouts built around trigger grenades
Trigger grenades shine when you build a loadout that lets you safely stack them on the Bastion’s back. Common setups use grenades as burst damage and rely on a high‑DPS weapon for cleanup.
Two consistent approaches emerge:
- High ground and grenade spam in Buried City, especially around Plaza Rosa rooftops, where you can lob explosives onto Bastion while it struggles to draw a line of sight.
- Weak‑spot focus with a light machine gun, such as Torrente, often from high ground or through vents in underground spaces like Bluegate’s Head House.
Using only basic “white” grenades, some players bring around 15 grenades to chip Bastion down from relative safety, then finish it with a rifle or LMG. Replacing those with trigger grenades reduces the required count but increases the cost, which is why many squads mix standard and trigger grenades rather than going all‑in on triggers.
Using Lure and other utility with trigger grenades
Trigger grenades are far more efficient if you can force Bastion to expose its back. Utility grenades and abilities make that much easier.
- Lure grenades (often written as “Lire” in some descriptions) can be thrown behind Bastion so that it rotates and walks away from you. This exposes the yellow battery pack on its back.
- Once Bastion is turned, you can stick multiple trigger grenades to that back area before triggering them for a concentrated burst.
- Stuns like Showstopper serve a similar role on Bombardiers, freezing them long enough for you to safely close the gap and stack grenades.
One field test used this exact sequence on Bastion: Lure to turn it, 6 trigger grenades on the back for a limb‑blowing detonation, then a second Lure and 30–40 Torrente rounds into the weak spot to finish. The grenade count alone did not kill Bastion, but it pushed it into a short and controllable cleanup phase.
Where to find Bastions and Bombardiers to practice grenade counts
The locations of these bosses are predictable enough that you can repeatedly test different grenade loads without wasting entire raids.
- Bastion in Buried City commonly spawns near Plaza Rosa. Rooftops around this plaza are ideal for high‑ground grenade runs.
- Bastion in Bluegate regularly appears at Head House, an underground arena‑style area reachable through tunnel networks and vents. The upper fences and vent exits provide natural high ground for LMG and grenade play.
- Bombardiers can be found in several spots, with frequent spawns reported in Buried City (notably around Marano Park between landmarks like Library, parking garage, and Research), and near Bluegate’s Olive Grove blue gate, where the boss slot is often a Leaper or Bombardier.
Wolfpack and other explosives alongside trigger grenades
Trigger grenades are strong on their own, but they scale even better when combined with other high‑tier explosives.
Wolfpack grenades in particular have a reputation for melting large Arcs. One player who found a Wolfpack blueprint describes it as the single biggest force multiplier for taking down larger enemies. The crafting recipe quoted for Wolfpack requires 2 explosive compounds and 2 sensors, which is relatively cheap for its impact.
Typical kill patterns look like this:
- Bombardier: 3 trigger grenades, then a Wolfpack to finish.
- Bastion: trigger grenade stacks plus Blaze or Wolfpack, then weapon fire from an LMG like Torrente or a heavy weapon such as Anvil.
These combos often make it feel as though “only a few” trigger grenades killed the boss, when in reality the Wolfpack or heavy weapon contributed a large share of the damage.
Planning a Bastion or Bombardier takedown around trigger grenades is mostly about consistency. Aim to hit weak spots, bring enough grenades that a few bad throws will not ruin the run, and pair them with strong weapons or a Wolfpack when available. With those pieces in place, 6–8 triggers for Bastion and 3–5 for Bombardier become reliable benchmarks rather than guesswork.