
The Undertaker Remembrance in Elden Ring Nightreign is one of the more straightforward character journals, but it hides a few easy-to-miss conditions, a misleading map objective, and one very specific action you need to take during the Night Aspect ending. Working through it unlocks several powerful relics and a unique Remembrance outfit for the Undertaker.
How to unlock Undertaker and start her Remembrance
You cannot start this questline until the Undertaker is playable. She is one of the Forsaken Hollows DLC Nightfarers, unlocked separately from the base cast.
Step 1: Unlock the Undertaker as a Nightfarer and select her in Roundtable Hold before beginning expeditions. Any expedition works; it does not have to be a Forsaken Hollows route.
Step 2: Run expeditions as Undertaker until you earn Memory Fragments and unlock Journal Chapters 2 and 3. A Memory Fragment drops when you defeat a Nightlord while playing as her, and you see the “Memory fragment found” notification back in the Hold.
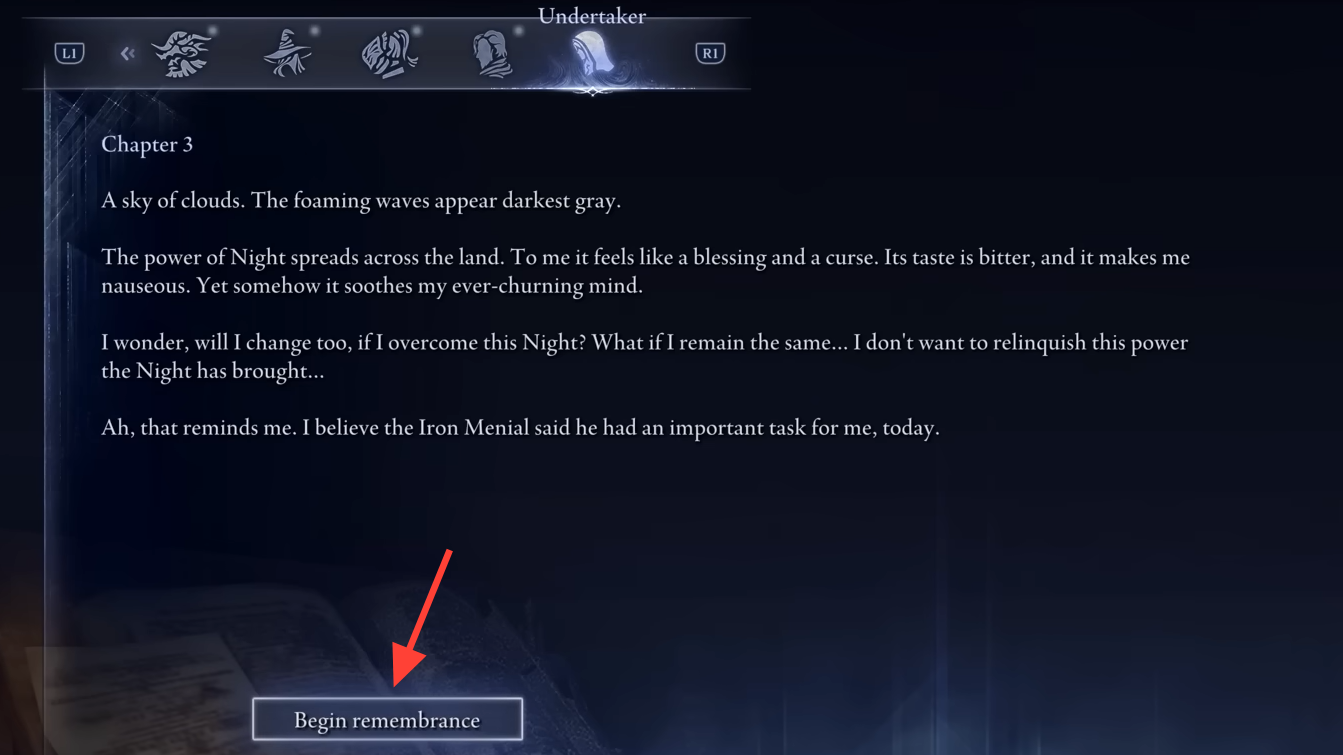
Step 3: In the Roundtable Hold hub, interact with the Journal in the right-hand corridor and open the Undertaker tab. Highlight Chapter 3 and choose Begin remembrance to enter the Realm of Remembrance and start the first quest.
Undertaker Remembrance Chapter 3: fight the Nightfarers and meet the Scholar
Chapter 3 is a self-contained gauntlet inside the keep, followed by a short interaction with Scholar that grants Undertaker’s first Remembrance relic, the Leather Monocle Case.
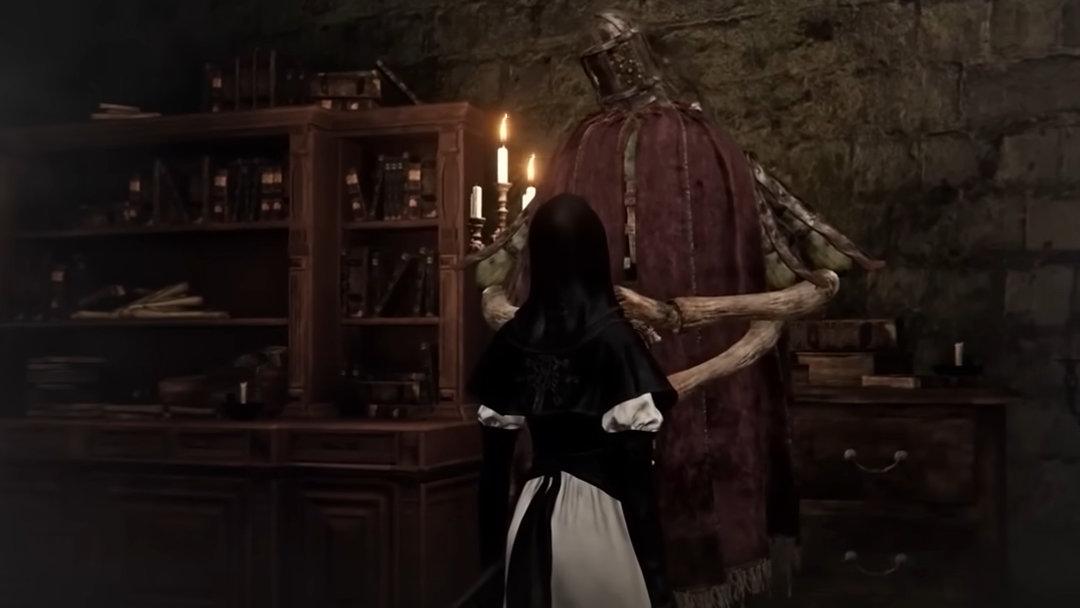
Step 1: After starting the Remembrance, talk to the Iron Menial in the opening room. He turns hostile and initiates the first duel. Defeat him to progress.
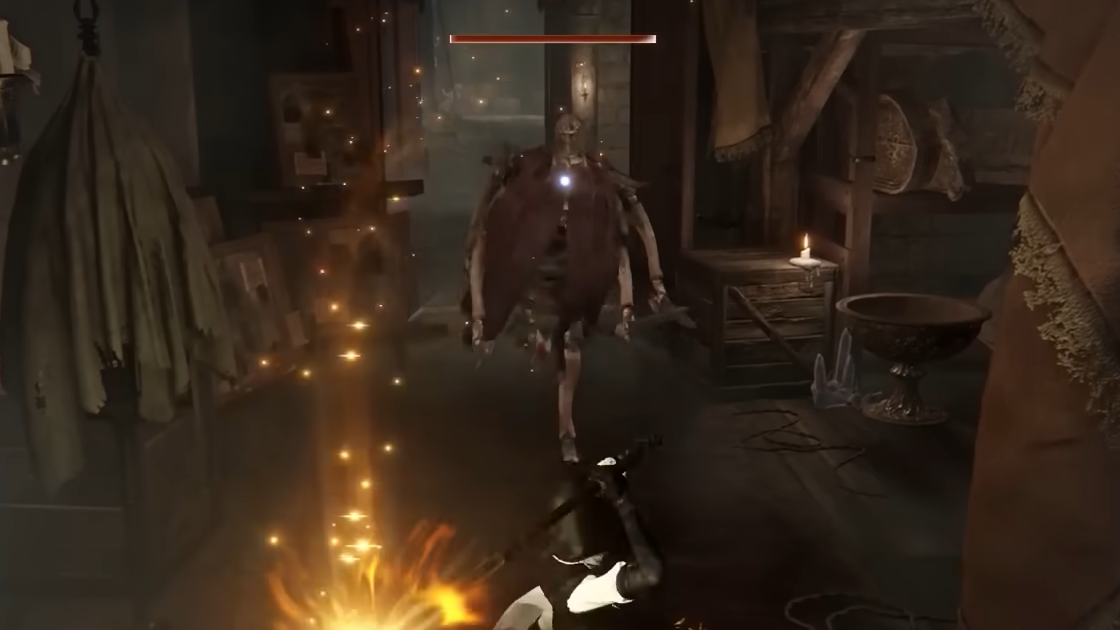
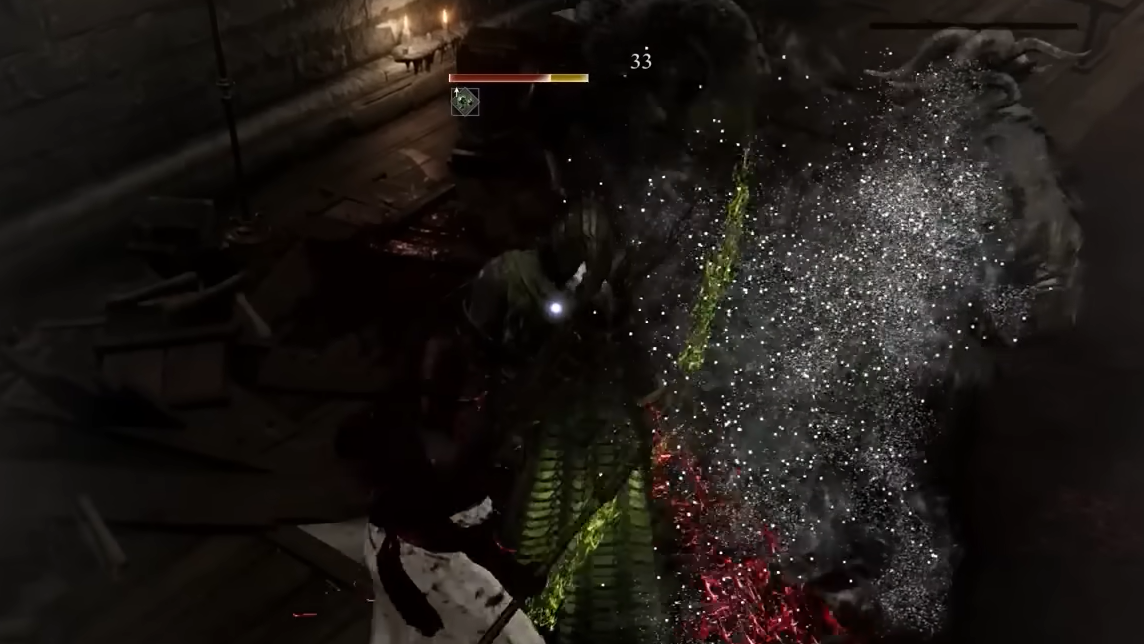
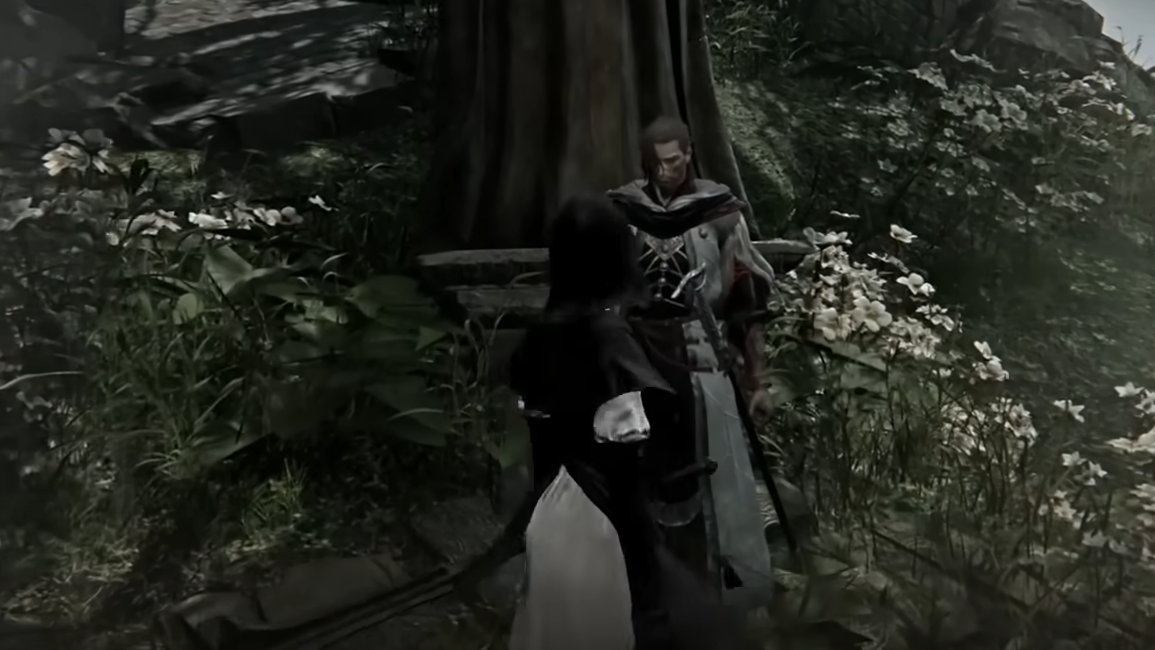
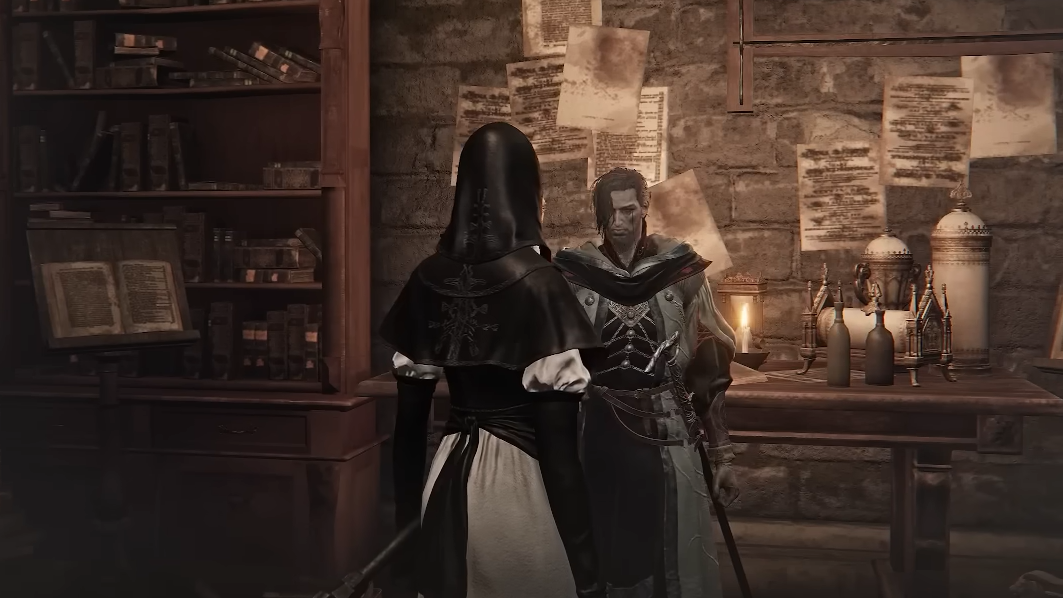
Step 2: Clear the keep by defeating the Nightfarers in sequence as you move outward from the first room. You fight Executor just outside the door, Guardian and Recluse together in the main Roundtable chamber, Wylder near the Visual Codex, and finally Raider and Ironeye in the DLC chapel.
Step 3: Once all Nightfarers are dead, Undertaker wakes in the chapel. Speak to the Iron Menial again to resolve the encounter and open the way to the next part of the memory.
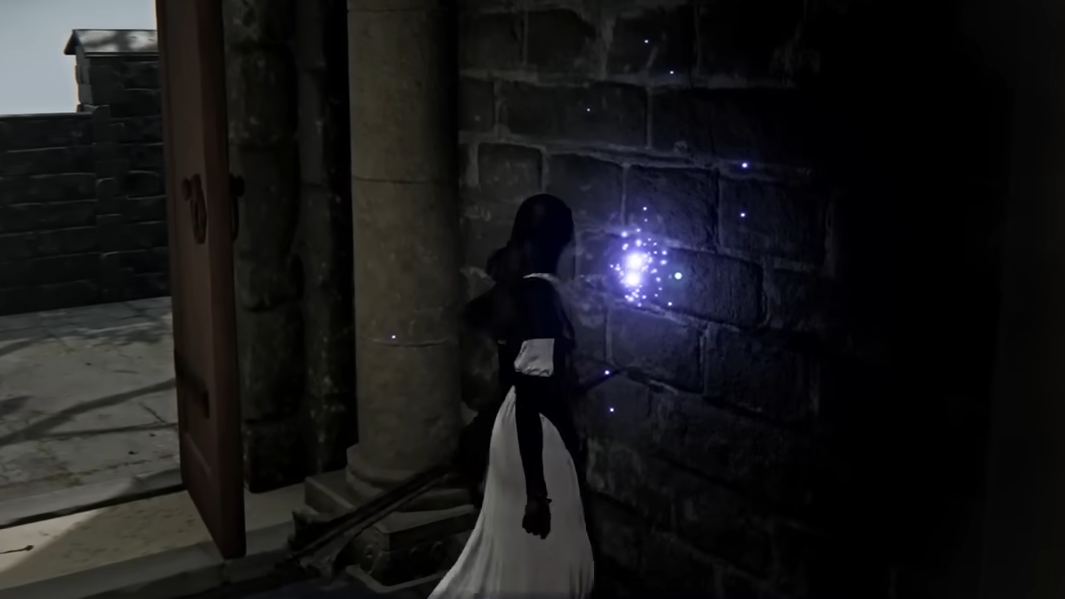
Step 4: In the chapel, interact with the purple orb on the wall behind where the Iron Menial stood. Smash it, then examine the wall as prompted to perform the “lick the wall” interaction that pushes the memory forward.
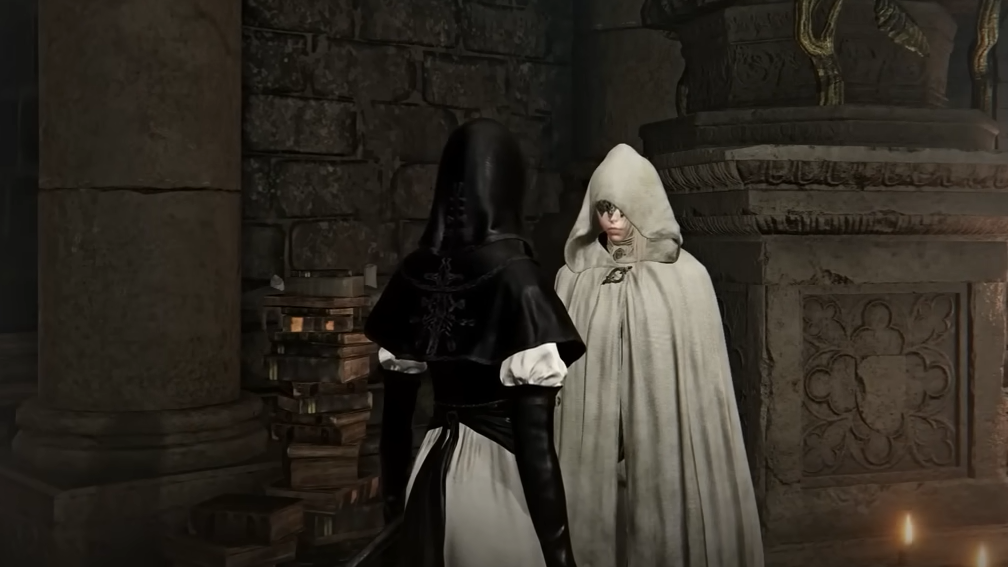
Step 5: A marker now appears in the Roundtable Hold courtyard. Follow it to find the Scholar standing in the grounds. Speak with him until his dialogue is exhausted; he tells Undertaker he is leaving the Hold in search of something.
When the conversation ends, you receive the Leather Monocle Case relic. For Undertaker, this focuses on self-buff play:
| Relic | Key effects |
|---|---|
| Leather Monocle Case | [Undertaker] boosts physical attacks while she has an assist effect from her own incantations, extends spell duration, and grants a flat Physical Attack Up +2. |
This relic leans into Undertaker’s high Faith by rewarding Sacred Seal buffs and mitigation spells that she casts on herself.

Step 6: Use the nearby portal in the courtyard to exit the Realm of Remembrance and complete Chapter 3.
How to reach Undertaker Remembrance Chapter 5
There is no explicit quest in Chapter 4. Progression here comes from normal play with Undertaker.
Step 1: Continue running expeditions as Undertaker. Killing Nightlords as her is the most reliable way to push the journal forward. Players report both repeat Tricephalos clears and other bosses like the Balance Nightlord, advancing the chapter counter.
Step 2: Once enough Memory Fragments have dropped, Journal Chapter 5 unlocks in the Undertaker tab. Select it and choose Begin remembrance to enter the next memory.
Undertaker Remembrance Chapter 5: “Search for the Scholar in Limveld”
Chapter 5 is where most players get stuck, mostly because the quest text is misleading. The objective tells you to search for Scholar in Limveld, but he is actually in The Great Hollow Shifting Earth event, which is treated as its own map.
Step 1: Inside the Remembrance, speak with Duchess in the Roundtable Hold and exhaust her dialogue. This reinforces the narrative setup for Undertaker and Scholar.
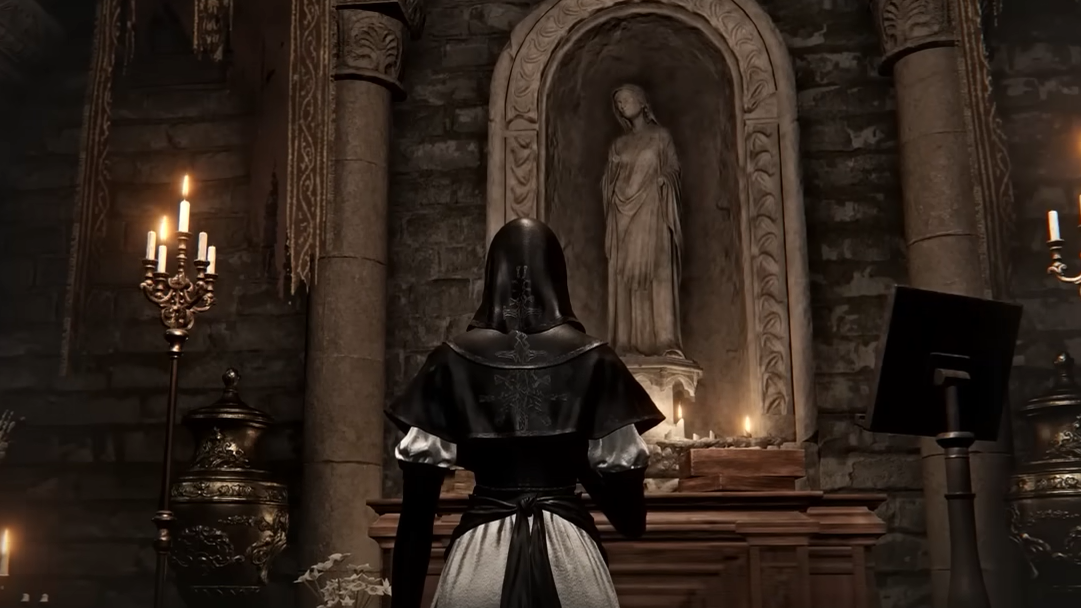
Step 2: Interact with the shrine in the Forsaken Hollows DLC chapel and offer a prayer. This is a simple prompt in the same room where you usually access DLC content.
Step 3: Talk to the Iron Menial again. He mentions a new Shifting Earth event, The Great Hollow, and suggests that Scholar has gone there. The journal objective updates to “Search for the Scholar in Limveld,” even though you actually need The Great Hollow expedition.
Step 4: Return to the expedition board and launch an expedition on a route where The Great Hollow Shifting Earth is active. If the event is not currently present, use Sovereign Sigils at the sigil store to manually activate The Great Hollow, provided you have unlocked it by defeating the relevant Everdark Sovereign.
How to find the Scholar in The Great Hollow castle
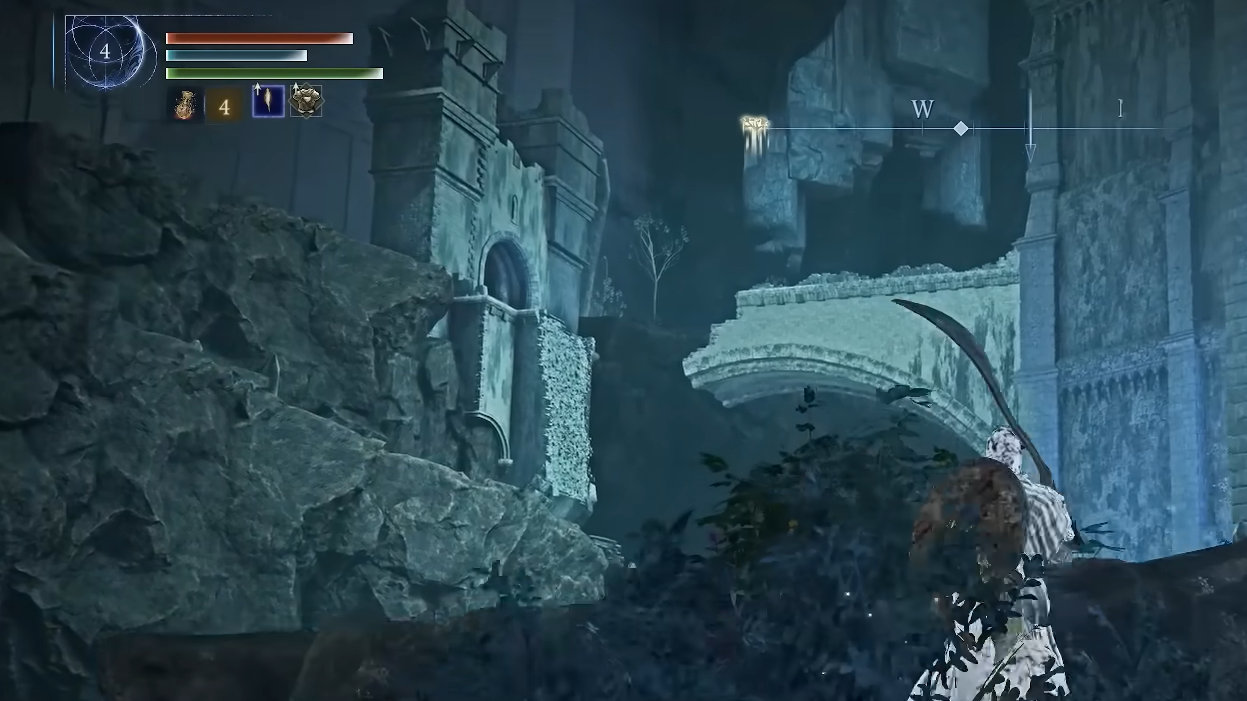
Once you are in The Great Hollow, you are looking for a red quest marker placed on the large castle in the northwest of the map. Scholar is imprisoned in a crystal inside that structure, reachable early in the run.
Step 1: Head toward the big northwest castle with the red quest flag. Approach the main front gate, then wrap around the outside of the walls to the left until you reach a spirit jump pad on the west side.
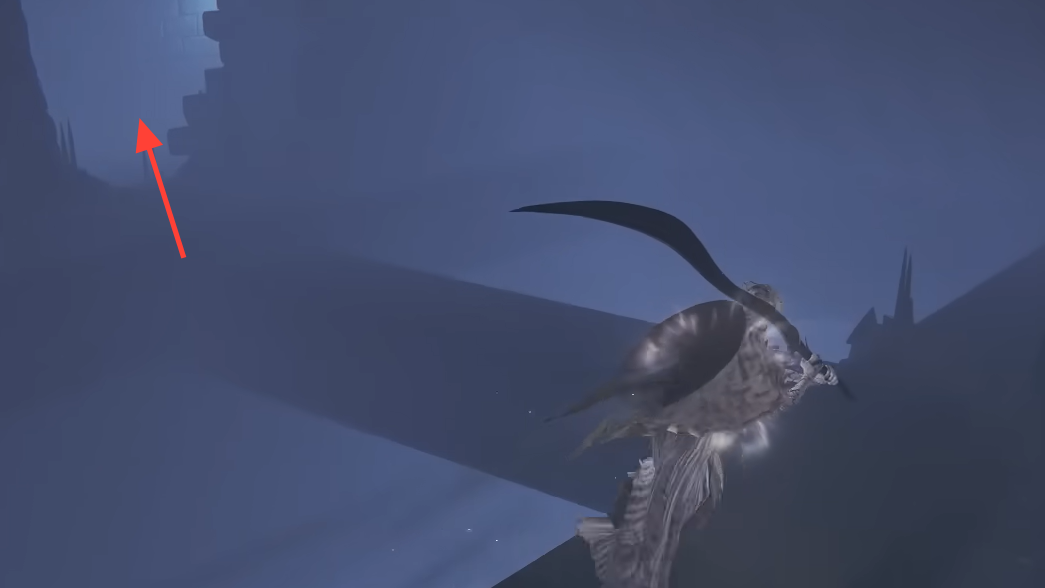
Step 2: Use the jump pad to fling yourself up to a balcony partway up the exterior of the castle. Land, then go through the nearby door, which leads into an interior room resembling a library or specimen hall.
Step 3: In the center of this room, there is a huge rock or specimen hanging from chains. Climb or jump onto this hanging mass from the surrounding floor level.
Step 4: From the hanging specimen, jump up to the wooden beam or rafter above it. Turn to the right side of the room and move along the rafters until you see a broken section of wall with an opening large enough to pass through.
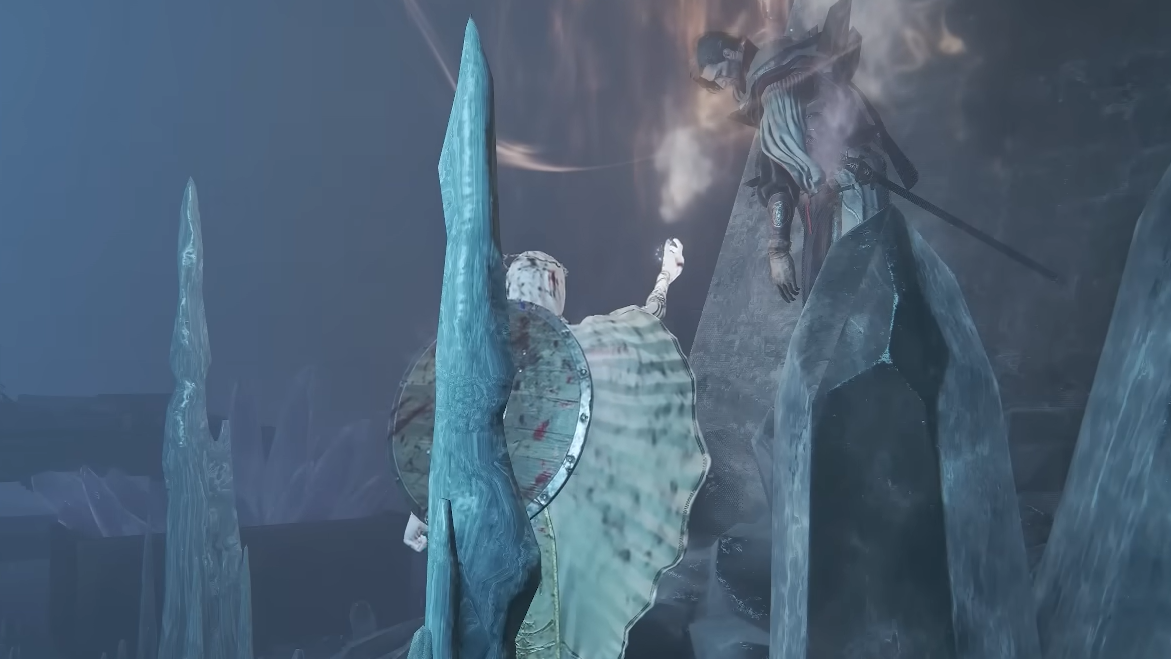
Step 5: Go through the hole in the wall and follow the narrow corridor beyond. At the end, you reach a chamber where the Scholar is trapped inside a large crystal formation. Interact with him to obtain the Scholar’s Primal Core (also referred to in other descriptions as the Primal Core).
Step 6: Back in Roundtable Hold, return to the Forsaken Hollows chapel and talk to Scholar. After the conversation, ending the Remembrance grants several rewards when you leave via the Remembrance gateway:
| Reward | Type | Notes |
|---|---|---|
| Night-Hued Glass | Item | Tied to Undertaker’s personal story with Scholar. |
| Bundled Paper | Item | Further narrative context for their relationship. |
| Undertaker's Chalice | Relic | Remembrance relic that sets up the final chapter and skin unlock. |
The Undertaker’s Chalice is critical later; keep it available for the Night Aspect expedition.
Undertaker Remembrance Chapter 6 and 7: Night Aspect and the Dismembered Finger
The later stages of Undertaker’s Remembrance are not explicitly step-marked in the journal like Chapters 3 and 5. Instead, you trigger the final chapter and her Remembrance skin by playing through the Night Aspect expedition (Shape of Night) with specific conditions.
How to trigger the final Undertaker Remembrance chapter
Step 1: Equip the Undertaker’s Chalice relic on Undertaker before starting the Night Aspect expedition. This relic links the run to her Remembrance progression.
Step 2: Complete the Night Aspect expedition as Undertaker and defeat its Nightlord, Heolstor (Shape of Night). You must finish the expedition; dying to Heolstor will not move the journal forward.
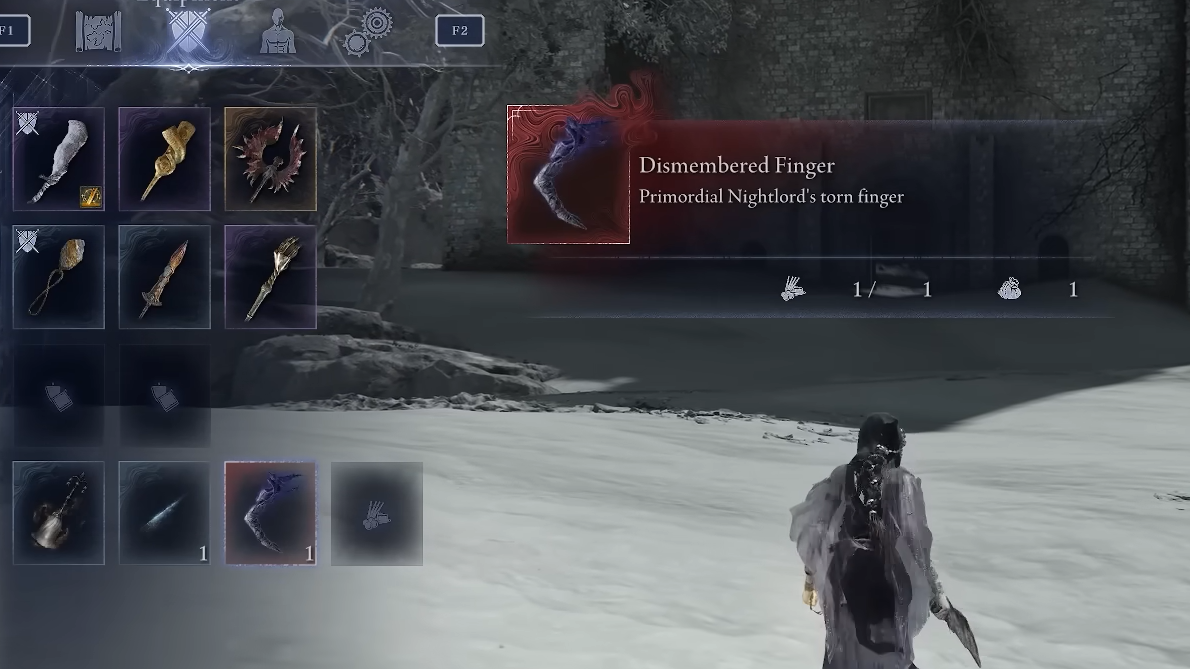
Step 3: After Heolstor falls, the usual Roundtable Hold ending sequence plays. Open your inventory or pouch and note the new quest item called “Dismembered Finger,” which appears only in this state.
How to use the Dismembered Finger to get the Remembrance skin
This is the most fragile part of the quest: the game never labels it as a Remembrance objective, and doing it incorrectly means repeating Night Aspect.
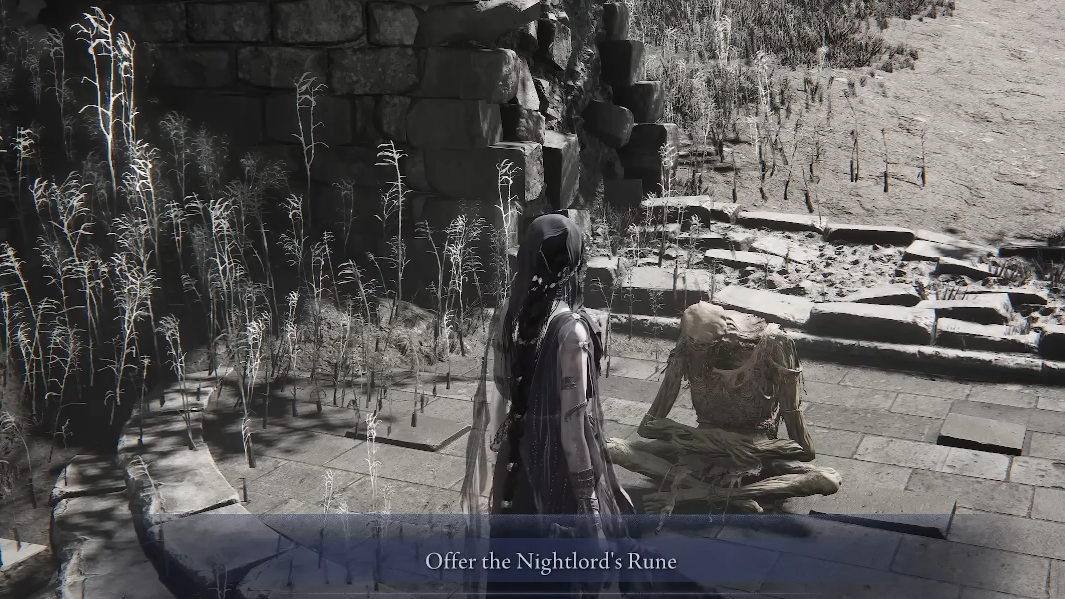
Step 1: During the post-Nightlord ending sequence, walk to the withered corpse in the keep that you normally interact with to end the game. Do not activate it yet.
Step 2: Open your inventory while standing near the corpse, highlight the Dismembered Finger item, and choose to discard/drop it on the ground. Make sure you actually drop it and leave it there; do not pick it back up.
Step 3: After leaving the Dismembered Finger on the floor, interact with the corpse as usual to finish the Night Aspect run and roll the ending.
Step 4: When you load back into Roundtable Hold after the credits, Undertaker’s Remembrance advances to its final chapter, and you receive two rewards:
| Reward | Description |
|---|---|
| Remembrance outfit (Undertaker skin) | A variant Undertaker appearance, most notably with a different necklace motif that reflects her completed story. |
| Glass Necklace | Remembrance relic with [Undertaker] bonuses tied to her ultimate art and aggressive play. |
The Glass Necklace relic focuses on Undertaker’s ult usage and pressure:
- Activating her ultimate art raises attack power for a window.
- Successive attacks further ramp attack power.
- Ultimate art charge speed is increased by three levels of “auto charge.”
At this point, Undertaker’s Journal should display Chapter 7, marking the Remembrance as complete and locking in both the cosmetic and mechanical rewards.
Once Undertaker’s Remembrance is wrapped up, the Scholar’s own journal becomes the natural next stop. The two questlines echo each other, and completing both gives a fuller picture of how their experiments with night corruption tie back into Nightreign’s larger story, while also rounding out your relic options if you favor Faith-heavy, buff-centric builds.