
Mounts in Universal Tower Defense are cosmetic flex pieces rather than gameplay upgrades. They don’t change how your units perform in stages, but they are a clear marker of how far you’ve pushed through the story and achievements, and they let you stand out in the lobby.
How mounts work in Universal Tower Defense
Mounts are unlocked through achievements, not gacha rolls or shop purchases. Each mount is tied to a specific achievement in the Achievements menu, usually under a Story stage tab. When you complete the requirement, you still need to manually claim the achievement reward for the mount to enter your Emotes & Mounts inventory.
Mounts are lobby-only. You can ride them in the hub to move around and show off, but they cannot be used inside any story, challenge, or legend stages. During gameplay, you move on foot only.
You can equip multiple mounts at once on a radial wheel, but you can only have a single mount active (spawned) at any given time.
How to unlock the Clay Owl mount
The Clay Owl is the early-game mount and is tied to finishing the first story world properly, rather than random drops.
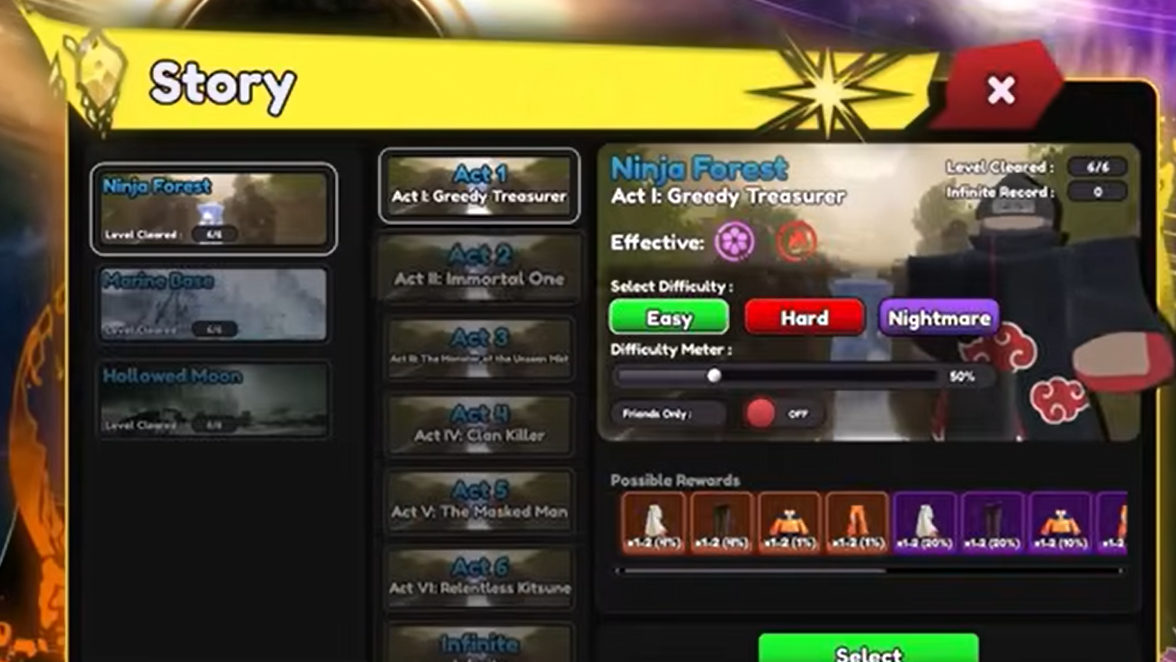
Requirement: Complete the Ninja achievement in the Story - Stage I tab. That means clearing all six acts of the Ninja Forest stage on easy difficulty. You can do this solo or with a group; difficulty setting is what matters.
Step 1: From the lobby, enter Story mode and select Ninja Forest. Set the difficulty to easy and keep the modulation low if you are still building your roster.
Step 2: Clear Acts I through VI in order, making sure each is clear on easy. The final map you need is Act VI: Relentless Kitsune.
Step 3: After finishing Relentless Kitsune, return to the lobby and open the Achievements menu on the left side of the screen. Go to Story - Stage I, select the Ninja achievement, and click to claim the reward. The claim is what actually grants the Clay Owl mount.
Recommended team for Ninja Forest
Ninja Forest is the first world, but it still punishes weak setups on the later acts. A few basics make the clear much smoother:
- Use Fire and Rose units. Both perform well here, with Rose-tagged damage dealers in particular shredding enemies quickly.
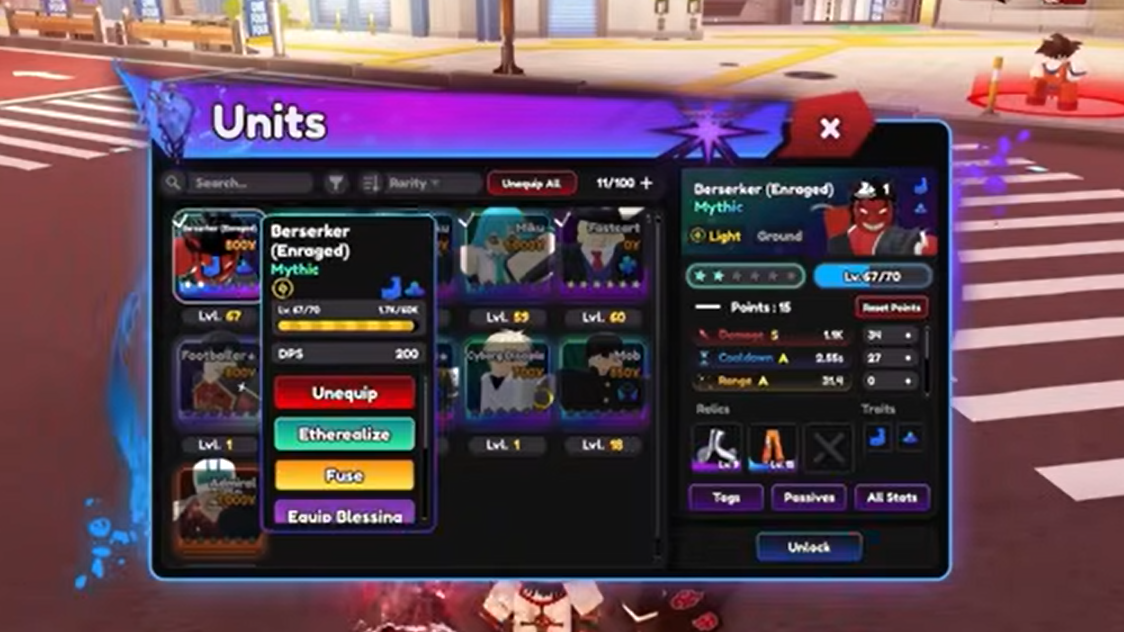
- Target high-impact Rose mythics. Units such as Psycho and Shunks are standout carries in this stage, but even lower rarities like Triple Threat are very effective if you invest upgrades properly.
- Always bring Fastcart. Fastcart is an Epic money-farming unit that dramatically improves your economy. There is a one–placement limit, so upgrade Fastcart to max early in the run before dumping resources into your damage dealers.
For a new account, speak to Roku in the lobby and redeem all available codes first. That initial influx of gems and resources helps you pull Fastcart and at least one good carry unit before grinding through the stage.
How to unlock the Submarine mount
The Submarine is a later milestone mount tied to the second story world and a higher difficulty setting.
Requirement: Complete the Pirate Captain achievement in the Story - Stage II tab. This requires clearing all six acts of the Marine Base stage on hard difficulty, solo or in a group.
Step 1: Enter Story mode from the lobby and pick Marine Base. Set difficulty to hard. Lower modulation if you need safer clears, but keep the difficulty at hard; normal or easy won’t count.
Step 2: Clear every act from I through VI on hard. The last one you need is Act VI: Dark Emperor.
Step 3: Return to the lobby, open the Achievements menu, then select Story - Stage II. Find the Pirate Captain achievement and claim it to receive the Submarine mount.
Recommended team for Marine Base
Marine Base on hard expects a more mature roster than Ninja Forest. Damage checks are tighter and enemy composition is less forgiving.
- Focus on Rose, Light, Ice, and Wind units. Those unit types perform best across Marine Base’s acts and help handle different enemy types without constantly swapping your lineup.
- Reuse strong Rose mythics. As in Stage I, Psycho and Shunks continue to be top performers. If you already invested in them, you do not need to reinvent your team.
- Add solid lower-rarity supports. Units like Ruka and Shakumira are strong budget options that fill gaps while you build out a full mythic core.
- Keep Fastcart in every loadout. Hard difficulty and higher upgrade costs make economic units even more important. Place Fastcart early, max it efficiently, then ramp your damage dealers.
If you are unsure which units to prioritize long term, community tier lists for Universal Tower Defense are useful for deciding where to spend gems and evolution materials, but you can clear Marine Base with a mix of strong legendaries and well-upgraded epics as long as your economy is stable.
How to equip and use mounts in the lobby
Unlocking a mount only puts it into your cosmetic inventory. You still need to equip it to the wheel and then actively summon it in the hub.
Step 1: In the lobby, click the Emotes & Mounts button labeled with an “E” in the top-right corner of the screen. This opens a purple radial wheel.
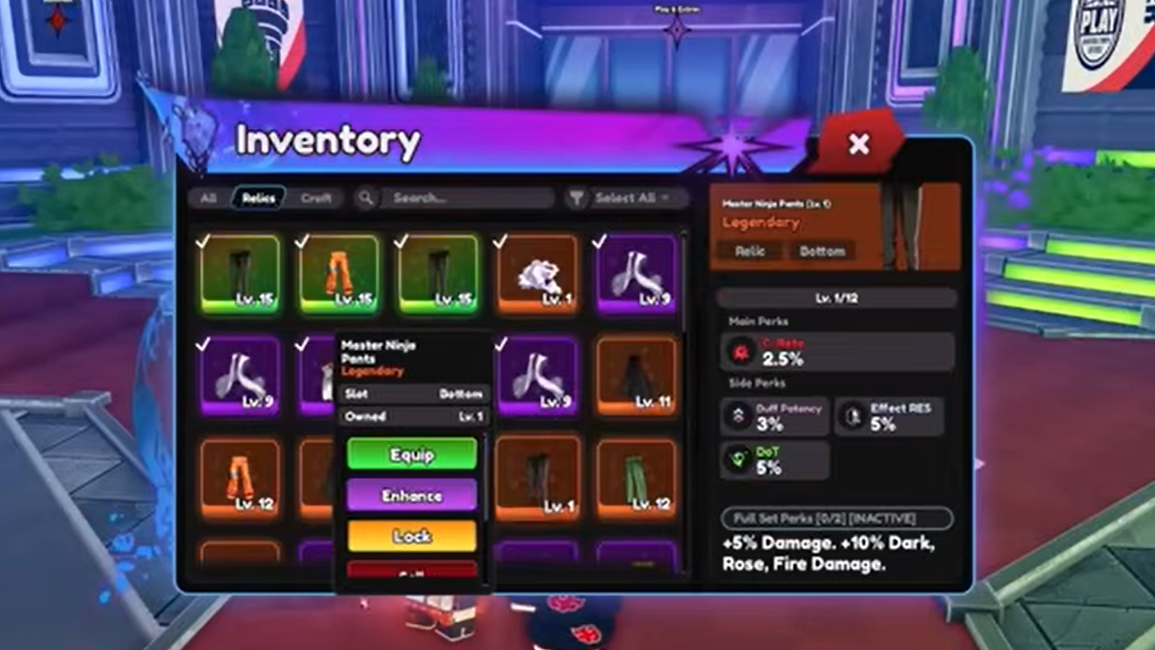
Step 2: Above the wheel, click Open Inventory. This brings up your full Emotes & Mounts Inventory, listing every emote and mount you own.
Step 3: In the inventory, select the mounts you want to carry on your wheel. You can equip up to six slots from here, mixing emotes and mounts as you like.
Step 4: Close the inventory to return to the radial wheel. Switch to the mount segment, then click the icon of the mount you want to ride. Your character will spawn onto that mount in the lobby.
While the inventory lets you equip several mounts, the wheel only allows a limited number of mount slots to be active at a time, and the game will only render one mount under your character.
Common mount issues and limitations
Mounts cannot be used inside stages
Mounts are purely for the lobby space. Once you load into Ninja Forest, Marine Base, or any other stage, mount usage is disabled and you move on foot. Mounts do not provide speed boosts, buffs, or any mechanical advantage during waves.
This also means your performance in leaderboards or late-game modes is fully determined by units, traits, relics, stat points, and modulation, not which mount you own.
Why a mount might not appear after an achievement
Sometimes the mount doesn’t show up in your inventory immediately after you complete the related achievement, even when the clear conditions were correct. This is a known bug.
If that happens:
Step 1: Open the Achievements menu and double-check that the specific achievement (Ninja or Pirate Captain) is marked as complete. If it shows as unclaimed, click to claim it again.
Step 2: If the achievement is already claimed but the mount is still missing from your Emotes & Mounts Inventory, close Universal Tower Defense and restart the game from Roblox.
Step 3: After relaunching, open the Emotes & Mounts inventory once more. In most cases the mount appears correctly after a short delay.
There is no manual support flow needed for this bug at the moment; it usually resolves itself after a restart and a bit of time. Also make sure you are looking under the mount section of the inventory, not just the emotes section.

How many mounts you can equip at once
The game distinguishes between “equipping” a mount to your wheel and “spawning” it under your character.
- You can equip up to four mounts onto the radial wheel at the same time, alongside emotes.
- You can spawn only one mount at a time in the lobby. Switching to another mount on the wheel despawns the previous one.
The practical approach is to keep your favorite two or three mounts on the wheel and reserve the remaining slots for emotes you actually use. There is no gameplay benefit to stacking more mounts; the limit is mostly a UI constraint.
Once Clay Owl and Submarine are unlocked and assigned to your wheel, you’ve effectively completed the current mount track in Universal Tower Defense. The rest of your progression comes from pushing higher story difficulties, farming challenges and nightmare stages, and optimizing traits, relics, and etherealization. The mounts simply ride along as a visual record of that grind.