
Blind to the World is one of the most memorable side stories in Where Winds Meet, taking you from a quiet lakeside in Qinghe into a drowned shrine and the ruined dwelling of the Lunar Goddess Li Zhenzhen. It is light on combat and built around a chain of puzzles that are easy to misread: a pressure-plate ring, a bell mechanism that lies to your eyes, and a final choice of offerings.
The overview below keeps the focus on how to start the quest, how each puzzle actually works, and what you get for seeing it through.
Where Winds Meet Blind to the World quest start and setup
Blind to the World is a side story in the Qinghe region, set around Moonveil Mountain and the Crimson Cliff lake. The quest begins when you meet Uncle Tian at the lakeshore; he is investigating a submerged shrine tied to the so‑called Moon or Lunar Goddess.
Once the conversation ends, your very first goal is simple: empty the lake.
| Element | Details |
|---|---|
| Quest type | Side story / Jianghu Legacy in Qinghe |
| Start location | Crimson Cliff lake under Moonveil Mountain, Qinghe |
| Main NPCs | Uncle Tian, Lunar Goddess Li Zhenzhen |
| Core mechanics | Underwater levers, pressure plates, bell sequence, Moonlit Flowers (self‑blindness) |

Drain the lake and expose the Moon Goddess statue
After speaking with Uncle Tian, dive into the lake directly in front of him. At the bottom you find a large stone plate with several heavy chains radiating outward. Each chain leads to a separate mechanism that locks the drainage system.
Follow each chain in turn and interact with all three underwater contraptions. Treat them as levers: once all are activated, the drainage plate engages and the lake slowly empties, exposing the muddy basin and the Moon Goddess statue in the center.
Resurface for air whenever your breath runs low; you can return to the bottom as often as needed. When the water is gone, talk to Uncle Tian again near the drained lakebed to move directly into the first puzzle.
Blind girl statue puzzle: correct plate order
The statue puzzle is the first real check on whether you are paying attention to orientation rather than flashing lights. Around the statue is a set of stone plates: one large central slab and four smaller plates that appear after you trigger the center.
| Step | Action around the statue |
|---|---|
| 1 | Stand on the large central plate in front of the statue to activate the puzzle. |
| 2 | Go behind the statue (north relative to your map) and step on the plate directly at her back. |
| 3 | Walk around the statue and trigger the remaining plates in clockwise order: east → south → west. |
The intended sequence can be described as “north, east, south, west” starting from the plate behind the statue and circling clockwise. If you mis-step or hit a plate out of order, the mechanism shocks you, and the sequence resets once you step away.
When the plates are activated in the correct order, the shrine responds with an audio cue, and a stone door nearby unlocks, revealing a corridor deeper into the mountain.
Through the corridor: ribbon traps and the flooded cave
Past the newly opened door, Uncle Tian leads you into a narrow, decorated hallway and then leaves you to handle the hazards yourself.
| Area | Hazard or mechanic | Safe approach |
|---|---|---|
| Burning corridor | Hanging ribbons or cloth that can catch you on fire when touched. | Move carefully between them or shoot them with fire arrows to burn them away from a distance. |
| Broken bridge chamber | A large gap where a bridge has collapsed, with a drop into deep water. | Ignore the idea of jumping straight across. Instead, take the cave entrance to the side that leads into an underwater tunnel. |
| Underwater passage | Long swim with limited air; blue Moonlit Flowers that blind your vision; one trap chest that can cause a cave‑in. | Use rays of light above you as air pockets, and touch Moonlit Flowers if needed to see the subtle “path” through darkness. |
In the cave beside the broken bridge, drop into the deep pool and swim forward. The path itself is linear, but the Moonlit Flowers complicate things: brushing against them temporarily blinds you, turning the screen nearly black. In return, the game highlights the route via visual or auditory cues tied to wind or vibrations, guiding you to the next air pocket or exit.
Two main spots let you resurface: one close to where you first dive in, and another deeper in the cavern near the tunnel that leads to the exit. A large chest deep in the cavern can cause a cave‑in and eat into your air supply, so approach it only with a full breath bar if you decide to open it.
Follow the objective marker through the tunnel, then up through a corner opening; from there, the path leads to a stone gate with four bells mounted overhead. This is where the second major puzzle begins.
Bell puzzle: why sight alone gives you the wrong answer
The stone gate is locked by a four‑bell mechanism. Each bell has a corresponding symbol or slab above it that you can shoot with a bow. A nearby pedestal lets you trigger the bells in a pattern, and the game expects you to reproduce that pattern.
If you simply stand in front of the device in normal light and copy what you see, the door stays shut. The shrine is themed around blindness for a reason: the correct sequence only reveals itself once you deliberately impair your sight.
Behind or near the bell platform grows a cluster of blue Moonlit Flowers, the same type that blinded you earlier in the cave. Touching them darkens your screen but heightens your other senses.
| Step | Bell puzzle action |
|---|---|
| 1 | Stand near the bells and locate at least one Moonlit Flower behind or beside the contraption. |
| 2 | Touch the flower to trigger the blindness effect; your vision fades, but the “true” bell order becomes perceptible. |
| 3 | While still affected, interact with the pedestal so the bells ring in their actual sequence. |
| 4 | Memorize the order and then shoot the slabs above the bells to match it. The internal order corresponds to bells 3 → 4 → 1 → 2. |
Standing at a medium distance where all four targets are visible makes it easier to hit them cleanly without wasting arrows. When the bells are shot in the correct sequence, the seal breaks and the stone gate grinds open, revealing the innermost cavern.
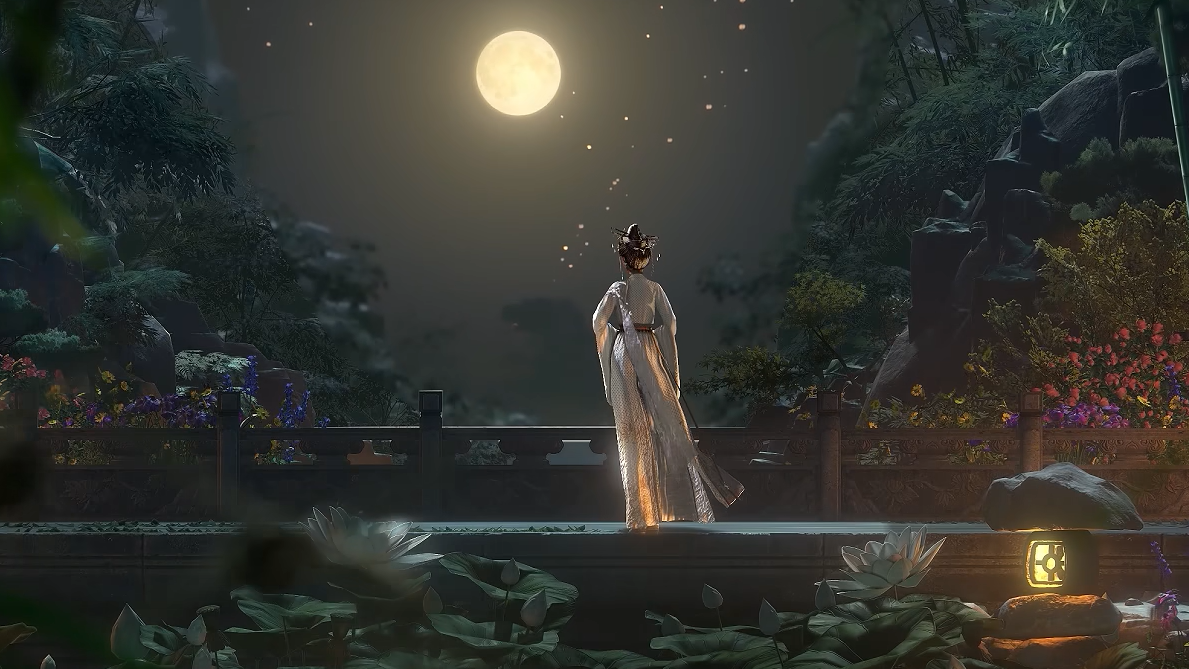
Meeting the Lunar Goddess and unlocking the final choice
Beyond the gate lies an expansive chamber: at its heart, on a raised cliff, is the still form of Li Zhenzhen, the Lunar Goddess. This is the emotional center of Blind to the World. Uncle Tian’s earlier story converges here, and the quest shifts from pure puzzles to quietly resolving an old vow.
Approach the elevated platform to trigger a cutscene around Li Zhenzhen’s past and her ties to Qinghe. Beside her is a table or altar holding a sealed container, often referred to as an Ice Jade Box, Frost‑Laced Box, or simply the Eye Box. Interact with this to pick it up, then hand it to Uncle Tian when prompted.
At this point, returning the box alone is not enough. Interacting with the Lunar Goddess shows a prompt about settling an old vow, but you lack the necessary offerings. The next objective sends you deeper into her dwelling to find what she “really wants.”
Finding the Small Blade and Moonlit Flower offerings
From the Lunar Goddess’s platform, turn toward the interior of the cavern and take the staircase leading down to her living quarters. This lower area holds both the items you need and additional lore if you decide to explore every corner.
| Item | Location | Quest role |
|---|---|---|
| Small Blade | On a table in the lower dwelling, near a clothes rack and other personal effects. | Symbolic quest item reflecting a violent, unresolved past. |
| Moonlit Flower | Growing just ahead of the table area, a single bright Moonlit Flower distinct from the others. | Alternative or complementary offering tied to her wish for peace and quiet. |
Pick up the Small Blade from the table and the glowing Moonlit Flower from nearby. These two items embody different aspects of Li Zhenzhen’s story: one is an instrument bound to old conflict; the other is a quiet, recurring motif throughout the quest that also defines the shrine’s mechanics.
Some versions of the quest let you present one item (commonly the Moonlit Flower) and move directly to the resolution. Others frame the two together, with the shrine treating both as part of a single offering that finally closes the vow. In either case, the Moonlit Flower is the “true” answer to what the Lunar Goddess desires.
Return to the Lunar Goddess on the upper platform, interact with her again, and select the offering option that appears using the items you picked up. A final cutscene plays, bringing her story arc and the Blind to the World side story to a close.
Exiting the shrine and what Blind to the World gives you
After the final scene, the quest flag is effectively complete, but you still need to physically leave the shrine to collect everything. The exit route runs back through the lower living space.
From the place where you found the Small Blade and Moonlit Flower, continue past the clothes rack and into a small side tunnel. Look for a narrow crevice in the rock wall; interact with it to squeeze through to a hidden dock area. A raft waits there to carry you back out to the surface and away from Moonveil Mountain’s flooded underbelly.
When you are clear of the cavern, the game delivers the full set of rewards tied to Blind to the World.
| Reward | Type | Use |
|---|---|---|
| Blinding Mist | Mystic Skill | Creates a poisonous mist that hides you and blinds ordinary enemies for a short time, enabling crowd control and finishers. |
| Dusty Wedding Dress (Li Zhenzhen) | Armor | Usable armor piece with moderate stats; mechanically useful early on but visually unremarkable compared to other gear. |
| Medicinal Tales ×1 | Upgrade item | Feeds into Medicine Chest upgrades, increasing both carry capacity and healing efficiency over time. |
| Ebon Iron (Lv. 2) ×8 | Material | Used in equipment development and upgrades. |
| Oscillating Jade ×4 | Material | High‑tier crafting and progression resource for gear and systems. |
| Echo Jade ×72 | Currency | Premium currency for character pulls and other unlocks. |
| Qinghe Exploration Points ×120 | Regional progress | Contributes to Qinghe’s exploration track, unlocking bonuses such as movement upgrades. |
| Enlightenment Points ×100 | Account progress | Spent on unlocking or upgrading talents and inner development options. |
| Character EXP ×33,000 | Experience | Directly pushes your main character level upward. |
| Zhou Coin ×33,000 | Currency | Standard in‑game money for purchases, crafting costs, and other fees. |
Blinding Mist is the standout reward: it lets you project a cloud of toxic fog that damages and visually cripples regular foes for several seconds, setting them up for Touch of Death executions or simple repositioning. It does not meaningfully affect bosses or elite enemies, but in group encounters it can completely change the tempo of a fight. The skill has a relatively steep Vitality requirement, so it fits best on builds that invest heavily in survivability and close‑range control.
The Dusty Wedding Dress is thematically potent but quickly eclipsed by other armor sets in raw stats and cosmetic appeal. The real long‑term value lies in the extra Medicinal Tales and account‑wide resources, which feed into systems that remain relevant for the entire game.
Blind to the World quietly ties together most of what defines Where Winds Meet: traversal that demands attention to air and verticality, environmental hazards that double as storytelling devices, and rewards that meaningfully expand your toolkit rather than just filling your inventory. Once you know that the shrine punishes sight and rewards “blindness,” the statue plates, the flower mechanics, and the bell puzzle all snap into place—and the Lunar Goddess’s final request feels less like a twist and more like the only answer that was ever going to fit.