
Windows 11 Home can encrypt your PC, but the switch you need is Device Encryption, not the full BitLocker Drive Encryption tool used on Pro, Enterprise, and Education editions.
Quick answer: Sign in with an administrator account, open Settings > Privacy security > Device encryption, and turn it On. If that menu is missing, your PC either does not support Device Encryption or you are not signed in as an admin.
Device Encryption vs. BitLocker on Windows 11 Home
The confusing part is the naming. Windows 11 Home does not include the full BitLocker Drive Encryption management applet for manually configuring individual drives through Manage BitLocker. That full interface is reserved for Windows Pro, Enterprise, and Education.
What Windows 11 Home does include is Device Encryption. It uses the same underlying BitLocker encryption technology, but it is presented as a simpler on-or-off feature. On supported hardware, it can turn on automatically when you set up the PC with a Microsoft account, or a work or school account.
| Feature | Windows 11 Home | Windows 11 Pro / Enterprise / Education |
|---|---|---|
| Device Encryption | Yes | Yes |
| Manage BitLocker control panel | No | Yes |
| Manual per-drive BitLocker setup in Control Panel | No | Yes |
| Automatic encryption for supported devices | Yes | Yes |
How to turn on Device Encryption in Windows 11 Home
Step 1: Sign in to Windows with an administrator account. Device Encryption will not appear if you are using a standard account.
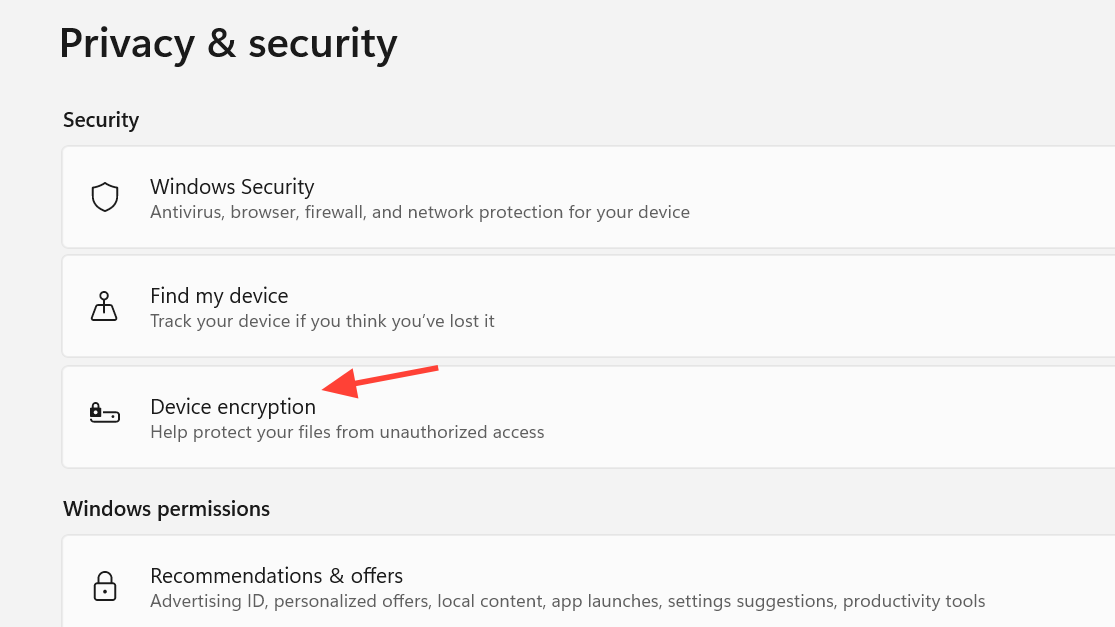
Step 2: Open Settings, then go to Privacy security > Device encryption. If you do not see Device encryption, stop there and check support status first.

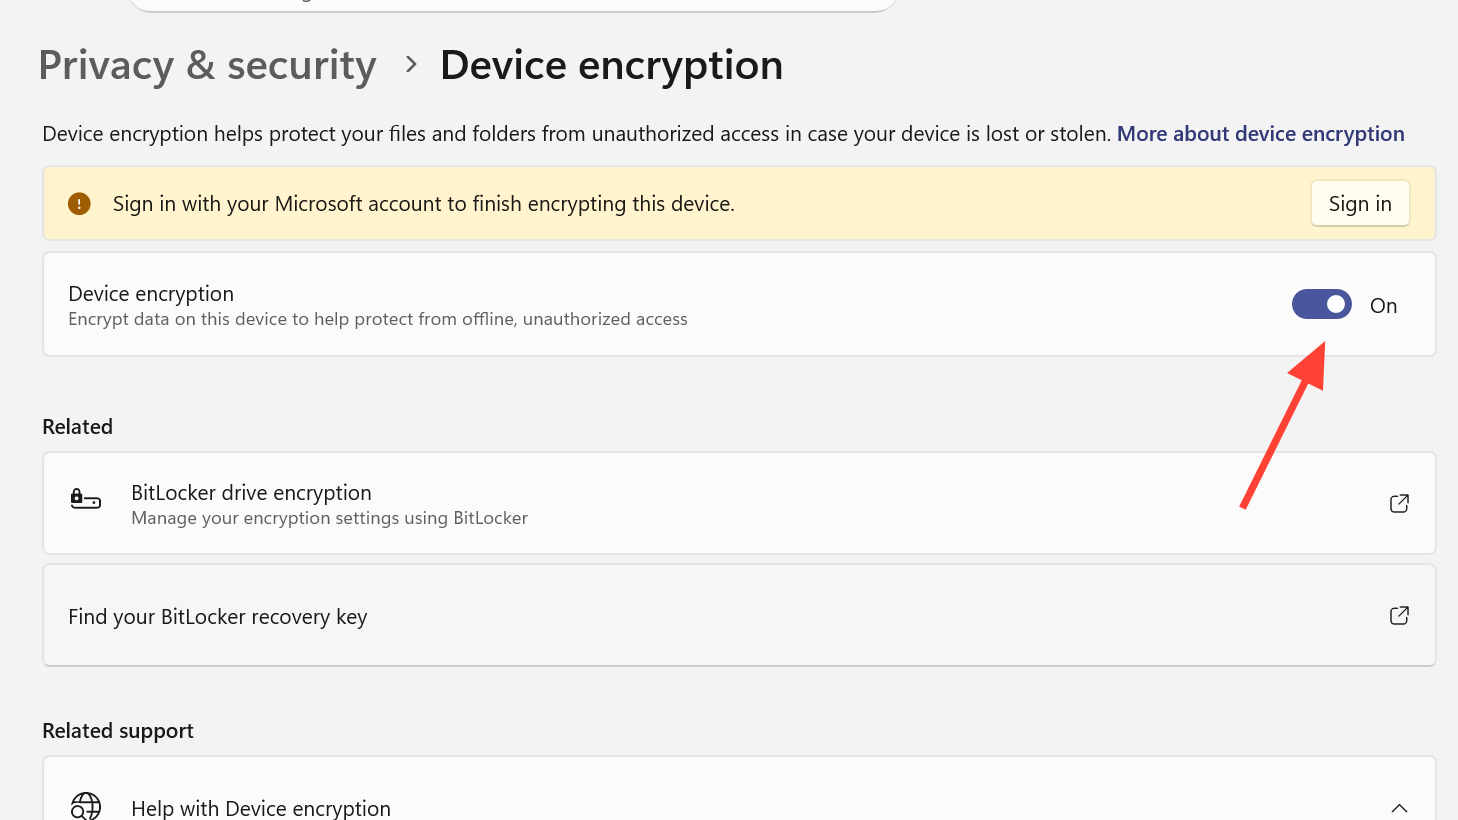
Step 3: Turn the Device encryption toggle to On. Windows will begin enabling encryption for the supported drives on the device.
Step 4: Leave the PC powered on and signed in while setup finishes. Encryption time varies with the amount of data on the drive.
You know it worked when the Device encryption page shows the feature as turned on.
What happens to the recovery key
When Device Encryption turns on during setup or first sign-in with a Microsoft account, or a work or school account, Windows attaches a recovery key to that account. That key matters if the PC ever asks for recovery after a hardware or firmware change, or if Windows detects something unusual during startup.
If you use only a local account, Device Encryption does not turn on automatically.
Why Device Encryption may not appear
If the switch is missing, Windows exposes the reason in System Information.
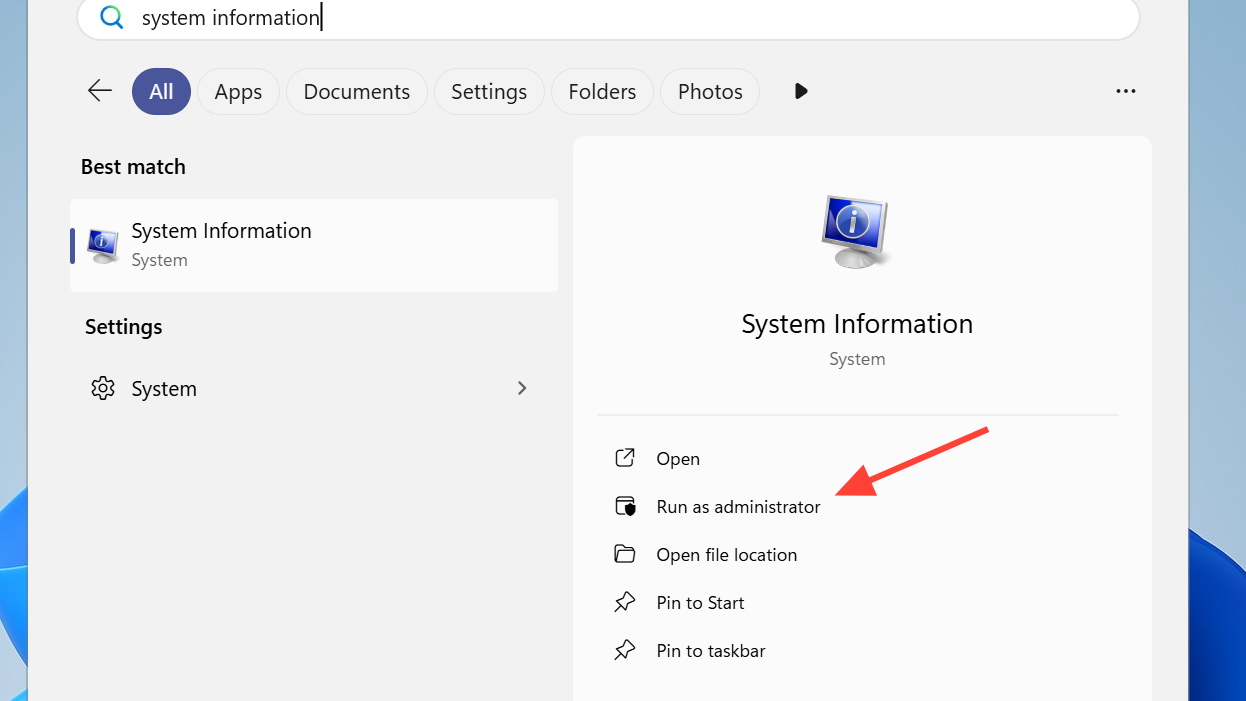
Step 1: Open Start, type System Information, right-click it, and choose Run as administrator.
Step 2: In System Summary, find Automatic Device Encryption Support or Device Encryption Support.
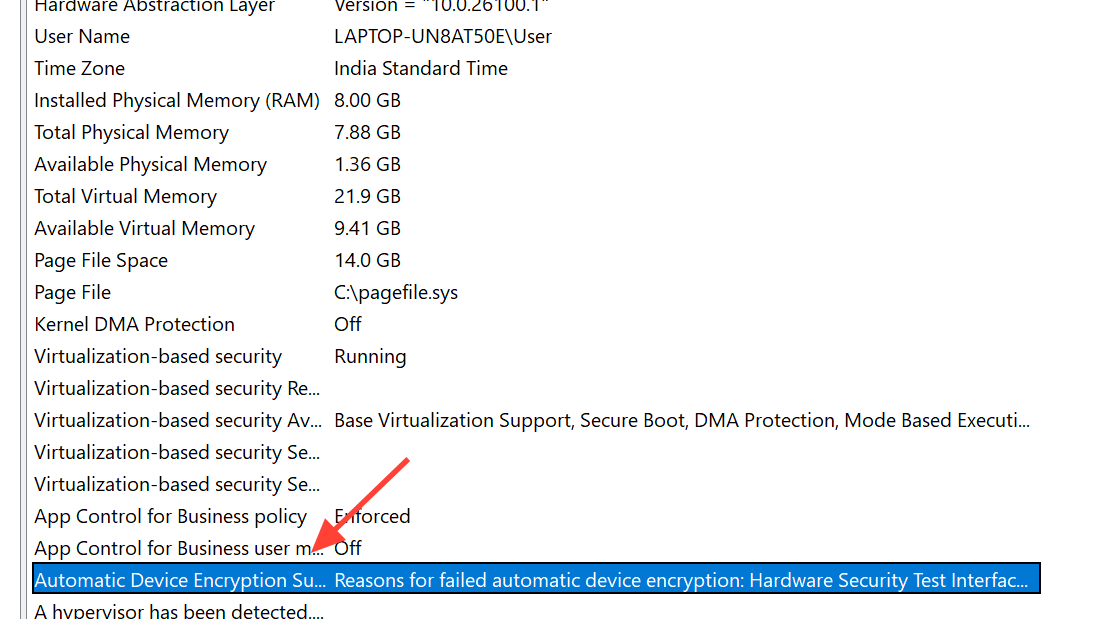
Step 3: Read the value shown there. That line tells you whether the device is eligible and, if not, what is blocking it.
| System Information value | What it means |
|---|---|
| Meets prerequisites | Device Encryption is available on the PC. |
| TPM is not usable | The PC does not have a usable TPM, or TPM is disabled in BIOS or UEFI. |
| WinRE is not configured | Windows Recovery Environment is not configured. |
| PCR7 binding is not supported | Secure Boot is off, or startup hardware conditions are blocking support. |
What to do if TPM or Secure Boot is blocking it
The most common blockers are TPM and Secure Boot. If System Information says the TPM is not usable, check your BIOS or UEFI settings and confirm TPM is enabled. If it says PCR7 binding is not supported, check whether Secure Boot is disabled.
Startup hardware can also interfere. Docking stations, specialized network hardware, or external graphics connected during boot can affect eligibility on some systems. If your PC is attached to extra hardware at startup, test again with the machine booted on its own.
Why “Manage BitLocker” may not help on Windows 11 Home
If you search for Manage BitLocker and do not get the full BitLocker Drive Encryption interface, that is expected on Windows 11 Home. The manual BitLocker tool is tied to Windows editions above Home.
That distinction matters because many generic BitLocker instructions start with Control Panel or the Manage BitLocker shortcut. On Home, the correct path is the Device encryption page in Settings.
What encryption options you do not get on Home
Windows 11 Home keeps this simple. You do not get the standard BitLocker setup flow where you choose between encrypting used disk space only or the entire drive, pick a specific encryption mode, or turn on encryption for one drive at a time through the BitLocker control panel.
Those options belong to BitLocker Drive Encryption on Pro-class editions. On Home, the experience is mostly limited to whether Device Encryption is on or off.
How to verify encryption status
The fastest check is the same Settings page you used to enable it. If Device encryption says it is on, Windows has the feature enabled.
Some systems may also show encrypted drives with BitLocker-style labels elsewhere in Windows. That does not mean you suddenly have the Pro-only BitLocker management console. It means the encryption engine underneath is BitLocker-based, even though the feature exposed to you is Device Encryption.
If your goal is simply to protect the data on a Windows 11 Home PC, the answer is straightforward: use Device Encryption in Settings, make sure you are signed in as an administrator, and confirm the machine meets the TPM, WinRE, and Secure Boot requirements. If you need the full BitLocker management panel with manual drive-by-drive controls, that is where Windows 11 Pro starts to matter.