
Network discovery warnings such as “Network discovery is turned off” often appear at the same time that the Network and Sharing Center refuses to open or respond. When that happens, file sharing, printer sharing, and visibility of other devices on the network are usually broken as well.
Repair Windows 11 system files and networking stack
When built‑in networking tools do not open at all, damaged system files or a corrupted TCP/IP stack are common causes. Repairing these first removes a lot of hidden problems before you touch any settings.
Step 1: Open an elevated Command Prompt.
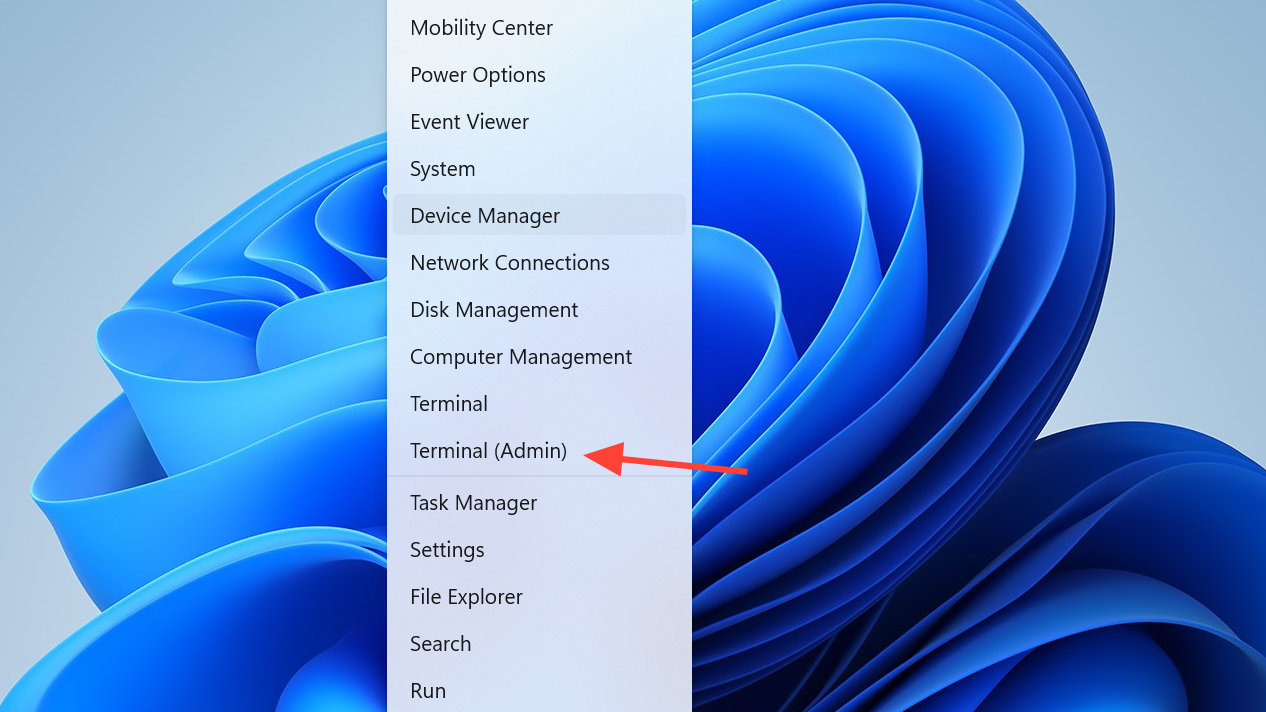
Press Windows + X and select Windows Terminal (Admin) or Command Prompt (Admin). Approve the User Account Control prompt. This window is needed so repair commands can change protected system files and network configuration.
Step 2: Run a System File Checker scan.
In the elevated window, run:
sfc /scannow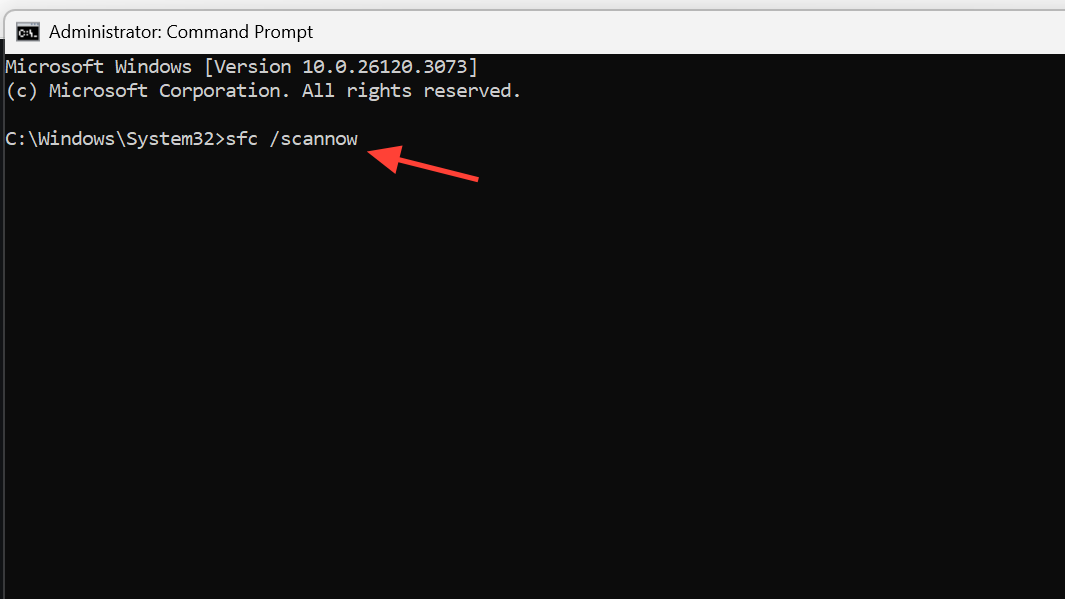
This command checks core Windows files and replaces anything that is damaged. Wait for it to reach 100%. If it reports that it repaired files, restart the PC afterward to apply the fixes.
Step 3: Reset Winsock (network sockets).
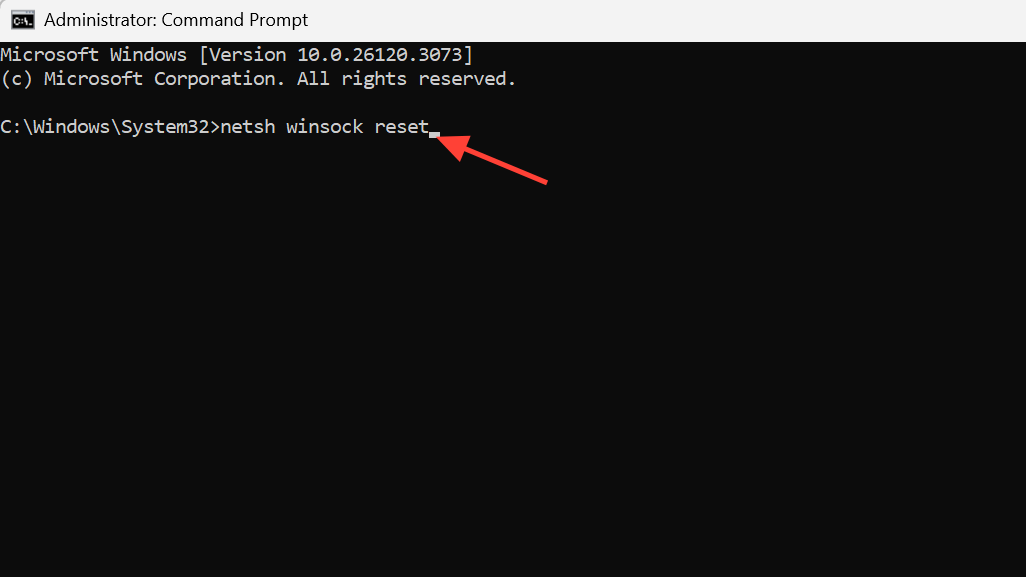
Open the elevated Command Prompt again after the restart and run:
netsh winsock resetWinsock defines how Windows talks to network applications. Resetting it clears out corrupt entries that can stop network tools and discovery from working correctly.
Step 4: Reset the IP stack.
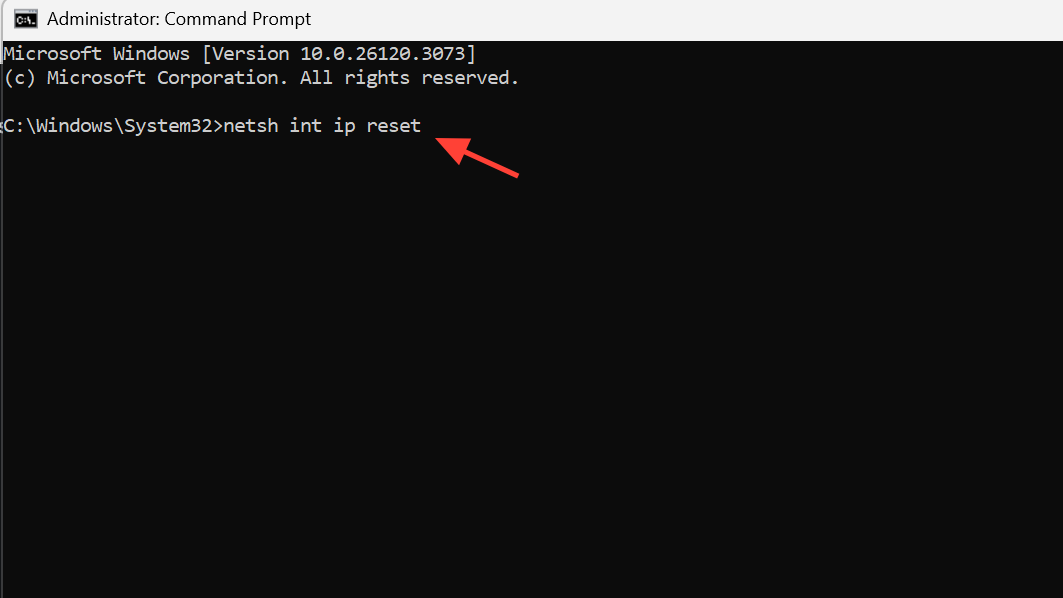
In the same window, run these commands one by one, pressing Enter after each line:
netsh int ip reset
ipconfig /release
ipconfig /renew
ipconfig /flushdns
This sequence reinstalls the IP stack, gets a fresh address from your router, and clears cached DNS entries. All of this removes stale network information that can interfere with opening networking components.
Step 5: Restart Windows.
Reboot the PC normally. After startup, test whether the Network and Sharing Center opens from the Control Panel or from any shortcut. If it opens, also confirm that network discovery messages have stopped.
Open Network and Sharing Center using alternative paths
Sometimes the Quick Access icon or a specific shortcut is broken while the underlying control panel still works. Opening it from multiple locations helps separate a shortcut problem from a deeper system issue.
Step 1: Try launching from Control Panel.
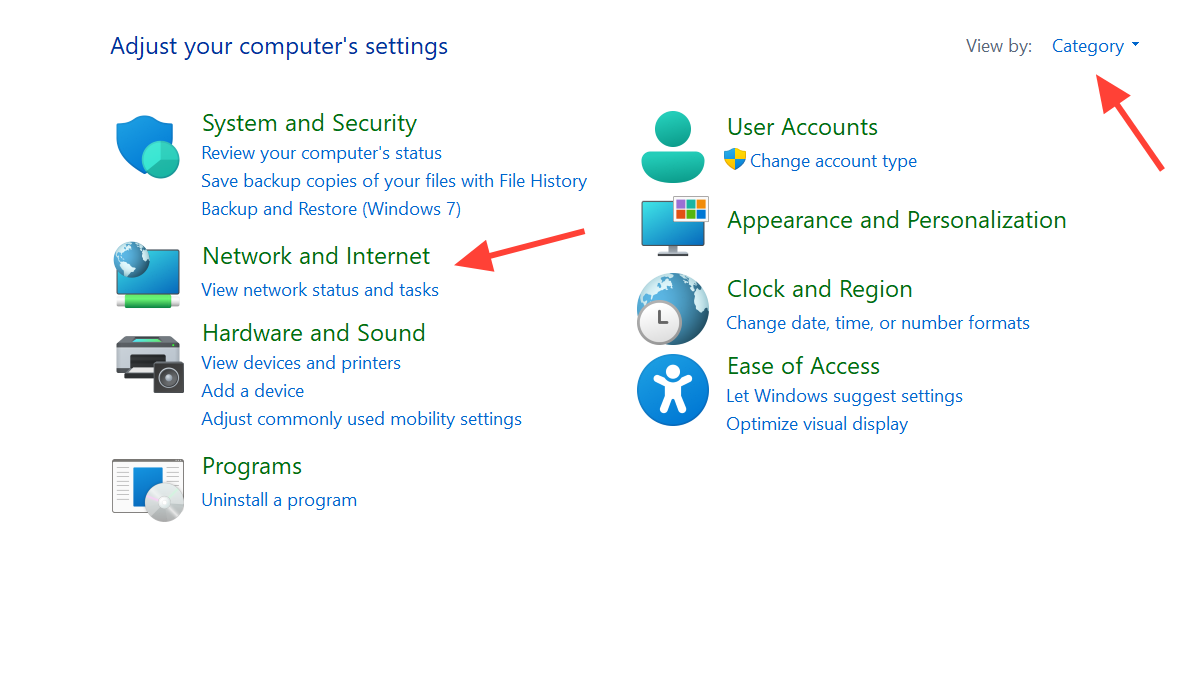
Press Windows + R, type control , and press Enter. In Control Panel, set View by: to Category, choose Network and Internet, then select Network and Sharing Center. If this path works, the previous icon you used is likely damaged; removing and recreating that shortcut is usually enough.
Step 2: Use the direct control panel command.
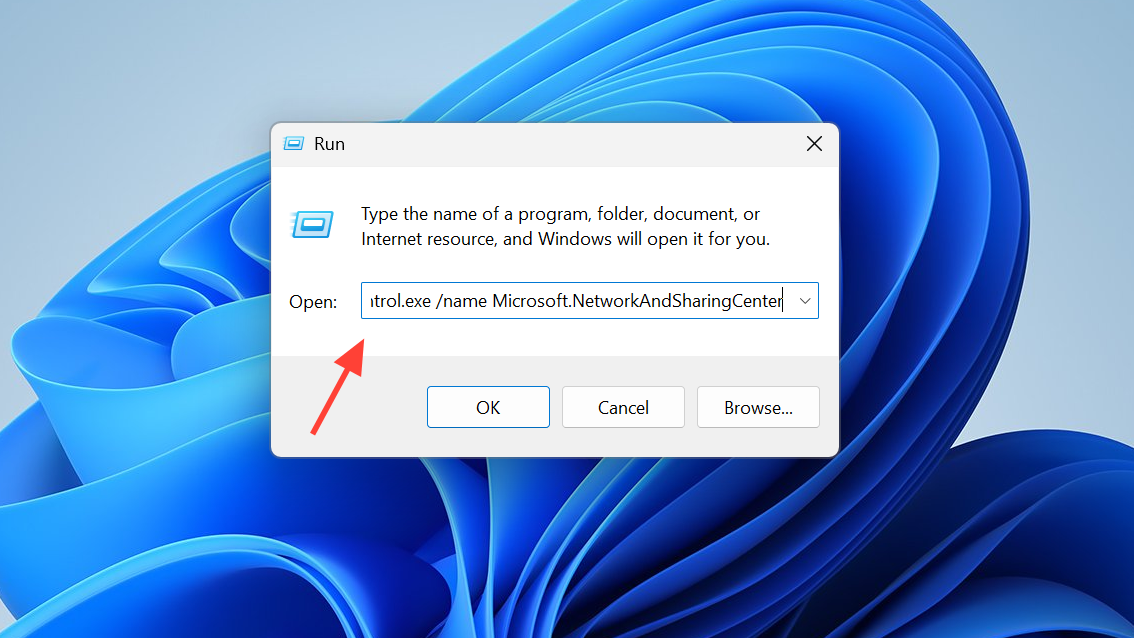
Press Windows + R, type:
control.exe /name Microsoft.NetworkAndSharingCenterThen press Enter. This runs the Network and Sharing Center module directly. If this works but other methods do not, pin this run command or create a new shortcut using this target.
Step 3: Try from Settings if Control Panel is unresponsive.
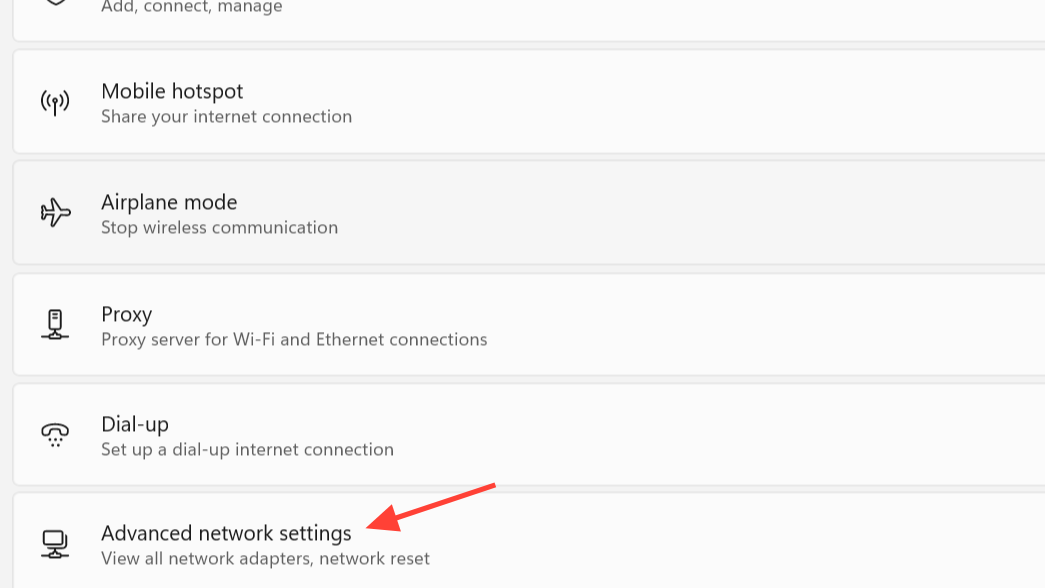
Press Windows + I to open Settings, select Network & internet, then scroll and choose Advanced network settings. When the Network and Sharing Center is working, there is usually a link from here to the classic panel; click it to test if it opens.
Start and configure required networking services
Network discovery, file sharing, and the Network and Sharing Center rely on several background services. If these are stopped or set to manual, the interface can freeze, fail to load devices, or refuse to open.
Step 1: Open the Services console.
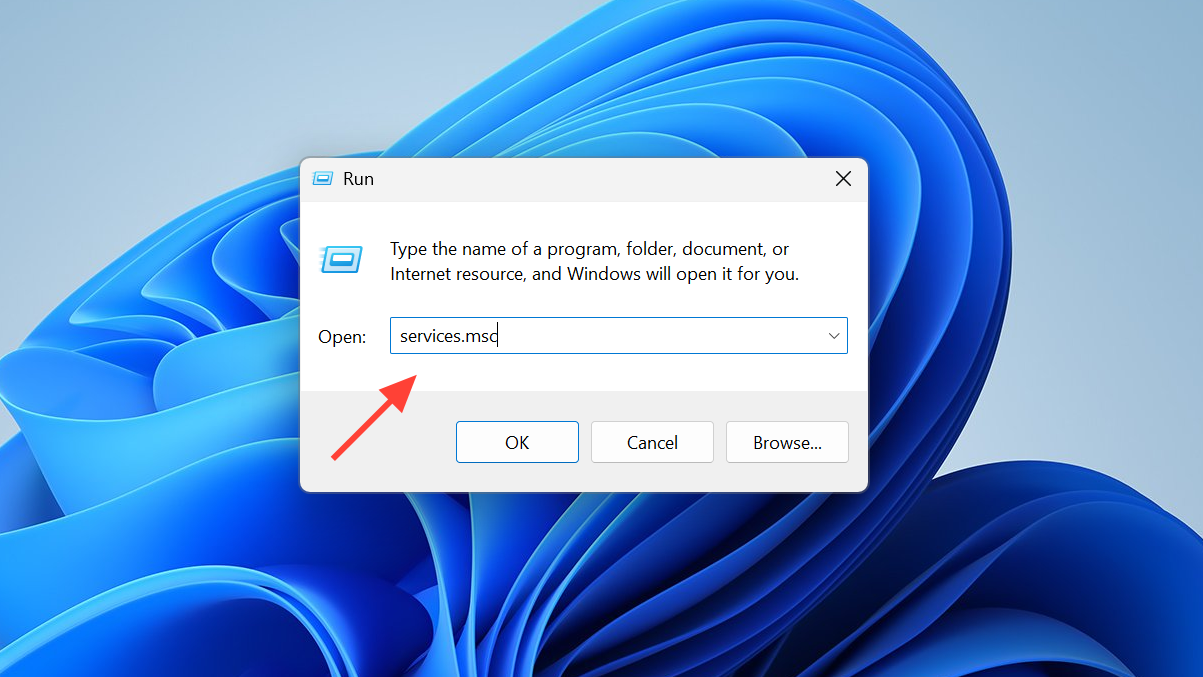
Press Windows + R, type services.msc, and press Enter. The Services window lists all background components running in Windows.
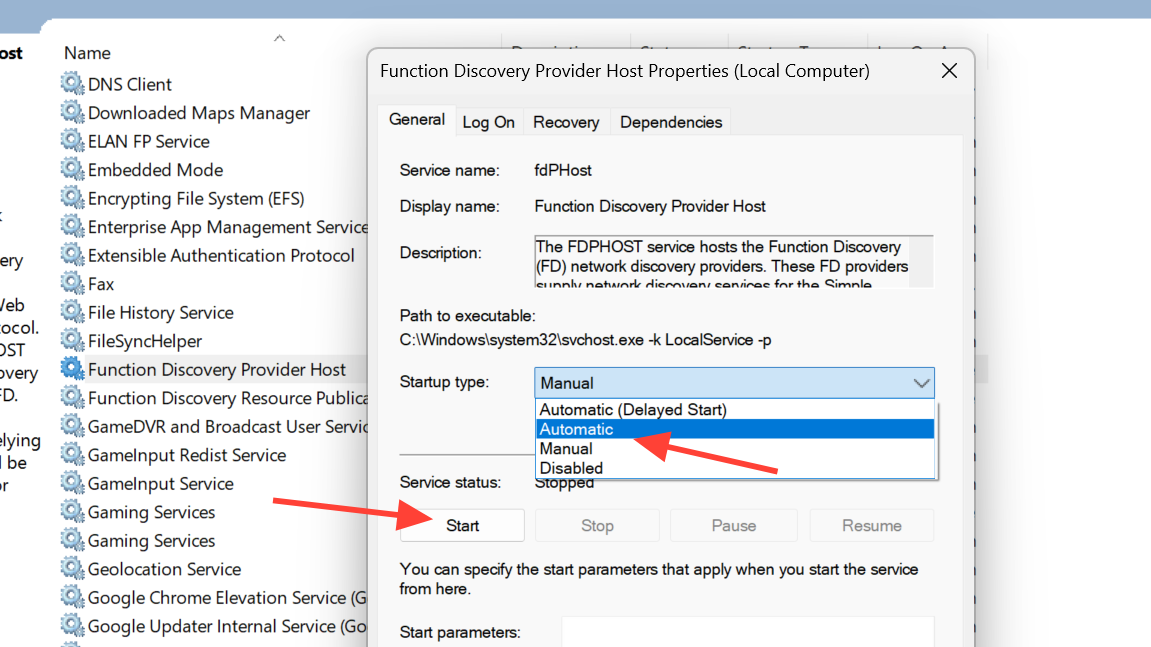
Step 2: Configure Function Discovery Provider Host.
Find Function Discovery Provider Host, double‑click it, set Startup type to Automatic, then click Start if the service is stopped. This service helps other devices be found on the network.
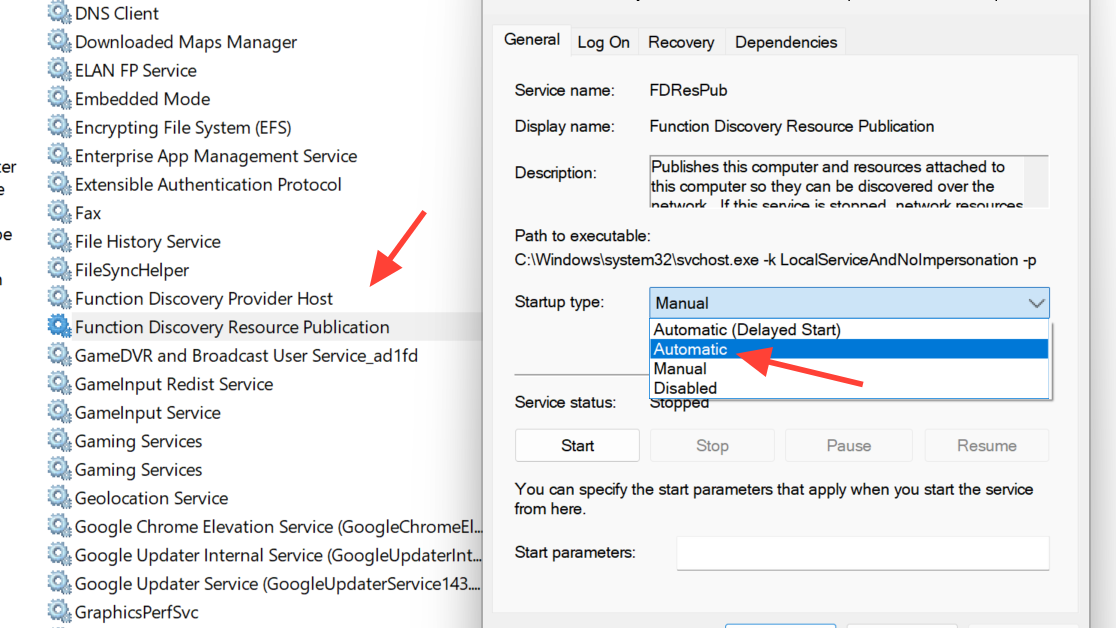
Step 3: Configure Function Discovery Resource Publication.
In the same list, open Function Discovery Resource Publication, set Startup type to Automatic, and start the service. This publishes your computer and its shares so other devices can see them.
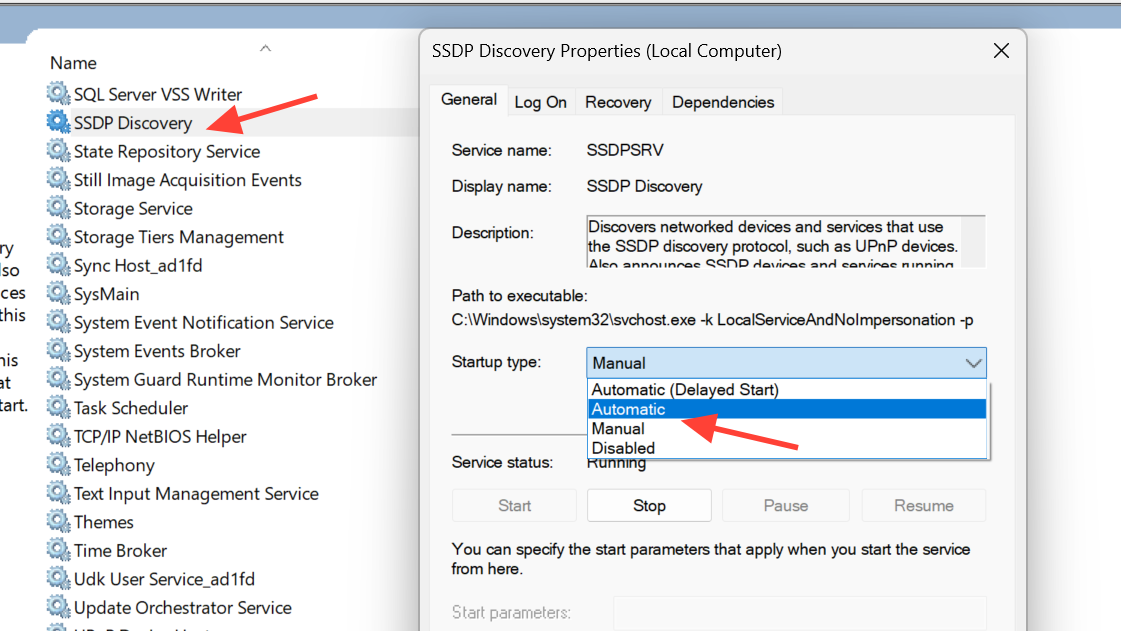
Step 4: Start SSDP Discovery.
Locate SSDP Discovery, open it, choose Automatic for Startup type, then start the service. It helps Windows find UPnP devices and is frequently used during network discovery.
Step 5: Start UPnP Device Host.
Open UPnP Device Host, set Startup type to Automatic, and start the service. While not strictly required for every network, missing UPnP services can cause device lists and discovery options to behave unpredictably.

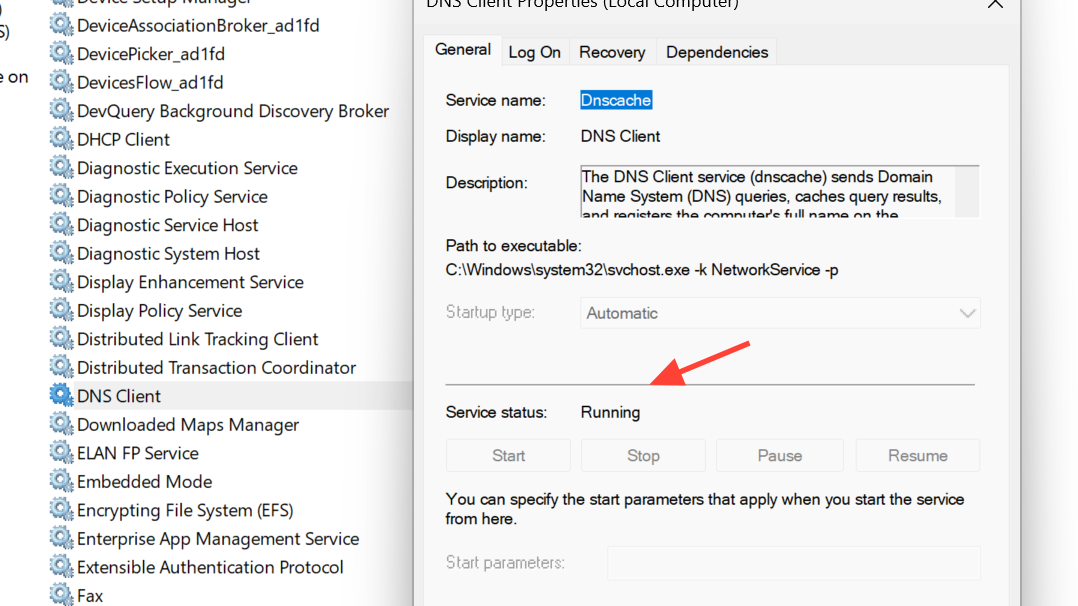
Step 6: Confirm DNS Client is running.
Scroll to DNS Client (also shown as Dnscache). Make sure its state is Running and that the startup type is not Disabled. This service resolves computer names on your network and helps the Network and Sharing Center show readable names instead of only IP addresses.
Step 7: Restart the PC and retest.
Close Services, restart Windows, and then try opening the Network and Sharing Center again. Also, check whether network discovery and file sharing now behave normally.
Turn on network discovery and file sharing in Windows 11
When the Network and Sharing Center opens, but network discovery remains off, file sharing and device visibility will still fail. Adjusting advanced sharing settings directly resolves most “network discovery is turned off” messages.
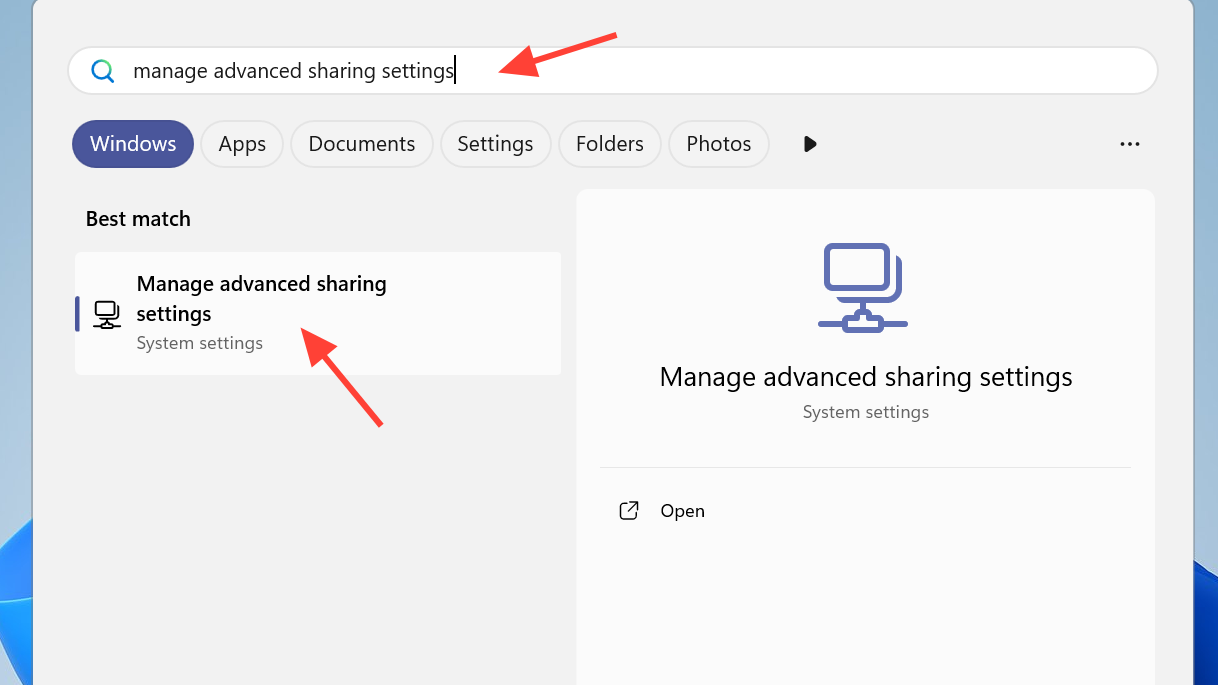
Step 1: Open Advanced sharing settings.
Press Windows + S, type Manage advanced sharing settings, and press Enter. This opens the sharing options that control discovery and file sharing on each network profile.
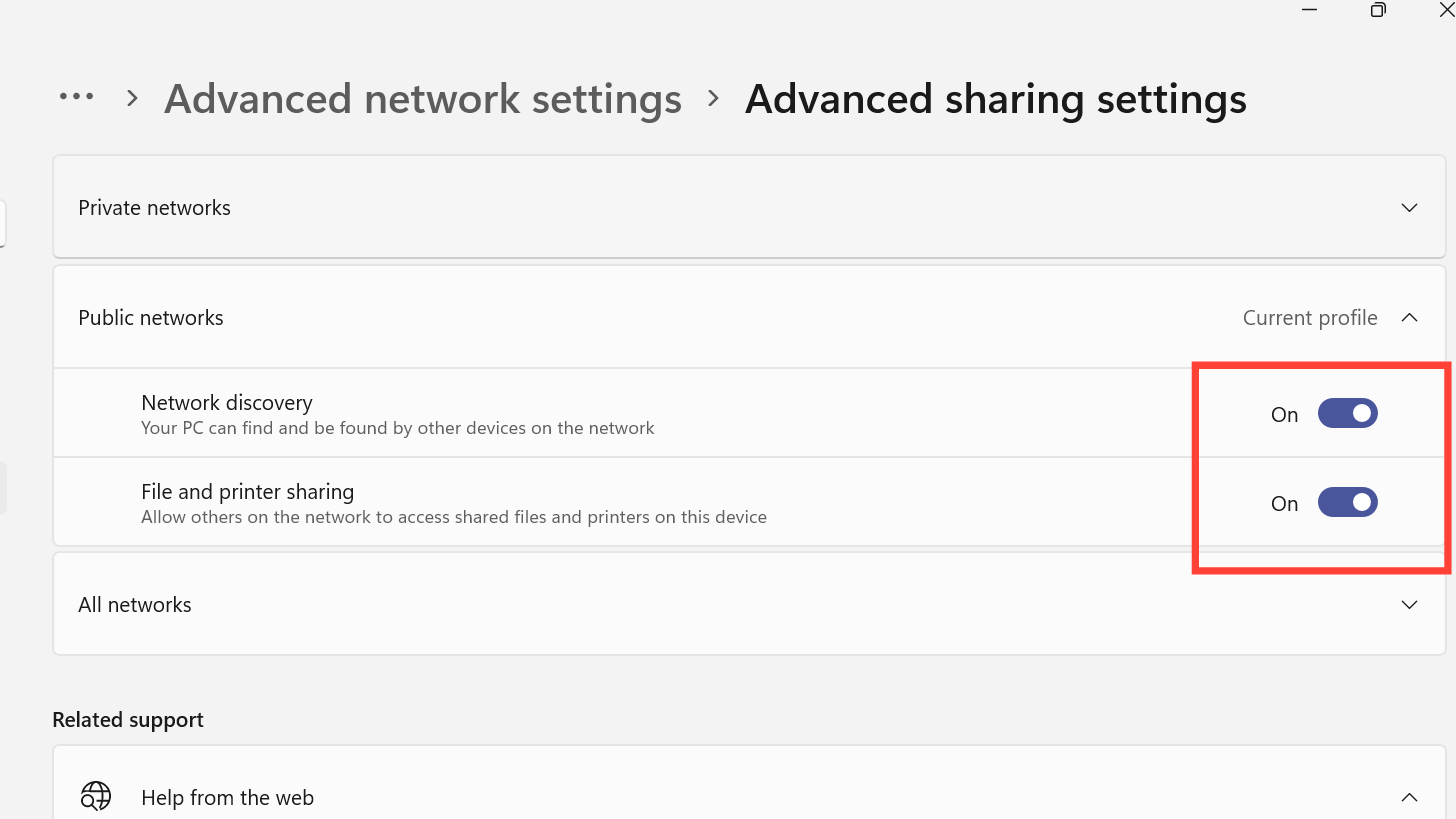
Step 2: Enable discovery and sharing on the Private profile.
Expand the Private section. Turn on Network discovery, turn on Automatic setup of network connected devices, and turn on File and printer sharing. These options allow your PC to see others and to share its own folders and printers on trusted home or office networks.
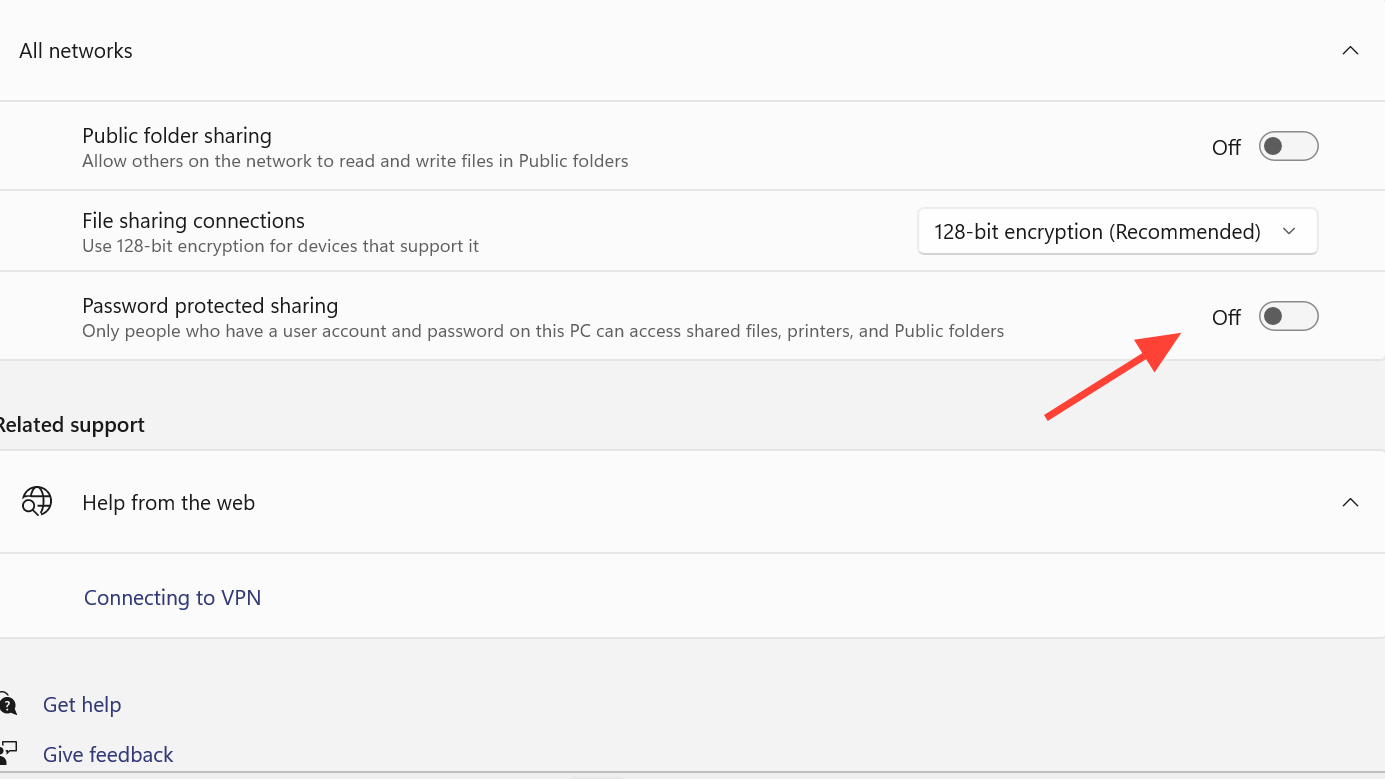
Step 3: Decide on password protection.
Expand All networks. If you prefer that anyone on the local network can open the shared folders without entering a username and password, turn off Password protected sharing. If you want stricter control, leave it on and be ready to enter account credentials when connecting from other devices.
Step 4: Save changes and verify.
Click Save changes. Open File Explorer, expand Network in the left panel, and confirm that your PC now appears and that other computers are visible. If the original warning about network discovery is gone, the settings are now active.
Check adapter settings and disable IPv6 if needed
Incorrect adapter properties can prevent network discovery from working correctly and can sometimes cause system components, such as Network and Sharing Center, to hang while loading.
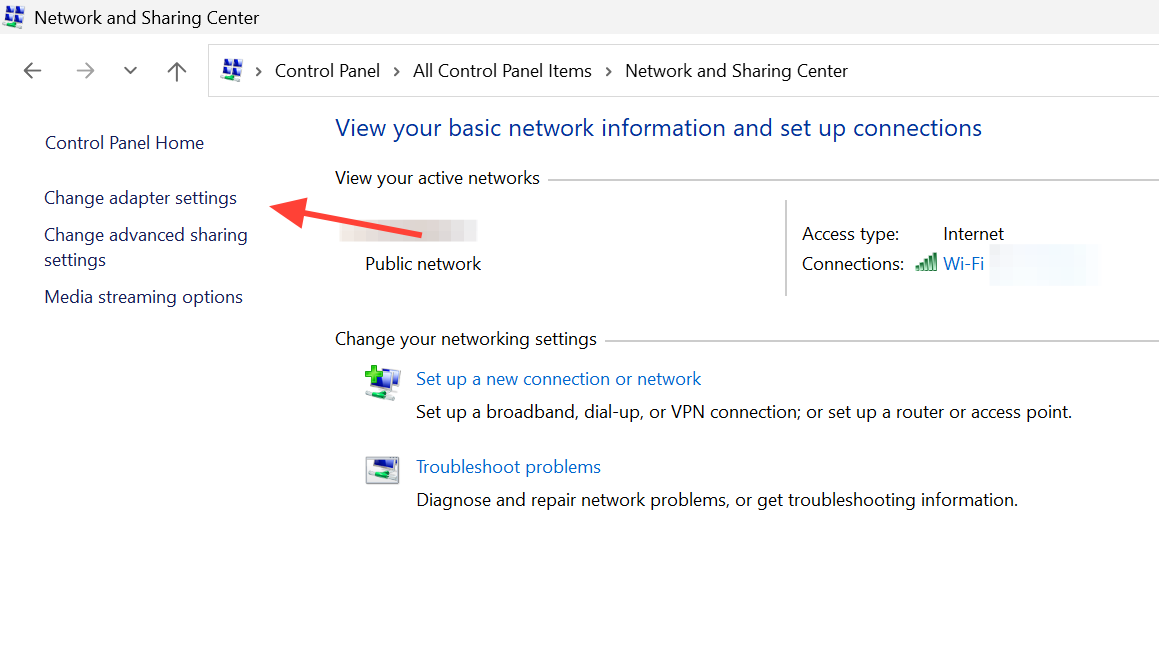
Step 1: Open adapter settings.
Go to Control Panel, select Network and Internet, then choose Network and Sharing Center. On the left, click Change adapter settings. This shows each network adapter on your system, such as Wi‑Fi or Ethernet.
Step 2: Verify file and printer sharing is enabled.
Right‑click your active network connection (Wi‑Fi or Ethernet) and choose Properties. In the list in the middle, make sure File and Printer Sharing for Microsoft Networks is checked. If it is not, tick it and click OK so that the PC can share folders and printers.
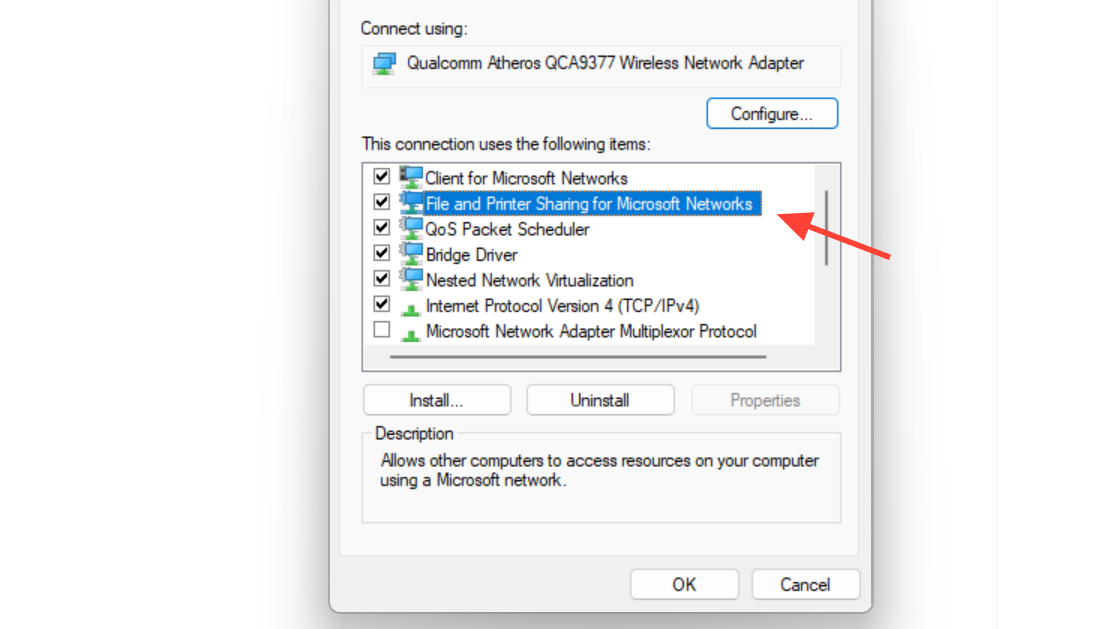
Step 3: Optionally turn off IPv6.
In the same properties window, uncheck Internet Protocol Version 6 (TCP/IPv6) and click OK. Some small networks and older routers work more reliably when only IPv4 is active. After this change, restart the PC and test network discovery and the Network and Sharing Center again.
Update or reinstall network drivers
Faulty or outdated network drivers can cause issues such as missing devices in the Network and Sharing Center, random disconnects, or panels that never finish loading.
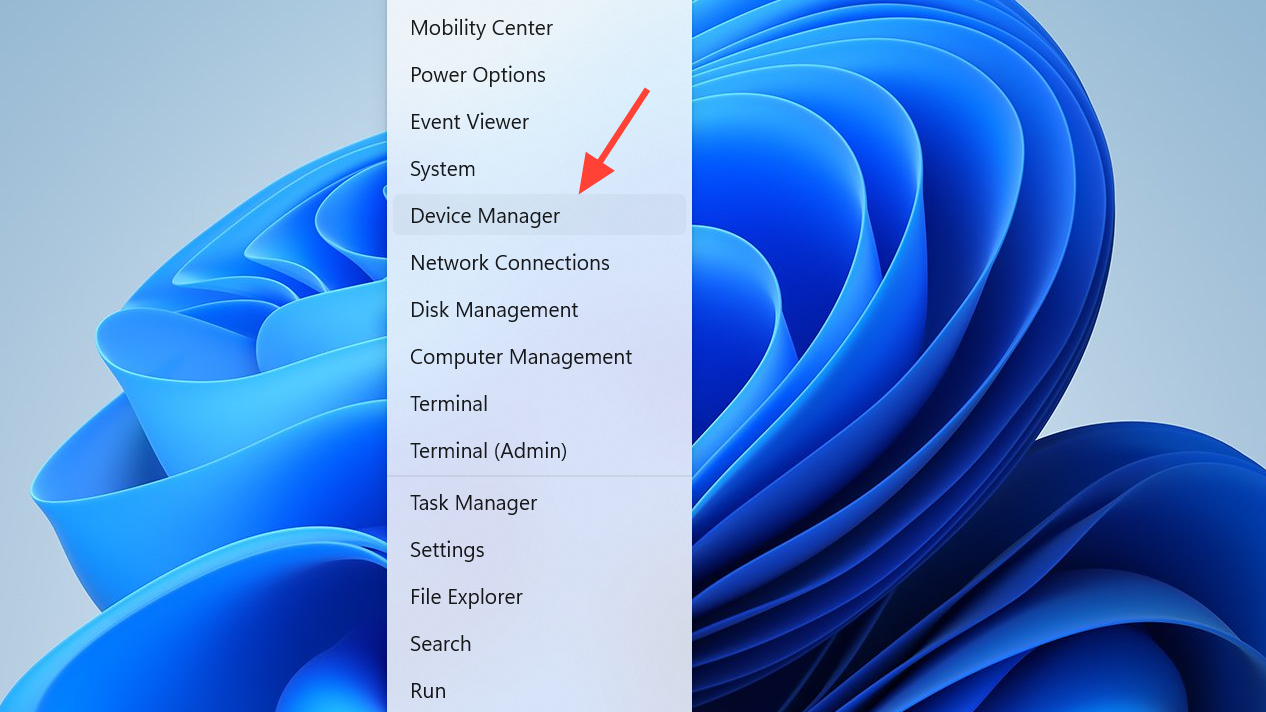
Step 1: Open Device Manager.
Press Windows + X and select Device Manager. This tool shows all hardware devices installed on your system.
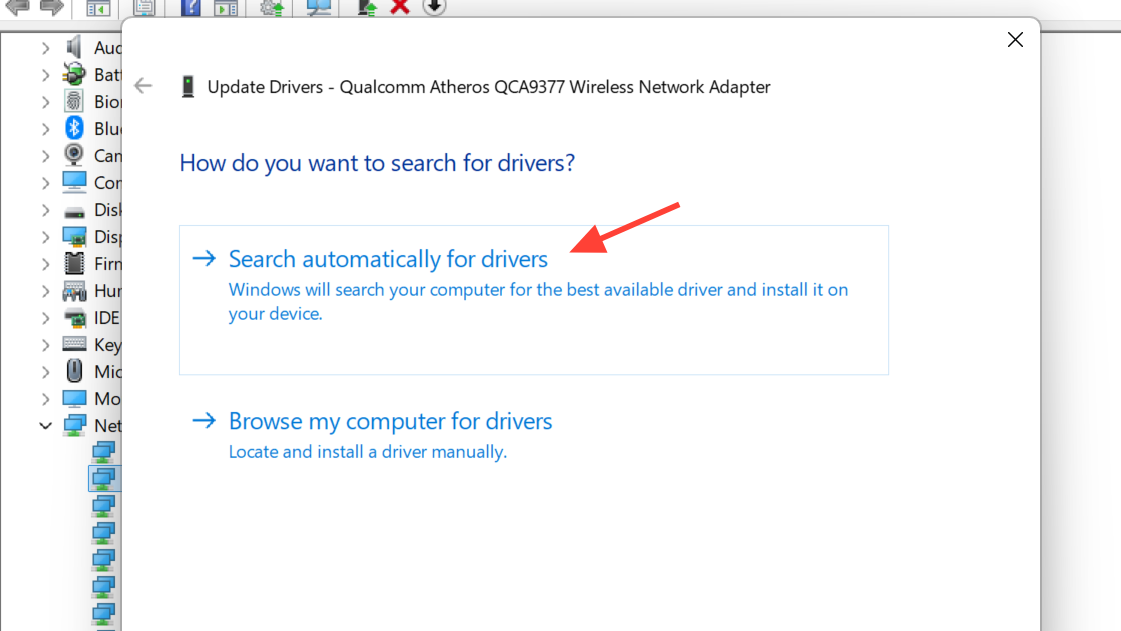
Step 2: Update the active network adapter.
Expand Network adapters. Right‑click your main adapter (Wi‑Fi or Ethernet) and choose Update driver. Select Search automatically for drivers and follow the prompts. If an update is installed, restart Windows and check whether the Network and Sharing Center behaves more reliably.
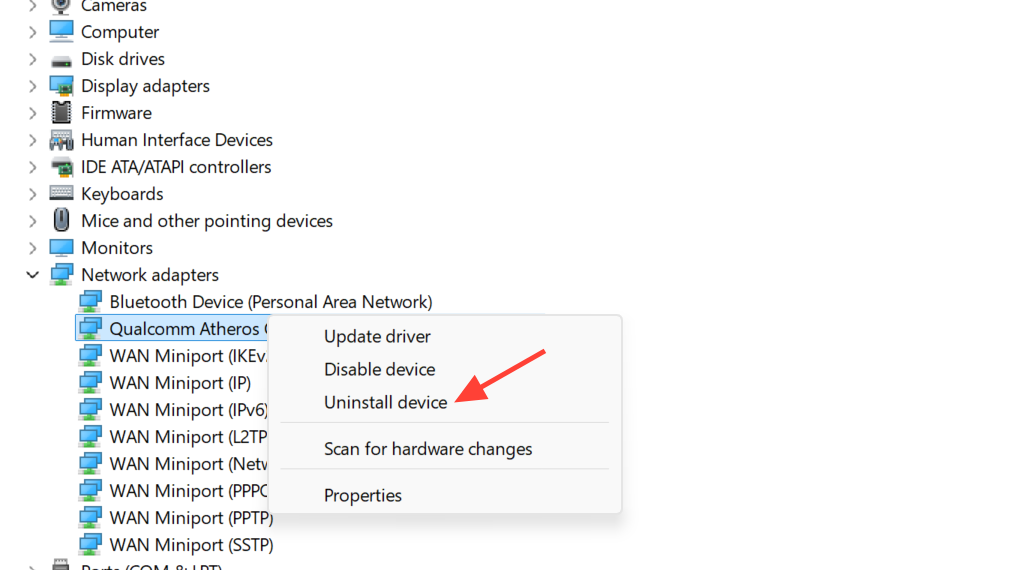
Step 3: Reinstall the adapter if updating does not help.
Right‑click the same adapter again and select Uninstall device. Confirm the removal. Then restart the PC; Windows will reinstall the adapter automatically with a fresh configuration, which can clear persistent driver‑level issues that affect networking tools.
Reset Windows network configuration as a last resort
When the Network and Sharing Center still does not open after repairs and service checks, a full network reset can clear misconfigurations across all adapters and profiles at once.
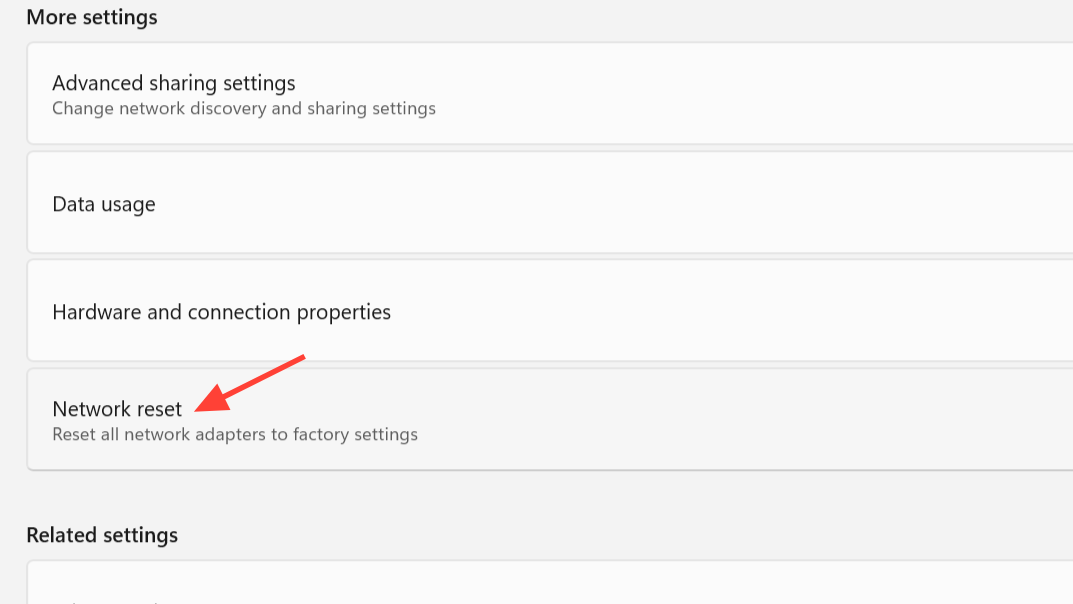
Step 1: Start the network reset.
Open Settings with Windows + I, go to Network & internet, then open Advanced network settings. Scroll down and choose the option that resets network adapters and settings (labelled Network reset in many builds). Read the warning, then start the reset.
Step 2: Restart and rejoin your network.
Windows will reboot and reinstall all network adapters. After logging in, reconnect to your Wi‑Fi or Ethernet, re‑enter Wi‑Fi passwords if needed, and then try opening the Network and Sharing Center again. With all previous network profiles cleared, the panel and discovery functions usually return to a clean, working state.
Once the Network and Sharing Center opens reliably and network discovery is enabled, keep your drivers updated and avoid unnecessary “tweaks” to networking services so that file and printer sharing continue to work smoothly.