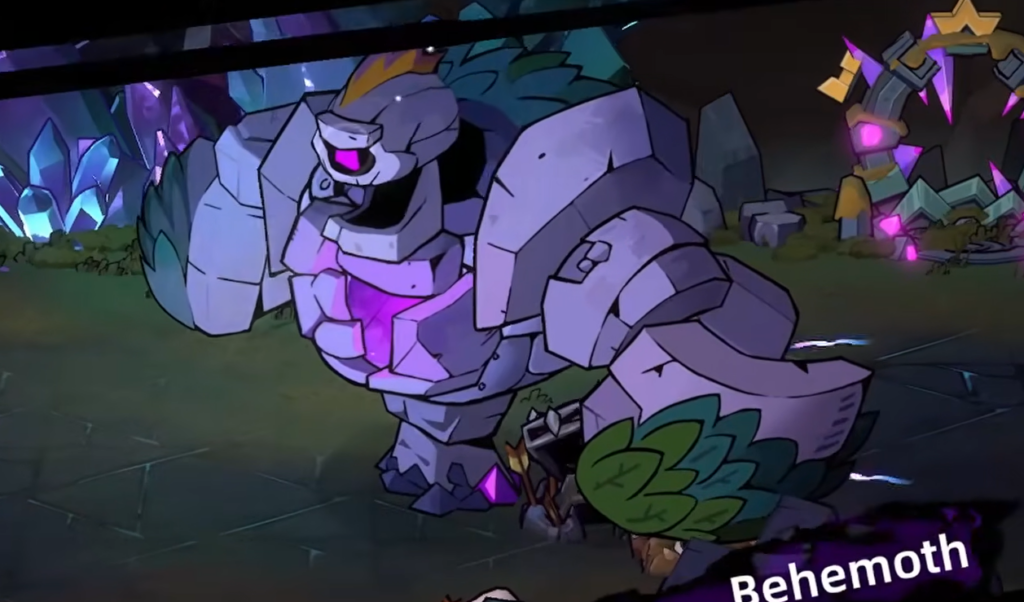
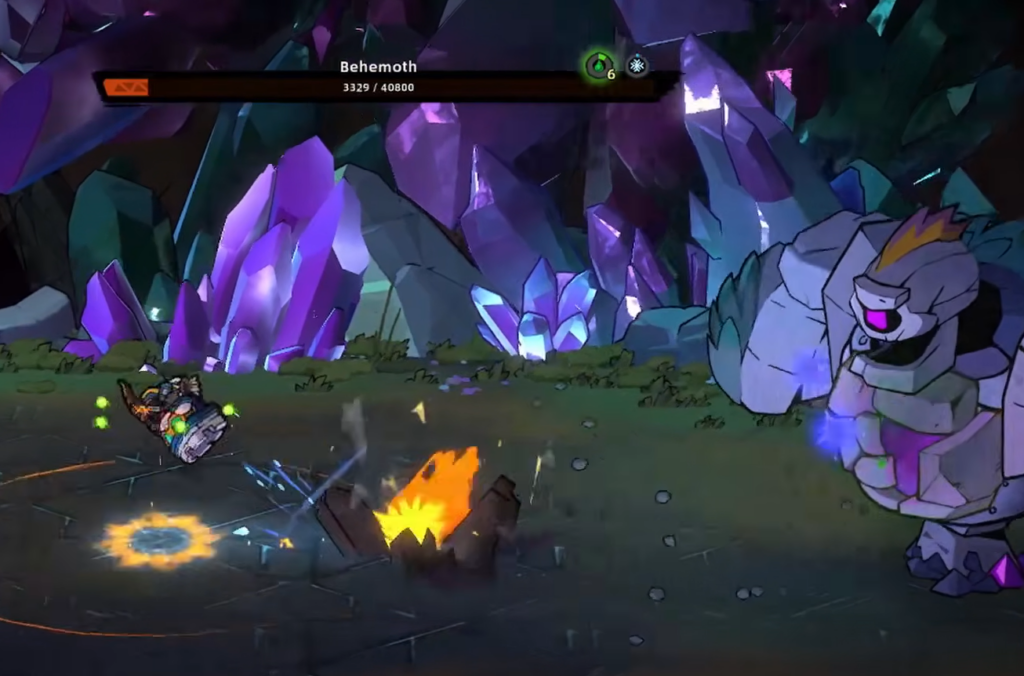
The Behemoth guards the Crystal Mountain region in Lost Castle 2, and it earns its reputation as one of the harder fights in the run thanks to attacks that blanket the whole screen. This sentient pile of rocks stays rooted in place the entire battle, so the fight is less about chasing it down and more about reading patterns, breaking its shield, and punishing the openings that follow.
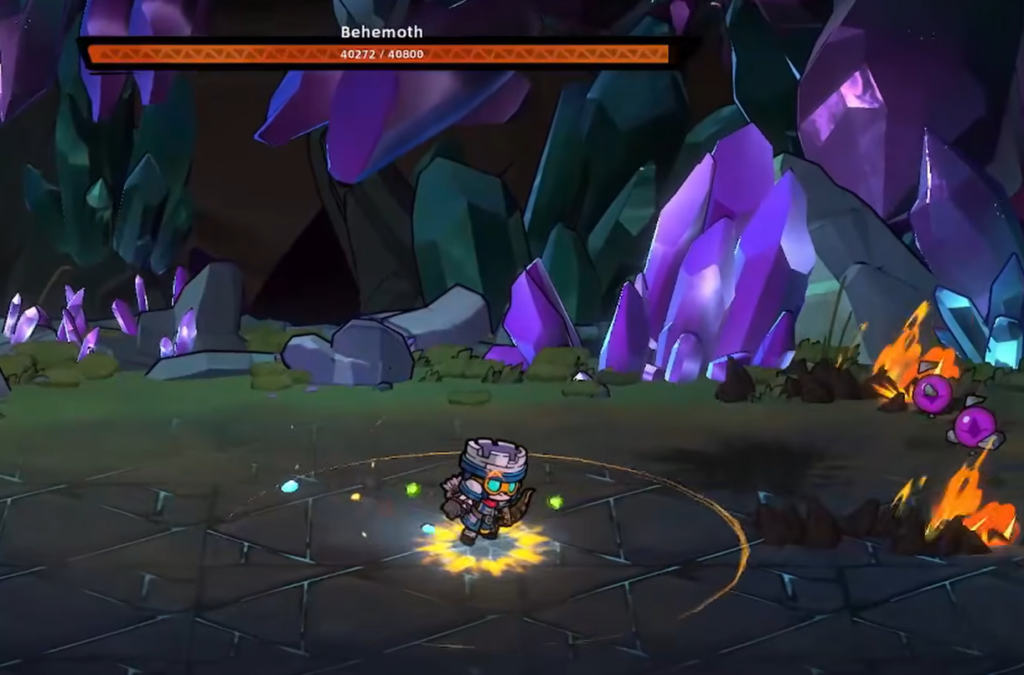
Quick answer: Shatter the rocks covering the Behemoth’s stomach to stun it, then attack the exposed purple orb in its chest. Repeat through both phases, dodging the falling boulders and screen-wide projectiles until the shield breaks long enough to finish it.
Phase one: Break the rock shield
Your hits barely register at the start because rocks cover the Behemoth’s weak point on its stomach. The entire goal of this phase is to smash that shield, which both stuns the boss and opens a window to deal heavy damage before it recovers. Like the Mutated Priest, the Behemoth never moves during the fight.
Its core attack is a fist slam in front of it that drops four large boulders from the ceiling. The impact points rotate through a Y shape, a triangle, and a sideways T, each marked by big pink circles on the floor. These hits are brutal, so step out of any circle the instant it appears.
The Behemoth also spawns pink orbs that float around the arena. You can destroy them by attacking, or pick them up and throw them at the boss for extra damage. It sometimes summons spiked blue crystals alongside the boulder attack, and those work the same way. Grab them and hurl them back.
When to attack based on your weapon
| Weapon type | Best damage window |
|---|---|
| Close-range | Strike right after the fist slam finishes. The final hit is signaled when it raises both hands overhead. Once it hits the ground, you get a few seconds to attack before the barrage repeats. |
| Ranged (bow, musket, abilities) | There is enough downtime between boulder sets to attack almost continuously. Since the boss never moves, spamming arrows or musket rounds is safe and highly effective for breaking the shield. |
When the shield finally breaks, a large purple orb drops in the center of the arena. Grab it immediately, because it turns into an enemy if you leave it too long. Throw it at the Behemoth to start your damage phase, then rush in and hammer the exposed orb on its chest.
Depending on your build, a single break may be enough to push the boss past the 50 percent health threshold and into phase two. If it survives, just cycle through the same steps until you knock it down to that point.
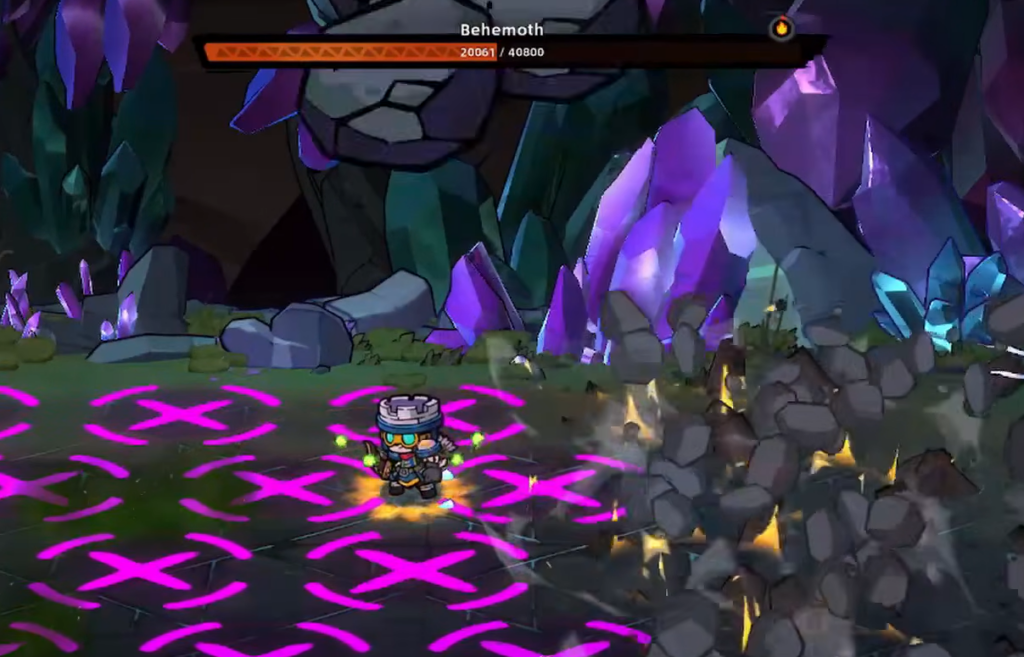
Phase two: Survive the screen-wide barrage
Phase two opens by blasting you to the far left side of the arena, then the Behemoth begins firing screen-wide projectiles while you work to close the gap. It always starts with three seismic waves that travel across the middle of the arena from right to left in a triangle pattern.
After that, projectiles flood the entire floor. Stop trying to attack and focus completely on dodging. The key is watching where and when the pink circles appear, because they detonate in the order they were summoned.
If the top of the arena fills with circles first and the bottom second, the lower circles are temporarily safe to stand on since they hit slightly later. You will often need to plant yourself on one circle to avoid an incoming rock, then immediately run off it a moment later to dodge the next one. Look for gaps between the circles as well, since those clear spots also work as safe zones.
Expect roughly five waves of these attacks. Ignore any orbs or crystals that fall here, because the boss’s own attacks will destroy them before you can pick them up. Once the Behemoth runs out of steam, it returns to the phase one boulder pattern, which is your real opportunity to break the shield again.
When the shield breaks, focus your hits on the giant purple orb in its chest just like before. If you do not finish the boss during that window, it blows you back to the left side and repeats the phase two projectile assault. Play defensively until it calms down, break the shield one more time, and you will have enough room to kill it.
Key reminders for the fight
- The Behemoth is stationary, so ranged weapons and abilities are the safest, most consistent way to break its shield.
- Damage only sticks once the rock shield is shattered and the chest orb is exposed.
- Always clear the pink circles the moment they appear, and grab the central purple orb fast so it does not spawn an enemy.
- During phase two projectile waves, prioritize survival over damage and use the delayed circles and gaps as footing.
The Behemoth comes down to discipline more than raw damage. Keep breaking the shield, commit fully to the chest orb during each stun, and treat the screen-wide barrages as pure dodging sections. Stick to that rhythm and the Crystal Mountain’s guardian falls without sending you back to camp.