
In Windows 11, File Explorer's "Details" view provides information about your files in columns. You can change which columns are displayed for a single folder or apply your preferred layout to all folders of a particular type, such as "Pictures" or "Documents." This customization is managed directly within File Explorer's interface.
Customize Columns for a Specific Folder
This method allows you to adjust the columns for an individual folder without affecting others. This is ideal for project folders or directories that require unique information to be visible at a glance.
Step 1: Open File Explorer by pressing Win + E and navigate to the folder you wish to modify. In the command bar at the top, click View and ensure the layout is set to Details Pane. This is the only view that displays columns.

Step 2: Position your cursor over any existing column header, such as Name, Date modified, or Type, and right-click. This action will open a context menu with a list of common columns.
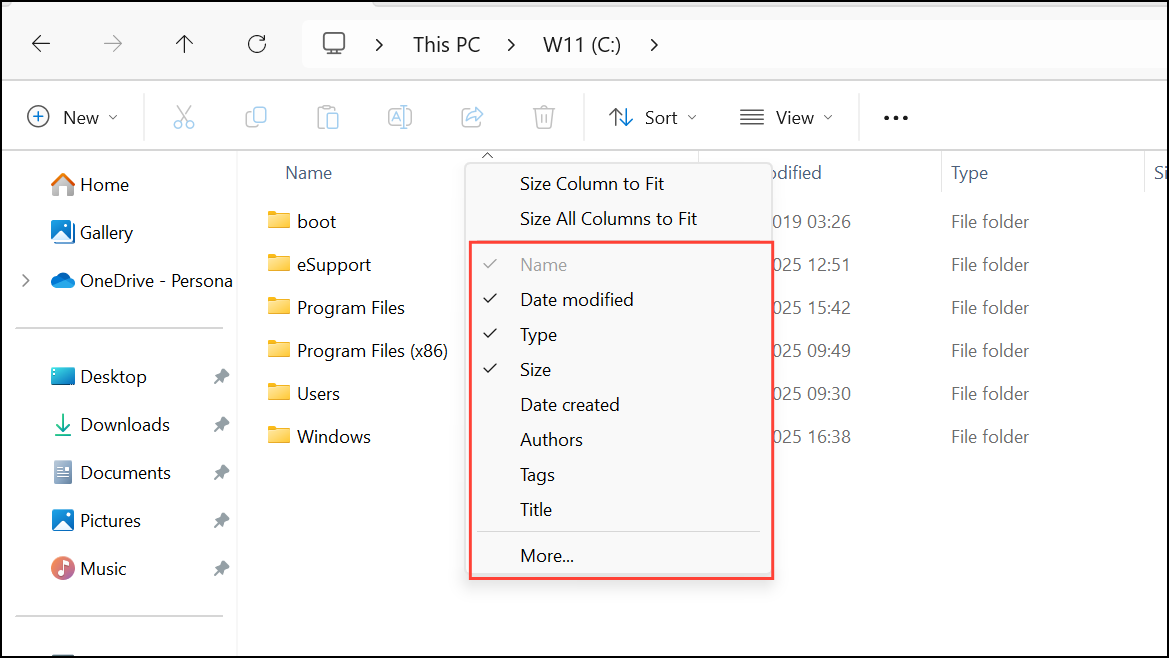
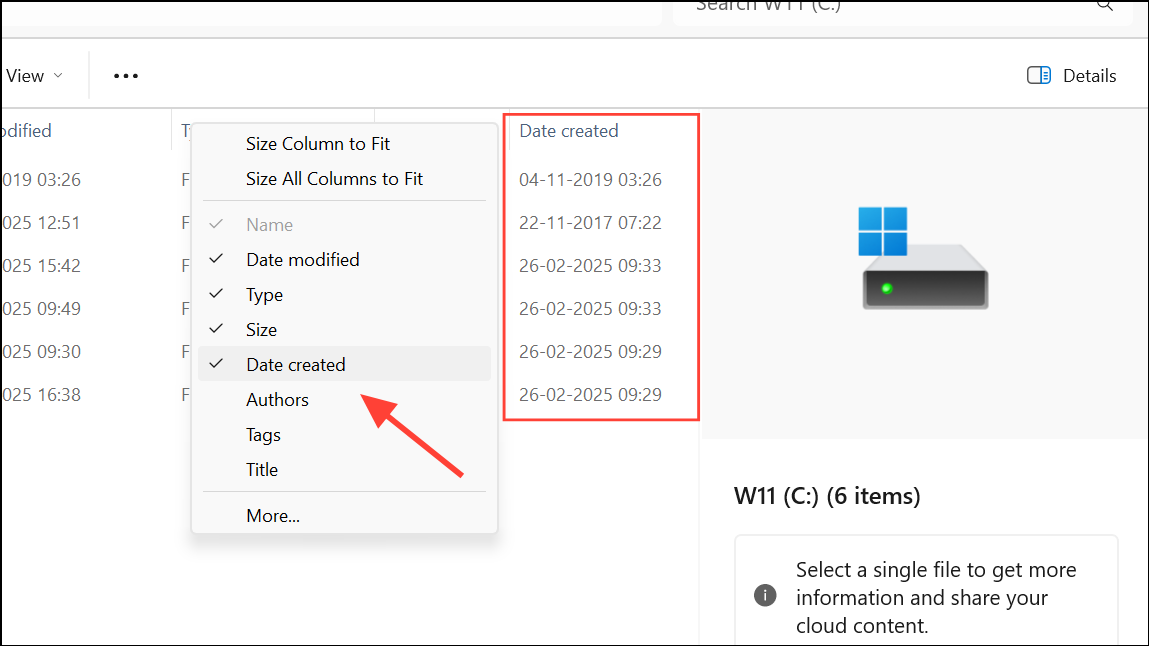
Step 3: In the context menu, select or deselect columns by clicking their names. A checkmark next to a name indicates that the column is currently visible. Clicking a checked item will hide it, while clicking an unchecked item will add it to the view.
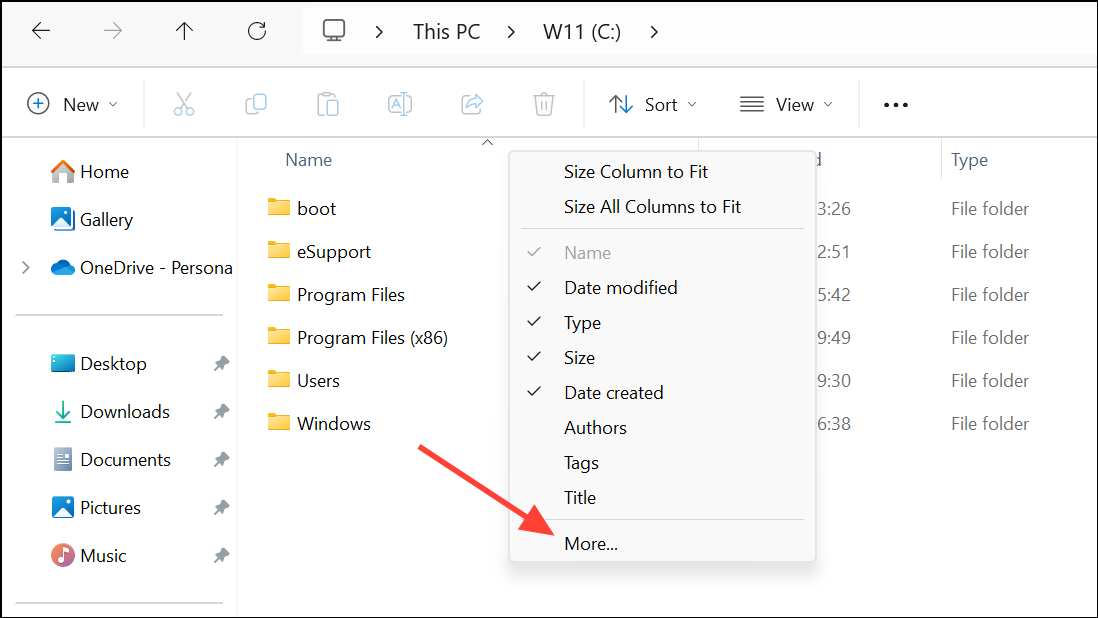
Step 4: If the column you need is not in the initial list, click More... at the bottom of the context menu. This will open the "Choose Details" window.
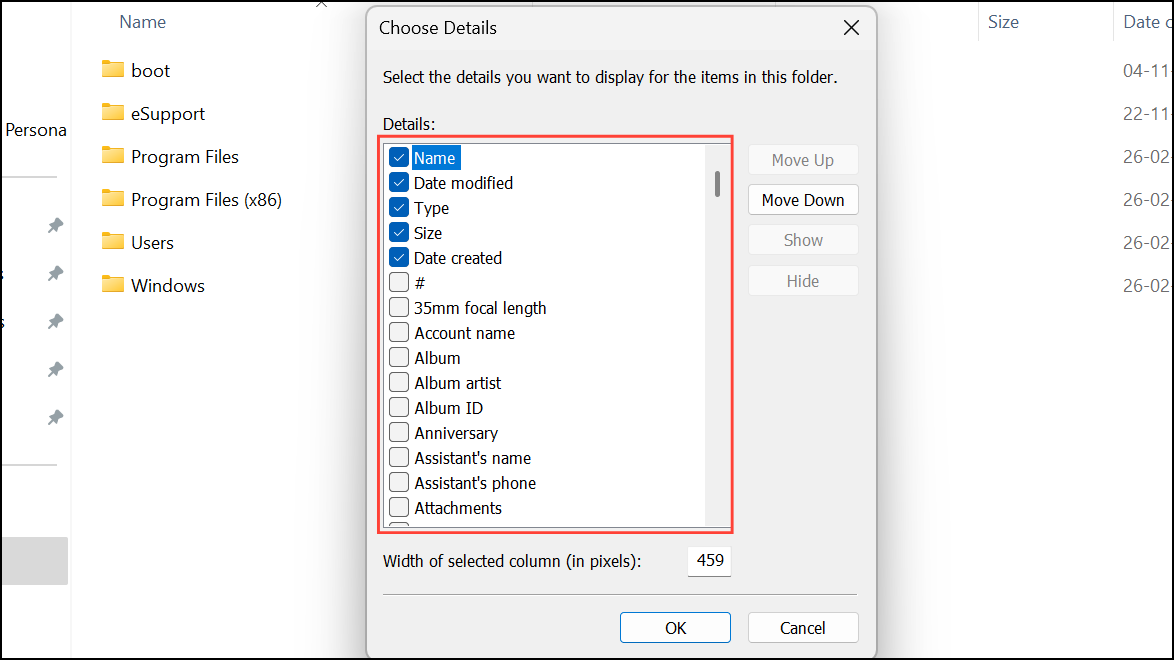
Step 5: In the "Choose Details" window, you can access a comprehensive list of all available columns. Scroll through the list and check the boxes for columns you want to add and uncheck the boxes for those you want to remove. You can also reorder columns by selecting a column name and using the Move Up and Move Down buttons. Click OK to save your changes.
The available columns will vary depending on the folder's optimization template. For instance, a folder optimized for "Pictures" will offer columns like "Date taken" and "Dimensions," which are not relevant for a "Documents" folder.
Apply Column Settings to All Folders of the Same Type
If you want to set a new default column layout for all folders of a certain kind, you can apply your changes system-wide. Windows categorizes folders into five main types: General Items, Documents, Pictures, Music, and Videos. This process applies a view to all folders belonging to the same category as the one you are customizing.
Step 1: First, select a representative folder (e.g., a folder inside your "Pictures" library) and customize its columns using the steps described in the previous method. Arrange the columns exactly as you want them to appear by default for all similar folders.
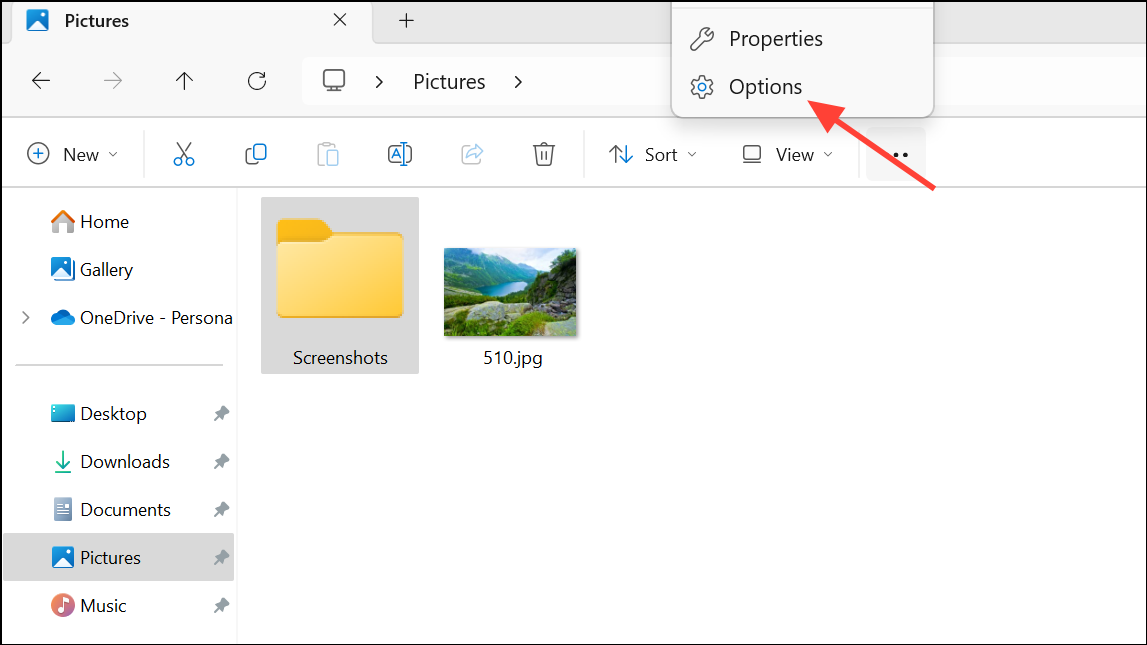
Step 2: Once the folder view is set to your preference, click the three-dot menu icon (...) in the File Explorer command bar and select Options from the dropdown menu.
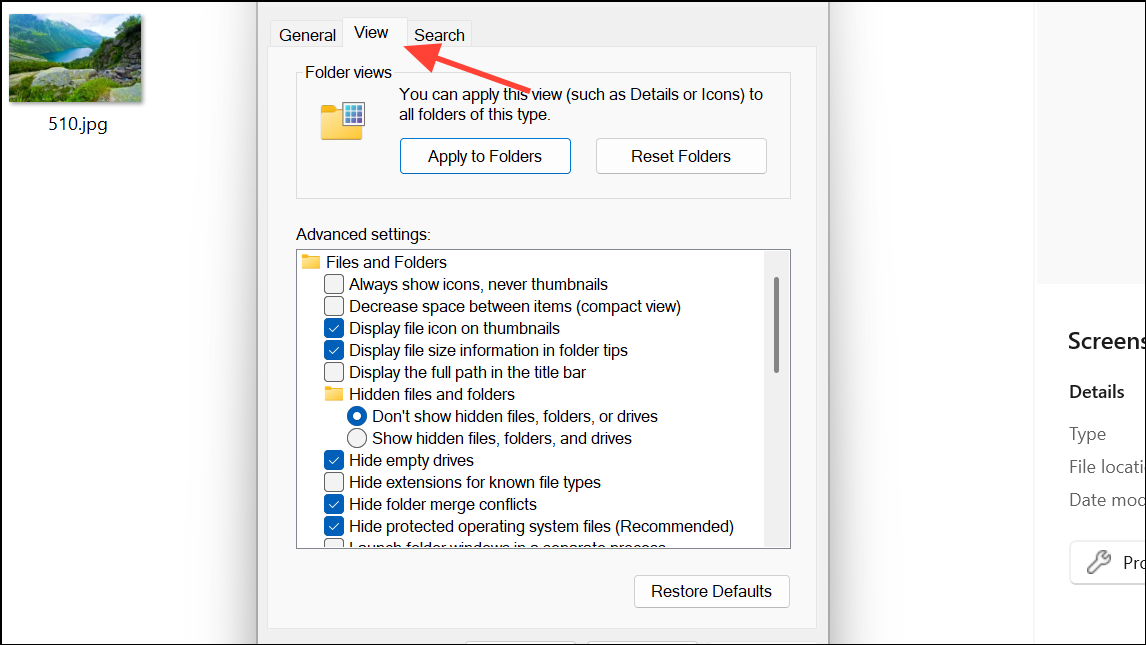
Step 3: In the "Folder Options" window that appears, navigate to the View tab. Here, you will find options related to how folders are displayed.
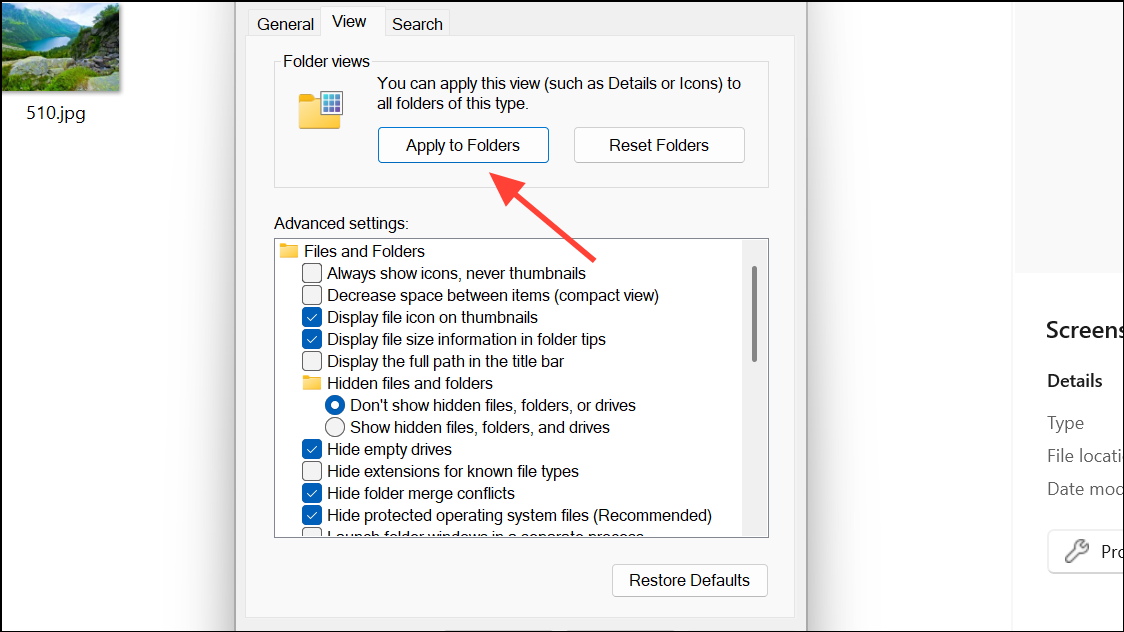
Step 4: Click the Apply to Folders button. A confirmation dialog will pop up, asking if you want to make all folders of that type match the current folder's view settings. Click Yes to confirm.
Step 5: To create a consistent experience across all folder types, you must repeat this process for each category. For example, after setting the view for "Pictures," open a folder in "Documents," customize its columns, and use Apply to Folders again. Do the same for "Music," "Videos," and a "General Items" folder (like your C: drive) to cover all bases.
These methods give you full control over the information displayed in File Explorer, streamlining file management for specific tasks or across your entire operating system.