
Sniping in Battlefield 6 lives and dies on zeroing. Bullet drop over distance means a center‑mass hold won’t land unless your scope is calibrated to the range you’re shooting. The Range Finder attachment streamlines that calibration so you can set the correct distance in a second and take the shot with confidence.
Unlock and equip the Range Finder (attachment details)
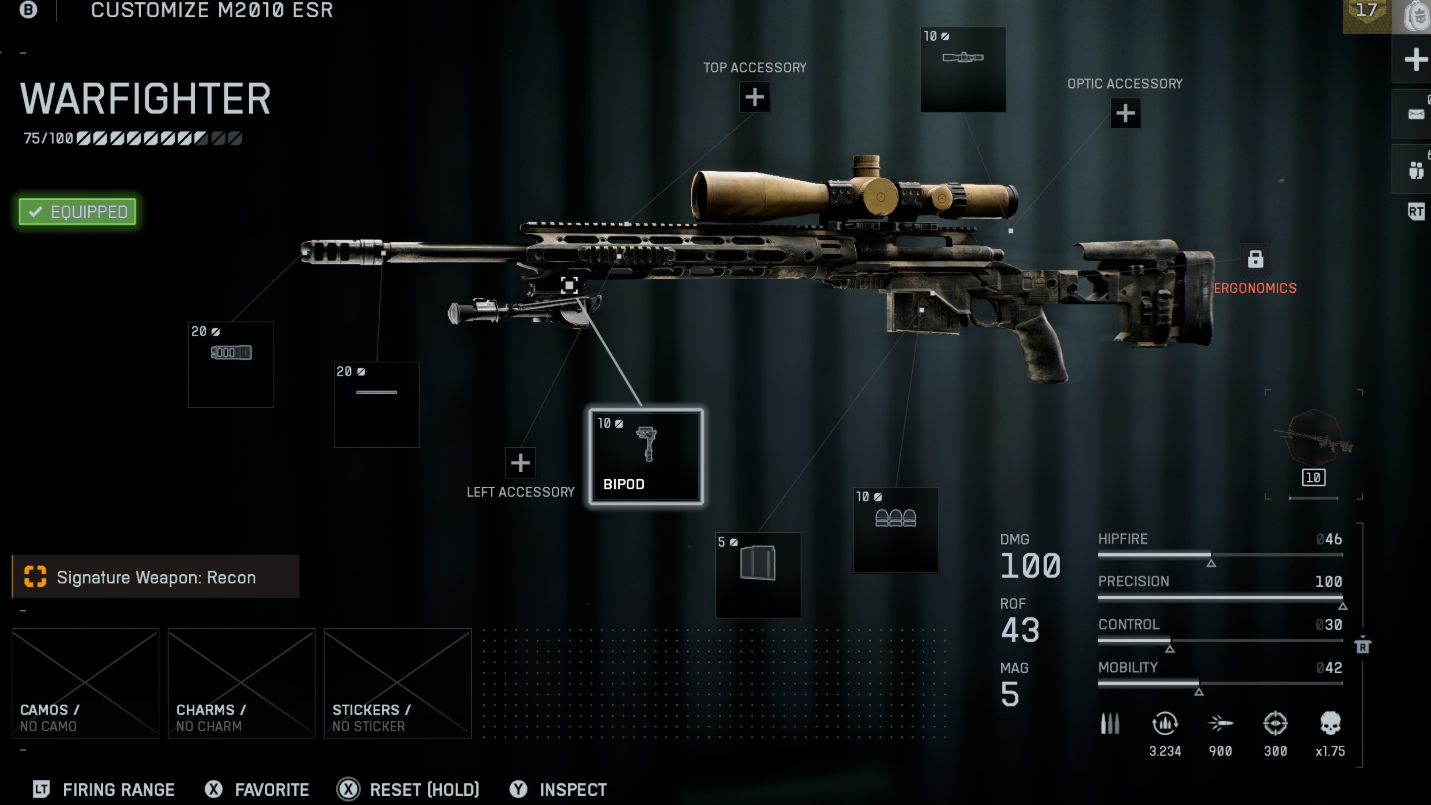
The Range Finder is a sniper rifle attachment that becomes available on the M2010 ESR once you reach Mastery Rank 4 for that weapon. It installs in the Right Accessory slot and costs 10 Attachment Points. Equip it from the weapon customization menu before a match.
How to use the Range Finder (PC and console)
With the Range Finder equipped and a magnified scope on your rifle, aim at your target and hold the zeroing button. The game will calibrate your scope to the distance you’re aiming at, compensating for bullet drop at that range.
| Action | PC | Xbox/PS5 | What you’ll see |
|---|---|---|---|
| Zero to the aimed distance | Hold B |
Hold D‑Pad Down |
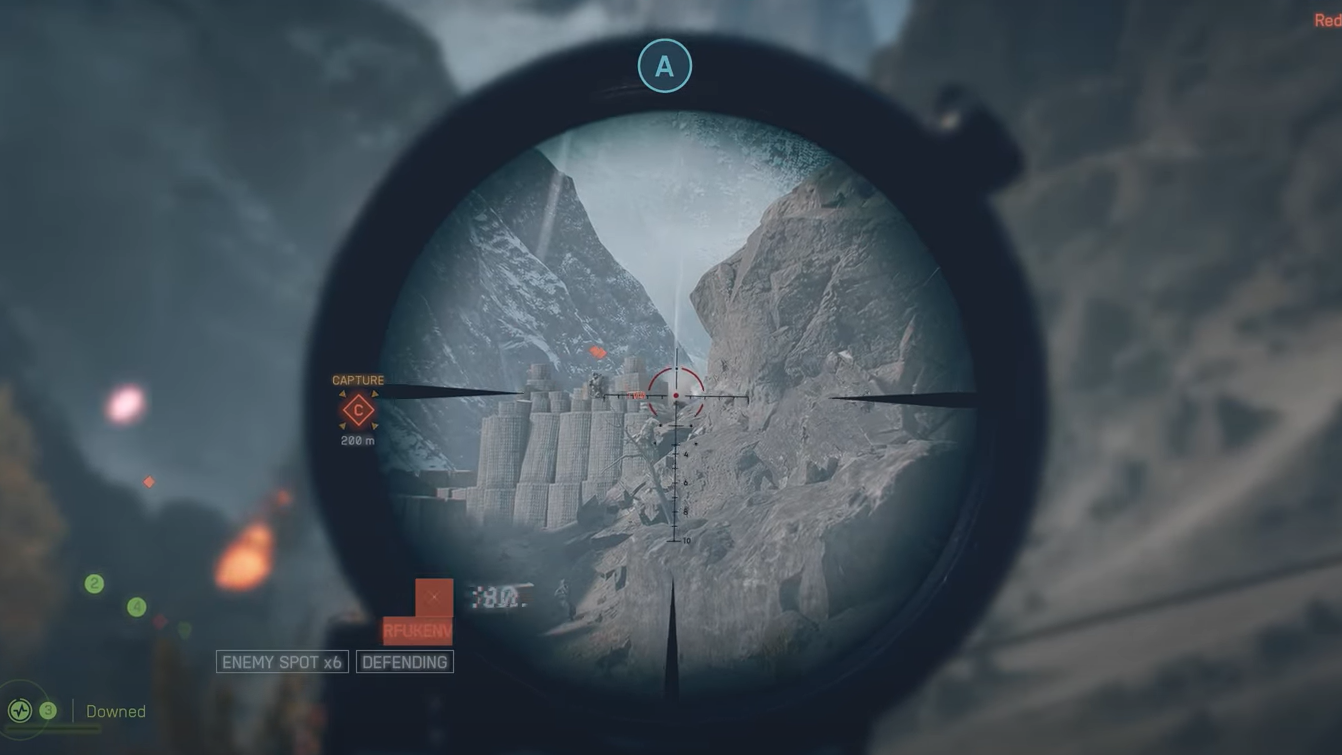
Current zeroing value appears in the bottom‑right HUD above your ammo count |
Important limits and behavior:
- Snipers can’t zero below 100 meters. Anything closer behaves like a 100m zero.
- The on‑screen zeroing readout is your source of truth. Re‑check it whenever you relocate or switch targets.
If your zeroing doesn’t match the shot distance, expect misses below or above the crosshair due to gravity. Calibrating before you fire aligns the point‑of‑aim with the point‑of‑impact at the set range.
Zeroing without the Range Finder (manual method)
You can still land long shots without the attachment by setting zeroing manually. The trade‑off is speed and precision.
- Ping the spot you intend to shoot. The ping shows the distance in meters.
- Press the zeroing button to cycle in 100m steps (100 → 200 → 300 → 400 → 500m).
- Adjust until your zeroing value matches the ping distance, then take the shot.
This method is slightly slower and coarser than the Range Finder’s direct calibration, but it frees up Attachment Points for other upgrades.
Quick reference (what to remember in a firefight)
| Item | Key detail |
|---|---|
| Attachment availability | M2010 ESR, Mastery Rank 4, Right Accessory slot, 10 Attachment Points |
| Controls | Hold B (PC) or hold D‑Pad Down (console) while aiming to set zeroing to the aimed distance |
| HUD feedback | Zeroing value appears bottom‑right above ammo |
| Minimum zero | 100 meters; anything closer still uses a 100m ballistic solution |
| Manual zeroing (no attachment) | Ping for distance; press the zeroing button to move in 100m increments up to 500m |
| Optic requirement | Use a magnified scope; 1x/iron sights do not display range values |
Common pitfalls and how to avoid them
- Forgetting to re‑zero: If you change elevation or shift to a farther target, recalibrate before firing. The previous zeroing value persists until you change it.
- Misreading the HUD: The zeroing indicator is easy to miss during a fight. Build a habit of glancing bottom‑right before you pull the trigger.
- Shooting under 100m: Don’t fight the system—hold directly on target. The game applies a 100m ballistic model at closer ranges.
Dial in your zero, confirm the HUD value, and take the shot. Once the Range Finder is a reflex, you’ll spend less time holding over and more time landing clean hits at distance.