
Short lock screen timeouts on Windows 11 can interrupt reading, disrupt presentations, or force you to repeatedly log back in after brief periods of inactivity. By adjusting the lock screen timeout, you can control how long your computer waits before locking or turning off the display, balancing security with convenience and power savings.
Change Lock Screen Timeout Using Windows 11 Settings
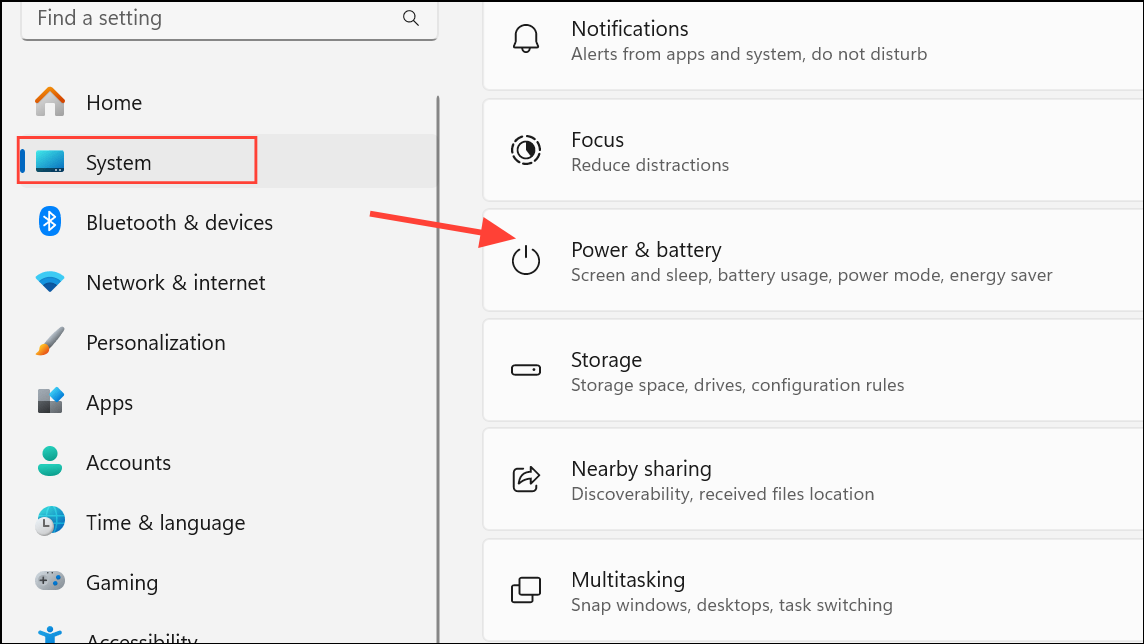
Step 1: Open the Settings app by right-clicking the Start menu and selecting Settings, or by pressing Windows + I on your keyboard.
Step 2: In the left sidebar, select System. Scroll down and click Power & battery (on some devices, this may simply appear as Power).
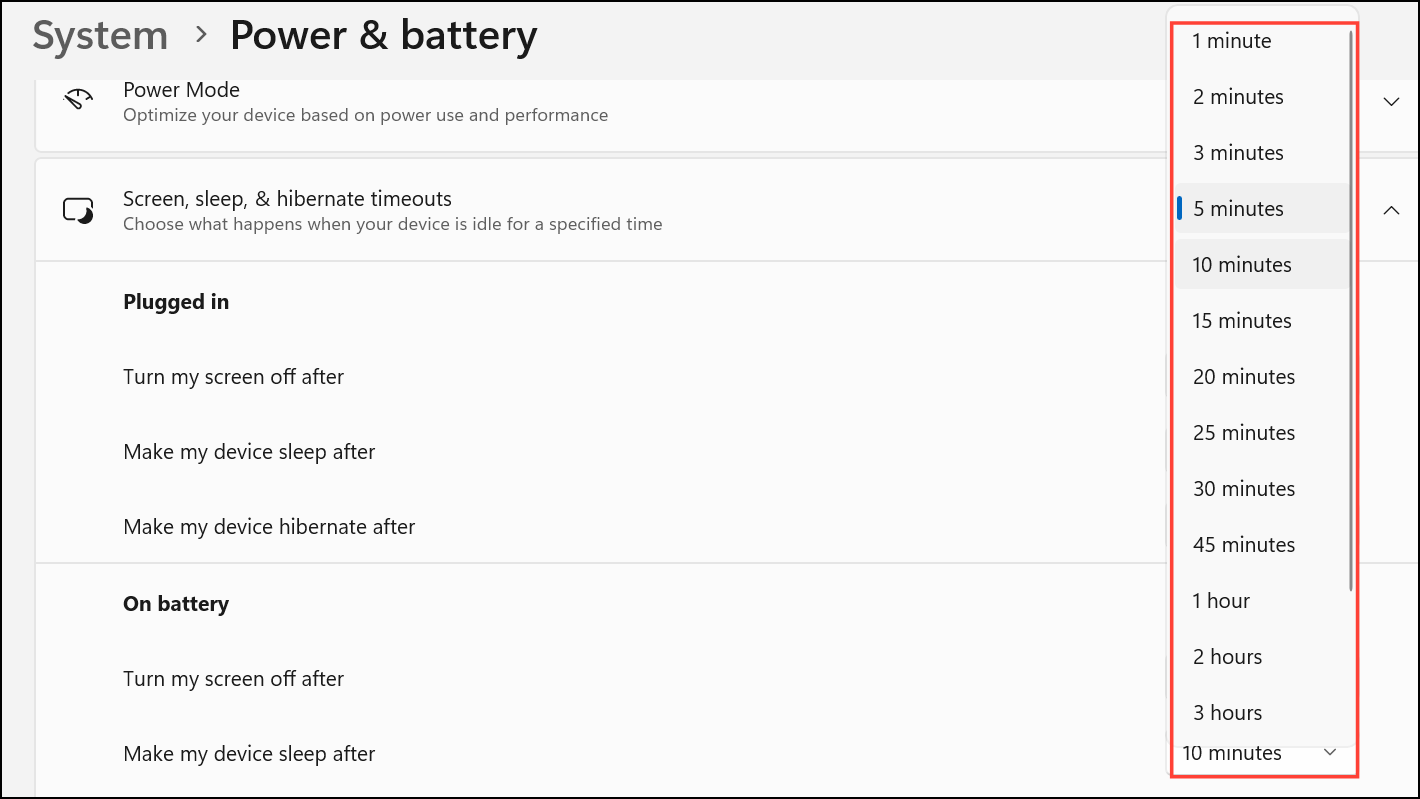
Step 3: Locate the Screen and sleep section within the Power settings. Expand it to reveal timeout options.
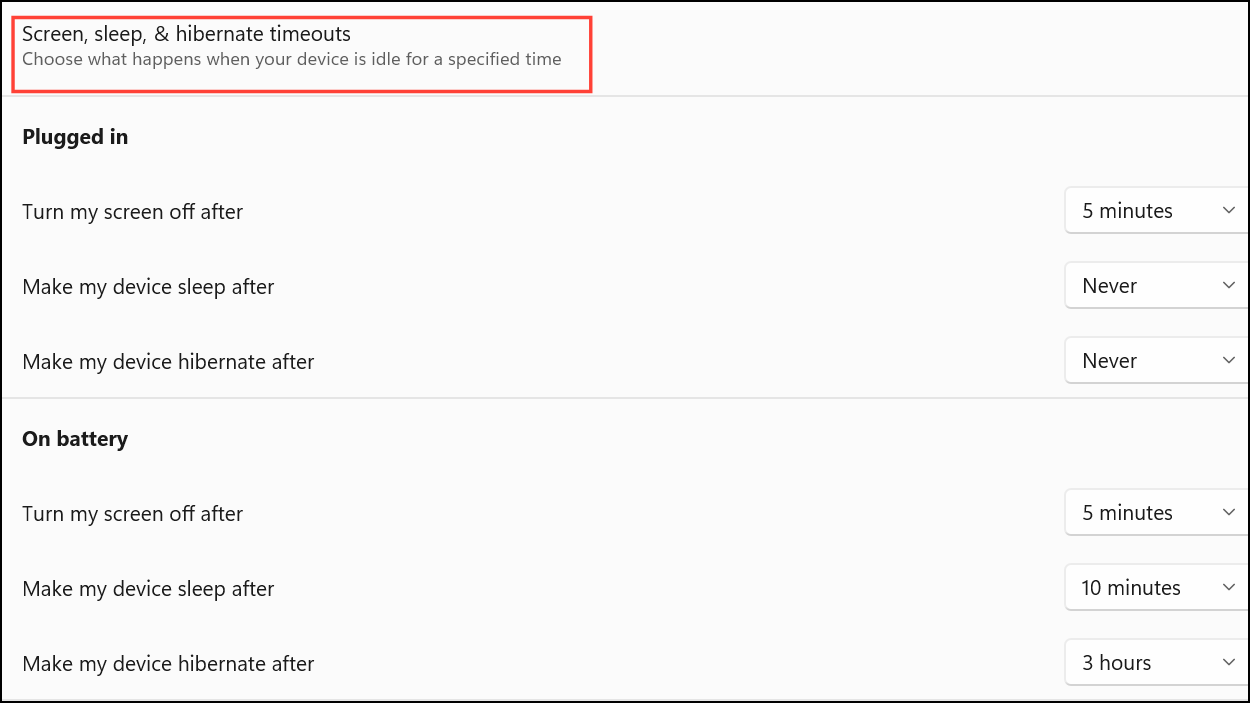
Step 4: Adjust the dropdowns for both On battery power, turn off my screen after and When plugged in, turn off my screen after. Choose a duration that suits your needs, such as 10 or 30 minutes. These settings determine how long the device waits before turning off the display and activating the lock screen.
This method provides a straightforward way to control screen timeout for both laptops and desktops, and changes take effect immediately.
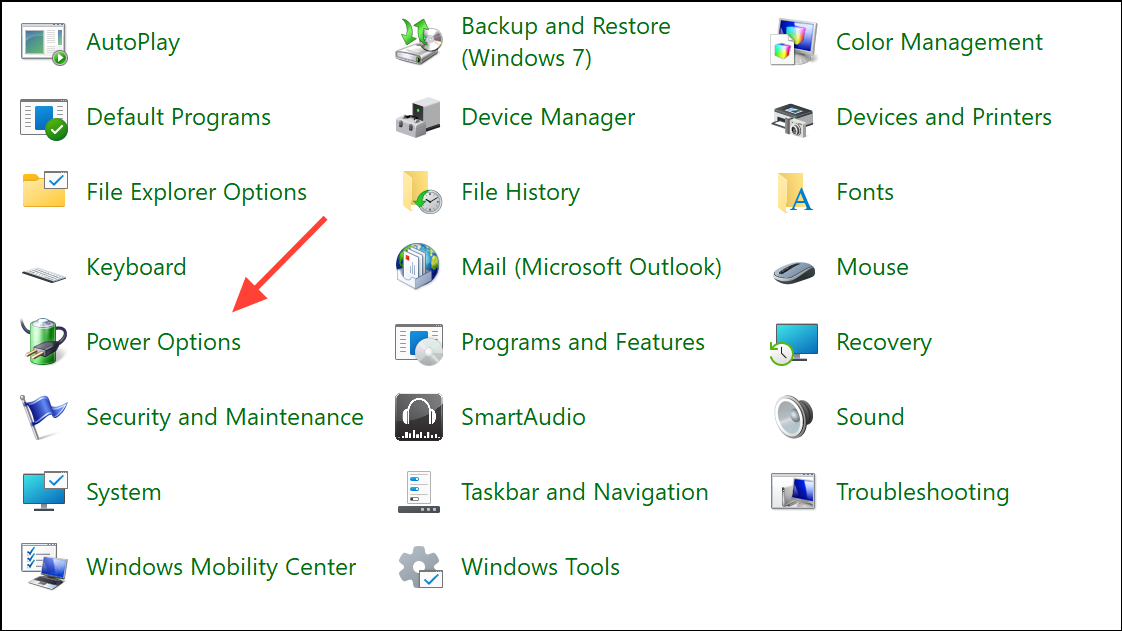
Set Lock Screen Timeout via Control Panel
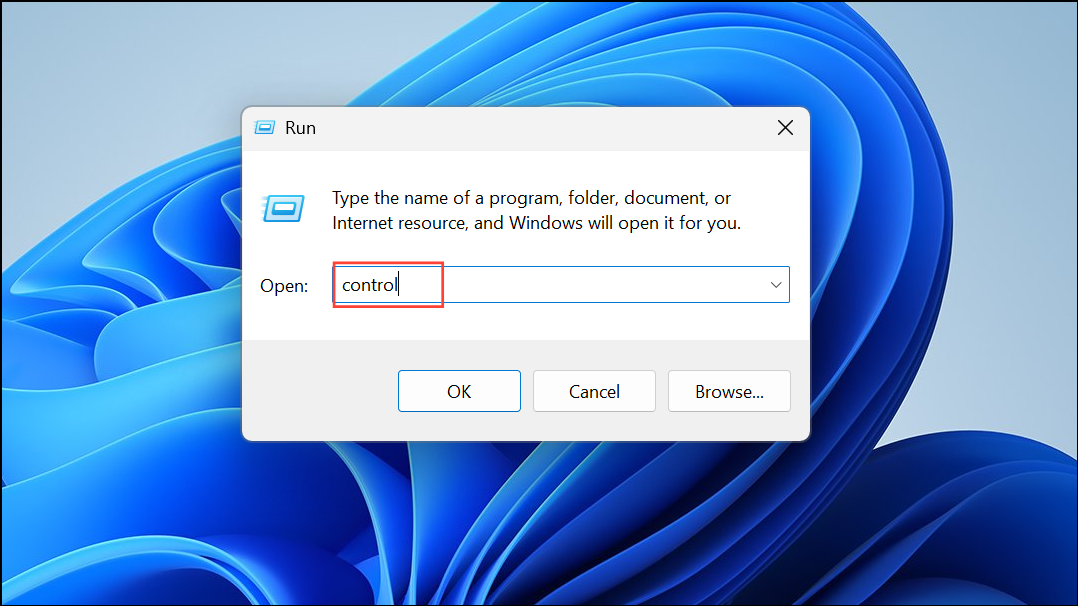
Step 1: Press Windows + R to open the Run dialog, then type control and hit Enter to open Control Panel.
Step 2: Change the View by setting to Large icons or Category, then select Power Options.
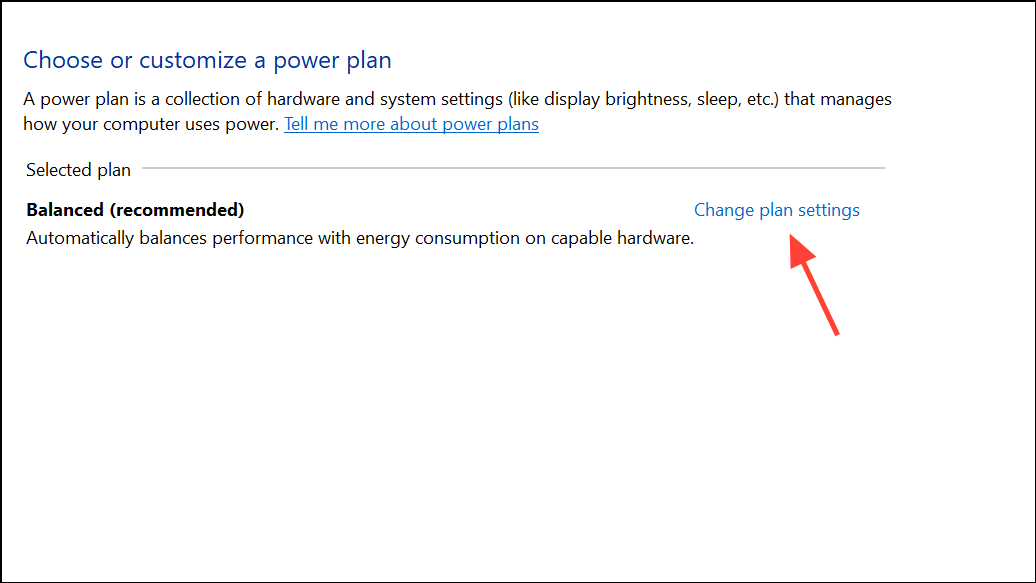
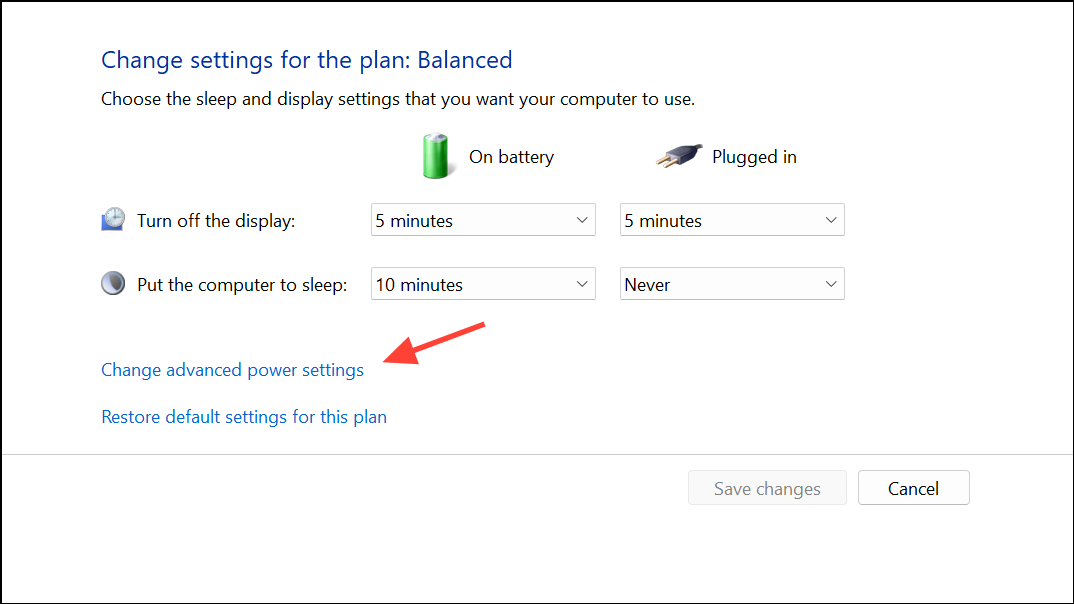
Step 3: Click Change plan settings next to your active power plan.
Step 4: Use the dropdown menus next to Turn off the display and Put the computer to sleep to set your preferred timeout values for both On battery and Plugged in scenarios.
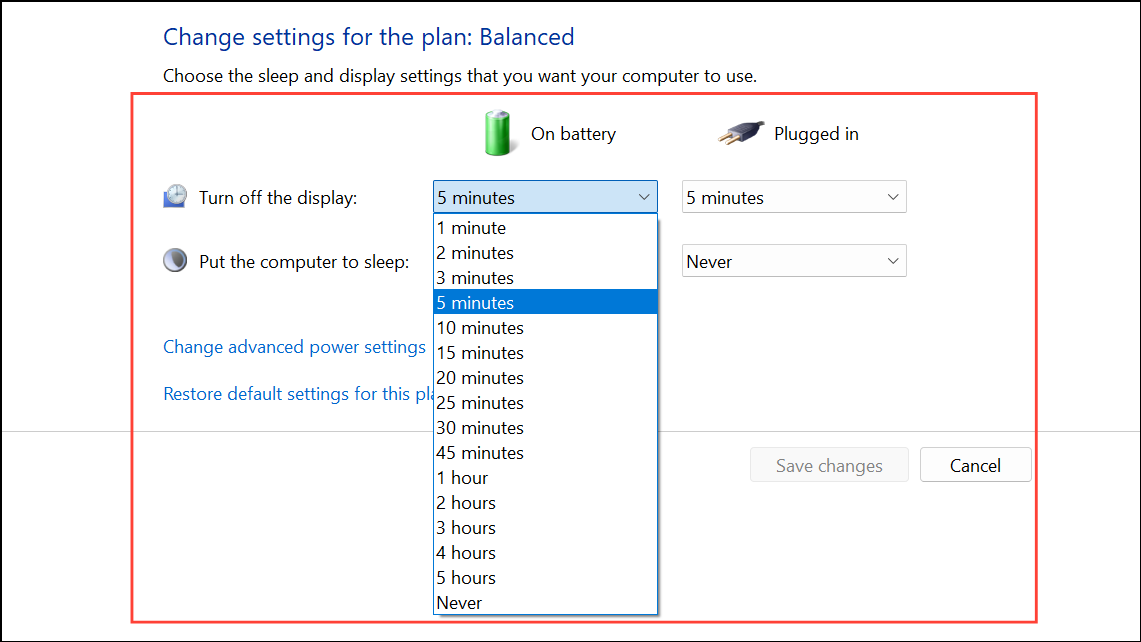
Step 5: Click Save changes to apply your settings.
The Control Panel method is useful for users who prefer the classic Windows interface or need to adjust advanced power plan configurations.
Unlock and Adjust Lock Screen Timeout Using Advanced Power Options
Some timeout options, like Console lock display off timeout, may not appear by default. You can unlock this setting through the Registry and then adjust it in Advanced Power Options.
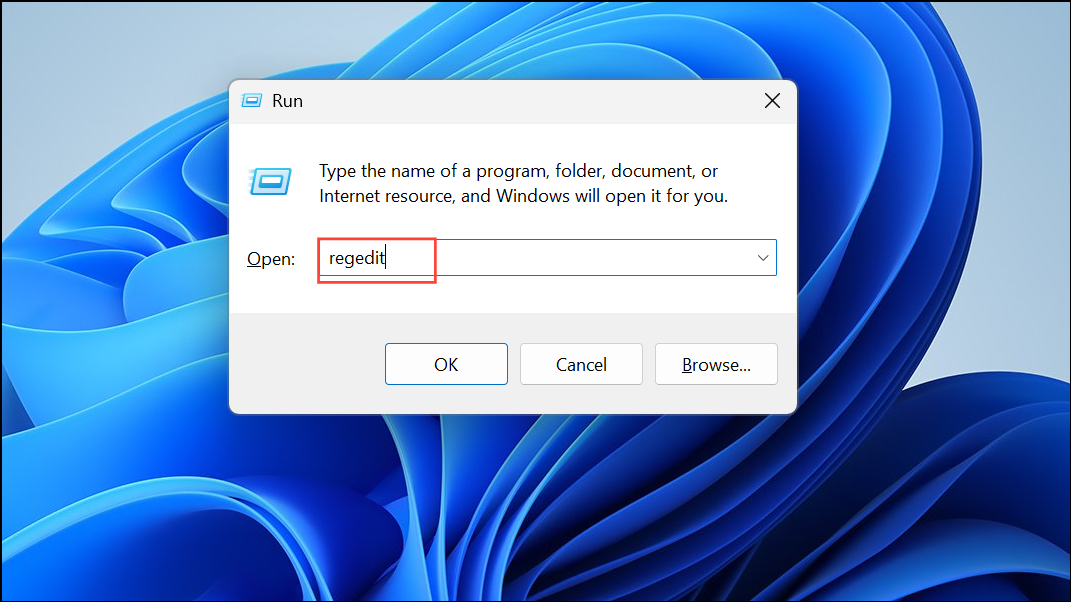
Step 1: Press Windows + R, type regedit, and press Enter. If prompted, click Yes to allow changes.
Step 2: In Registry Editor, navigate to:
HKEY_LOCAL_MACHINE\SYSTEM\CurrentControlSet\Control\Power\PowerSettings\7516b95f-f776-4464-8c53-06167f40cc99\8EC4B3A5-6868-48c2-BE75-4F3044BE88A7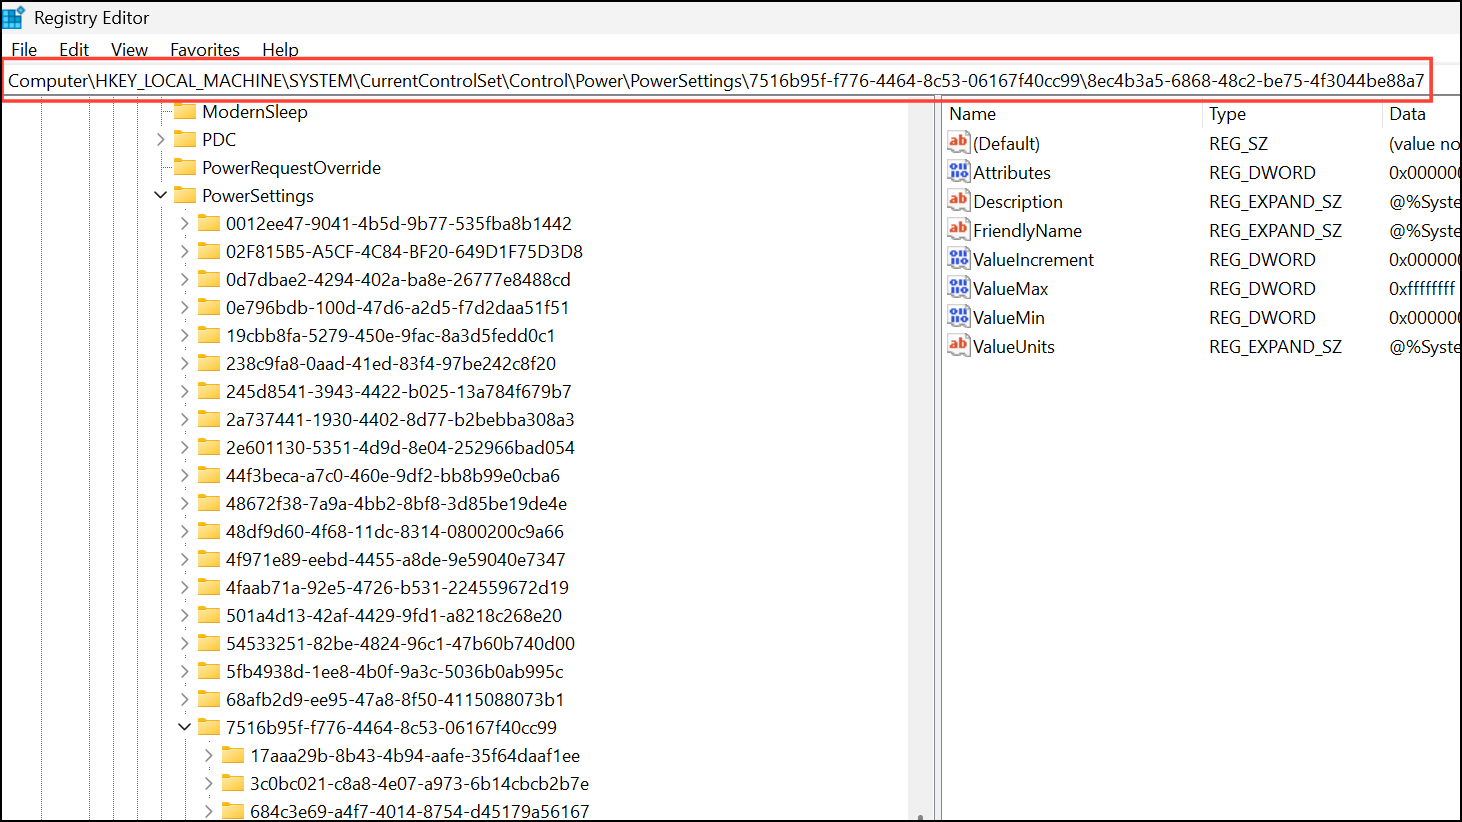
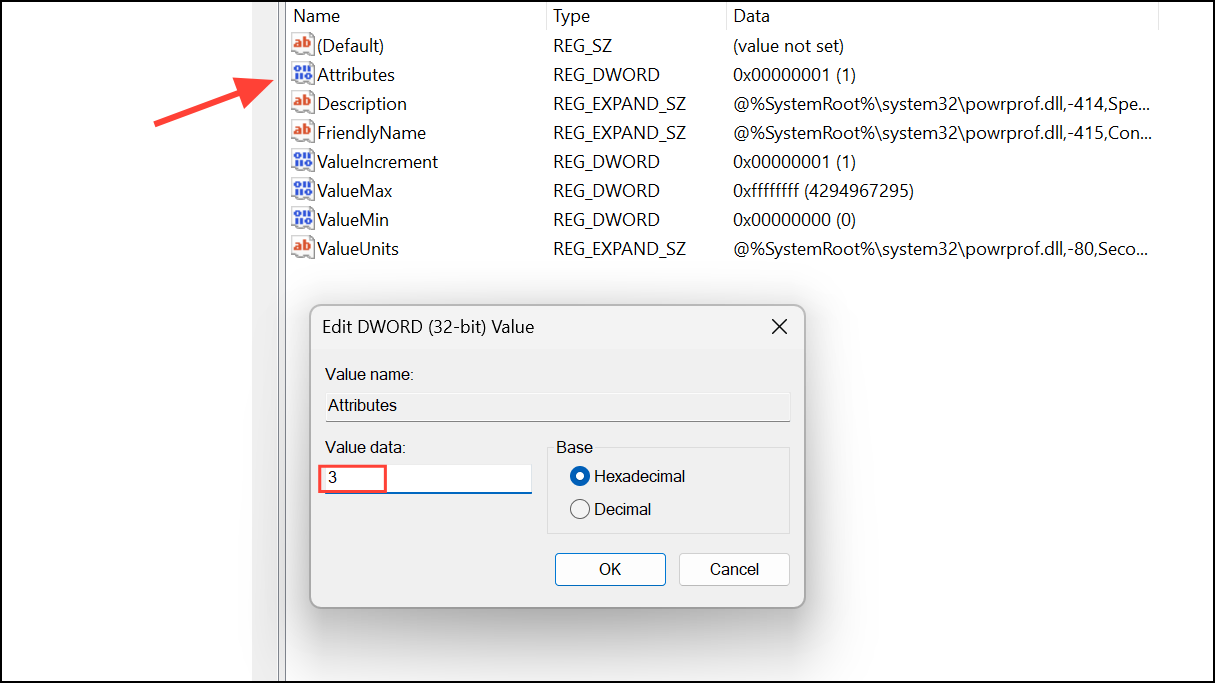
Step 3: Double-click the Attributes key in the right pane and change its value to 2. Click OK to save.
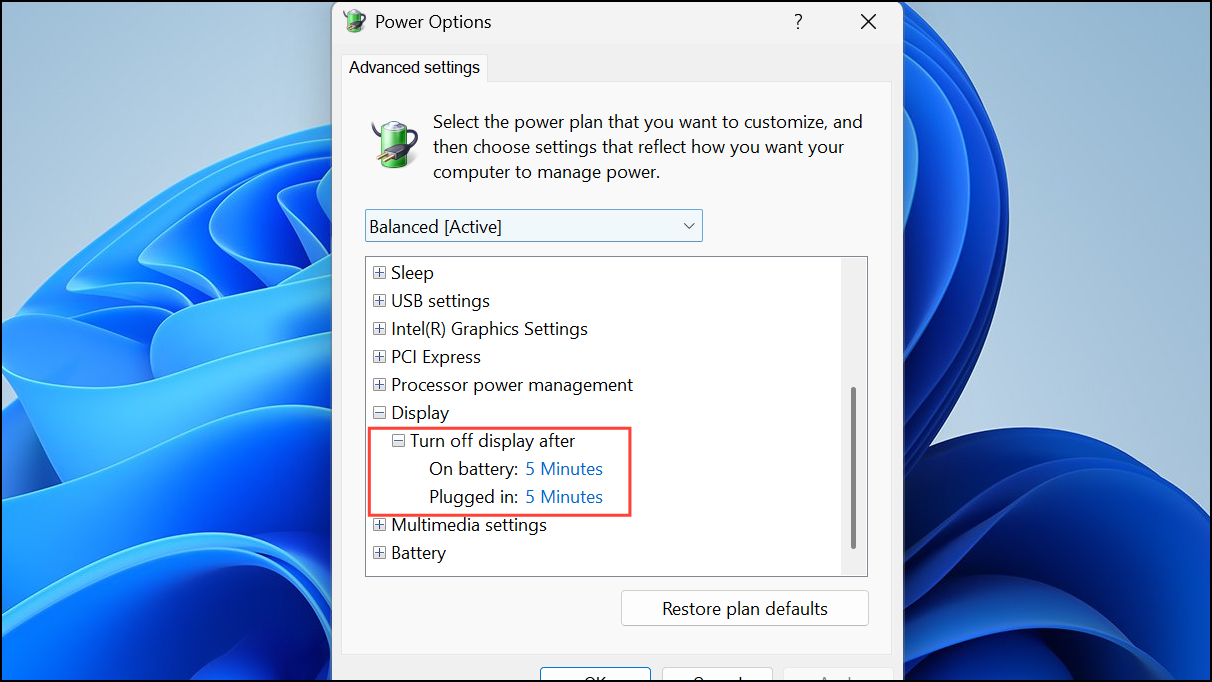
Step 4: Open Control Panel again, go to Power Options, and select Change plan settings for your current plan. Click Change advanced power settings.
Step 5: In the Advanced settings window, expand Display and then Console lock display off timeout. Set the timeout in minutes for both battery and plugged-in modes. Click Apply and OK to confirm.
This approach provides more granular control over lock screen timeout, especially if you want the display to turn off after a specific period of inactivity while the device remains unlocked.
Change Lock Screen Timeout Using Command Prompt or PowerShell
For users comfortable with command-line tools, Windows 11 allows direct adjustment of timeout settings through Command Prompt or PowerShell.
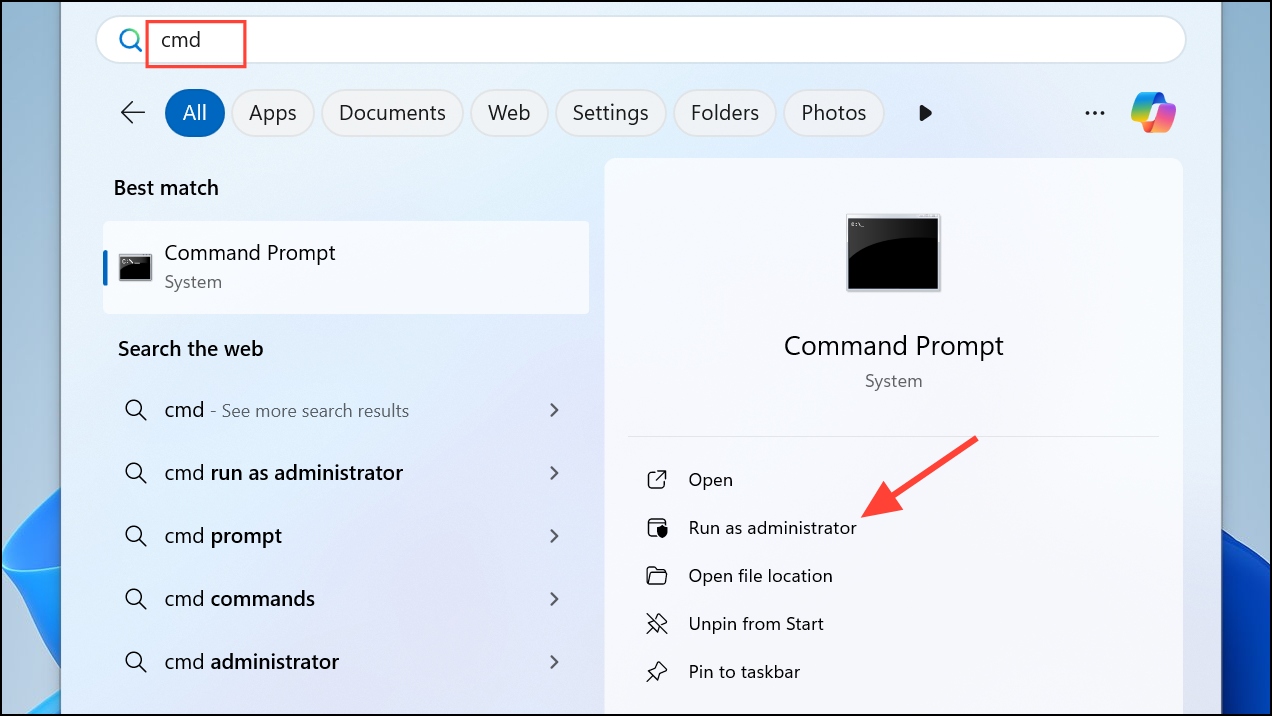
Step 1: Open Command Prompt or PowerShell as an administrator. To do this, type cmd or powershell in the Start menu, then right-click and select Run as administrator.
Step 2: To set the screen timeout when running on battery, enter:
powercfg -change -monitor-timeout-dc 
Replace <minutes> with your desired timeout value.
Step 3: To set the screen timeout when plugged in, use:
powercfg -change -monitor-timeout-ac 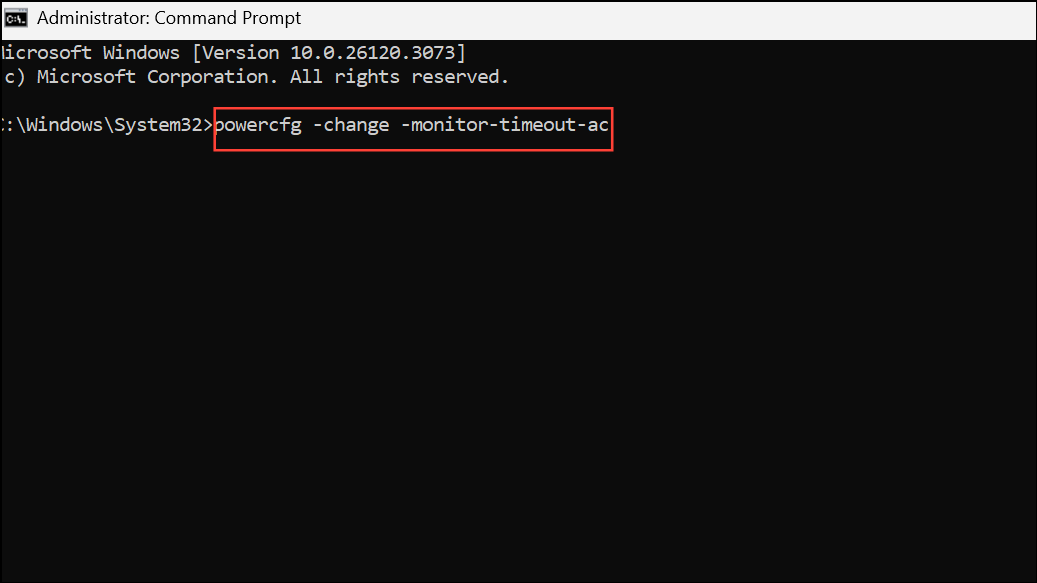
These commands immediately update the relevant power settings. You can also use the following format for more advanced adjustments:
powercfg /SETDCVALUEINDEX SCHEME_CURRENT 7516b95f-f776-4464-8c53-06167f40cc99 3c0bc021-c8a8-4e07-a973-6b14cbcb2b7e 
or
powercfg /SETACVALUEINDEX SCHEME_CURRENT 7516b95f-f776-4464-8c53-06167f40cc99 3c0bc021-c8a8-4e07-a973-6b14cbcb2b7e 
This method is especially useful for scripting or remote management of multiple devices.
Troubleshooting Persistent Lock Screen Timeout Issues
Some users report that their screen continues to lock after just one minute of inactivity, even after adjusting all available settings. If standard methods fail, consider the following troubleshooting steps:
- Check for active screensavers, especially blank screensavers, as these can override timeout settings.
- Review Dynamic Lock settings in Settings > Accounts > Sign-in options and disable if unnecessary.
- Update your graphics drivers and Windows updates to ensure compatibility with power management features.
- Investigate third-party software or background services that might override power settings. Use
msconfigto perform a clean boot and identify problematic services. - Explore BIOS or UEFI settings for power management features, such as "CPU Power Management," which may limit timeout options. Disabling certain power management options in BIOS has resolved the issue for some users, particularly on specific laptop models.
- If the issue persists across multiple user accounts, try creating a new local user profile without linking a Microsoft account during setup. Some users have found that lock screen timeout functions normally when Windows 11 is set up offline, without Microsoft account synchronization.
Advanced users may also reset their device to factory settings as a last resort, but this will erase personal data and apps. Always back up important files before proceeding with a reset.
Adjusting the lock screen timeout in Windows 11 gives you direct control over your device’s idle behavior, streamlining your workflow and optimizing security. If you continue to experience issues, reviewing BIOS settings or testing with a local account may resolve persistent problems.