
Agent mode in ChatGPT Atlas hands routine web actions to an assistant that can navigate, click, and type inside the page you already have open. You stay in control the whole time with on-page visibility, optional Browser Memories, and a choice between using your logged-in sessions or a clean, logged-out mode.
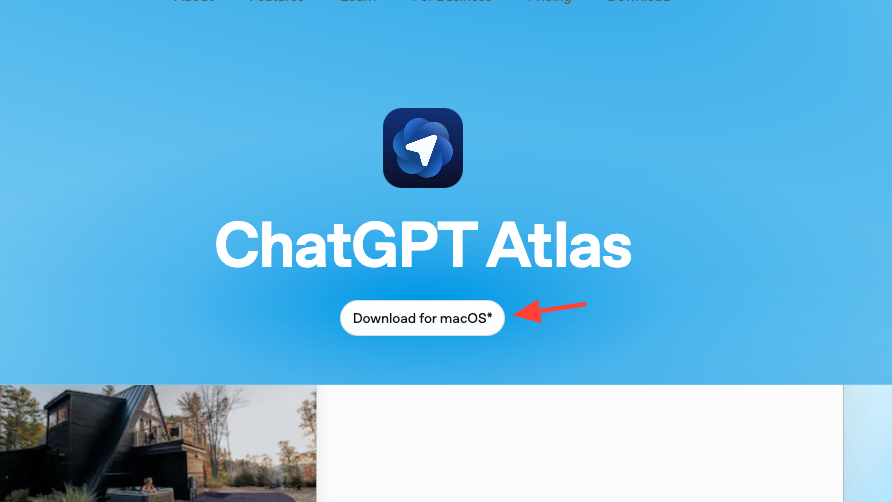
Install ChatGPT Atlas (macOS)
Step 1: Download the app for macOS from https://chatgpt.com/atlas. This installs a browser with ChatGPT built in.
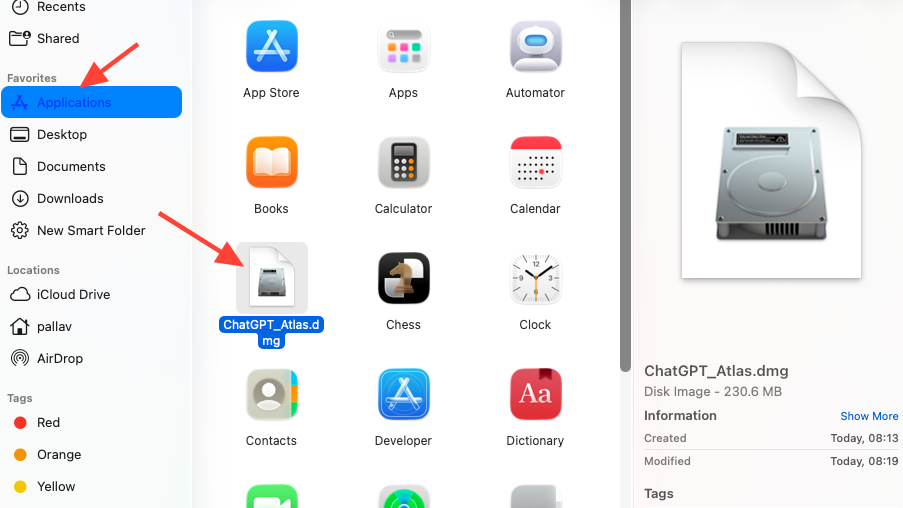
Step 2: Open the .dmg and drag Atlas into Applications. This completes the standard macOS install.
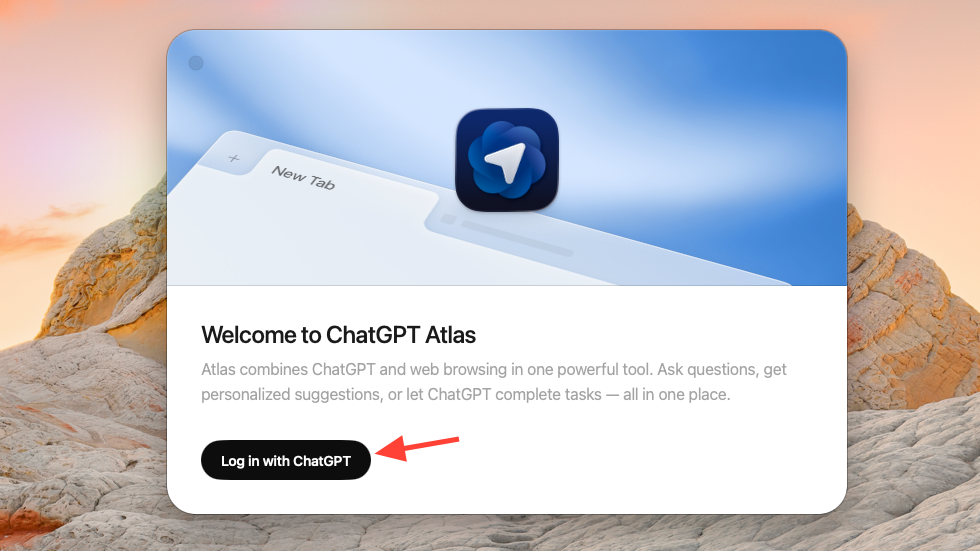
Step 3: Launch Atlas and sign in with your ChatGPT account. Signing in links your existing chats and settings to the browser.
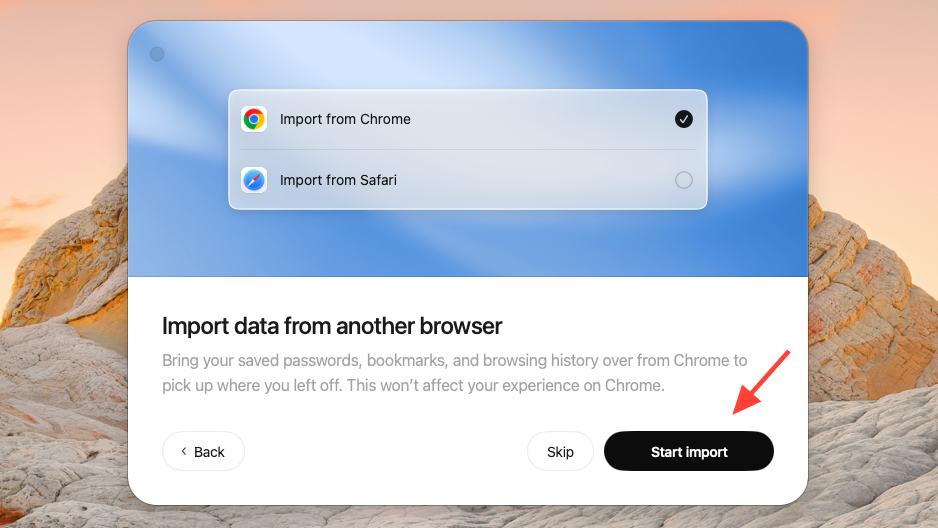
Step 4: Import bookmarks, passwords, and history if you want a seamless switch. You can also skip and import later.
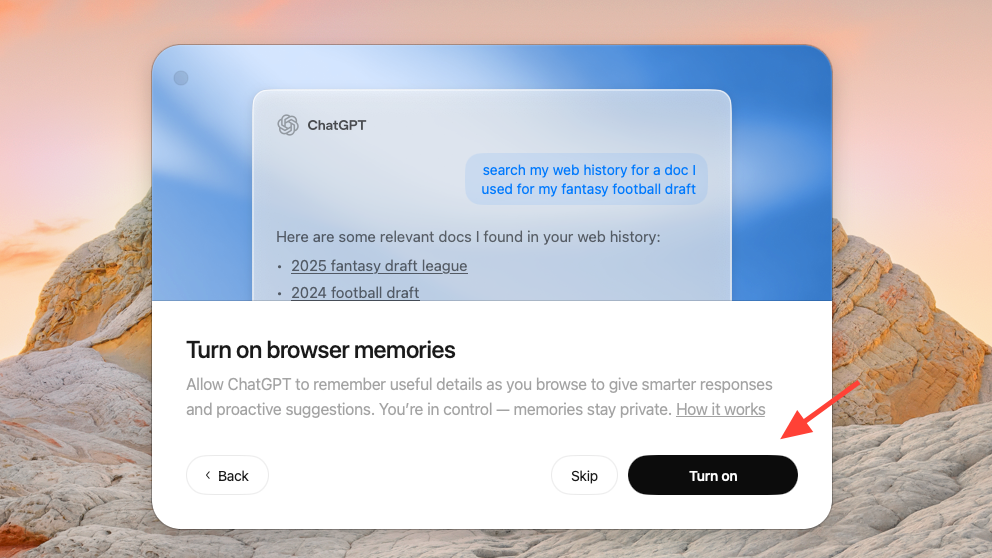
Step 5: You can also turn on 'Browser Memories', which will allow ChatGPT to remember details of your browsing history and enable it to give you suitable responses quickly. All your data will be kept completely secure and private.
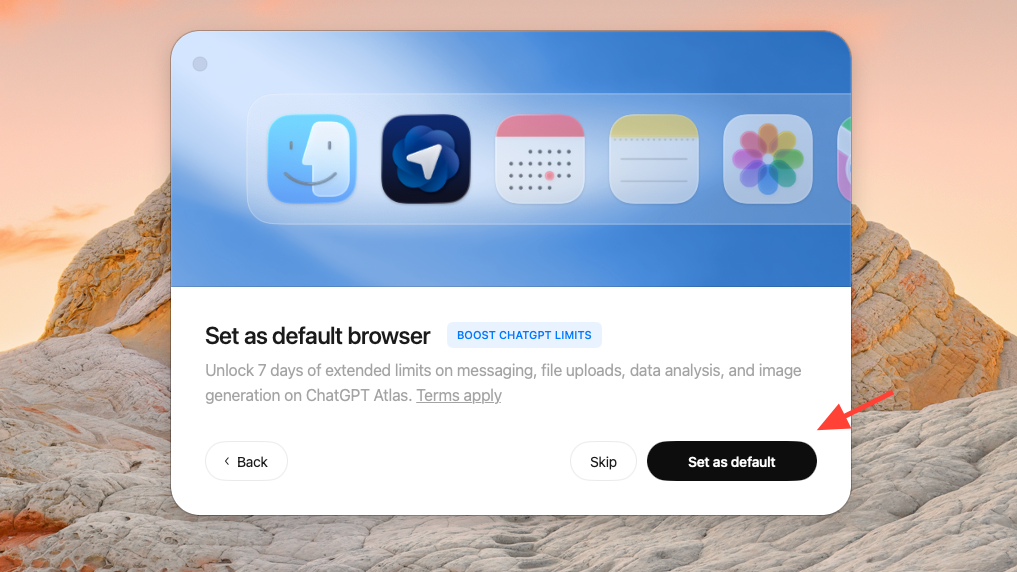
Step 6: Click 'Continue', and you will get the option to make the Atlas browser your default option. You can also skip this if you don't want to change your default browser.
Step 7: Once you've set up the Atlas Browser, it will launch automatically and you can start using it immediately.
Use the Ask ChatGPT sidebar and inline cursor
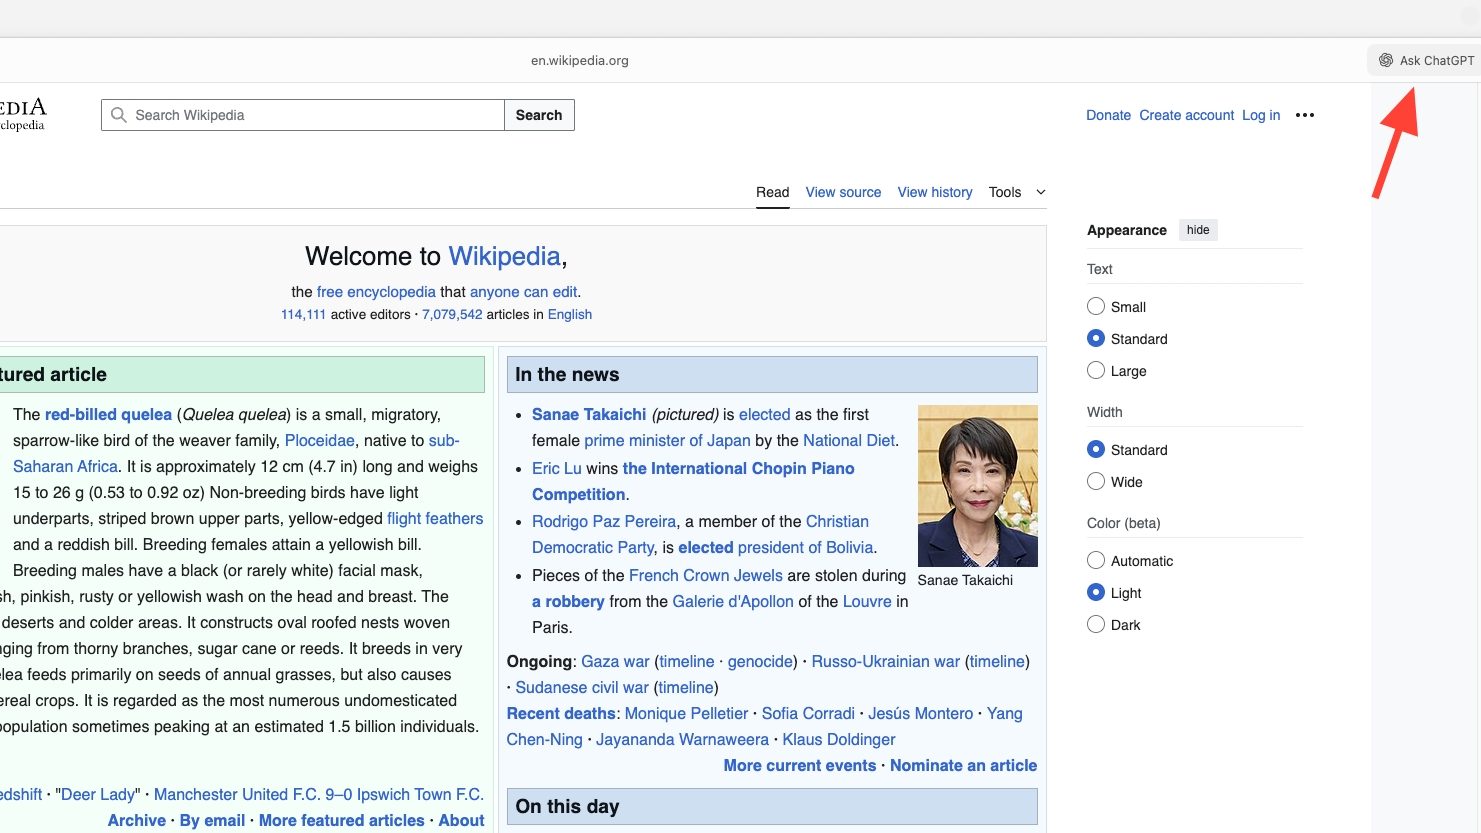
Step 1: You can use ChatGPT on any website with the Atlas browser. Just visit the website you want and open the side chat by selecting “Ask ChatGPT” or using CMD + .. The sidebar reads the page you’re viewing and keeps context in the thread.
Step 2: Type your question or select the microphone to speak. Voice works for asking questions in the sidebar.
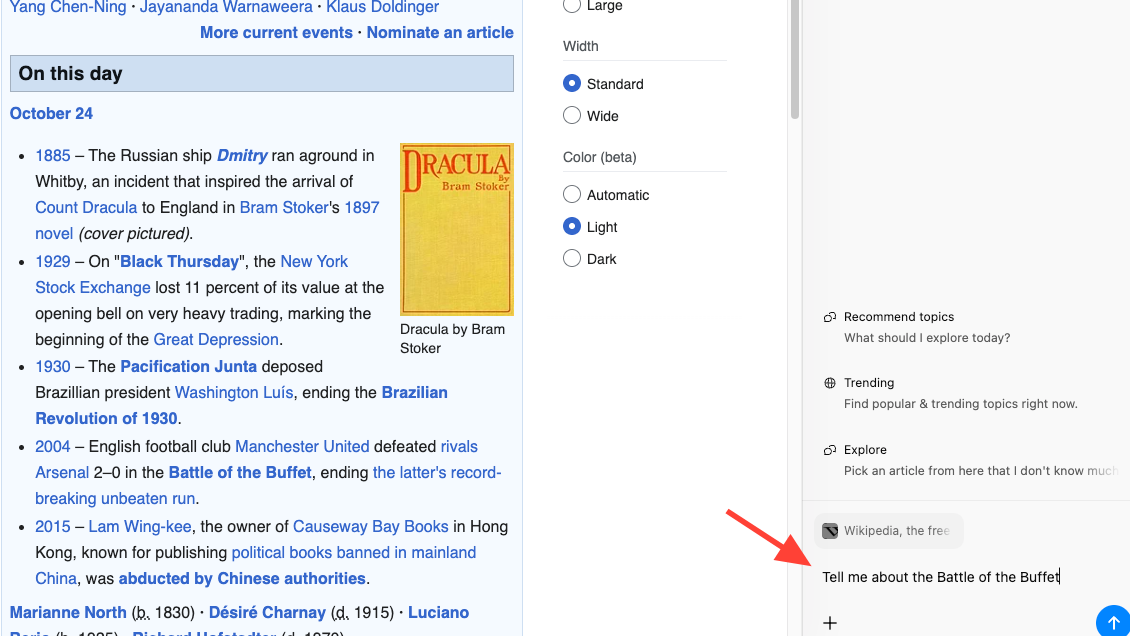
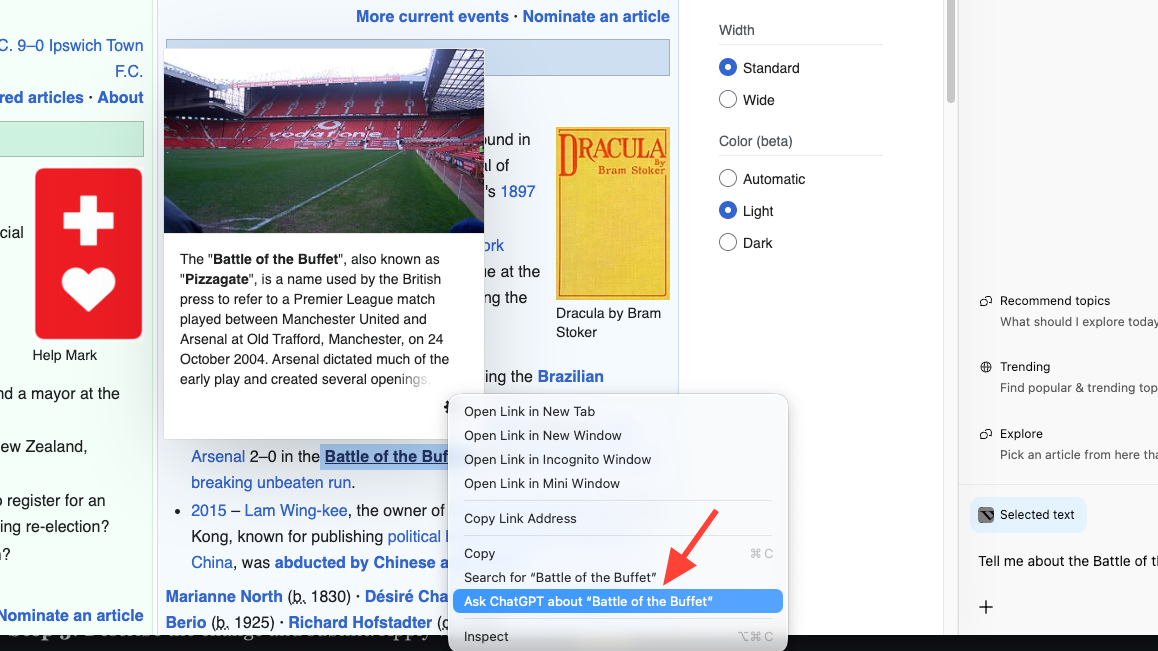
Step 3: Send selected text to the sidebar by highlighting, then right‑clicking and choosing “Ask ChatGPT about…”. This includes the selection as context without changing the page.
Step 4: Edit text directly in any web field with the inline cursor. Press CMD + E or choose “Edit with ChatGPT” from the File menu to open the cursor.
Step 5: Describe the change and submit. Apply with Update or cancel to revert. You can dictate directly into web text fields using the microphone; dictation is for entering text, not for describing edit instructions.
Start Agent mode from a page you’re viewing
Pro, Plus, and Team users can rely on the Agent mode when using the Atlas browser to find information and get things done more quickly and efficiently.
Step 1: Open the sidebar on the page where you want help. Agent mode works in your current browsing session.
Step 2: Choose Agent mode from the sidebar menu. This hands control to the agent for on‑page actions.
Step 3: Describe the task and set clear bounds (for example, “draft but do not submit”). The agent plans steps and confirms actions in the panel.
Step 4: Send your message to start. You’ll see the agent navigate, click, and type in the tab, while reporting progress in the sidebar.
Step 5: Watch for prompts on sensitive pages. The agent pauses for approval on sensitive surfaces so you can review before it proceeds.
Start Agent mode from a new tab
Step 1: Open a new tab and start a chat. This gives you a clean place to describe a multi‑step task.
Step 2: Click the + in the chat composer and select Agent mode. This switches the chat to action-taking mode.
Step 3: Describe the goal in plain language. The agent will open tabs and act in your browser to complete the task.
Choose Agent mode scope (logged‑in vs logged‑out)
Step 1: Use logged‑in agent sessions for tasks that require your existing website logins. The agent can act on sites you’re already signed into.
Step 2: Use logged‑out mode for tasks that don’t need your accounts. In logged‑out mode, the agent won’t use your existing cookies and won’t be logged into accounts without your explicit approval.
Step 3: Prefer logged‑out mode when in doubt. This reduces exposure if a page contains hidden, malicious instructions.
Set custom instructions for Agent mode
Step 1: Open Settings from the profile icon in the top‑right of the browser. Settings control how the agent behaves across sites.
Step 2: Select Agent mode in the Settings menu. This opens the place to guide navigation rules.
Step 3: Enter custom instructions: preferred sources, required steps, approval checkpoints, and any do‑not‑touch rules. Clear rules make actions faster and more predictable.
Step 4: Save and test on a simple task. Adjust when the agent over‑ or under‑acts so future runs follow your expectations.
Control page visibility and Browser Memories
Step 1: Use the page visibility toggle in the address bar to decide if ChatGPT can see the current page. When visibility is off, the agent can’t read page content.
Step 2: Turn Browser Memories on only if you want context carried across sessions. Memories store filtered facts, not full page copies, and help the agent choose sensible next actions.
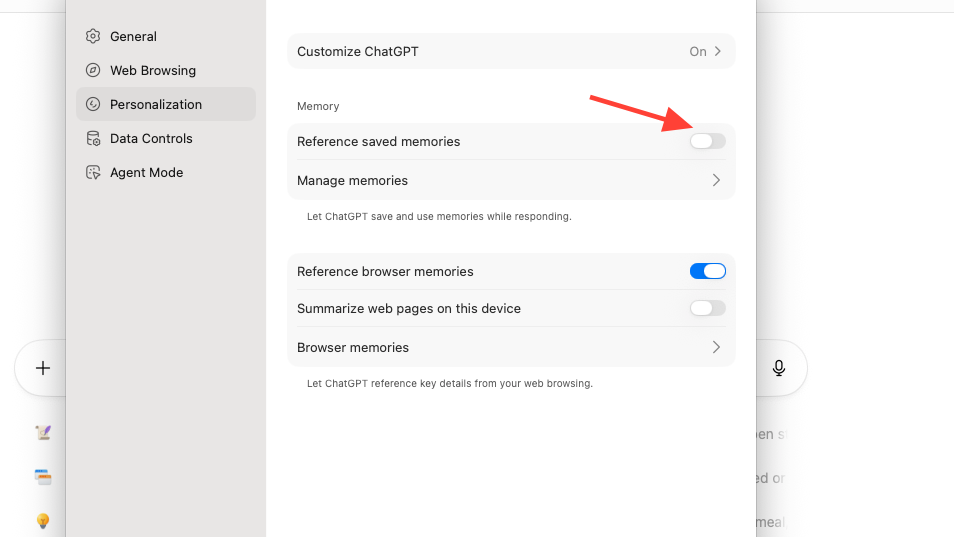
Step 3: Review memories in Settings to view, archive, or delete entries. Clearing browsing history removes associated memories.
Step 4: Open an incognito window when you want chats, browsing, and account activity kept separate from your signed‑in session.
What the agent can and cannot do (safety)
| Area | What Agent does | Limits and safeguards |
|---|---|---|
| Actions in your tab. | Reads the visible page (when allowed), navigates, clicks, and types to complete multi‑step flows. | Reports progress in the panel; pauses on sensitive pages for your approval. |
| Account access. | Uses sites you’re already signed into for tasks that need your sessions. | Logged‑out mode keeps cookies out of scope and avoids acting as you without approval. |
| System access. | Operates inside the browser only. | Cannot run code in the browser, access your file system or other apps, download files, or install extensions. |
| Visibility and memories. | Can use Browser Memories (if enabled) to choose sensible actions. | Page visibility is per‑site and off means no page access. Memories are optional and fully manageable in Settings. |
| Data use. | Works with your browsing context to answer and act. | Page content isn’t used for training by default. You can opt in to include web browsing in data controls; sites that block GPTBot are excluded. |
| Security risks. | Designed with safeguards and approval pauses. | Agents can be influenced by hidden instructions on pages. Monitor actions and prefer logged‑out mode for sensitive tasks. |
Example workflow: analyze a long page with Agent mode
Step 1: Open a lengthy article or paper in Atlas. This gives the agent a clear, single source to work with.
Step 2: In the sidebar, ask for a brief summary of the problem, method, and main claims. This frames the task before action.
Step 3: Switch to Agent mode and ask it to find a specific section by heading (for example, “Method” or “Results”) and extract the key points into bullets. The agent will scroll and select the right region.
Step 4: Ask the agent to open one or two linked references on the page and summarize how they support the main claims. This keeps the context in the same session.
Step 5: Request a 150–200 word note you can paste into your doc (what changes, what stays the same, next steps). Review, then copy the output where you need it.
Plans and access (who gets Agent mode)
| Plan | Atlas on macOS | Sidebar chat | Agent mode | Browser Memories |
|---|---|---|---|---|
| Free. | Available. | Available. | Not available. | Optional. |
| Go. | Available. | Available. | Not available. | Optional. |
| Plus. | Available. | Available. | Preview. | Optional. |
| Pro. | Available. | Available. | Preview. | Optional. |
| Business. | Available (beta). | Available. | Preview. | Admin controlled. |
| Enterprise / Edu. | Available when enabled by admins. | Available. | Preview when enabled. | Admin controlled. |
Fix Agent mode not starting or not taking actions
Step 1: Allow page visibility in the address bar. If visibility is off, the agent cannot read or act on the page.
Step 2: Start the agent in the same tab as the task. Agent mode acts inside your current browsing session, not a different window.
Step 3: Approve prompts on sensitive sites. The agent pauses until you confirm it can proceed.
Step 4: Try logged‑out mode for tasks that shouldn’t touch your accounts. This keeps cookies and saved sessions out of scope.
Step 5: Check your plan and workspace settings. Agent mode is in preview for Plus, Pro, and Business, and may require admin enablement for Enterprise/Edu.
Step 6: Review custom instructions if the agent stops early. Overly strict rules or missing approval checkpoints can block progress; relax constraints and retry.
Start with a small, well-bounded task so you can watch the agent work and shape its rules. Once it’s reliable, hand it more steps and keep visibility and memory controls tuned to your comfort level.