
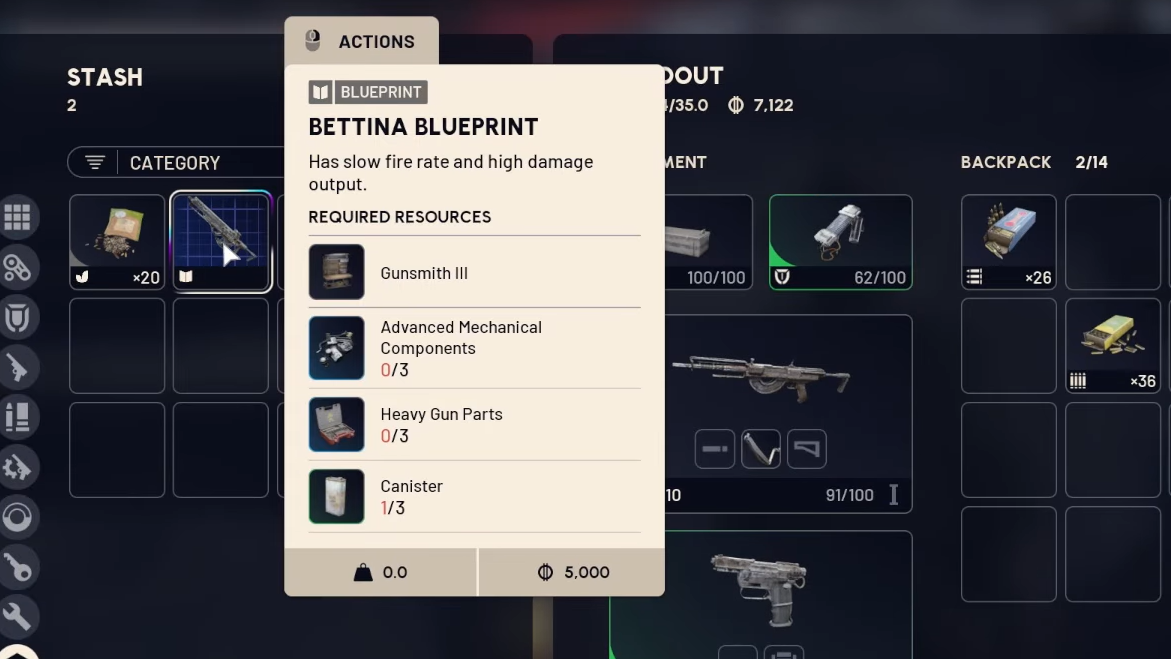
Blueprints are the backbone of ARC Raiders' crafting economy. Each one permanently unlocks a recipe at your Raider Den workbench, letting you reliably produce weapons, mods, augments, grenades, mines, and utility items instead of gambling on random loot drops. They are Epic-quality items worth 5,000 Coins apiece, and many of the most powerful ones only appear during specific Dynamic Events or on certain maps. The in-game blueprint grid currently tracks 75 slots, though only about 72 are confirmed obtainable. A handful of additional blueprints — Canto, Surge Coil, and Dolabra — have been added through updates and condition-specific events.
Quick answer: There are 75 blueprint slots visible in the inventory grid. Roughly 72 are currently obtainable through scavenging, quests, Trials, and Dynamic Events. Three slots remain unfilled and are widely believed to correspond to Silencer III, Horizontal Grip, and Kinetic Converter, none of which have confirmed drop methods yet.
How Blueprints Work in ARC Raiders
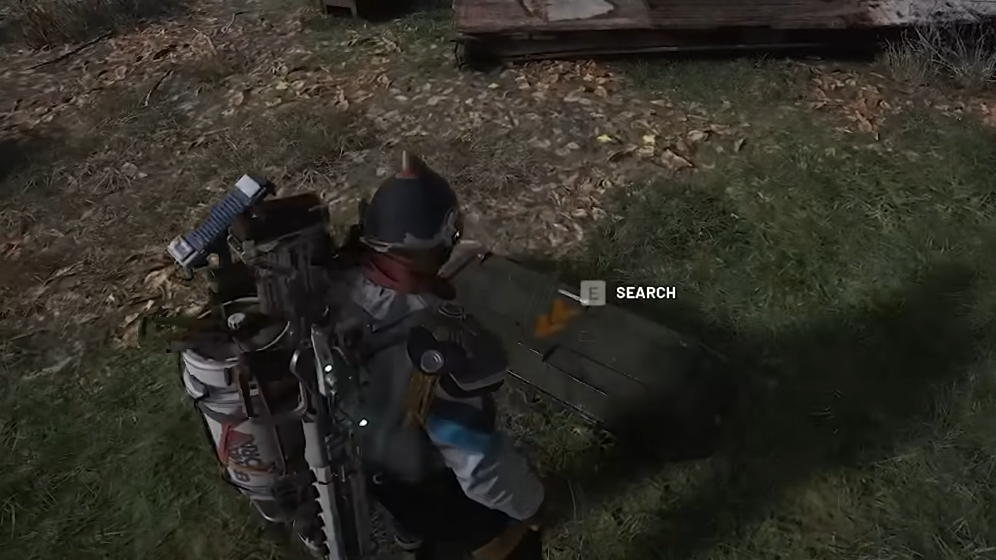
When you pick up a blueprint during a raid, you must extract it safely back to Speranza before you can use it. Once there, open your inventory, select the blueprint, and choose "Learn and Consume." The item is destroyed, and the recipe is permanently added to your crafting options at the appropriate workbench. You cannot learn blueprints mid-raid. If you find a rare one, heading straight for extraction is almost always the right call.
Learning a blueprint is a one-time action. Duplicate blueprints still sell for 5,000 Coins each, or you can drop them for squadmates who haven't unlocked the recipe. Trials are a surprisingly efficient way to earn blueprints — most scavengeable blueprints can also appear as Trial rewards. Keep in mind that choosing to go on an Expedition at the end of a season wipes all learned blueprints from your account, so plan accordingly.
Where Different Blueprint Types Spawn
Not every container can drop every blueprint. The loot pool is filtered by container type, map, and active map condition. Here's the general breakdown of where to look.
| Blueprint Category | Primary Container Type |
|---|---|
| Weapons & gun parts | Raider Containers |
| Explosives (grenades, mines) | Industrial Containers |
| Medical items (Vita Shot, Defibrillator) | Medical Containers |
| Augments | Security Containers (rarely Medical) |
| Utilities (Barricade Kit, Remote Raider Flare) | Electrical Containers |
| Mods (grips, stocks, silencers, mags) | Residential Containers |
ARC Surveyors can also drop blueprints at random. Some items like the Tempest are exceptions to the normal container rules — it spawns in Residential Containers and First Wave Caches rather than Raider Containers despite being a weapon.
Complete ARC Raiders Blueprint List
The table below covers every confirmed blueprint, organized alphabetically. It includes the item type, crafting materials, and where or how to obtain each one. Condition-locked blueprints are marked with the specific Dynamic Event required.
| Name | Type | Recipe Materials | How to Obtain |
|---|---|---|---|
| Angled Grip II | Mod | 2× Mechanical Components, 3× Duct Tape | Random drop, any map |
| Angled Grip III | Mod | 2× Mod Components, 5× Duct Tape | Electromagnetic Storm / Locked Gate / Night Raid |
| Anvil | Weapon | 5× Mechanical Components, 5× Simple Gun Parts | Random drop, any map |
| Anvil Splitter | Mod | 2× Mod Components, 3× Processor | Random drop |
| Aphelion | Weapon | 3× Magnetic Accelerator, 3× Complex Gun Parts, 1× Matriarch Reactor | Random drop on Stella Montis only |
| Barricade Kit | Quick Use | 1× Mechanical Components | Random drop, any map |
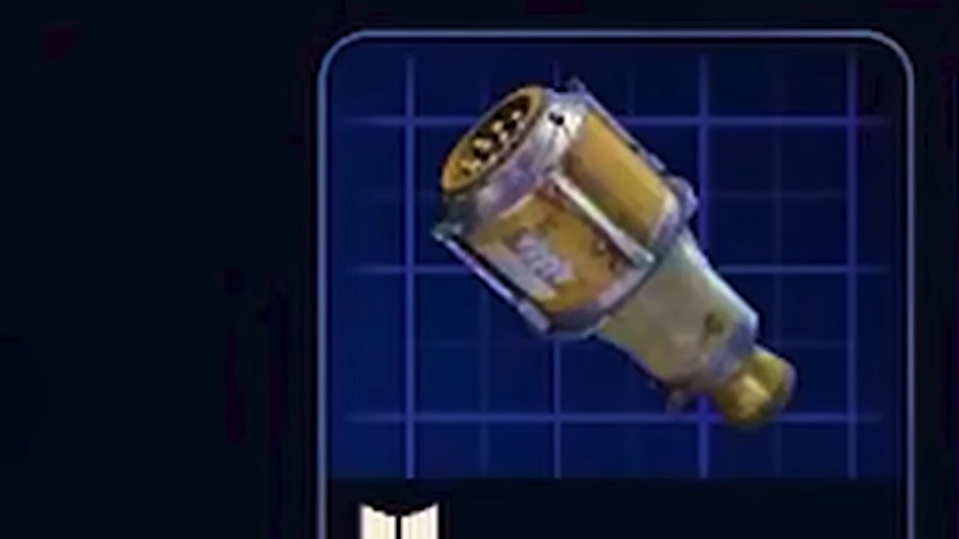
| Bettina | Weapon | 3× Advanced Mechanical Components, 3× Heavy Gun Parts, 3× Canister | Random drop, any map |
| Blaze Grenade | Grenade | 1× Explosive Compound, 2× Oil | Random drop, any map |
| Blue Light Stick | Quick Use | 3× Chemicals | Random drop, any map |
| Bobcat | Weapon | 3× Advanced Mechanical Components, 3× Light Gun Parts | Locked Gate / Hurricane only |
| Burletta | Weapon | 3× Mechanical Components, 3× Simple Gun Parts | Quest reward — Industrial Espionage |
| Canto | Weapon | — | Hurricane only (First Wave Cache) |
| Combat Mk. 3 (Aggressive) | Augment | 2× Advanced Electrical Components, 3× Processor | Stella Montis / The Blue Gate |
| Combat Mk. 3 (Flanking) | Augment | 2× Advanced Electrical Components, 3× Processor | Stella Montis / The Blue Gate |
| Compensator II | Mod | 2× Mechanical Components, 4× Wires | Random drop, any map |
| Compensator III | Mod | 2× Mod Components, 8× Wires | Electromagnetic Storm / Locked Gate / Night Raid |
| Complex Gun Parts | Material | 2× Light Gun Parts, 2× Medium Gun Parts, 2× Heavy Gun Parts | Random drop, Security Containers |
| Deadline | Mine | 3× Explosive Compound, 2× ARC Circuitry | Stella Montis only |
| Defibrillator | Quick Use | 9× Plastic Parts, 1× Moss | Random drop, any map |
| Dolabra | Weapon | 3× Shredder Gyro, 3× Magnetic Accelerator, 2× Vaporizer Regulator | Drops from ARC Assessor during Close Scrutiny |
| Equalizer | Weapon | 3× Magnetic Accelerator, 3× Complex Gun Parts, 1× Queen Reactor | Harvester event reward |
| Explosive Mine | Mine | 1× Explosive Compound, 1× Sensors | Random drop, any map |
| Extended Barrel | Mod | 2× Mod Components, 8× Wires | Electromagnetic Storm / Locked Gate / Night Raid |
| Extended Light Mag II | Mod | 2× Mechanical Components, 3× Steel Spring | Random drop, any map |
| Extended Light Mag III | Mod | 2× Mod Components, 5× Steel Spring | Electromagnetic Storm / Locked Gate / Night Raid |
| Extended Medium Mag II | Mod | 2× Mechanical Components, 3× Steel Spring | Random drop, any map |
| Extended Medium Mag III | Mod | 2× Mod Components, 5× Steel Spring | Electromagnetic Storm / Locked Gate / Night Raid |
| Extended Shotgun Mag II | Mod | 2× Mechanical Components, 3× Steel Spring | Random drop, any map |
| Extended Shotgun Mag III | Mod | 2× Mod Components, 5× Steel Spring | Electromagnetic Storm / Locked Gate / Night Raid |
| Fireworks Box | Quick Use | 1× Explosive Compound, 3× Pop Trigger | Cold Snap event only |
| Gas Mine | Mine | 4× Chemicals, 2× Rubber Parts | Stella Montis only |
| Green Light Stick | Quick Use | 3× Chemicals | Random drop, any map |
| Heavy Gun Parts | Material | 4× Simple Gun Parts | Random drop, Raider Containers |
| Hullcracker | Weapon | 1× Magnetic Accelerator, 3× Heavy Gun Parts, 1× Exodus Modules | Quest reward — The Major's Footlocker |
| Il Toro | Weapon | 5× Mechanical Components, 6× Simple Gun Parts | Random drop, any map |
| Jolt Mine | Mine | 1× Electrical Components, 1× Battery | Random drop, any map |
| Jupiter | Weapon | 3× Magnetic Accelerator, 3× Complex Gun Parts, 1× Queen Reactor | Harvester event reward |
| Launcher Ammo | Ammo | 5× Metal Parts, 1× Crude Explosives | Quest reward — The Major's Footlocker (not shown in grid) |
| Light Gun Parts | Material | 4× Simple Gun Parts | Random drop, Raider Containers |
| Lightweight Stock | Mod | 2× Mod Components, 5× Duct Tape | Electromagnetic Storm / Locked Gate / Night Raid |
| Looting Mk. 3 (Safekeeper) | Augment | 2× Advanced Electrical Components, 3× Processor | Random drop, any map |
| Looting Mk. 3 (Survivor) | Augment | 2× Advanced Electrical Components, 3× Processor | Random drop, any map |
| Lure Grenade | Grenade | 1× Speaker Component, 1× Electrical Components | Quest reward — Greasing Her Palms |
| Medium Gun Parts | Material | 4× Simple Gun Parts | Random drop, Raider Containers |
| Muzzle Brake II | Mod | 2× Mechanical Components, 4× Wires | Random drop, any map |
| Muzzle Brake III | Mod | 2× Mod Components, 8× Wires | Electromagnetic Storm / Locked Gate / Night Raid |
| Osprey | Weapon | 2× Advanced Mechanical Components, 3× Medium Gun Parts, 7× Wires | Random drop, any map |
| Padded Stock | Mod | 2× Mod Components, 5× Duct Tape | Electromagnetic Storm / Locked Gate / Night Raid / Hidden Bunker |
| Pulse Mine | Mine | 1× Crude Explosives, 1× Wires | Stella Montis only |
| Red Light Stick | Quick Use | 3× Chemicals | Random drop, any map |
| Remote Raider Flare | Quick Use | 2× Chemicals, 4× Rubber Parts | Random drop, any map |
| Seeker Grenade | Grenade | 1× Crude Explosives, 2× ARC Alloy | Stella Montis only |
| Shotgun Choke II | Mod | 2× Mechanical Components, 4× Wires | Random drop, any map |
| Shotgun Choke III | Mod | 2× Mod Components, 8× Wires | Electromagnetic Storm / Locked Gate / Night Raid |
| Shotgun Silencer | Mod | 2× Mod Components, 8× Wires | Electromagnetic Storm / Locked Gate / Night Raid / Hidden Bunker |
| Showstopper | Grenade | 1× Advanced Electrical Components, 1× Voltage Converter | Random drop, any map |
| Silencer I | Mod | 2× Mechanical Components, 4× Wires | Random drop, any map |
| Silencer II | Mod | 2× Mod Components, 8× Wires | Random drop, any map |
| Smoke Grenade | Grenade | 14× Chemicals, 1× Canister | Random drop, any map |
| Snap Hook | Utility | 2× Power Rod, 3× Rope, 1× Exodus Modules | Electromagnetic Storm only |
| Stable Stock II | Mod | 2× Mechanical Components, 3× Duct Tape | Random drop, any map |
| Stable Stock III | Mod | 2× Mod Components, 5× Duct Tape | Electromagnetic Storm / Locked Gate / Night Raid |
| Surge Coil | Utility | — | Electromagnetic Storm only |
| Tactical Mk. 3 (Defensive) | Augment | 2× Advanced Electrical Components, 3× Processor | Stella Montis / The Blue Gate |
| Tactical Mk. 3 (Healing) | Augment | 2× Advanced Electrical Components, 3× Processor | Stella Montis / The Blue Gate |
| Tactical Mk. 3 (Revival) | Augment | 2× Advanced Electrical Components, 3× Processor | Stella Montis / The Blue Gate |
| Tagging Grenade | Grenade | 1× Electrical Components, 1× Sensors | Random drop, any map |
| Tempest | Weapon | 3× Advanced Mechanical Components, 3× Medium Gun Parts, 3× Canister | Night Raid / Hurricane only |
| Torrente | Weapon | 2× Advanced Mechanical Components, 3× Medium Gun Parts, 6× Steel Spring | Random drop, any map |
| Trailblazer | Grenade | 1× Explosive Compound, 1× Synthesized Fuel | Stella Montis only |
| Trigger 'Nade | Grenade | 2× Crude Explosives, 1× Processor | Quest reward — Sparks Fly (also scavengeable) |
| Venator | Weapon | 2× Advanced Mechanical Components, 3× Medium Gun Parts, 5× Magnet | Random drop, any map |
| Vertical Grip II | Mod | 2× Mechanical Components, 3× Duct Tape | Random drop, any map |
| Vertical Grip III | Mod | 2× Mod Components, 5× Duct Tape | Electromagnetic Storm / Locked Gate / Night Raid |
| Vita Shot | Quick Use | 2× Antiseptic, 1× Syringe | Random drop, any map |
| Vita Spray | Quick Use | 3× Antiseptic, 1× Canister | Random drop, any map (also quest — Worth Your Salt) |
| Vulcano | Weapon | 1× Magnetic Accelerator, 3× Heavy Gun Parts, 1× Exodus Modules | Hidden Bunker / Hurricane only |
| Wolfpack | Grenade | 2× Explosive Compound, 2× Sensors | Night Raid only |
| Yellow Light Stick | Quick Use | 3× Chemicals | Random drop, any map |
Event-Locked and Map-Specific Blueprints
Several of the most desirable blueprints in ARC Raiders are gated behind specific Dynamic Events or maps. Missing these conditions means you simply cannot find these recipes, no matter how many containers you open.
| Dynamic Event / Condition | Exclusive Blueprints |
|---|---|
| Night Raid | Tempest, Wolfpack |
| Locked Gate | Bobcat |
| Hidden Bunker | Vulcano |
| Hurricane | Bobcat, Canto, Tempest, Vulcano |
| Harvester | Equalizer, Jupiter |
| Cold Snap | Fireworks Box |
| Electromagnetic Storm | Snap Hook, Surge Coil |
| Close Scrutiny | Dolabra |
| Stella Montis (any condition) | Aphelion, Deadline, Gas Mine, Pulse Mine, Seeker Grenade, Trailblazer |
Most Tier III mods — Angled Grip III, Compensator III, Extended Barrel, Lightweight Stock, Muzzle Brake III, Padded Stock, Shotgun Choke III, Shotgun Silencer, Stable Stock III, and Vertical Grip III — require an active Electromagnetic Storm, Locked Gate, or Night Raid condition to appear. Some of these also drop during Hidden Bunker.
The Equalizer and Jupiter blueprints deserve special mention. Both come exclusively from completing the Harvester event puzzle while the Queen is active. You can kill the Queen first, but other players may finish the puzzle before you. The drop between the two is random, and getting one over the other repeatedly is common — trading duplicates with other raiders is a practical workaround.
Quest-Exclusive Blueprints
Four blueprints are initially obtained only through quest completion. Some of these can also appear as Trial rewards or scavenging drops after the quest is done.
| Blueprint | Quest Name |
|---|---|
| Hullcracker (+ Launcher Ammo) | The Major's Footlocker |
| Burletta | Industrial Espionage |
| Lure Grenade | Greasing Her Palms |
| Trigger 'Nade | Sparks Fly |
The Vita Spray blueprint can also come from the Worth Your Salt quest, though it drops freely on all maps as well.
The Three Missing Blueprints
The in-game grid previously showed 77 total slots, but a patch reduced the visible count to 75 (with roughly 72 confirmed obtainable). Three empty positions remain, and no player has confirmed finding them. The leading candidates for these unfilled slots are Silencer III, Horizontal Grip, and Kinetic Converter. Some players have also speculated about the Anvil Splitter occupying one of the missing slots, though it already exists as a craftable blueprint in the current build.
There have been unverified claims that Embark Studios confirmed at least one blueprint has never been discovered by any player, potentially tied to an elaborate in-game puzzle. Nothing official has been confirmed on this front, and the community remains divided on whether these slots represent future content or hidden secrets.
Blueprints define your long-term progression in ARC Raiders. Once you learn a recipe, you can reliably craft that item whenever you have the materials, removing the frustration of hoping for the right drop from a locked room. Prioritize raiding during Dynamic Events if you're hunting specific condition-locked recipes, and always extract immediately when you find something rare. Duplicate blueprints still hold value as trade currency or a quick 5,000-Coin sale, so nothing goes to waste.