
Trial Chambers are underground combat dungeons made of tuff and copper that appear across the Overworld. The most reliable way to reach one is using a Trial Explorer Map from a Cartographer villager, which marks a chamber for you to follow on the surface before digging down to the structure. Mojang’s overview confirms both the underground location and the villager map method (minecraft.net).
Know where Trial Chambers generate
Chambers generate underground in any Overworld biome and only in new chunks created on or after version 1.21. The starting room typically sits around Y −40 to −20, and layouts often extend upward toward Y 0. If you are searching a world created before 1.21, ride out past your explored area to generate fresh terrain first. Because generation follows a large grid centered on 0,0, expect one chamber per region and long distances between structures.
Method 1: Buy and use a Trial Explorer Map (recommended)
Step 1: Find or convert a Cartographer villager and level them to Journeyman (level 3). Quick early trades include paper and glass panes; use a Cartography Table to restock your map needs. The Trial Explorer Map costs 12 emeralds and 1 compass at Journeyman.
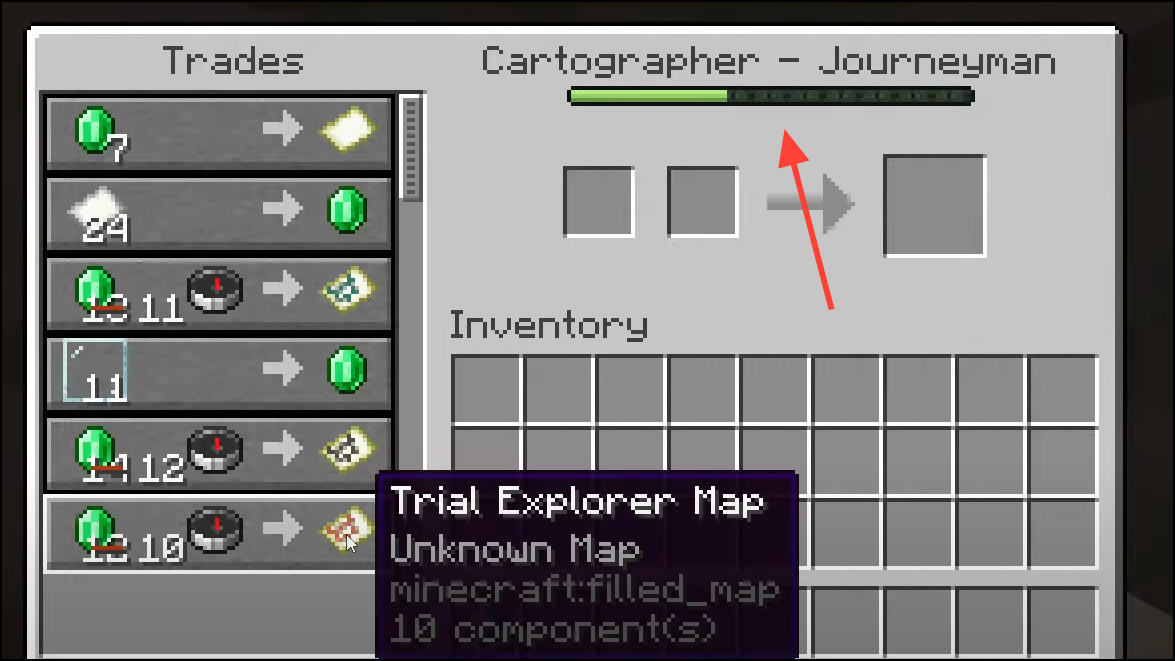
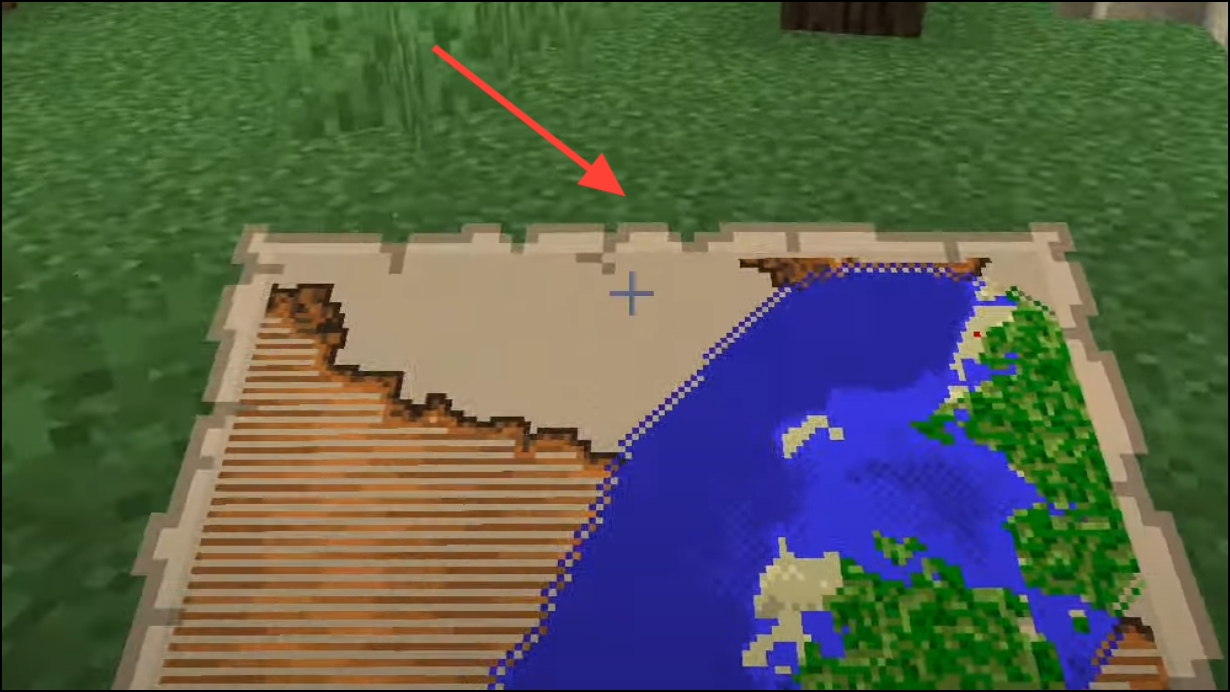
Step 2: Hold the purchased map to center its rendering on your current position. Face the map so your player icon points toward the chamber marker. If the marker sits off the visible map, upgrade the map zoom in a Cartography Table until the icon appears.
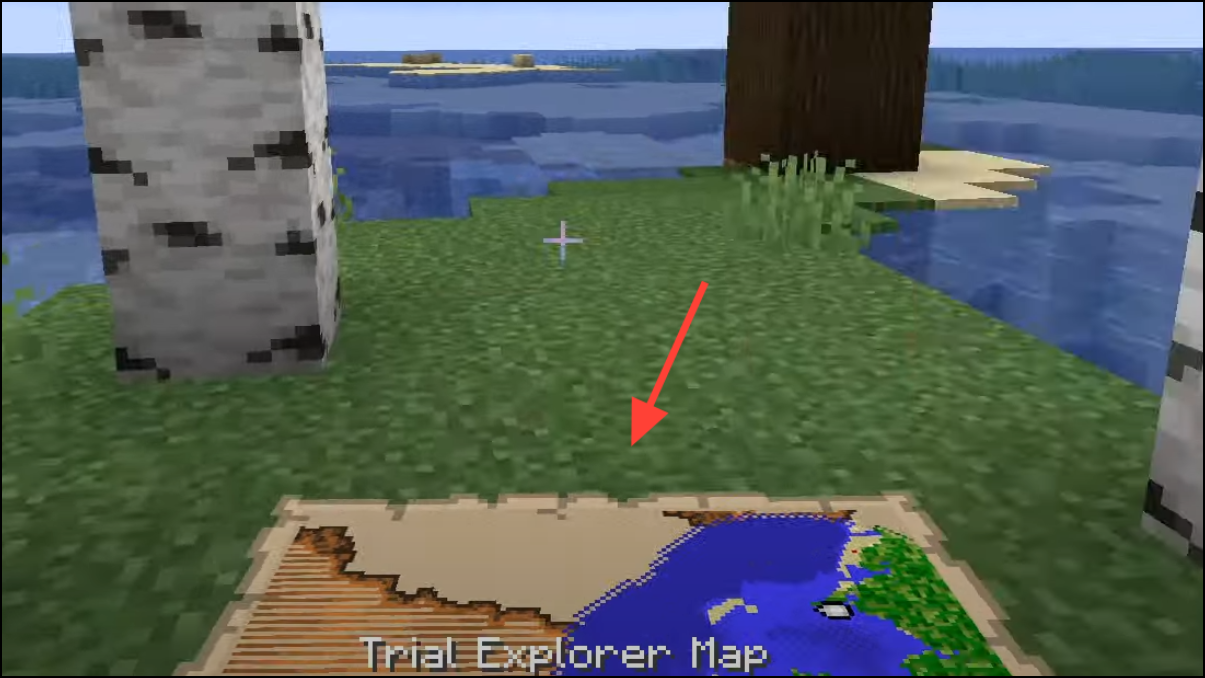
Step 3: Travel until you stand directly on the marker on the surface. Trial Chambers are underground; there is no surface entrance. Place a temporary bed or note coordinates to simplify returns if needed.
Step 4: Dig a safe shaft straight down in a 2×1 pattern and ladder or water‑bucket your descent. Aim for Y −40 to −20 first; if you miss, scan upward toward Y 0. You are close when you uncover tuff bricks and copper blocks or a 3×3 oxidized copper doorway.
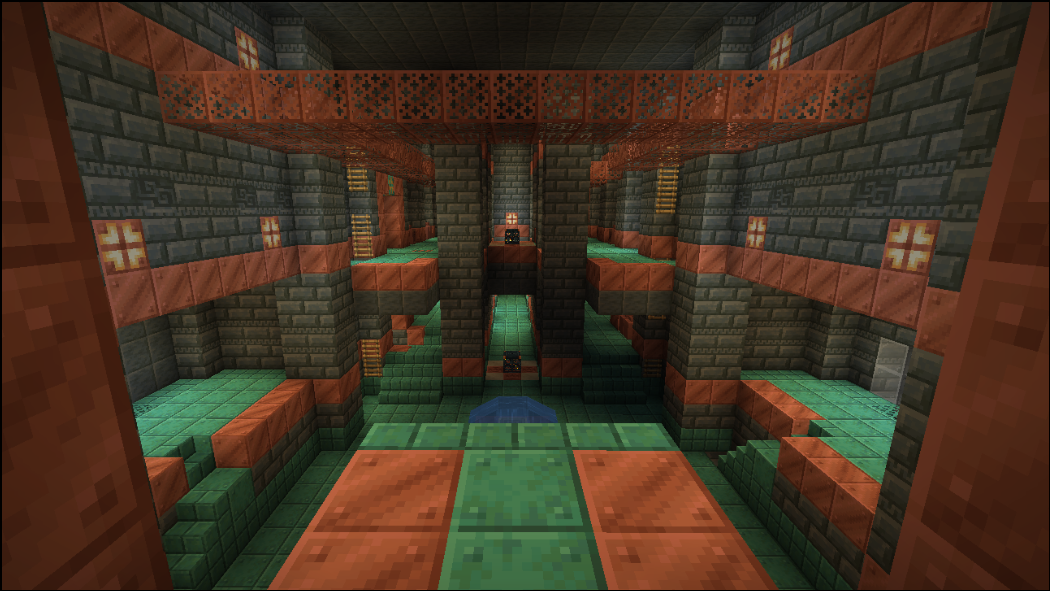
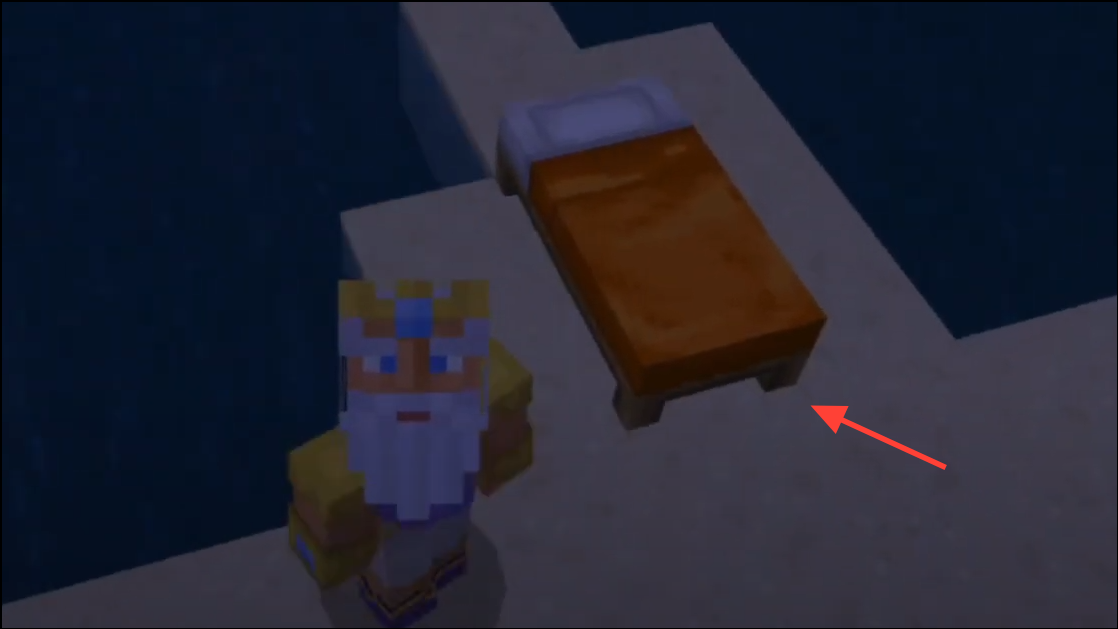
Step 5: Break into the structure carefully. Chambers ignore light for spawns, so place cover, use a shield, and avoid waking multiple trial spawners at once. Look for vault pedestals and beds in intersections to set spawn.
Method 2: Use the locate command (cheats/single‑player/admin)
Step 1: Enable cheats for the world or ensure you have operator privileges on a server. This method instantly gives you the nearest coordinates.
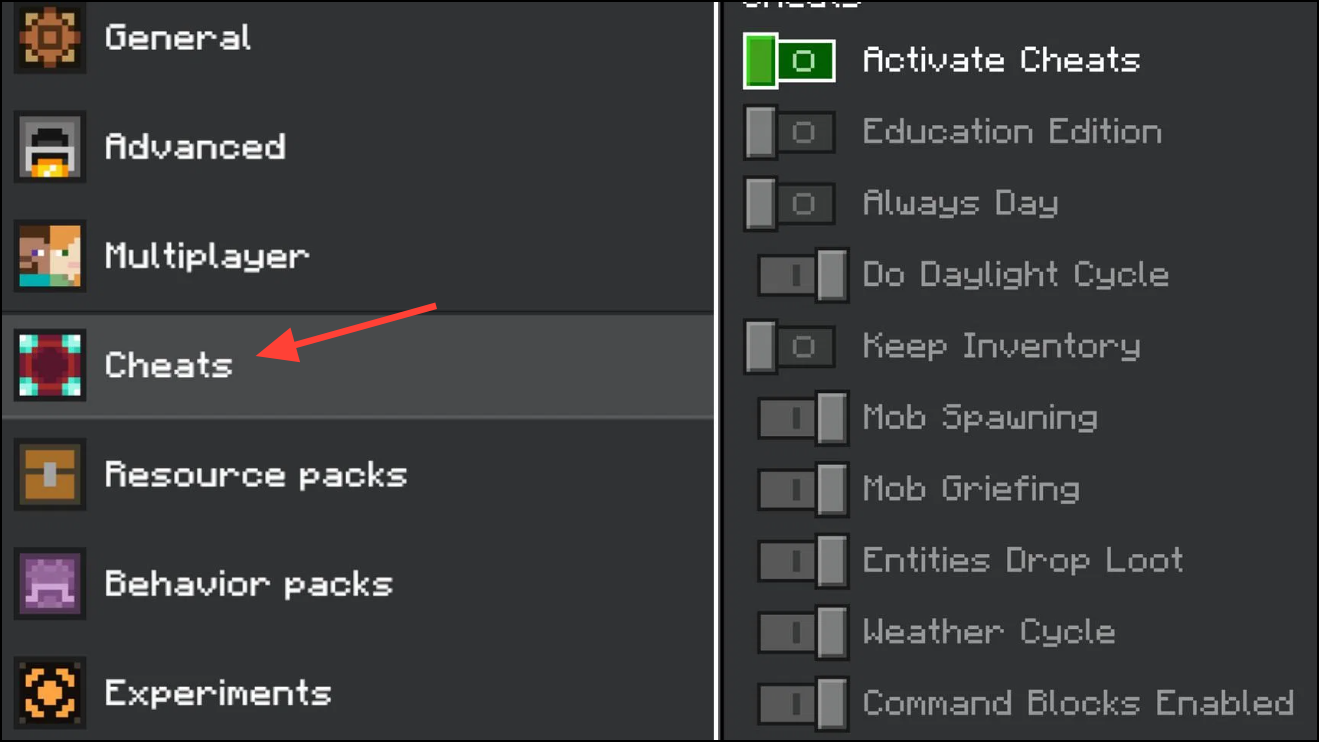
Step 2: Run the locate command for the structure.
/locate structure minecraft:trial_chambersStep 3: Travel or teleport to the reported coordinates. Start a safe 2×1 descent near the target and break in when you reach tuff and copper blocks.
Method 3: Use your seed on a structure map (no cheats)
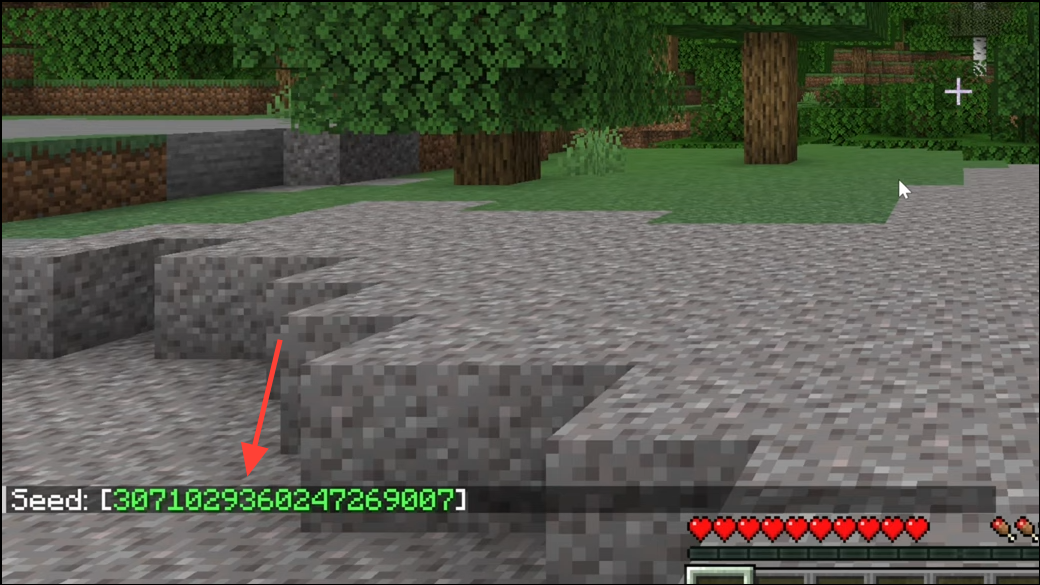
Step 1: Retrieve your world seed. In Java, press F3 then read “Seed” on the debug screen, or use /seed if allowed. In Bedrock, the seed appears in World Settings or by running /seed if cheats are enabled.
Step 2: Enter the seed into a trusted seed map tool to preview Trial Chamber locations. Plot a route to the nearest location that lies in chunks you have not generated yet in your own world.
Step 3: At the target surface coordinates, dig a safe shaft and search between Y −40 and 0 for tuff/copper rooms if the exact entrance isn’t obvious.
Method 4: Manual discovery by smart digging
Step 1: Prepare essentials: iron or better pickaxe, shield, food, blocks, torches, and a water bucket. Bring a bed to set spawn near the dig site.
Step 2: Pick a search area in unexplored terrain (new chunks). Start a 2×1 vertical shaft to about Y −35. A 2×1 shaft prevents freefall if one block opens to a cave.
Step 3: Carve short horizontal probes every 10–12 blocks while moving toward 0,0 or along long straight lines. Watch for sudden patches of tuff bricks and any copper blocks; natural caves rarely expose large, regular tuff‑brick walls.
Step 4: If you reach Y −40 without finding the structure, spiral upward in 5‑block increments toward Y −15 and then toward Y 0. Many rooms sit in this band, even if the starting room is deeper.
Step 5: When you locate the chamber, open a controlled entry and mark a safe return path with signs or torches pointing out.
Troubleshooting and field tips
Map marker but no chamber below: Ensure you are in new chunks; older, already‑explored chunks in pre‑1.21 worlds cannot host chambers. If your surface is on the ocean or uneven hills, your vertical projection might miss rooms that extend off‑center—scan a 30–60 block radius between Y −40 and 0.
Map icon not visible: The structure may sit outside your current map scale. Use a Cartography Table to increase zoom, or walk toward the general direction until the icon appears at the map edge.
Console and Bedrock notes: The Cartographer’s Trial Explorer Map is also available on Bedrock at Journeyman for 12 emeralds plus a compass. If you built your base long before 1.21, sail or travel far enough to create fresh chunks before using a map.
Recognize the entrance: Look for a 3×3 oxidized copper doorway, copper grates, and carved tuff bricks. Intersections often contain beds; set your spawn before engaging spawners.
Safe descent checklist: Use a 2×1 dig or drop a water column to avoid cave falls. Keep a bucket ready for lava pockets, and carry extra ladders or scaffolding for an exit route.
Quick gear checklist before you dig
- Iron or diamond pickaxe plus spare pick or materials to craft/repair.
- Shield, food stacks, and a bow with arrows for ranged spawners.
- Blocks for cover, torches for navigation, and a water bucket for lava and falls.
- Bed for respawn and a few chests to stage loot near the entry point.
Using a Cartographer’s map is the fastest repeatable method; commands and seed tools are instant if permitted. When you reach tuff and copper, slow down—controlled entry and spawn management will save time and gear.