
The "WARNING! BIOS Recovery mode has been detected" message interrupts the normal boot process on ASUS motherboards, signaling that your system cannot load the BIOS properly. This error typically appears after a failed BIOS update, sudden power loss during firmware flashing, or BIOS corruption, and leaves your PC unable to start Windows 11 until the BIOS is recovered. Addressing this issue restores your computer's ability to boot reliably and prevents repeated recovery prompts.
Recover BIOS Using a USB Flash Drive
Restoring the BIOS from a USB flash drive is the most direct and effective method for resolving this error, especially when the system cannot access the BIOS setup screen or boot into Windows.
Step 1: Prepare a working Windows computer and a USB flash drive with at least 1GB capacity. The USB drive must be formatted as FAT16 or FAT32 to ensure compatibility with the motherboard's recovery function.
Step 2: Download the latest BIOS file for your specific motherboard model from the official ASUS Download Center. Use the search function to locate your model, then navigate to the "Drivers & Utilities" section and select "BIOS & Firmware" to download the appropriate file.
Step 3: Extract the downloaded BIOS archive if necessary. Locate the BIOSRenamer.exe utility included in the archive or on the ASUS support page. Double-click the utility to automatically rename the BIOS file with the correct extension (usually .CAP) required for your motherboard’s recovery process.
Step 4: Copy the renamed BIOS file to the root directory of the formatted USB drive. Do not place it inside any folders.
Step 5: Insert the USB flash drive into a designated USB port on the affected motherboard. For some ASUS models, the port nearest to the PS/2 keyboard/mouse connector is preferred for recovery.
Step 6: Power on or restart the computer. The motherboard should automatically detect the BIOS file on the USB drive and launch the EZ Flash recovery utility. Follow on-screen prompts to begin the BIOS update. Wait until the progress bar completes and a success message appears before removing the USB drive or powering off the system.
Step 7: When prompted after restart, press F1 to enter BIOS setup. Once inside, press F5 to load optimized defaults, then confirm by selecting OK. This step resets all BIOS settings to stable defaults and helps prevent further boot issues.
Recover BIOS Using the Motherboard Support DVD
If your motherboard includes a support DVD, you can attempt recovery with the disc. Note that the BIOS version on the DVD may be outdated, so use this method only if you cannot access a USB drive or the latest BIOS file.
Step 1: Insert the motherboard support DVD into your optical drive and restart the computer. The system should detect the disc and initiate the EZ Flash recovery interface automatically.
Step 2: Select the appropriate BIOS file when prompted—this is usually indicated on the recovery error screen (e.g., X299E3.CAP). Use your keyboard or mouse to select the file.
Step 3: Wait for the update process to complete. Once successful, click OK to restart the system.
Step 4: After reboot, press F1 to enter BIOS setup. Press F5 to restore default BIOS settings, then confirm with OK.
Reformat the USB Drive to FAT16 or FAT32
Incorrect USB formatting can cause the motherboard to fail to detect the BIOS file. Reformatting ensures the drive is compatible with the recovery utility.
Step 1: Insert the USB drive into a working Windows PC. Right-click the drive in File Explorer and select "Format."
Step 2: Choose FAT32 (or FAT16 if required) as the file system, then click "Start" to format. Be aware this erases all data on the drive.
Step 3: Once formatting is complete, copy the correct BIOS file to the root of the USB drive and proceed with the recovery steps outlined above.
Reset BIOS Settings or Clear CMOS
Corrupted or unstable BIOS settings can cause repeated recovery prompts. Resetting the BIOS to default values or clearing the CMOS can resolve configuration errors.
Step 1: Enter the BIOS setup after recovery by pressing F1 during boot. Once inside, press F5 to load optimized defaults and confirm with OK.
Step 2: If you cannot access the BIOS setup, power off the system and unplug it from the outlet. Locate the CMOS battery on your motherboard, remove it for about one minute, then reinsert it. Some models include a dedicated CMOS reset button or jumper—refer to your motherboard manual for instructions.
Step 3: Reconnect power and start the computer. This should clear any problematic settings and allow a normal boot.
Perform a Startup Repair or System Restore
In rare cases, the error may persist due to underlying system file corruption or failed Windows updates. Startup Repair and System Restore can address these issues.
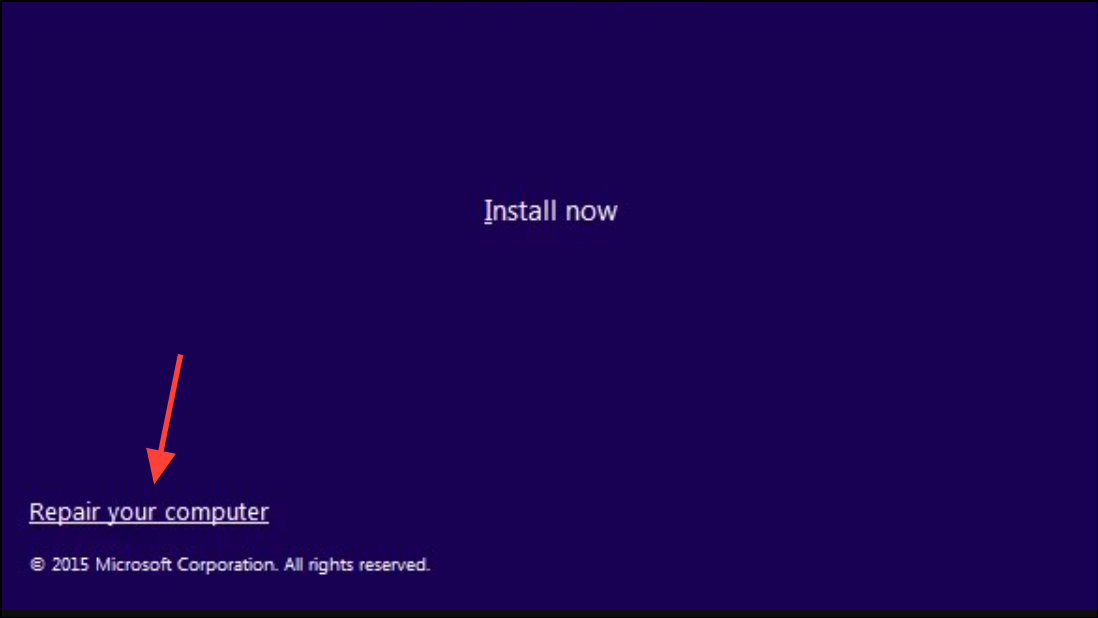
Step 1: Create a bootable Windows 11 installation media using the Media Creation Tool on another computer. Insert the media into the affected PC and boot from it.
Step 2: On the Windows Setup screen, select your language preferences, then click "Repair your computer" to access advanced options.
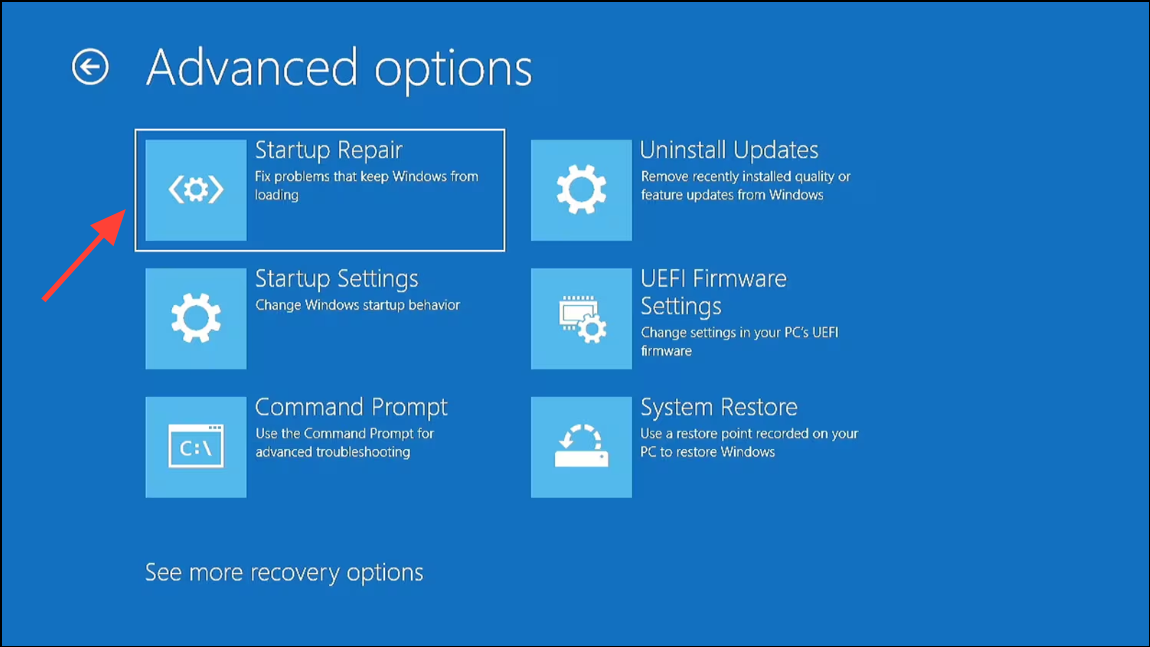
Step 3: Navigate to Troubleshoot > Advanced Options > Startup Repair to automatically fix boot issues. If Startup Repair fails, return to Advanced Options and select "System Restore" to revert your PC to a previous working state.
Replace the Faulty Motherboard (If All Else Fails)
If none of the above solutions resolve the BIOS recovery mode error, hardware failure may be the root cause. Persistent BIOS corruption, inability to flash firmware, or repeated recovery prompts after all troubleshooting indicate a defective motherboard.
Consult your manufacturer’s support or a professional technician to confirm the diagnosis. If necessary, replace the motherboard with a compatible model and reinstall your system components.
Restoring BIOS functionality with these methods returns your system to normal operation and prevents recurring recovery errors. Always use the latest BIOS version for your motherboard and avoid power interruptions during firmware updates to reduce the risk of future issues.