
When Clipchamp refuses to start a screen recording on Windows 11, it’s almost always a permissions or setup problem. The app and the browser recorder both need explicit access to your camera, microphone, and screen, and a few UI choices in the share prompt can change what actually gets captured. Work or school PCs can add policy blocks on top.
Common symptoms and the fastest checks
| Symptom | Check first | Where to fix |
|---|---|---|
| Record button is grayed out | Browser/App has camera/mic/screen permission | Edge/Chrome site permissions, Windows app settings |
| “We can’t record your camera and/or microphone” | Camera/mic blocked or in use by another app | Browser site settings; close webcam utilities; device properties |
| No screen share prompt appears | Popup blocked or permission previously denied | Reset site permissions for Clipchamp/SharePoint origin |
| No system audio in recording | “Share system audio” toggle not enabled | Enable audio in the share picker (when offered) |
| Menus/pop‑ups missing from capture | Only a single window was shared | Select “Entire screen” instead of “Window” |
| Works at home, blocked at work | Admin policy denies screen capture | Ask IT to review screen capture policy |
Use a supported setup
On Windows 11, use Microsoft Edge (version 79 or newer) or Google Chrome (version 74 or newer). Keep your browser up to date. The Windows Clipchamp app also supports screen and camera recording. Safari isn’t supported for this workflow.
Fix permissions (camera, microphone, and screen)
Clipchamp needs three separate grants: camera, microphone, and screen capture. If you denied one earlier, the recorder can’t start until it’s restored.
- In Edge: Settings → Cookies and site permissions → All sites → open the Clipchamp or your organization’s SharePoint URL, then set Camera and Microphone to Allow.
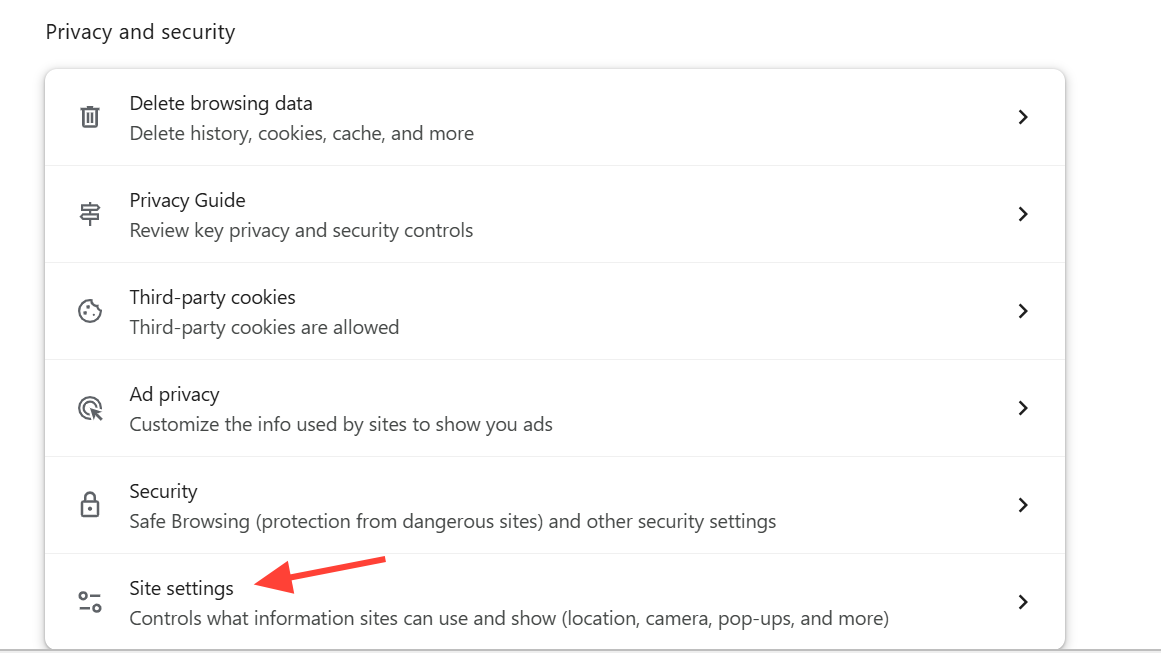
- In Chrome: Settings → Privacy and security → Site settings → under Recent activity, open the Clipchamp or SharePoint URL and set Camera and Microphone to Allow.
- When the share picker opens, choose what to capture (Entire screen, Window, or Tab). Enable the “Share system audio” option if you want device audio included.
If you’re on a work account, the prompt may show your organization’s SharePoint address as the site origin. Allowing that origin is required for the recorder to work. If you need a step‑by‑step reference that consolidates these flows, use Microsoft’s permission guidance on Clipchamp’s recorder once and keep it handy for future resets: Troubleshoot camera, microphone, and screen recording permissions.
Choose the right share option for what you need to show
- Entire screen: Captures everything on a display, including context menus, floating palettes, and pop‑up dialogs. Use this to avoid “empty clicks” in the final video.
- Window: Captures only one app window; transient menus and dialogs from other processes typically won’t appear.
- Tab: Captures a browser tab and offers a built‑in audio toggle for that tab’s sound.
Clear and re‑grant site permissions if prompts never appear
If you aren’t seeing prompts to share your screen or enable the microphone, reset the site’s access and try again:
- Edge: Go to the Clipchamp or SharePoint site → lock icon in the address bar → Permissions for this site → Reset permissions.
- Chrome: Go to the Clipchamp or SharePoint site → lock icon → Site settings → Reset permissions.
Reload the page, start a new recording, and select your source in the share picker. Make sure “Share system audio” is on if you want device sound in the capture.
Fix microphone and camera errors
If you see an error page about the camera or microphone:
- Close other apps that might be using the camera or mic (webcam utilities, conferencing apps, virtual webcam drivers). Only one app can control these devices at a time.
- In Windows Sound settings, open your microphone’s device properties and disable any “allow apps to take exclusive control of this device” option if exclusive access is blocking recording.
- Verify the correct input device is selected in the recorder before pressing Record.
Update or repair the Clipchamp Windows app
If you record with the Windows app and the recorder won’t start or freezes, update the app in Microsoft Store, then repair it:
- Windows Settings → Apps → Installed apps → Clipchamp → Advanced options → Repair (or Reset if Repair doesn’t help).
If you need a reference for the Windows repair flow, use Microsoft’s app repair guide: Repair apps and programs in Windows.

Try the browser recorder in a clean session
- Open an InPrivate/Incognito window in Edge or Chrome and sign into Clipchamp.
- Start a new recording; grant camera/mic; pick your screen source and enable audio.
A private session helps rule out extension conflicts and stale site settings without permanently changing your main profile.
Work or school PC? Screen capture may be blocked by policy
Organizations can deny web‑based screen capture through browser policy. If recordings fail at the share step on a managed device, ask your IT admin to review screen capture policies in your browser environment. Microsoft Edge documents the “permit or deny screen capture” setting here: Edge browser policies.
Audio capture details you shouldn’t miss
- System audio: When the share picker offers “Share system audio,” enable it to include device sound with “Entire screen” or supported sources.
- Browser tab audio: If you only need a tab and its sound, pick the Tab option and toggle audio on in the picker.
- Microphone narration: Even if you don’t share system audio, you can narrate with your mic once permission is granted; confirm the correct mic is selected in the recorder.
Games and high‑motion apps
If screen+camera recording freezes while capturing a game, switch to “Entire screen” and keep the game in windowed or borderless‑windowed mode. Close overlays and webcam utilities, then retry. If the Windows app struggles, test the same workflow in Edge or Chrome to compare behavior.
About lost recordings after a crash
If Windows rebooted or the browser closed before Clipchamp finished processing, there may be no recoverable temp file. Working data typically lives under the app’s package folder while the session is active:
C:\Users\<your‑user>\AppData\Local\Packages\Clipchamp.Clipchamp_yxz26nhyzhsrtOnce a session ends abruptly, those buffers are often gone. To reduce risk on long captures, record in shorter segments and save immediately after each take.
Still blocked?
If you’ve re‑granted permissions, tested in a private browser session, and repaired the app but recording still won’t start, contact Clipchamp support from the official channel so the team can review your account and environment: Contact Clipchamp support.