
You’re trying to enable Secure Boot and your firmware throws: “Secure Boot can be enabled when system in User Mode. Repeat operation after enrolling Platform Key (PK).” That error simply means the system is still in Setup Mode and doesn’t have the Secure Boot keys installed. You need to switch the firmware to User Mode by installing the default keys (including the Platform Key), then enable Secure Boot.
What “Setup Mode” vs. “User Mode” means
- Setup Mode: Secure Boot keys are missing. Secure Boot cannot be turned on.
- User Mode: Secure Boot keys (including the PK) are present. You can enable Secure Boot.
The fix is to install the platform’s default Secure Boot keys in firmware. Many boards label this “Install default Secure Boot keys,” “Enroll PK,” or “Restore Factory Keys.”
Quick prerequisites for Secure Boot (avoid black screens)
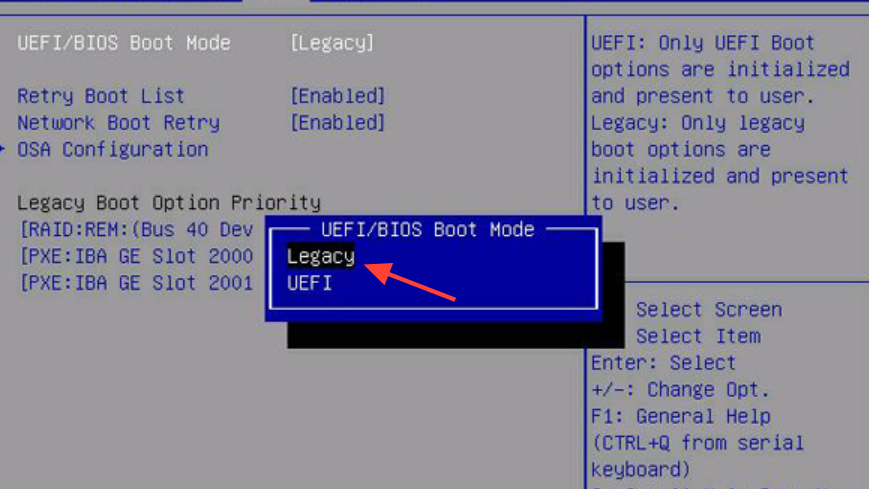
- UEFI firmware only: Compatibility Support Module (CSM) must be Disabled.
- GPT system disk: Windows installed in UEFI mode typically uses a GPT system disk. If you enable UEFI-only on an MBR install, the drive may disappear from the boot list.
- GPU UEFI support: Disabling CSM requires a graphics adapter with UEFI GOP. Older cards may not support it and can cause a black screen until CSM is restored.
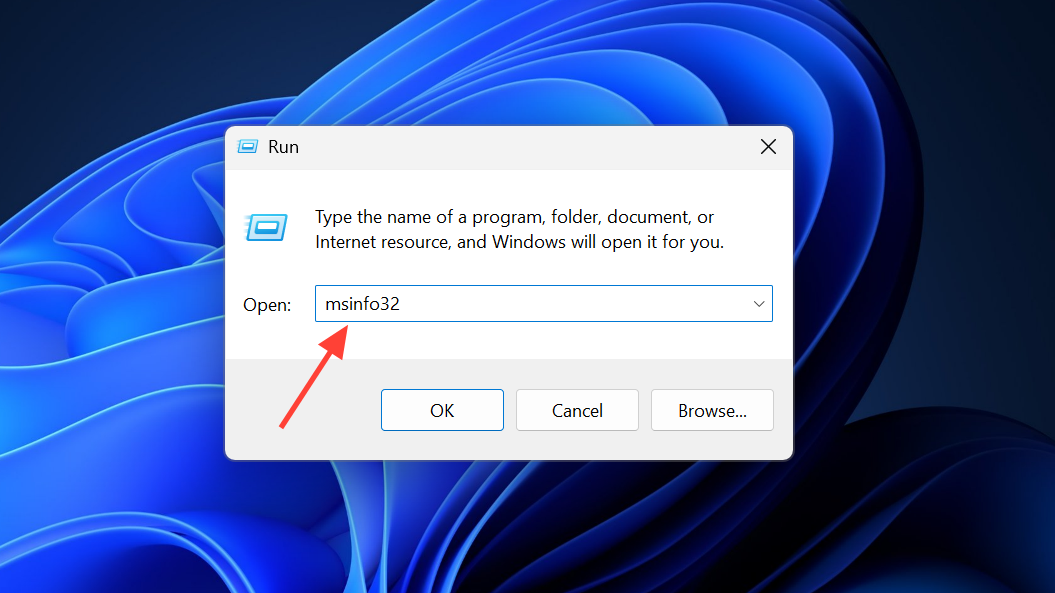
In Windows, open System Information (press Windows+R, type msinfo32):
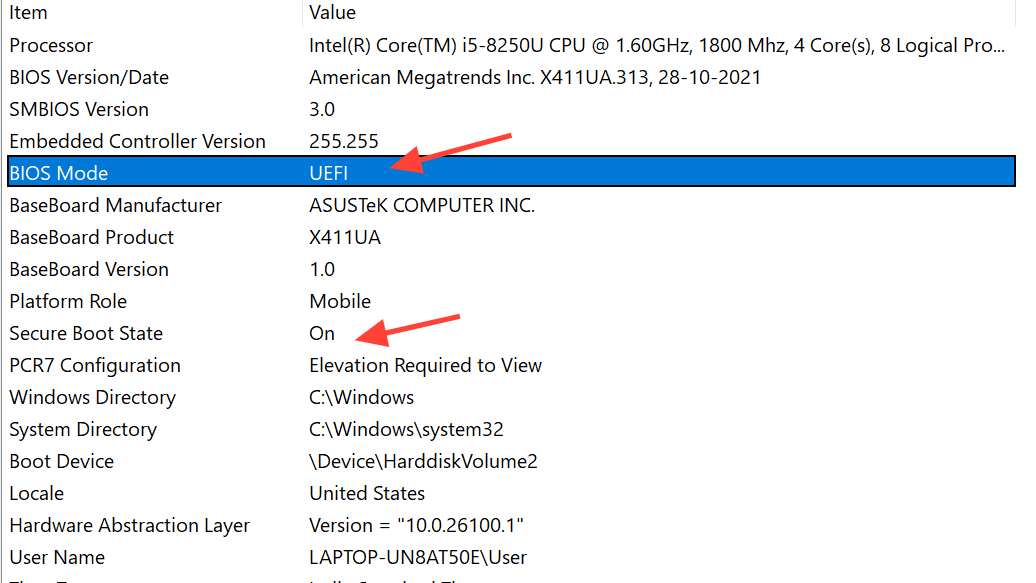
- BIOS Mode: should say UEFI (not Legacy).
- Secure Boot State: Off means keys are present but not enabled; Unsupported usually means Legacy/CSM or MBR install.
mbr2gpt) or reinstall Windows in UEFI mode. Back up first.Fix: enroll the Platform Key (PK) and enable Secure Boot
Use this sequence; wording varies slightly by vendor.
- Enter UEFI/BIOS. From Windows, you can restart into firmware using the official UEFI settings flow if you need it: Windows 11 and Secure Boot.
- Disable CSM (sometimes called Legacy Support). Save and re-enter firmware if prompted.
- Go to the Secure Boot page.
- Change Secure Boot Mode from Standard to Custom to unlock key management.
- Open Key Management (or similar) and choose:
- Install default Secure Boot keys, or
- Enroll Platform Key (PK) (and “Enroll all factory default keys” if offered), or
- Restore Factory Keys/“Reset to Default”.
- Set Secure Boot to Enabled.
- (Optional but recommended) Change Secure Boot Mode back to Standard.
- Save & Exit. Boot into Windows and verify in System Information that Secure Boot State is On.
Vendor menu paths (where to find the keys)
| Motherboard vendor | Menu path (labels vary by BIOS version) | Action to install keys |
|---|---|---|
| MSI | Settings → Advanced → Windows OS Configuration → Secure Boot | Set Mode to Custom → “Manage Keys” → Install default keys → Enable Secure Boot → set Mode back to Standard |
| ASRock | Security → Secure Boot → Key Management | Select Platform Key (PK) → Generate/Enroll → “Install default Secure Boot keys” → Enable Secure Boot |
| Gigabyte/Aorus | Security → Secure Boot | Set Mode to Custom → Key Management → “Install default keys” or “Restore Factory Keys” → Enable Secure Boot |
| NZXT (N7 series) | Security → TPM/Secure Boot | Enable TPM if needed → Set Mode to Standard → Enable Secure Boot (keys installed by default or via “Install default keys”) |
If your board names differ, look for “Secure Boot,” “Key Management,” “Platform Key,” or “Install default keys.”
Common roadblocks and how to clear them
- “CSM is loaded” or you can’t enable Secure Boot: Disable CSM/Legacy Support. Secure Boot only works in pure UEFI mode.
- “Manage keys” is greyed out: Switch Secure Boot Mode to Custom first. That typically unlocks key options.
- Still stuck in Setup Mode: Use the firmware’s Restore Factory Keys or Install default keys. This enrolls the PK and other databases in one step.
- Secure Boot enabled but “not active” in apps/games: After installing keys, toggle Mode Custom → Standard, save, reboot. This often finalizes User Mode on finicky boards.
- Windows boot entry disappears after changes: Your Windows install may be Legacy/MBR. Convert the system disk to GPT (with backups) and ensure BIOS Mode reads UEFI, or reinstall Windows in UEFI mode.
- Black screen after disabling CSM: Your GPU may lack UEFI GOP. Options:
- Revert by clearing CMOS to restore defaults.
- Boot from integrated graphics or a different GPU to re-enter firmware and re-enable CSM.
- Update the GPU’s firmware if the vendor provides a UEFI/GOP update; otherwise, you must keep CSM enabled with that card.
Verify from Windows that Secure Boot is on
- Press Windows+R → type
msinfo32→ Enter.
- Confirm:
- BIOS Mode: UEFI
- Secure Boot State: On
If it reads Off, revisit firmware to ensure keys are installed and Secure Boot is enabled. If it reads Unsupported, the machine is still in Legacy/CSM or the system disk isn’t UEFI-bootable.
When a BIOS update helps
Some older firmware versions hide Secure Boot menus or have incomplete key management. Updating the motherboard BIOS can expose the correct options, improve UEFI/GOP compatibility, and make the key enrollment flow reliable. Use your vendor’s official update utility and release notes.
The key takeaway: that User Mode error isn’t a dead end. Switch to pure UEFI, install the default keys to move from Setup Mode to User Mode, then enable Secure Boot. If you prepare for GPT and GPU UEFI support before making changes, you’ll avoid the common boot hiccups and black screens.