
Extended Security Updates (ESU) for Windows 10 keep your system receiving critical security patches after October 14, 2025, but some eligible PCs never show the “Enroll now” option in Windows Update. This usually comes down to how Windows flags your device in the registry or how the ESU feature is toggled internally, not to a hardware fault.
Check basic ESU requirements before applying fixes
Before changing anything, confirm that your device is allowed to use the free Windows 10 ESU offer. That avoids wasting time on a machine that will never show the button.
| Requirement | What to check |
|---|---|
| Windows edition. | Must be Windows 10 Home or Pro, not Enterprise or Education. |
| Activation. | Windows must be activated with a valid license. |
| Version and build. | Windows 10 version 22H2 with current cumulative updates. |
| Account type. | Consumer device, not managed by an organization policy. |
| Region rollout. | ESU consumer feature must be available in your country. |
Step 1: Press Windows + R, type winver, and press Enter to confirm you are on Windows 10 version 22H2 (build 19045.xxxx or later). If not, install all pending updates via Settings > Update & Security > Windows Update.

Step 2: Open Settings > System > About and make sure the edition is Windows 10 Home or Windows 10 Pro, and that the device is not joined to a domain.
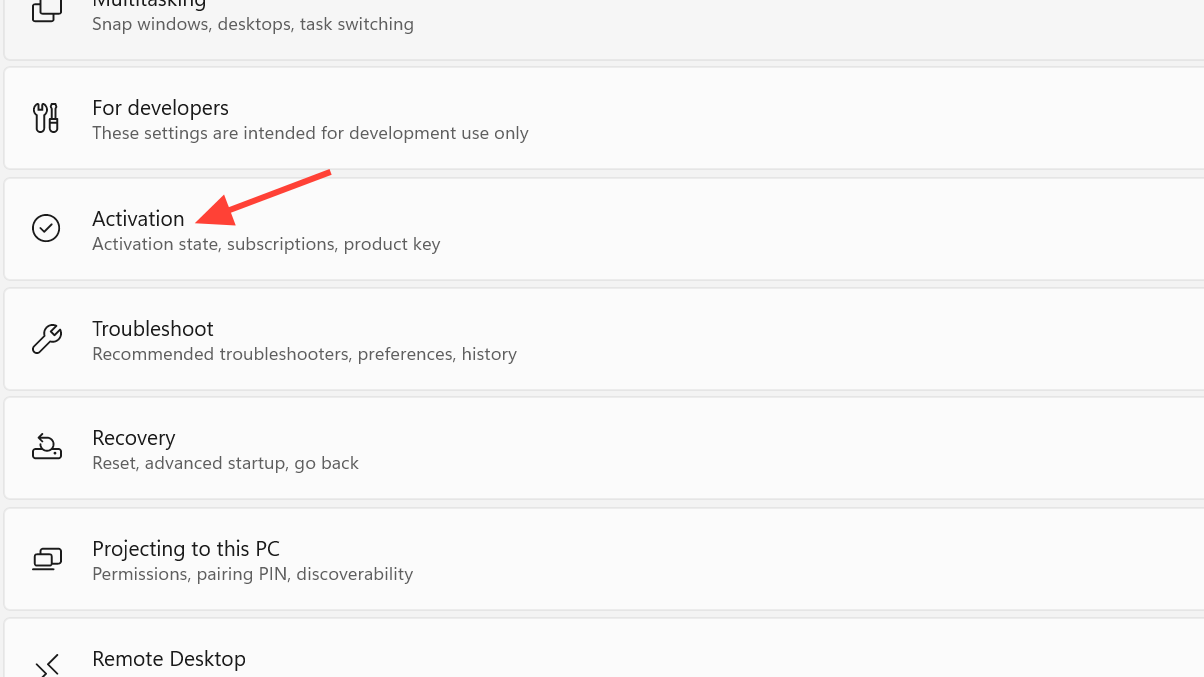
Step 3: Go to Settings > Update & Security > Activation and verify that Windows reports as activated. If activation is missing or shows an error, resolve that first.
Method 1 – Create the ConsumerESU registry keys (fastest fix)
This method tells Windows Update that the current user’s device is eligible and successfully evaluated for Consumer ESU. After a reboot, Windows Update usually displays the Extended Security Updates section with the “Enroll now” button.
1. Open Registry Editor
Step 1: Press Windows, type regedit, and select “Registry Editor” from the results.

Step 2: When User Account Control appears, click “Yes” so you can edit system settings.
2. Go to the Windows key for the current user
Step 1: In the Registry Editor address bar, paste this path, and press Enter:
HKEY_CURRENT_USER\SOFTWARE\Microsoft\Windows NT\CurrentVersion\WindowsStep 2: If you prefer to navigate manually, expand these keys in the left pane in order: HKEY_CURRENT_USER → SOFTWARE → Microsoft → Windows NT → CurrentVersion → Windows.

3. Create the ConsumerESU key
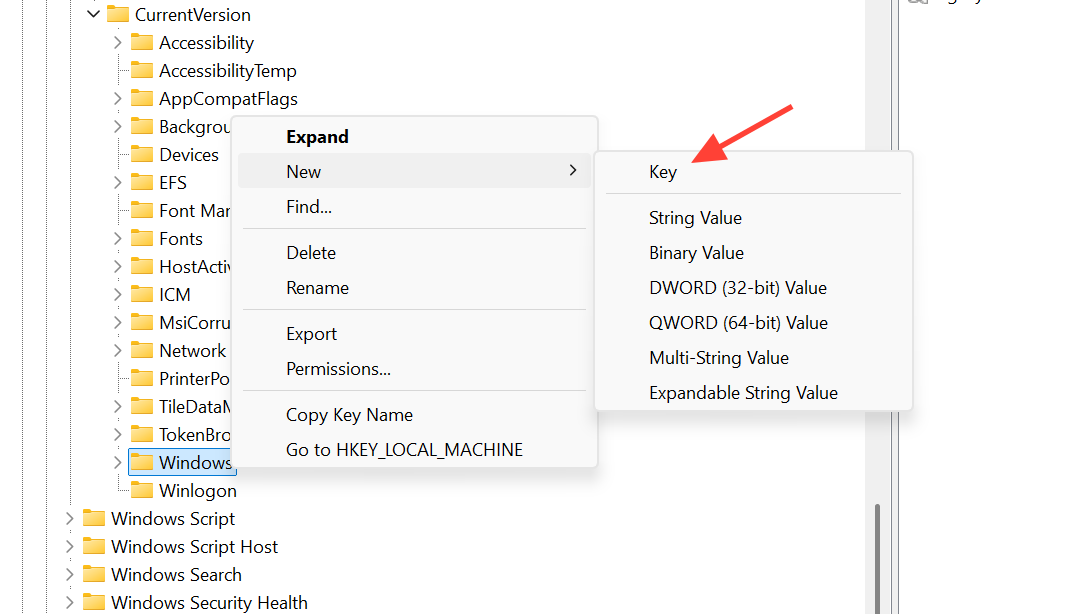
Step 1: Right‑click the Windows folder in the left pane and choose New > Key.
Step 2: Name the new key exactly ConsumerESU (without quotes) and press Enter. The spacing and spelling must match.
4. Add ESUEligibility value
Step 1: Click the new ConsumerESU key, so it is selected.
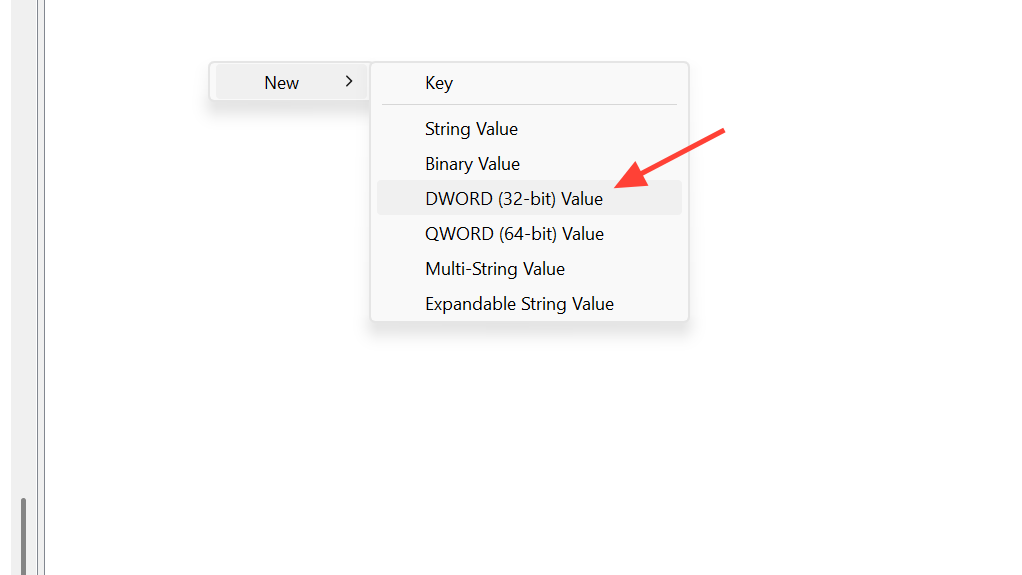
Step 2: In the right pane, right‑click an empty area and select New > DWORD (32‑bit) Value.
Step 3: Name this value ESUEligibility and press Enter.
Step 4: Double‑click ESUEligibility, set “Base” to “Decimal”, and type 2 in “Value data” to indicate the device is eligible.
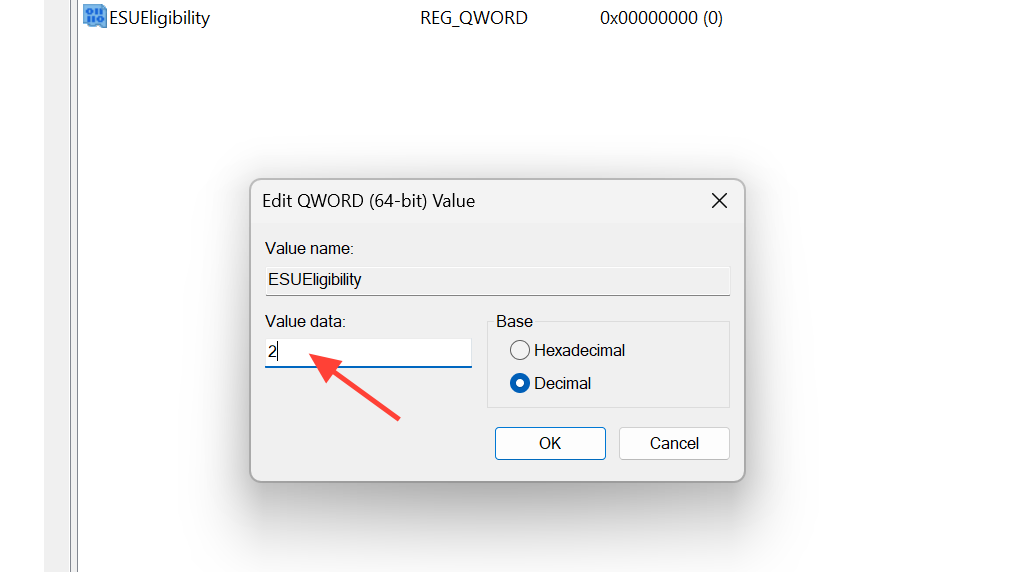
Step 5: Click “OK” to save the value.
5. Add ESUEligibilityResult value
Step 1: Still under ConsumerESU, right‑click the right pane again and choose New > DWORD (32‑bit) Value.
Step 2: Name this value ESUEligibilityResult and press Enter.
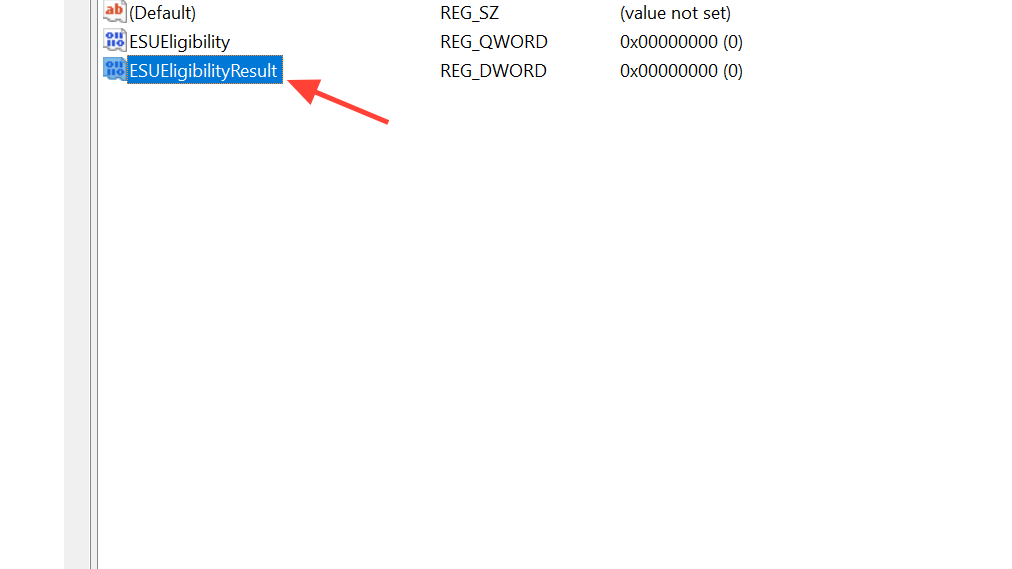
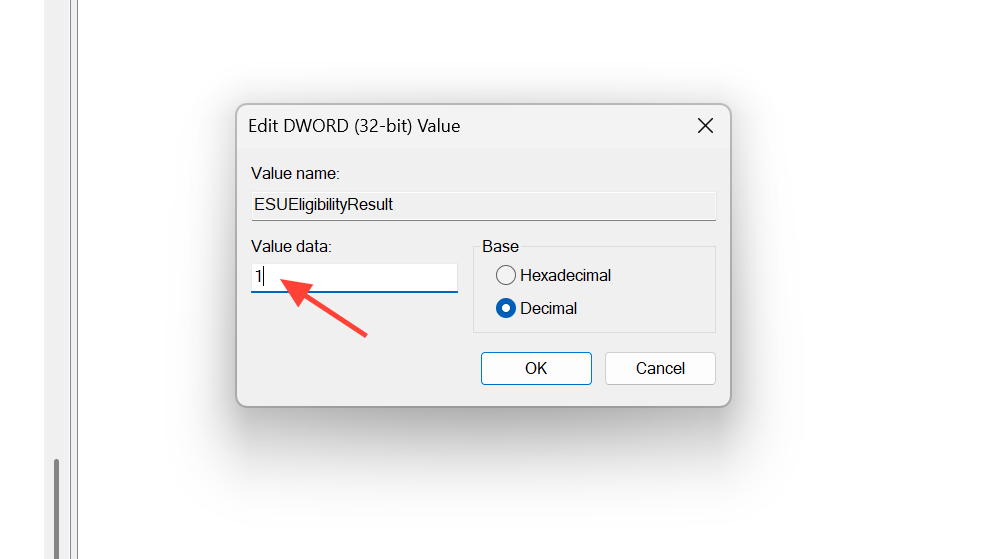
Step 3: Double‑click ESUEligibilityResult, set “Base” to “Decimal”, and type 1 in “Value data” to record a successful eligibility check.
Step 4: Click “OK” and confirm that both values now appear under the ConsumerESU key.
6. Restart and check Windows Update
Step 1: Close Registry Editor.
Step 2: Open the Start menu, select the power icon, and choose “Restart” to reload Windows with the new ESU flags.
Step 3: After the restart, open Settings > Update & Security > Windows Update and click “Check for updates”. Scroll down and look for a section mentioning Extended Security Updates for Windows 10 with an “Enroll now” button.
Step 4: If the button appears, select “Enroll now” and follow the prompts to sign in with a Microsoft account and complete enrollment. You will need an Internet connection for this step.
Method 2 – Turn on Consumer ESU using commands (Quick Method)
Some PCs do not respond to the simple ConsumerESU key alone because the internal Consumer ESU feature flag is off. This method uses built‑in command‑line tools to toggle the feature and evaluate eligibility.
1. Make sure the telemetry service is enabled
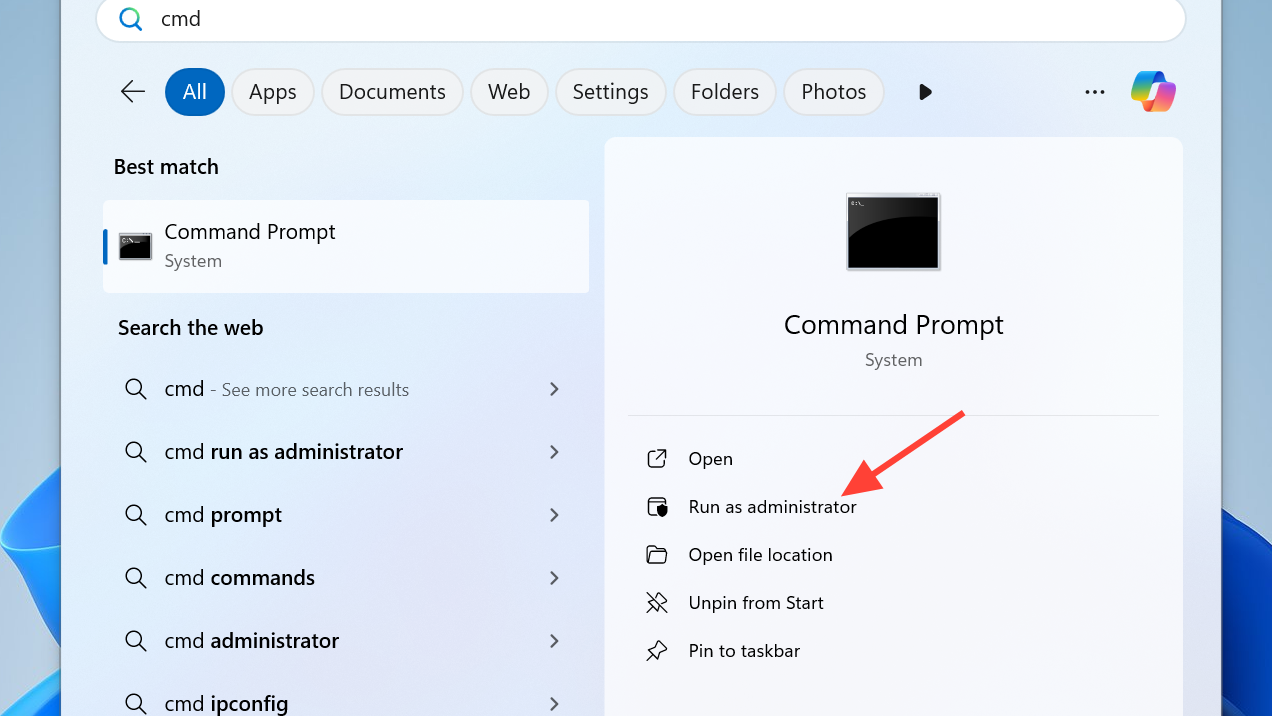
Step 1: Press Windows, type cmd, right‑click “Command Prompt”, and select “Run as administrator”. Confirm the UAC prompt.
Step 2: In the Command Prompt window, run this command to set the Connected User Experiences and Telemetry service (DiagTrack) to automatic start:
sc.exe config DiagTrack start= auto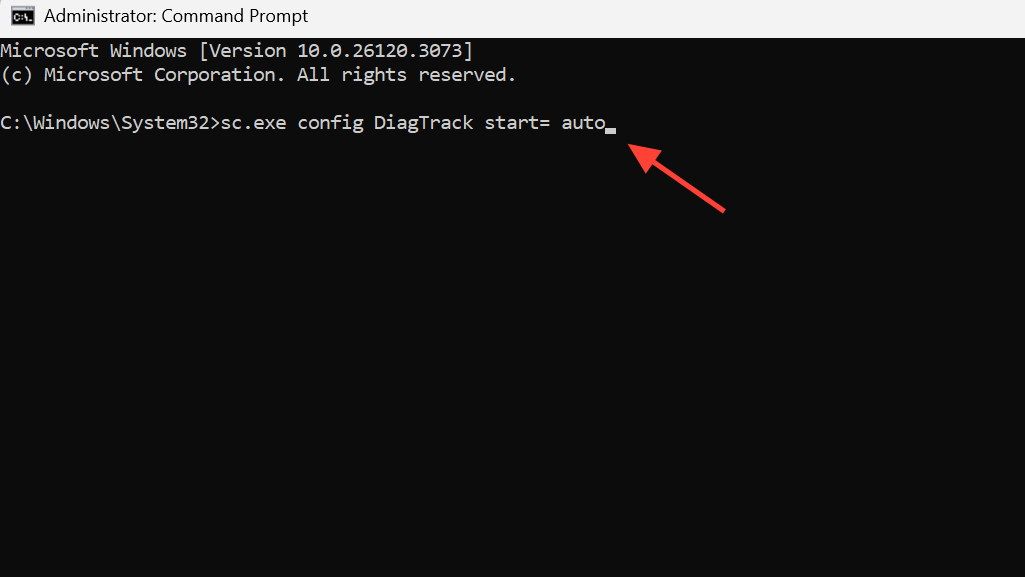
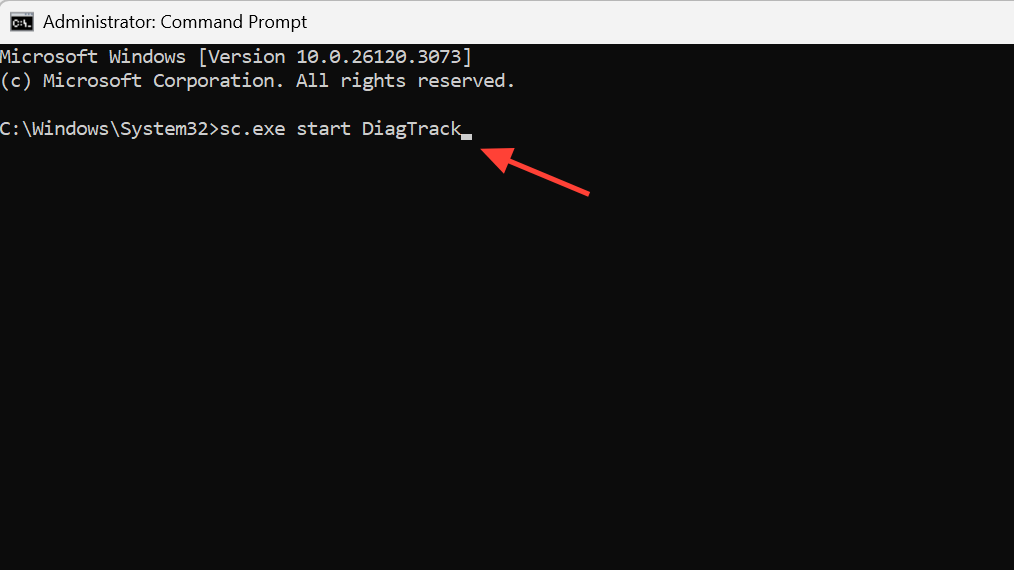
Step 3: Run this command to start the service immediately:
sc.exe start DiagTrackTelemetry must be active because Consumer ESU relies on it for feature configuration and eligibility evaluation.
2. Add the Consumer ESU feature override
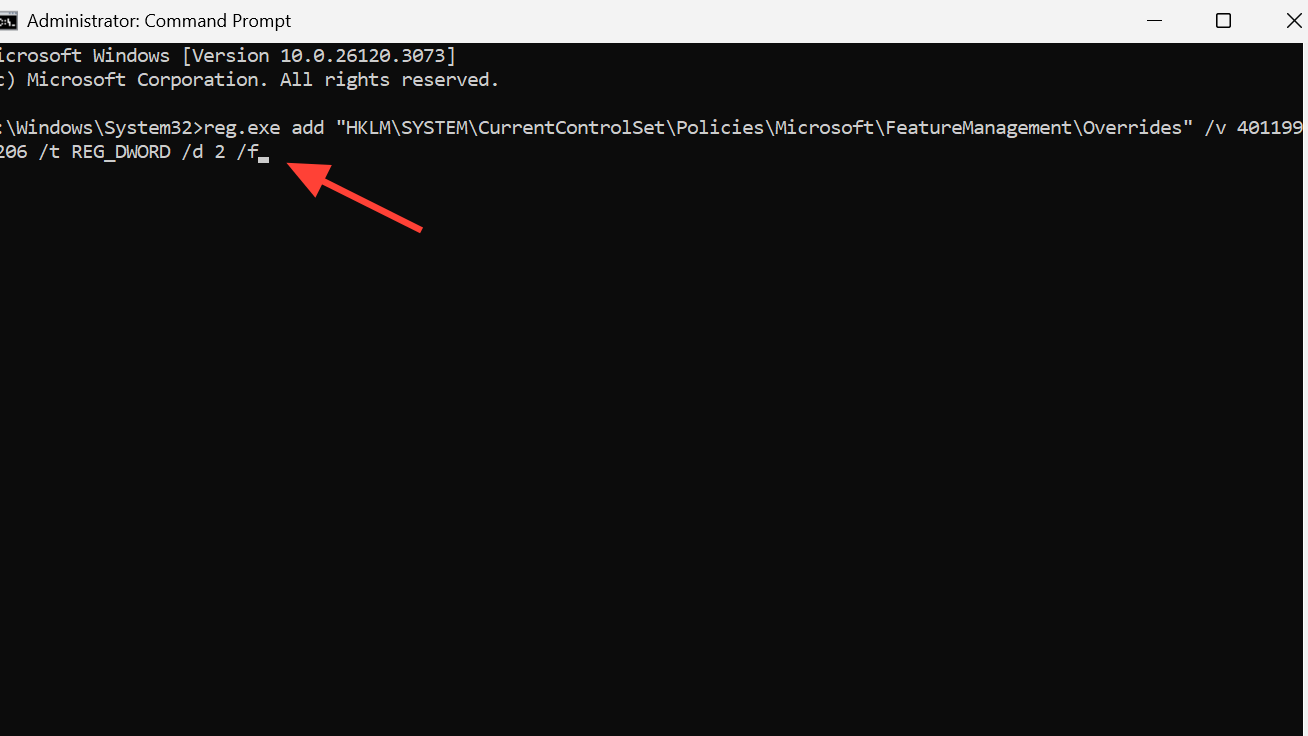
Step 1: In the same elevated Command Prompt, add the Consumer ESU override value to the system feature management key:
reg.exe add "HKLM\SYSTEM\CurrentControlSet\Policies\Microsoft\FeatureManagement\Overrides" /v 4011992206 /t REG_DWORD /d 2 /fThis value toggles the Consumer ESU feature on for the system so that eligibility can be evaluated.
3. Restart and check eligibility
Step 1: Restart Windows so that the feature override is applied at boot.
Step 2: After the restart, open Command Prompt as administrator again.
Step 3: Run the eligibility evaluation and query the ConsumerESU registry branch with a single combined command:
cmd /c ClipESUConsumer.exe -evaluateEligibility reg.exe query "HKCU\SOFTWARE\Microsoft\Windows NT\CurrentVersion\Windows\ConsumerESU"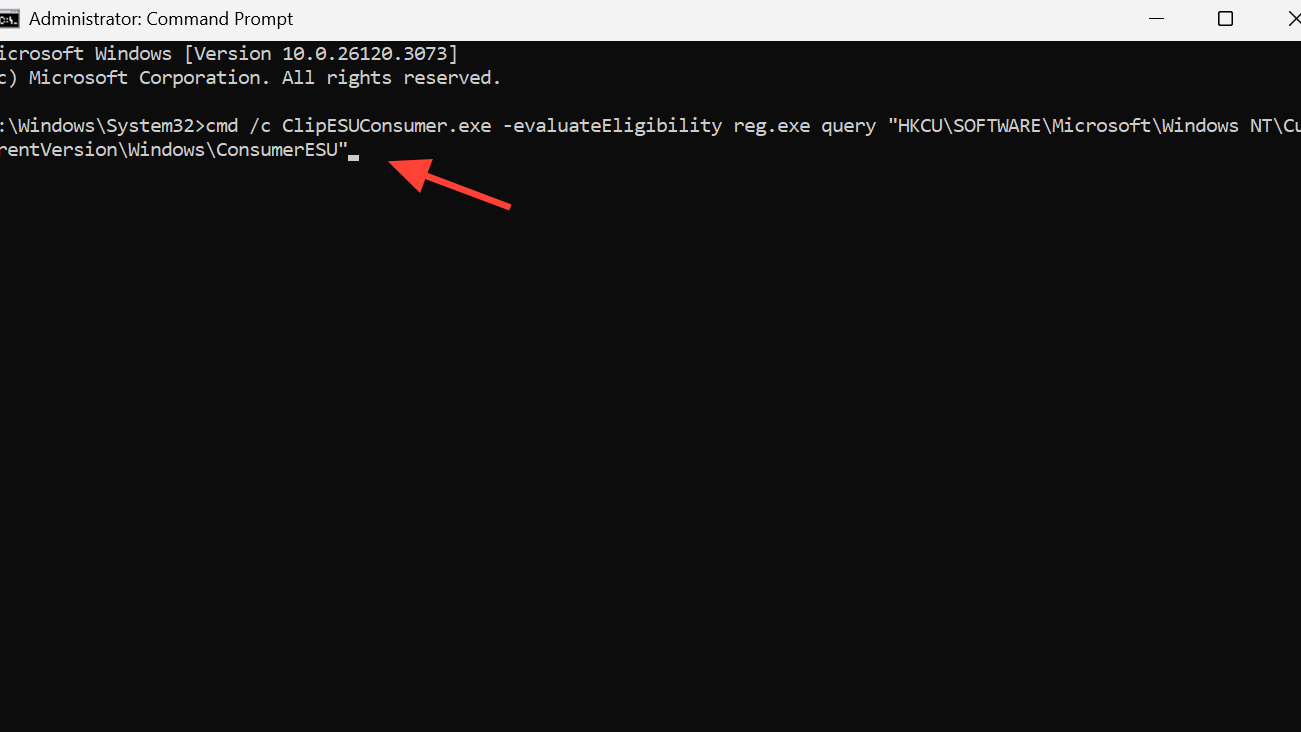
Step 4: Look at the output: if the values in ConsumerESU are non‑zero, Consumer ESU is enabled for the current user and the feature is active. A zero value or missing key means you should move to Method 3 (Full Method).
Step 5: Open Settings > Update & Security > Windows Update, click “Check for updates”, and see whether the ESU enrollment section appears.
Method 3 – Full Method with scheduled tasks (when the Quick Method fails)
On some systems, toggling the override and telemetry is not enough. In that case, running two internal scheduled tasks forces Windows to reconcile and refresh feature configuration, which often finally exposes the ESU enrollment UI.
1. Re‑add the override value (if needed)
Step 1: Open Command Prompt as administrator again.
Step 2: Re‑run the override command to make sure the value is present and correct:
reg.exe add "HKLM\SYSTEM\CurrentControlSet\Policies\Microsoft\FeatureManagement\Overrides" /v 4011992206 /t REG_DWORD /d 2 /f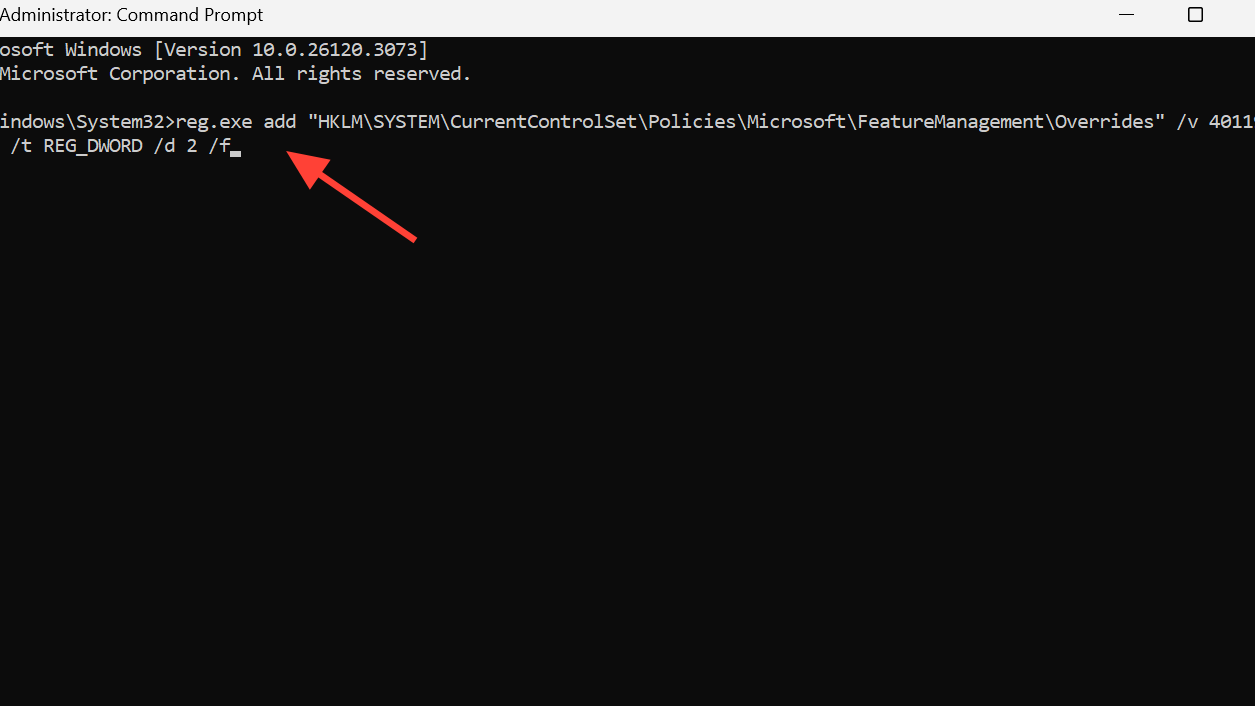
2. Run the ReconcileFeatures scheduled task
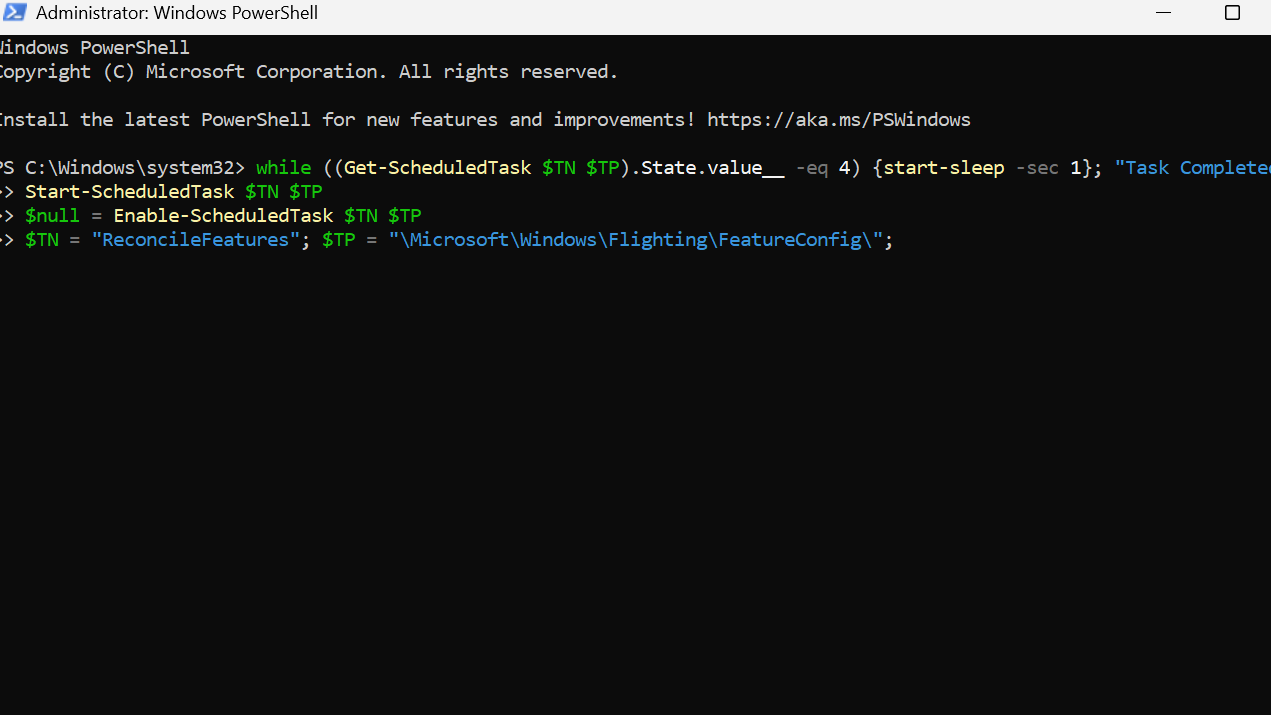
Step 1: Open Windows PowerShell as administrator (search for PowerShell, right‑click, choose “Run as administrator”, then confirm).

Step 2: In the PowerShell window, run this block to enable and start the ReconcileFeatures task and wait for its completion:
$TN = "ReconcileFeatures"; $TP = "\Microsoft\Windows\Flighting\FeatureConfig\";
$null = Enable-ScheduledTask $TN $TP
Start-ScheduledTask $TN $TP
while ((Get-ScheduledTask $TN $TP).State.value__ -eq 4) {start-sleep -sec 1}; "Task Completed"
This task updates feature configuration for the device, including Consumer ESU, based on current policies and Telemetry data.
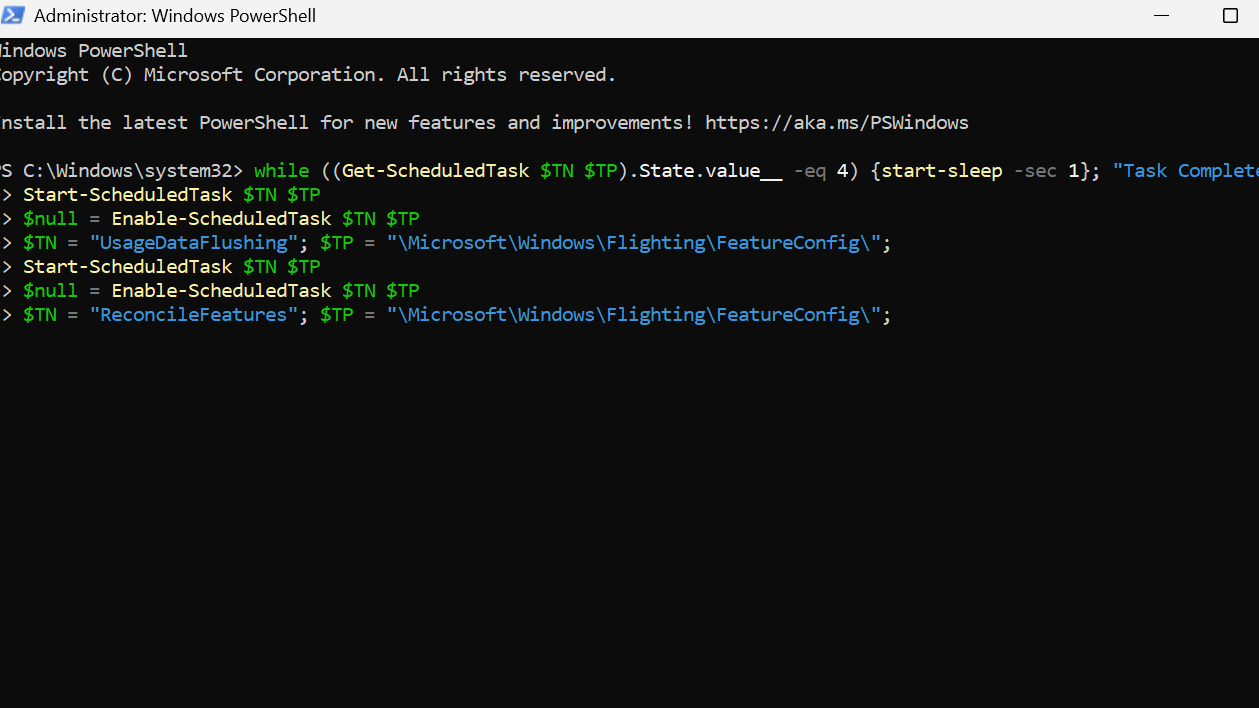
3. Run the UsageDataFlushing scheduled task
Step 1: In the same elevated PowerShell window, run this second block:
$TN = "UsageDataFlushing"; $TP = "\Microsoft\Windows\Flighting\FeatureConfig\";
$null = Enable-ScheduledTask $TN $TP
Start-ScheduledTask $TN $TP
while ((Get-ScheduledTask $TN $TP).State.value__ -eq 4) {start-sleep -sec 1}; "Task Completed"
This task flushes and refreshes usage data linked to feature configuration, which can unblock ESU enrollment visibility.
4. Restart and recheck ESU eligibility
Step 1: Close PowerShell and restart the PC to reload updated configuration.
Step 2: When Windows starts, open Command Prompt as administrator again.
Step 3: Run these two commands in order to re‑evaluate Consumer ESU and view the current registry values:
cmd /c ClipESUConsumer.exe -evaluateEligibility
reg.exe query "HKCU\SOFTWARE\Microsoft\Windows NT\CurrentVersion\Windows\ConsumerESU"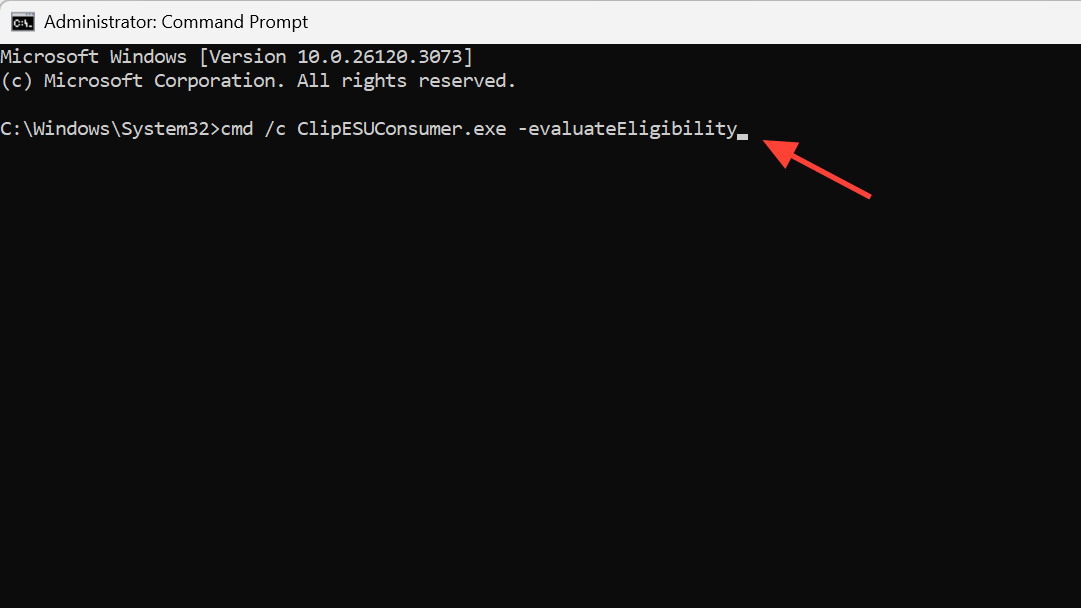
Step 4: If the returned ESUEligibility and ESUEligibilityResult values are non‑zero, Consumer ESU is active for this user. Even if Windows Update does not immediately show a prompt, security updates are delivered once ESU packages roll out.
Step 5: Open Settings > Update & Security > Windows Update, click “Check for updates”, then scroll and confirm whether the “Enroll now” button appears.
Method 4 – Fix devices incorrectly tagged as commercial
Some home PCs are incorrectly classified as “Commercial device” in ESU eligibility, which blocks the consumer ESU flow. Adjusting a single registry value can switch them back to retail/consumer classification.
1. Change DeviceRetail flag to consumer
Step 1: Open Registry Editor (regedit) with administrative rights.
Step 2: Navigate to this key in the left pane:
HKEY_LOCAL_MACHINE\SOFTWARE\Microsoft\Windows NT\CurrentVersion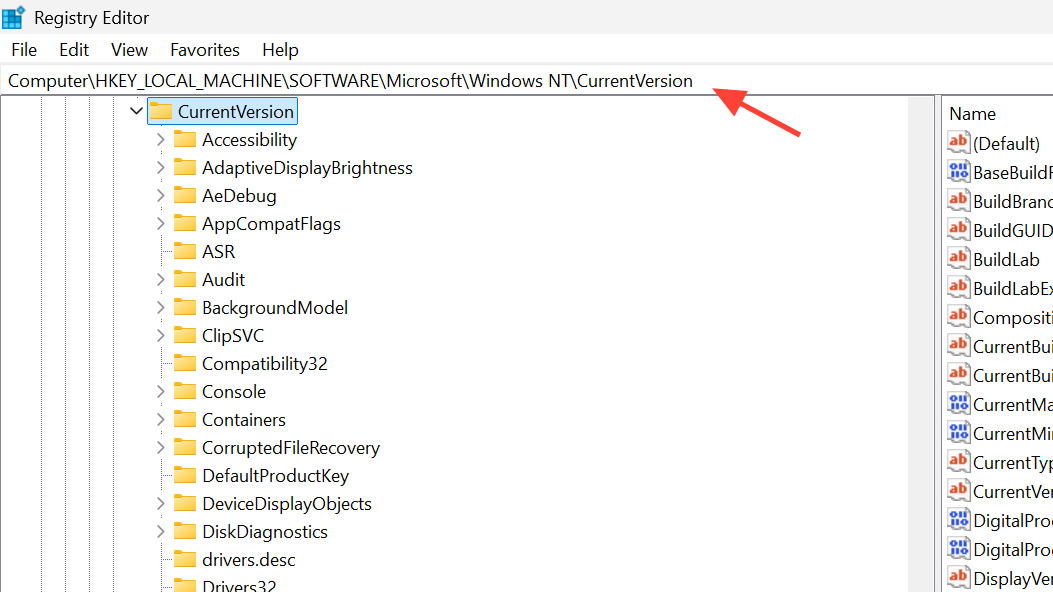
Step 3: In the right pane, find the value named DeviceRetail. If it does not exist, you can create it as a DWORD (32‑bit) value.
Step 4: Double‑click DeviceRetail and set “Base” to “Decimal”, then enter 1 in “Value data” to mark the device as a retail/consumer machine.
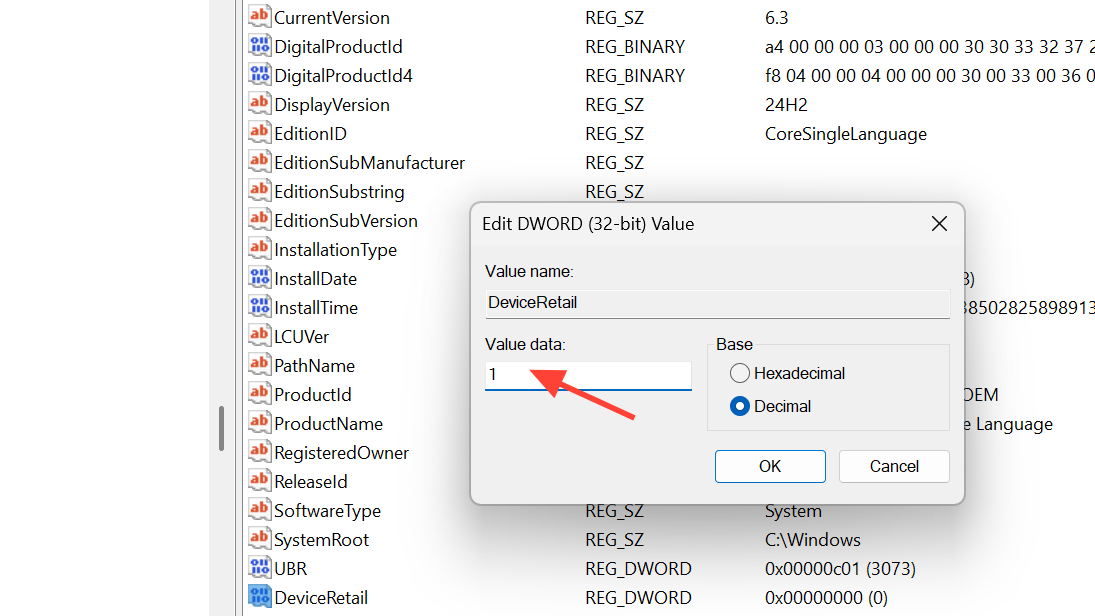
Step 5: Click “OK”, close Registry Editor, restart Windows, and then repeat the eligibility check and ESU methods above. The device should now be handled as consumer for ESU purposes.
Method 5 – Refresh Windows Update services when the button still does not show
Sometimes the eligibility values are correct, but Windows Update has not refreshed its view. Restarting update services and triggering detection can resolve this last hurdle.
1. Restart Windows Update and BITS
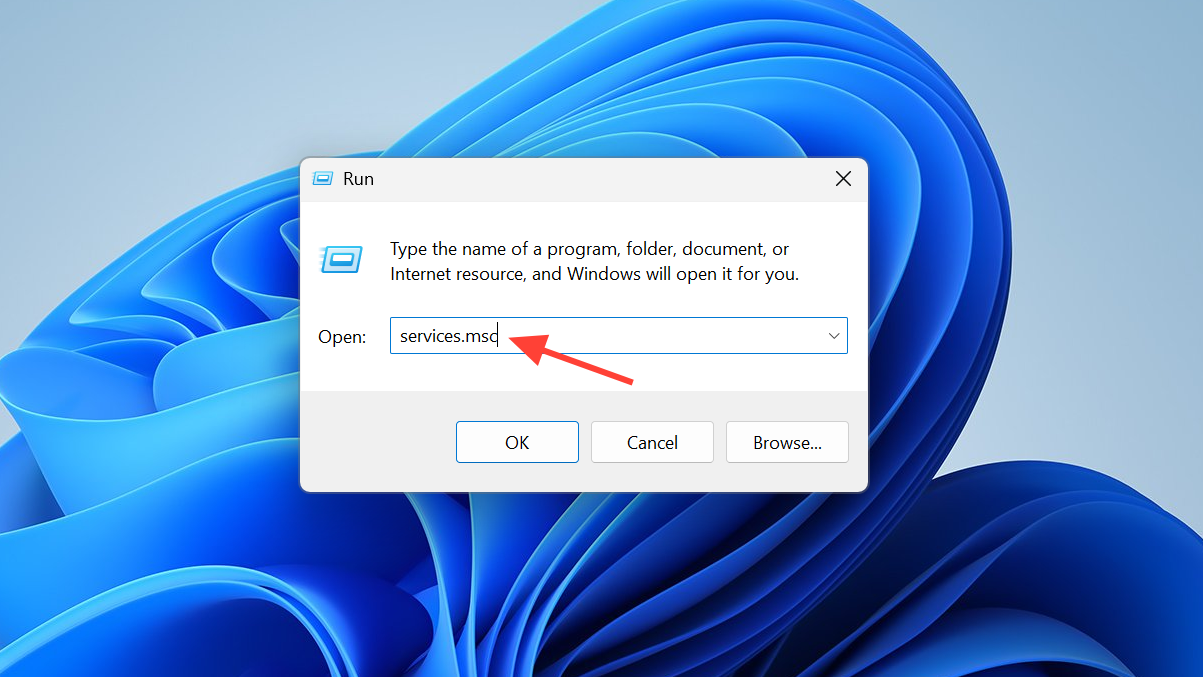
Step 1: Press Windows + R, type services.msc, and press Enter to open the Services console.
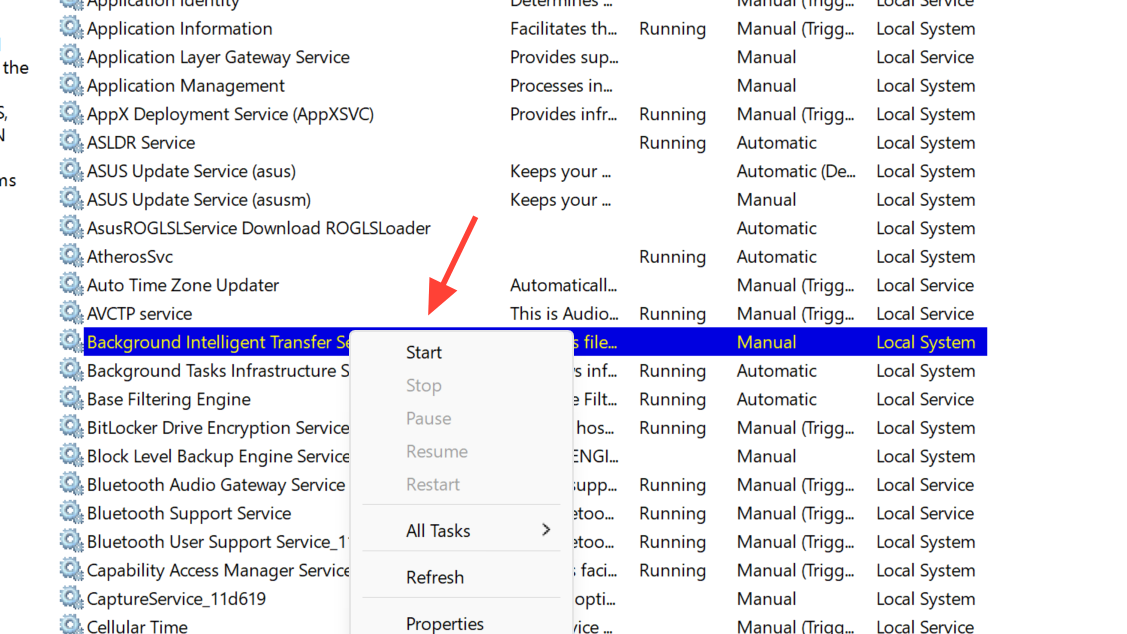
Step 2: Find “Windows Update” in the list, right‑click it, and select “Restart”. If “Restart” is greyed out, choose “Start” instead.
Step 3: Find “Background Intelligent Transfer Service (BITS)”, right‑click it, and select “Restart” as well.
2. Force Windows Update to check again
Step 1: Open Command Prompt as administrator.
Step 2: Run this command to tell Windows Update to detect updates immediately:
wuauclt /detectnow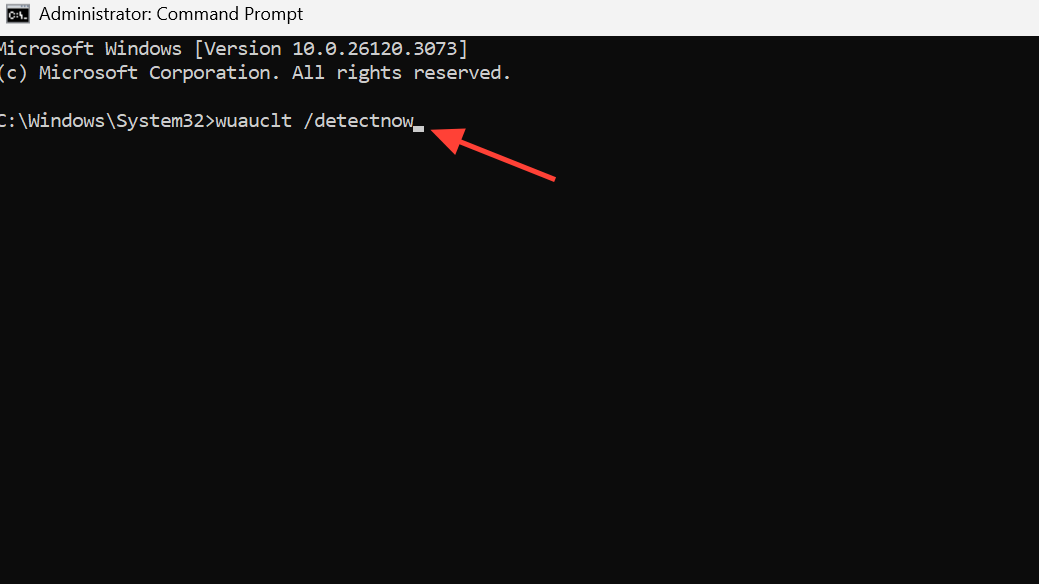
Step 3: Run this command to push an update check:
wuauclt /updatenow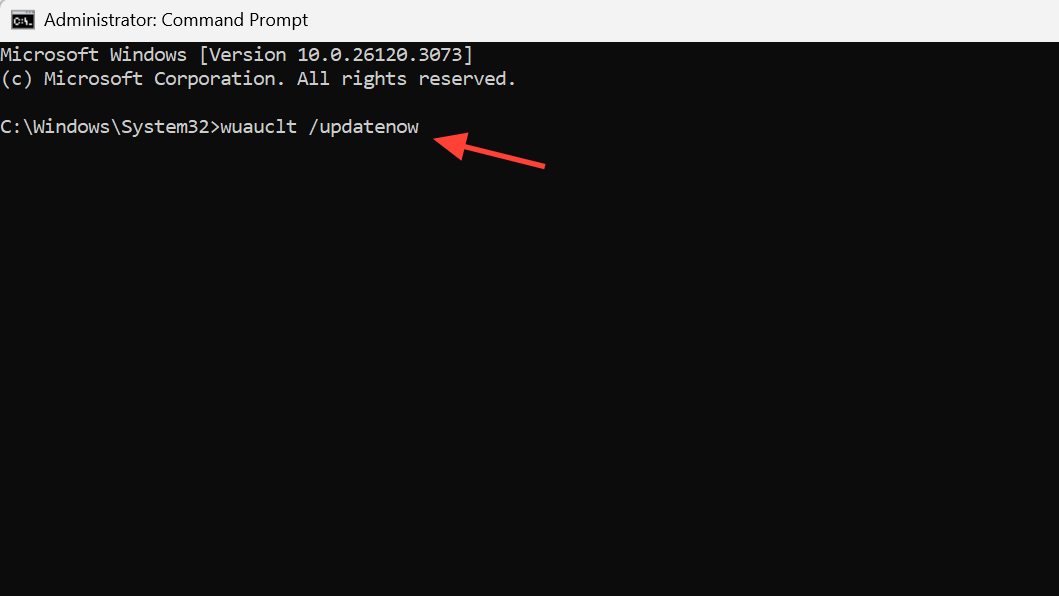
Step 4: Open Settings > Update & Security > Windows Update and wait a few minutes, then scroll down again to look for the ESU enrollment section.
What to do after you successfully enroll in ESU
Once the “Enroll now” button appears and the wizard completes, Windows records your device in the ESU program and continues to deliver monthly security patches through October 13, 2026.
Step 1: Keep your Microsoft account details handy. The ESU program requires periodic sign‑ins (roughly every 60 days) to keep eligibility active, even if you normally prefer a local account.
Step 2: Leave automatic updates enabled under Windows Update so ESU patches install as they are released, reducing the risk from new vulnerabilities.
Step 3: Plan a longer‑term move to a supported system, such as Windows 11 or a different operating system, before ESU coverage ends in 2026 to avoid another end‑of‑support deadline.
Once the missing “Enroll now” option is fixed and ESU is active, your Windows 10 PC goes back to quietly receiving important security updates while you decide when to upgrade.