Windows 10, the most recent iteration, offers way more features and customization options to users. However, you may encounter different errors on Windows 10 that will adversely affect your experience and progress. ‘Windows cannot find Bin64\InstallManagerApp.exe’ is one such error. In this article, we will discuss the error and the various fixes.
What is the ‘Windows cannot find Bin64\InstallManagerApp.exe’ Error?
Computers with AMD Graphic card require an AMD graphic driver for functioning. Bin64\InstallManagerApp.exe is an important component of the Catalyst Control Center which helps overclock and optimize the graphic card. It is used to install the AMD graphics driver by running the installation wizard. If it’s missing, you wouldn’t be able to either install or update the driver.
The error is accompanied by an error message which will help you identify it. The message is given below.
Windows cannot find “Bin64\InstallManagerAPP.exe”. Make sure you entered the name correctly and try again.This error can happen due to multiple reasons. For instance, due to corrupt files, running an older version of Windows, the driver files might be incompatible or the antivirus might be hindering the installation process. If you have identified the cause leading to the error, fixing it won’t be much of a problem.
In the next couple of sections, we will walk you through the various fixes. Try the fixes in the sequence that they are mentioned until the error is fixed.
Fix 1: Update Windows OS
Your primary approach when you encounter the error should be to update the Windows. Updating the Windows resolves bugs in the previous version as well as automatically updates the drivers.
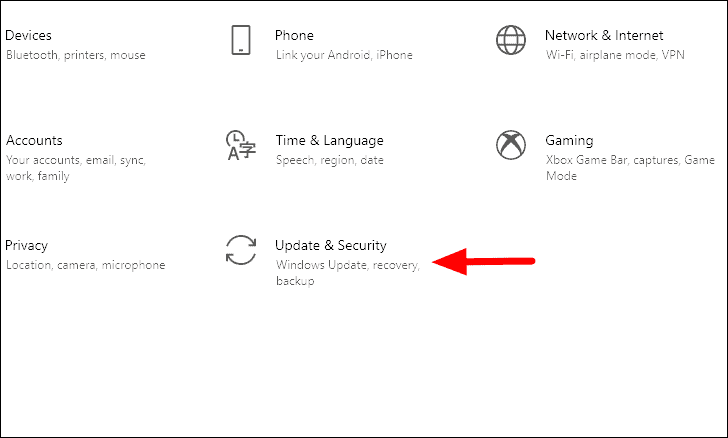
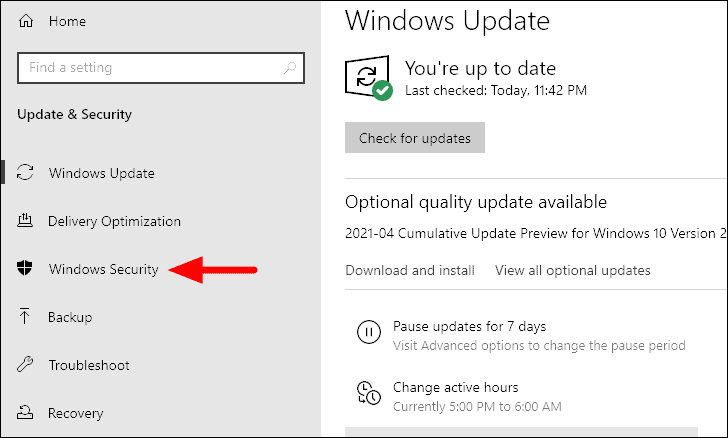
To update the Windows, press WINDOWS + I to launch system ‘Settings’ and then select ‘Update & Security’ from the list of options.
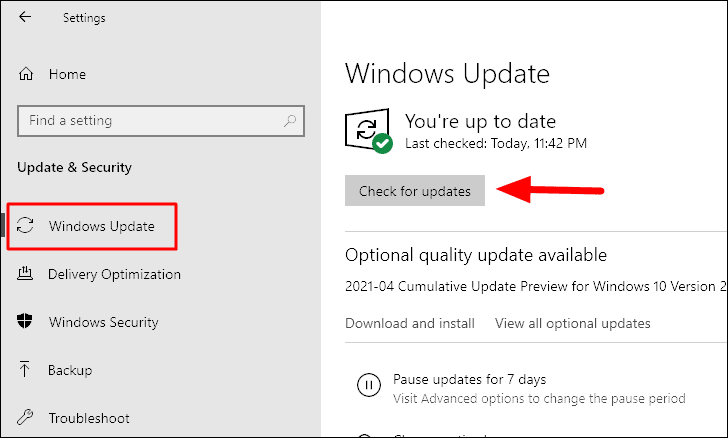
The ‘Windows Update’ tab will open by default. Click on ‘Check for updates’ on the right to check if there are any available updates. In case there is, Windows will download and install it on your computer.
After the update is installed, you will be asked to restart the computer. Once the computer restarts, check if the error is fixed. If not, move to the next fix.
Fix 2: Clean Install AMD Graphic Drivers
Clean installing the AMD Graphic driver has worked as a fix for many users. In this method, you have to manually download the AMD Graphic driver and the Display Driver Uninstaller (DDU) and then install them on your computer in Safe mode.
Downloading AMD Graphic Driver and DDU
First, download the AMD Graphic driver from amd.com/en/support by selecting the driver manually at the bottom and not opting for the automatic detect and install option. After you have selected the desired driver, click on ‘Submit’ at the bottom and then download it on the next page.
Next, download the Display Driver Uninstaller from guru3d.com/file-details. The download link is provided at the bottom of the page.
Disabling Real-Time Protection & Other Anti-Virus
After you have downloaded the files, it’s time you disable the real-time protection and any other anti-virus that prevents the installation. The real-time protection can be disabled from Windows Security.
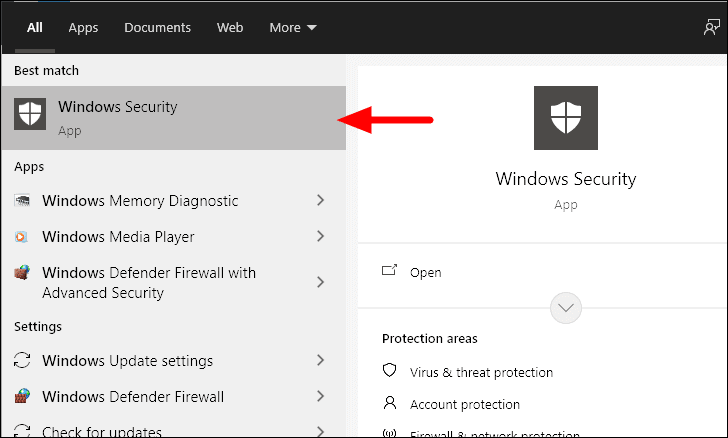
To disable real-time protection, search for ‘Windows Security’ in the ‘Start Menu’ and then click on the search result to launch the app.
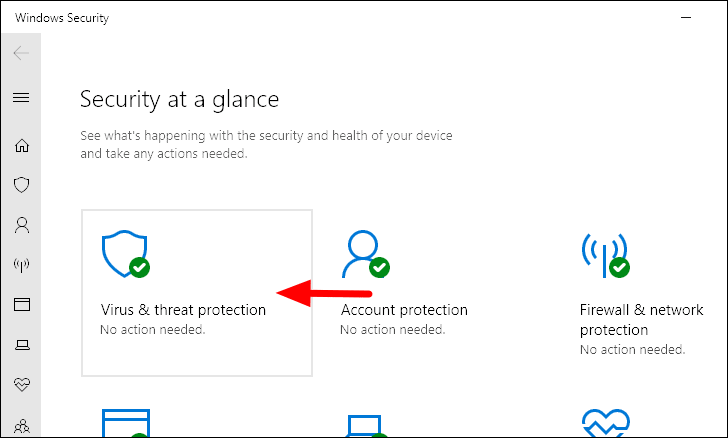
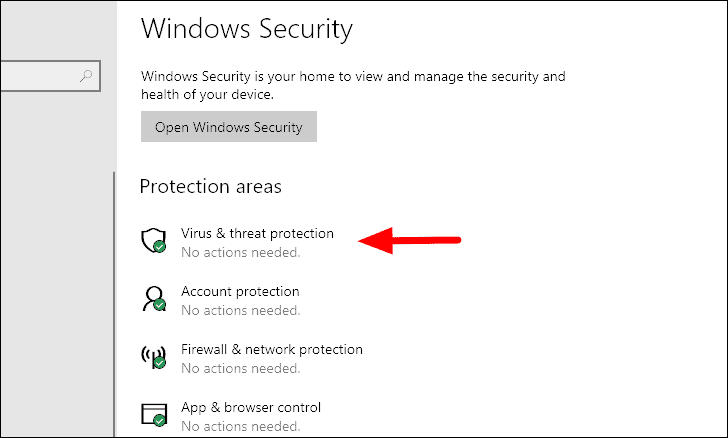
In the ‘Windows Security’ window, click on ‘Virus & threat protection’ from the list of options.
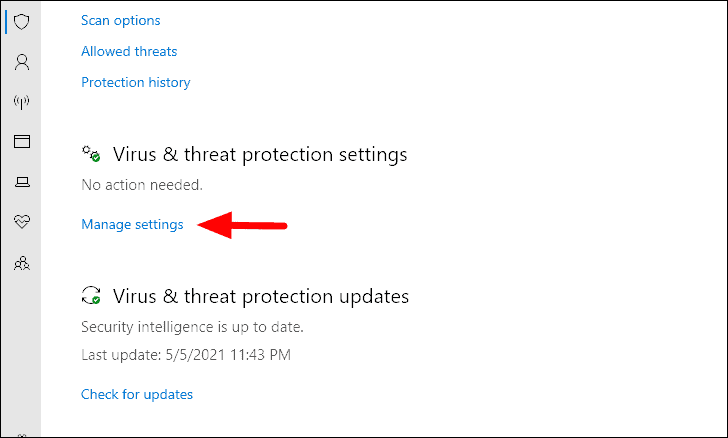
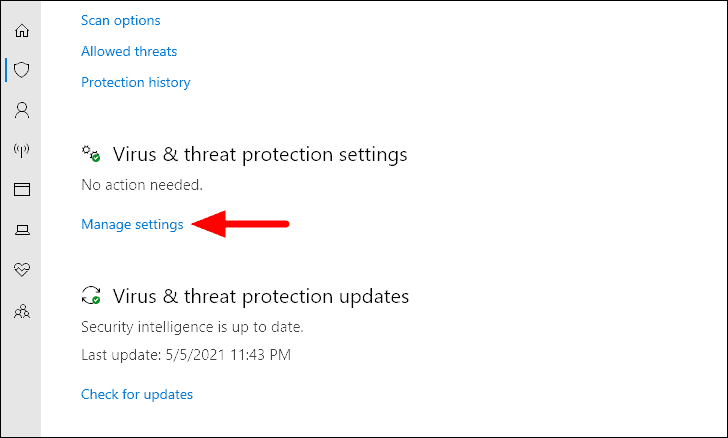
Now, scroll down and locate ‘Virus & threat protection settings’ and then click on ‘Manage settings’ under it.
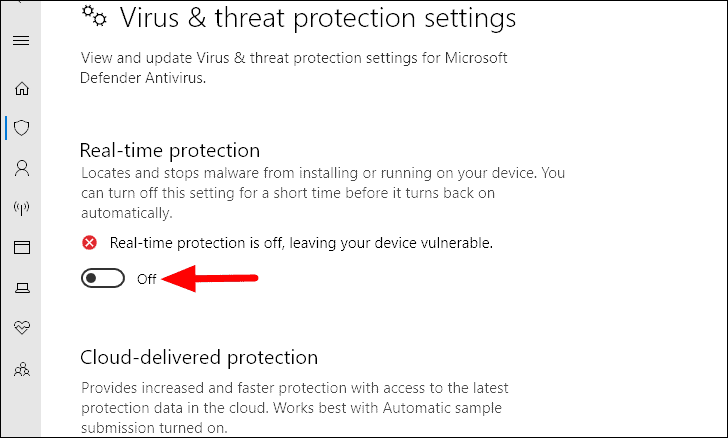
You will now find a toggle under ‘Real-time protection’, clicking on which will disable it. After you click on it, a confirmation box will pop up. Click on ‘Yes’ in the box to confirm the change.
Before you proceed, ensure that you have disabled any anti-virus that is installed on your computer.
Deleting Existing AMD Folder
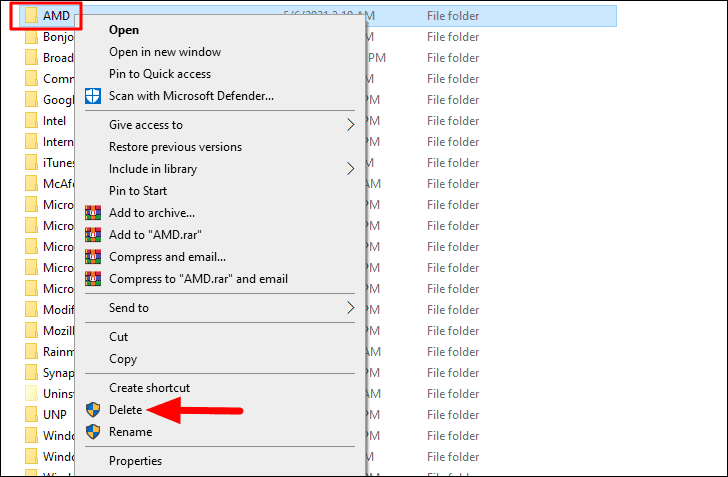
Next, you have to delete all the contents of drivers by deleting the AMD folder which is located in the ‘C’ drive. The folder is either located directly in the ‘C’ drive or in the ‘Program Files’ folder under it.
After you have located the folder, right-click on it and then select ‘Delete’ from the context menu.
Uninstalling Existing AMD Graphic Drivers
The next step is to uninstall the AMD Graphic drivers on your system before you install the new ones.
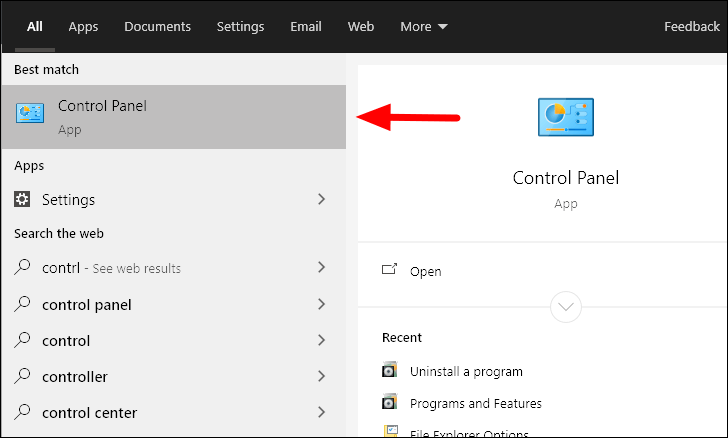
To uninstall the drivers, search for ‘Control Panel’ in the ‘Start Menu’ and then click on the search result to launch the app.
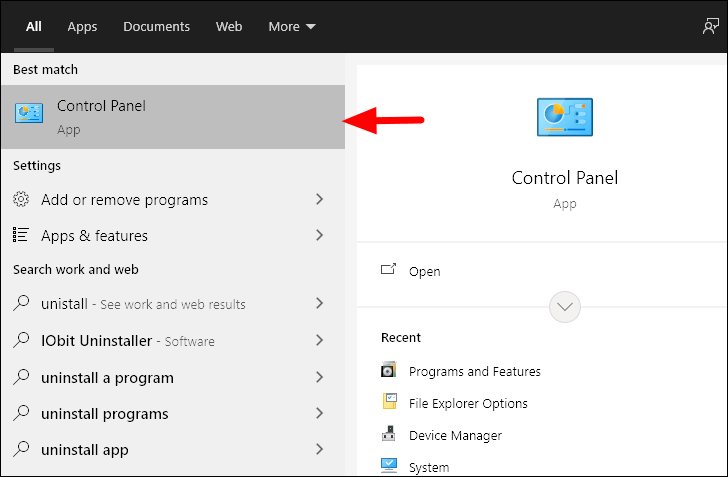
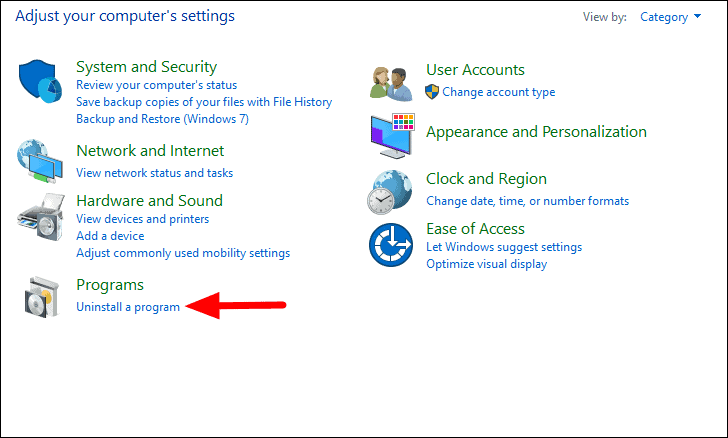
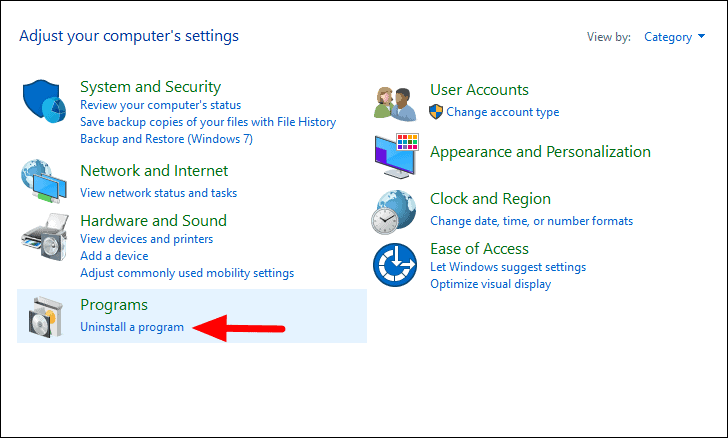
In the Control Panel, click on ‘Uninstall a Program’ under ‘Programs’.
Next, right-click on the ‘AMD Software’ program in the list and then select ‘Uninstall’ from the menu that appears or click on the ‘Uninstall’ option at the top.
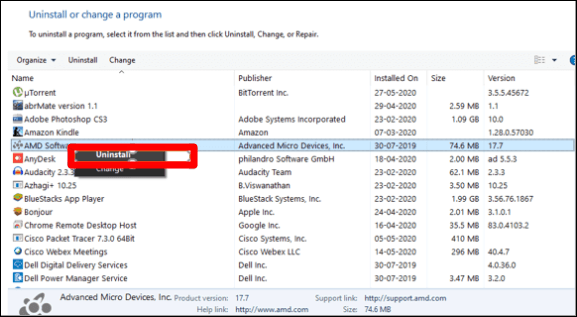
You will now receive a pop up, click on ‘Yes’ to confirm the uninstall.
Boot Windows in Safe Mode
The only part left now is to install the DDU and AMD Graphics Driver, hence, boot the Windows in ‘Safe’ mode.
To boot the Window in ‘Safe’ mode, press WINDOWS + R to launch the ‘Run’ command.
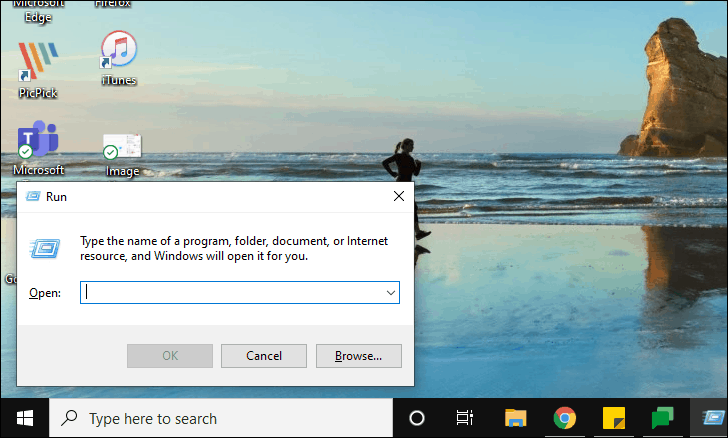
Next, enter ‘msconfig’ in the text box and press ‘OK’ at the bottom.
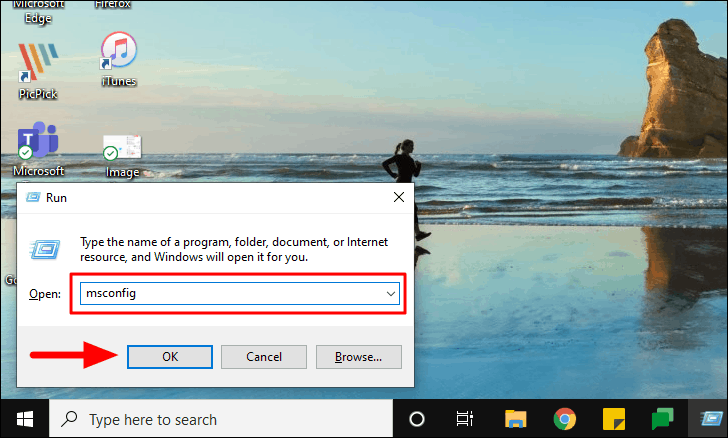
In the ‘System Configuration’ window that launches, switch to the ‘Boot’ tab, tick the checkbox for ‘Safe Boot’ under ‘Boot Options’ and then click on ‘OK’ at the bottom.

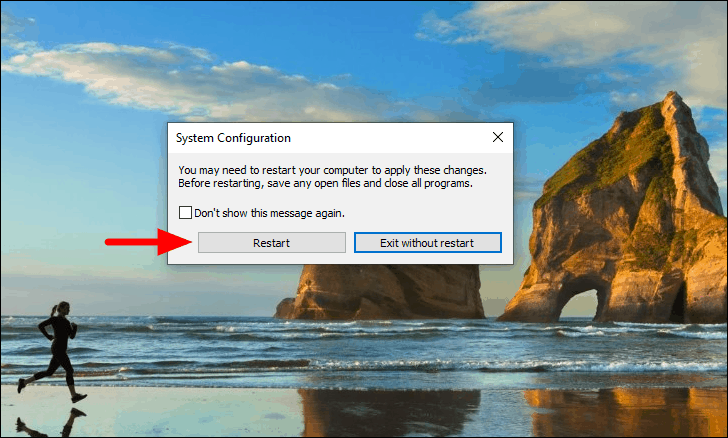
Click on ‘Restart’ on the pop up that appears to boot the Windows in safe mode.
Installating the AMD Graphic Drivers
After you have booted the Windows in safe mode, run the Display Driver Installer application. After the application is run, your system will automatically restart.
Once the computer restarts, install the AMD Graphic Drivers by double-clicking on the installer and then following the on-screen instruction. After the installation is complete, restart the computer and the ‘Windows cannot find Bin64\InstallManagerApp.exe’ error will be fixed.
Fix 3: Disable Controlled Folder Access
Disabling the ‘Controlled Folder Access’ has fixed the error for a lot of users, hence you must try it as well. Also, since you are already in the ‘Update & Security’ settings from the last fix, navigating to the location from where you can disable controlled folder access is simple.
To disable controlled folder access, go to the ‘Windows Security’ tab in the ‘Update & Security’ settings.
In ‘Windows Security’, you will find various options under ‘Protection areas’. Select ‘Virus & threat protection’ from the list.
The ‘Windows Security’ window will launch with the ‘Virus & threat protection’ tab open. Next, click on ‘Manage settings’ under ‘Virus & threat protection settings’.
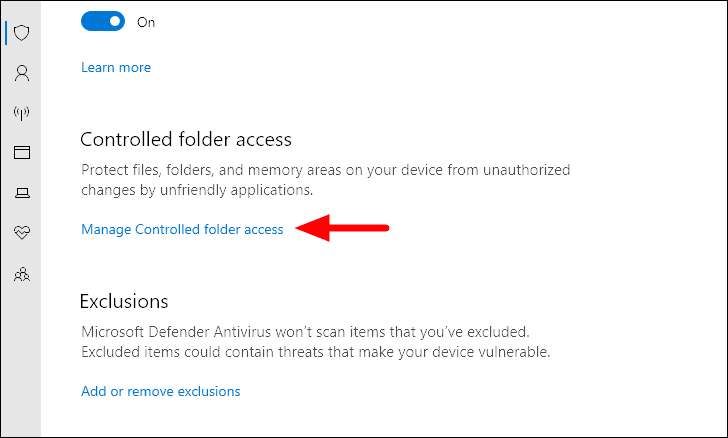
Scroll down and look for the ‘Controlled folder access’ section and then click on the ‘Manage Controlled folder access’ option under it.
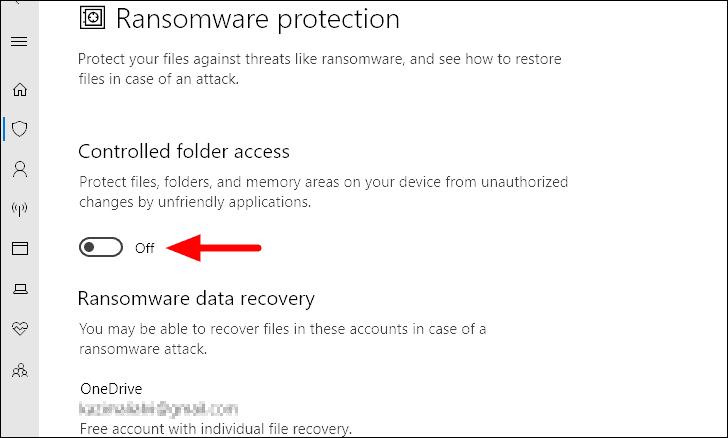
Now, click on the toggle under ‘Controlled folder access’ to disable it, if it is enabled.
After you have disabled the ‘Controlled Folder Access’, check if the error is fixed. In case it’s not, revert any change made earlier and move to the next fix.
Fix 4: Run DISM and SFC Scan
You can run the SFC scan to fix the ‘Windows cannot find Bin64\InstallManagerApp.exe’ error. It will scan and repair all Windows system files. Before you run an SFC scan, it’s recommended to run DISM (Deployment Image Servicing and Management) tool in advance to check the health and repair Windows image.
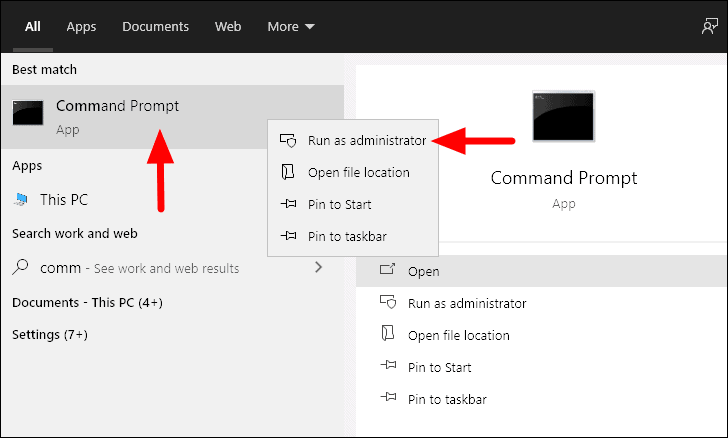
To run the scan, you first need to launch the ‘Command Prompt’. Search for it in the ‘Start Menu’, right-click on the search result, and then select ‘Run as administrator from the menu. A box will pop up asking you to confirm opening command prompt as administrator, click on ‘Yes’ to proceed.
Now enter the following command to run DISM, press ENTER, and wait for the process to complete. It may take a couple of minutes for the process to complete depending on the system’s health and it may appear stuck at times, but don’t interrupt the process and allow it time to complete.
DISM /online /cleanup-image /restorehealth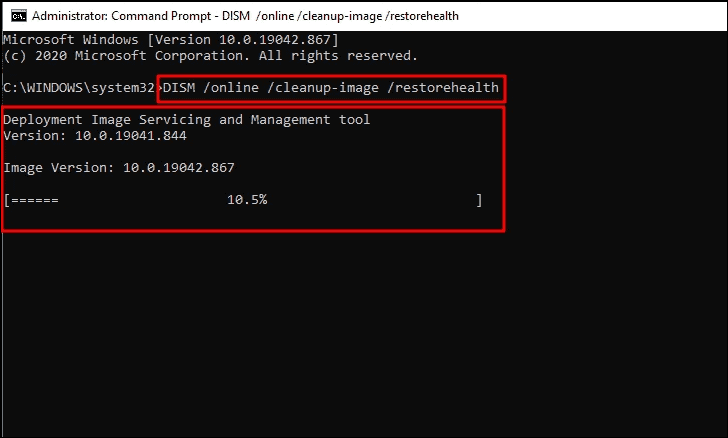
After the DISM process is executed, run the SFC scan by entering the following command in the command prompt window and press ENTER.
sfc /scannow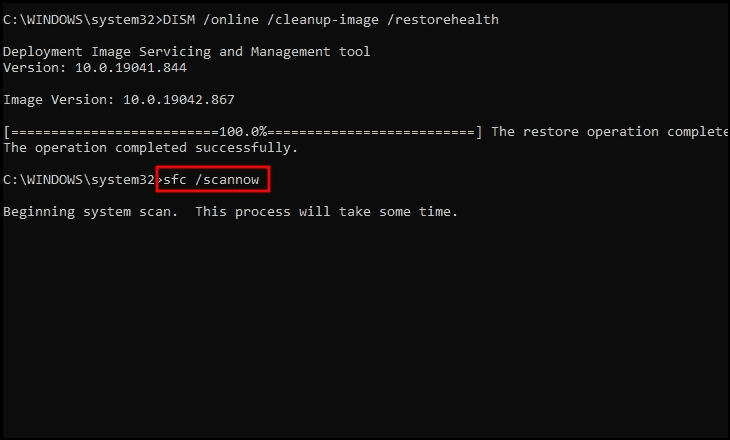
After the scan is completed, restart your computer and check if the error is fixed.
Fix 5: Reinstall Microsoft Visual C++ Redistributable Files
Many a time, you may be facing the ‘Windows cannot find Bin64\InstallManagerApp.exe’ error due to corrupted Microsoft Visual C++ Redistributable files. To fix the error, you will have to reinstall these files.
First, search for ‘Control Panel’ in the ‘Start Menu’ and then click on the option in the search result to launch the app.
Next, click on ‘Unistall a program’ under ‘Programs’.
Now, note down all the Microsoft Visual C++ Redistributable files and their respective versions so that you can download them manually.
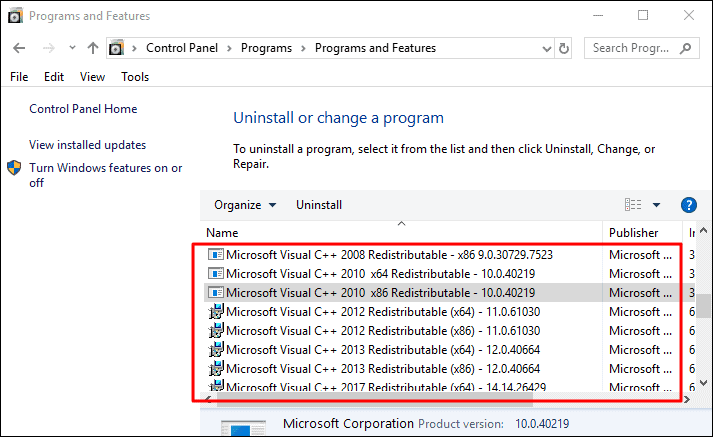
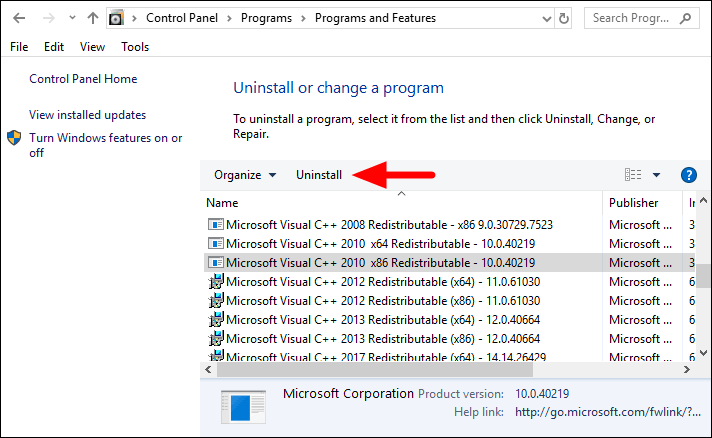
Next, download all the files from support.microsoft.com. After you have downloaded all the files, uninstall the ones already installed on your computer from the ‘Control Panel’.
To uninstall a redistributable file, select the file and then click on ‘Uninstall’ at the top. You might receive a pop-up asking to confirm the uninstall, click on ‘Yes’ to proceed.
Similarly, uninstall the remaining Microsoft Visual C++ Redistributable files.
The next process is to install the ones that you earlier downloaded from the Microsoft website. To download, double-click on the installer and then follow the on-screen instruction to install it on your computer.
After you have installed all the files, check if the error has been fixed.
The fixes mentioned in this article are effective and one of them must have fixed the ‘Windows cannot find Bin64\InstallManagerApp.exe’ error on your computer. Once the error is resolved, you can install the drivers and enhance your Windows experience by a great deal.