
Network interruptions occur immediately when Windows 11 displays the “Windows could not automatically detect this network’s proxy settings” error. This issue often blocks internet access or causes sluggish connections, and typically appears as a yellow warning icon on the system tray’s network indicator. The error points to misconfigured proxy settings, outdated drivers, or even malware, all of which can disrupt your ability to get online. Fortunately, several targeted fixes can restore normal network operation.
Run the Network Troubleshooter
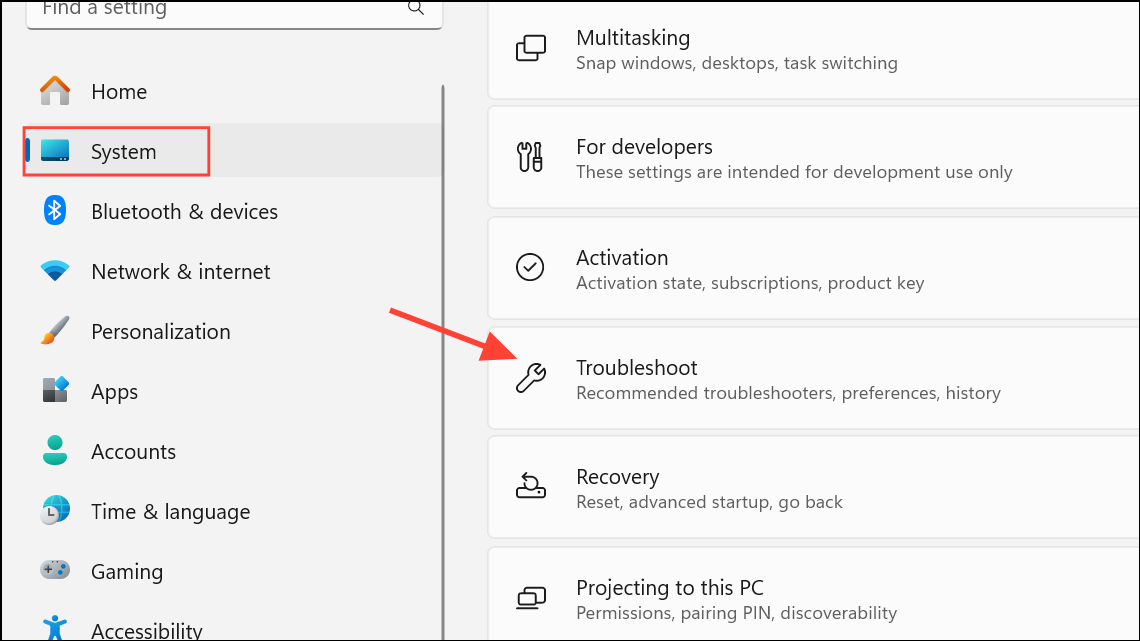
Step 1: Open the Windows Settings app by pressing Win + I. Navigate to System, then select Troubleshoot from the list.
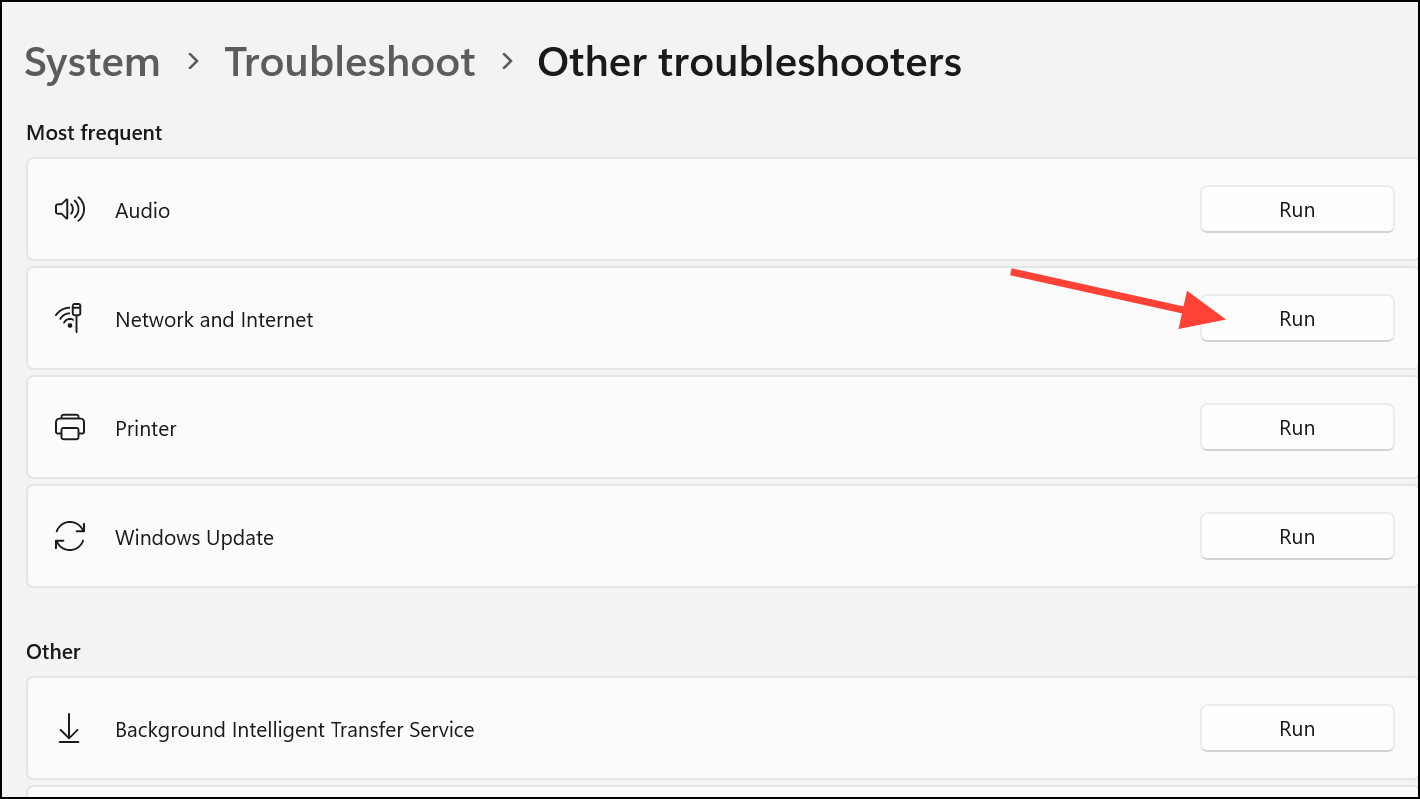
Step 2: Click on Other troubleshooters. Find Network and Internet and click Run. Follow the on-screen instructions to allow Windows to automatically diagnose and resolve network issues.
The troubleshooter checks for common misconfigurations, restarts relevant network services, and applies fixes where possible. This process often resolves the proxy detection error without further intervention.
Check and Adjust Proxy Settings
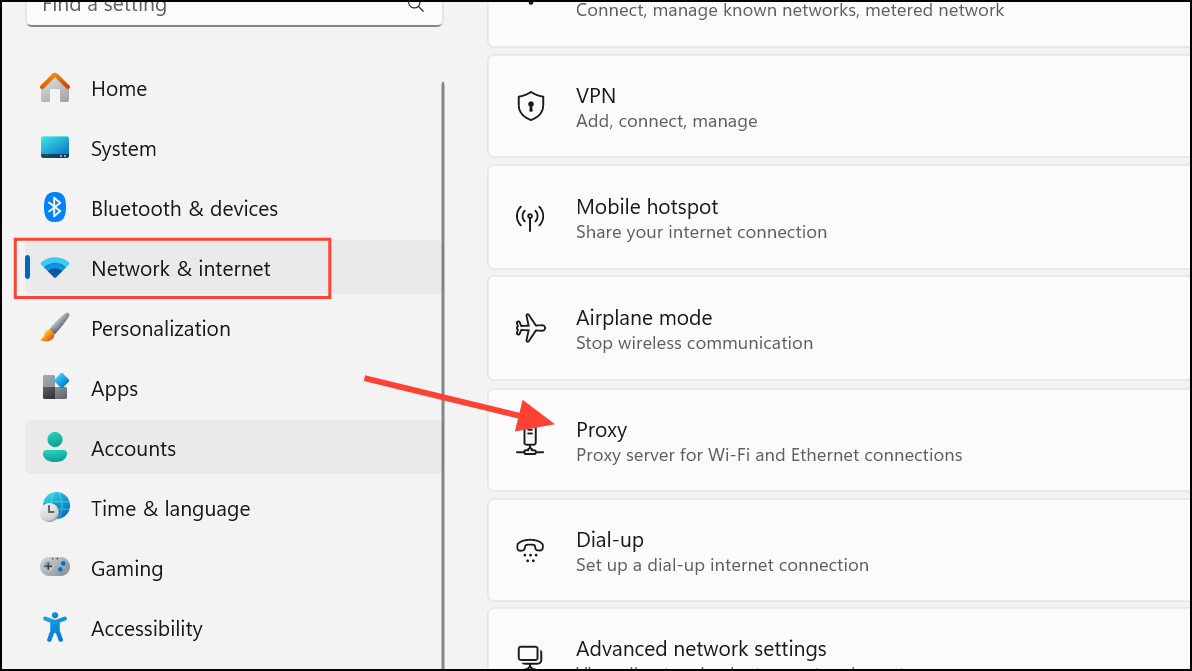
Step 1: In Windows Settings, go to Network & internet and select Proxy.
Step 2: Ensure the Automatically detect settings toggle is turned on. For most home networks, Use setup script and Use a proxy server should be set to Off unless you have specific instructions from your network administrator.
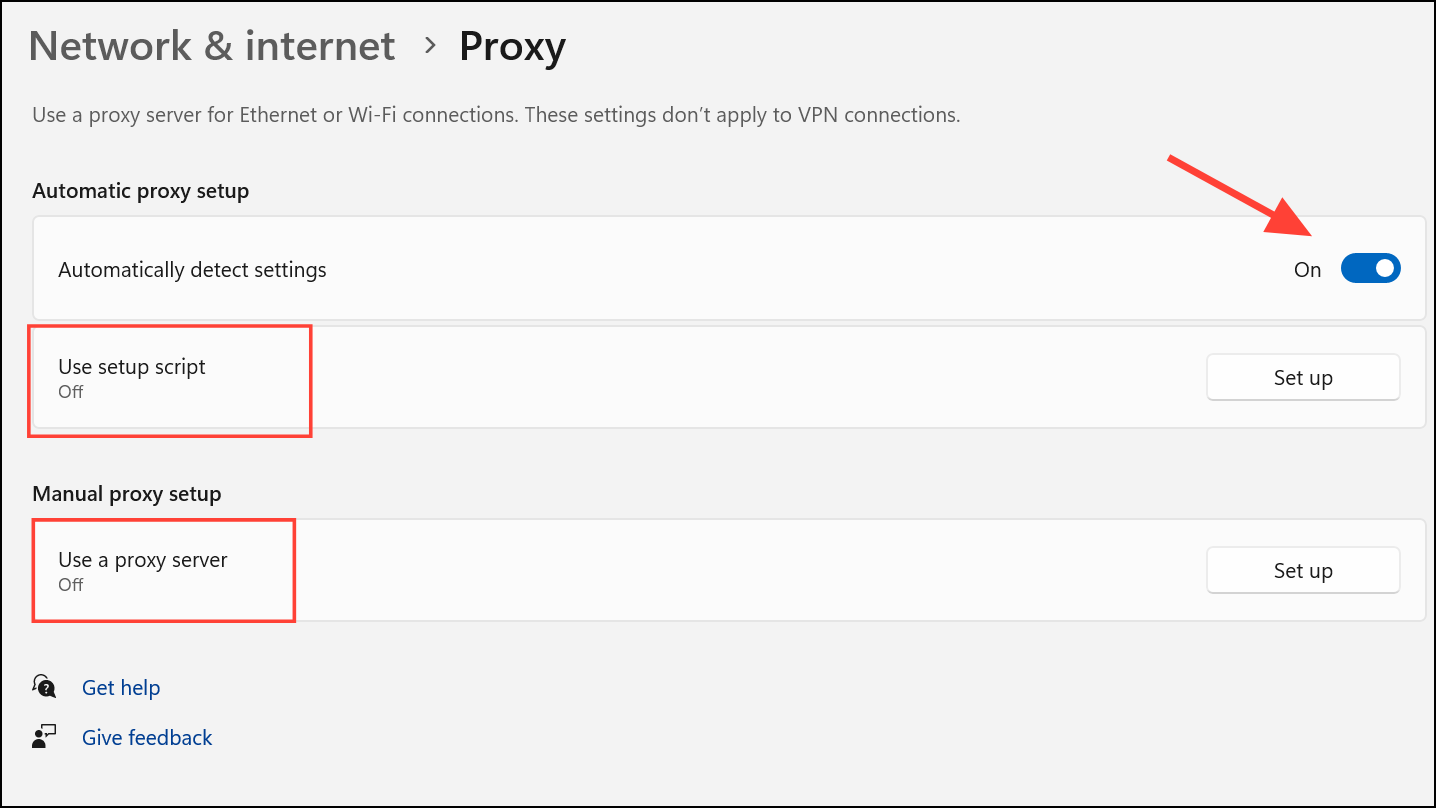
Incorrect proxy settings are a primary cause of this error. Setting the proxy options to automatic detection allows Windows to configure network access for typical home and small business environments.
Restart Network Adapter
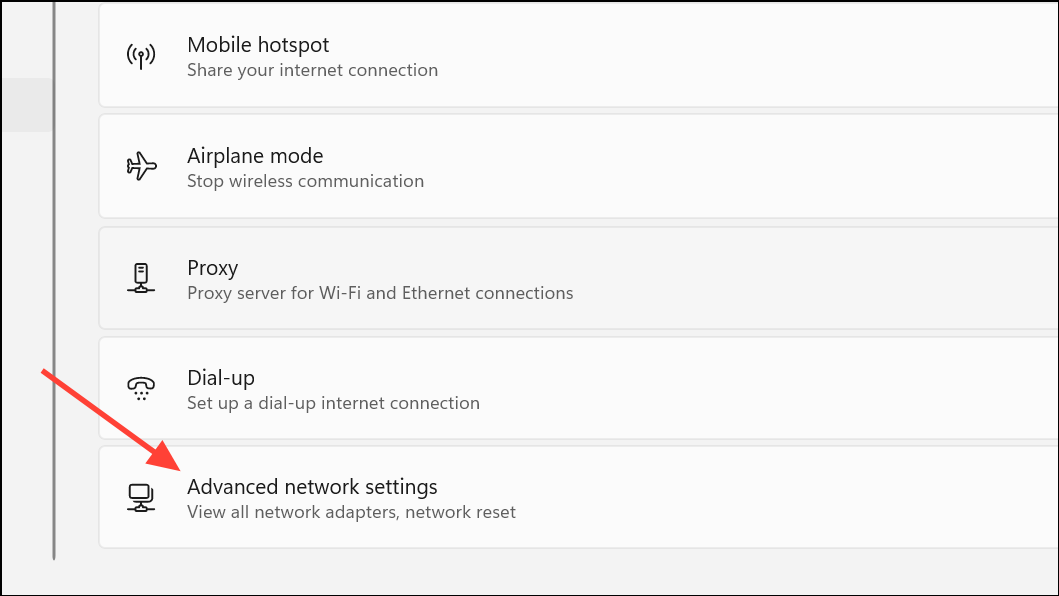
Step 1: Open Settings and go to Network & internet. Click Advanced network settings at the bottom.
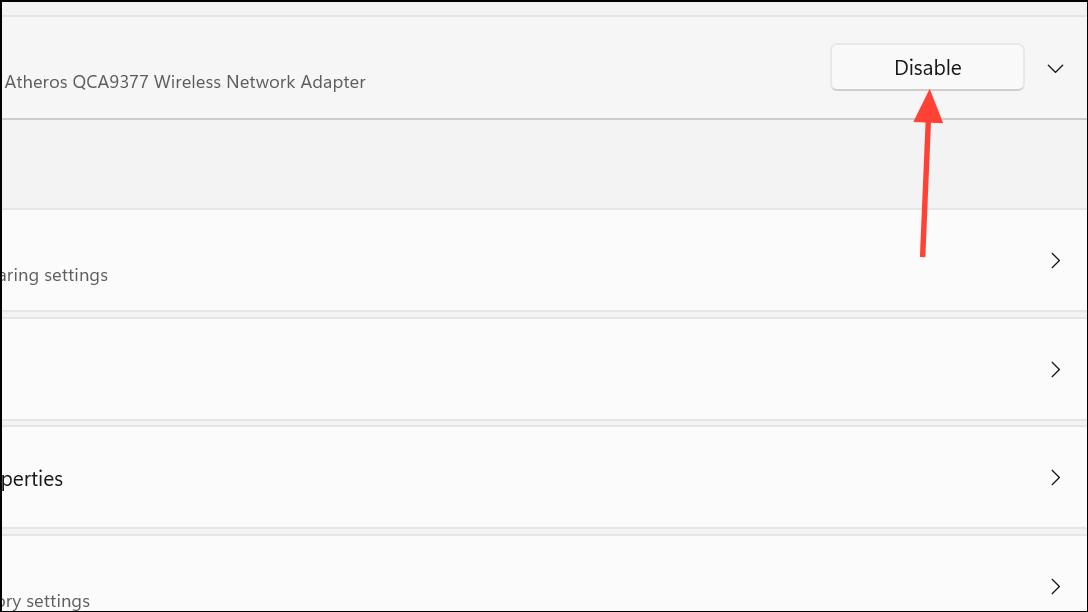
Step 2: Under Network adapters, select your active connection (Wi-Fi or Ethernet), then click Disable. Wait 10–30 seconds, then click Enable to re-activate the adapter.
Restarting the adapter clears temporary glitches and resets low-level network hardware communication, which can restore connectivity if the adapter had entered a fault state.
Reset Network Settings
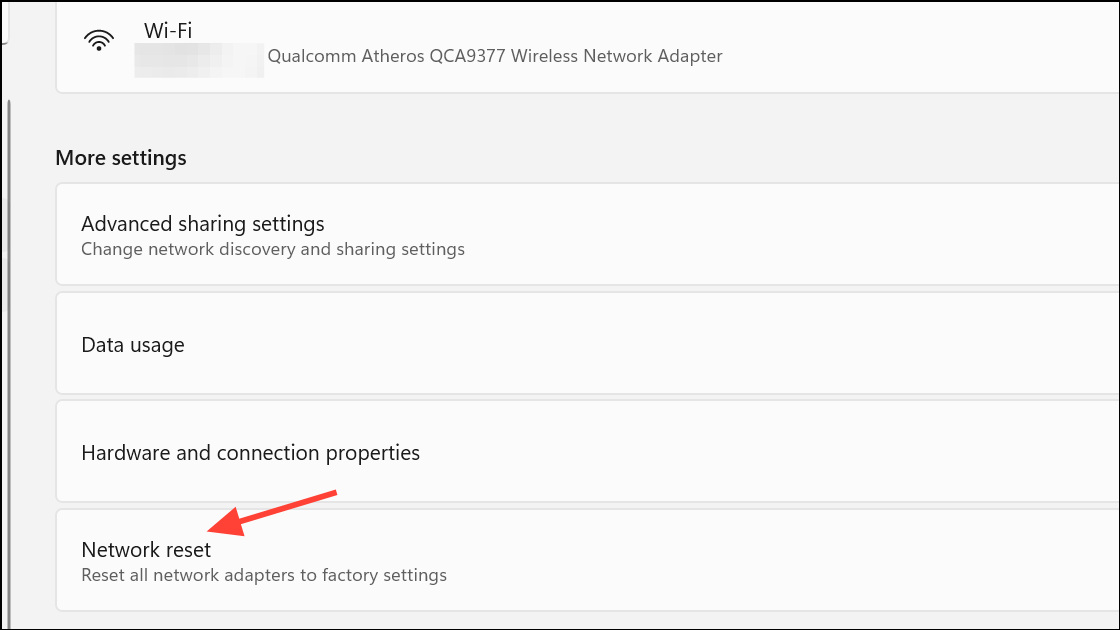
Step 1: In Settings, navigate to Network & internet, then select Advanced network settings.
Step 2: Scroll down and click Network reset. Click Reset now and confirm. Your computer will restart, reinstall all network adapters, and revert all network settings—including proxy configurations—to their defaults.
This step is especially effective when previous changes or third-party software have altered network settings in ways that are difficult to manually undo.
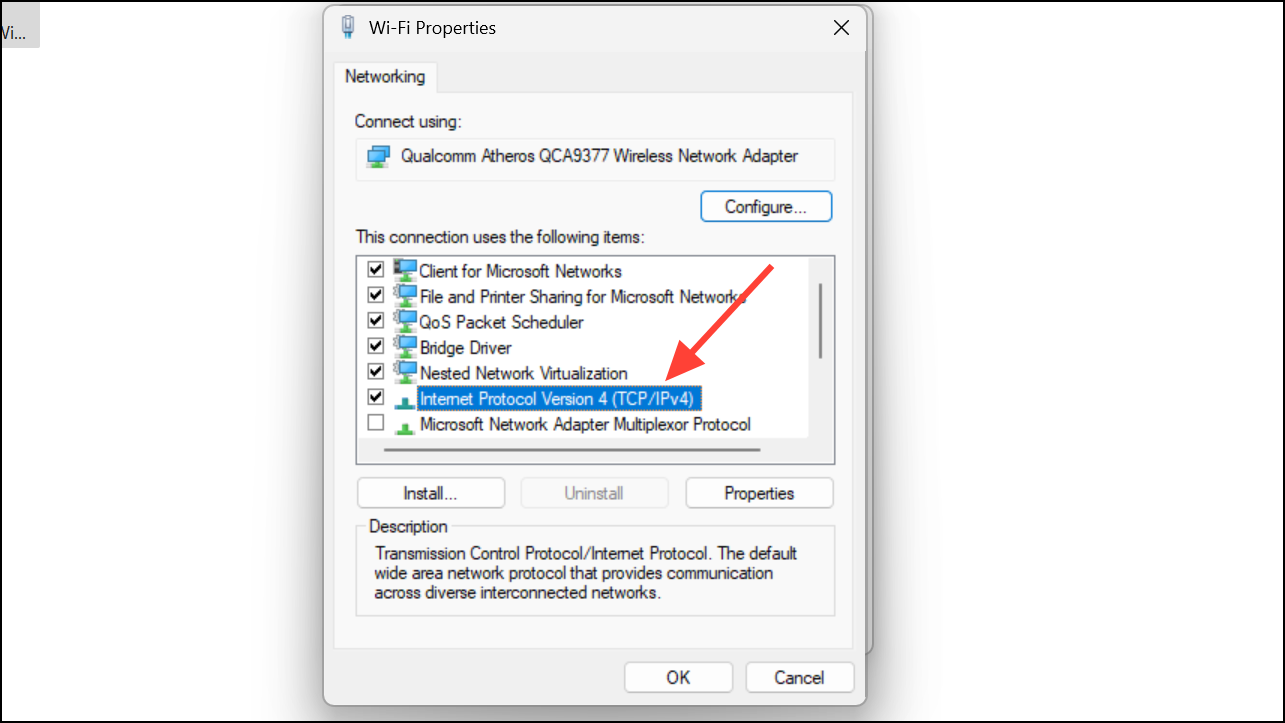
Disable Manual IP and DNS Settings
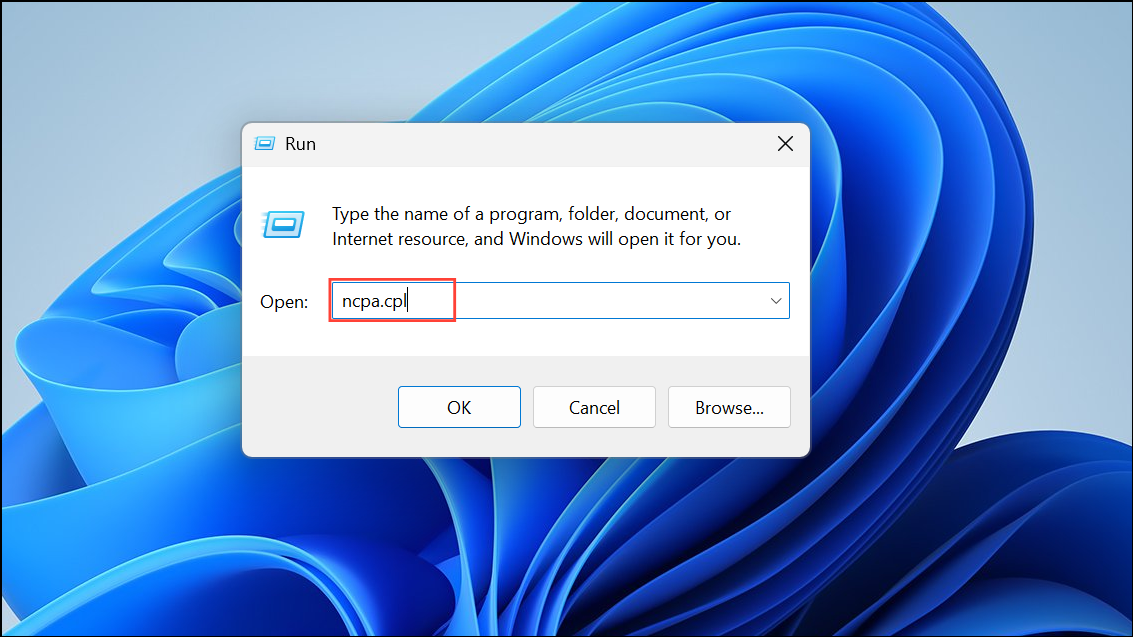
Step 1: Press Win + R to open the Run dialog, type ncpa.cpl, and press Enter.
Step 2: Right-click your active network adapter and select Properties. Double-click Internet Protocol Version 4 (TCP/IPv4).
Step 3: Select both Obtain an IP address automatically and Obtain DNS server address automatically. Click OK to save changes.
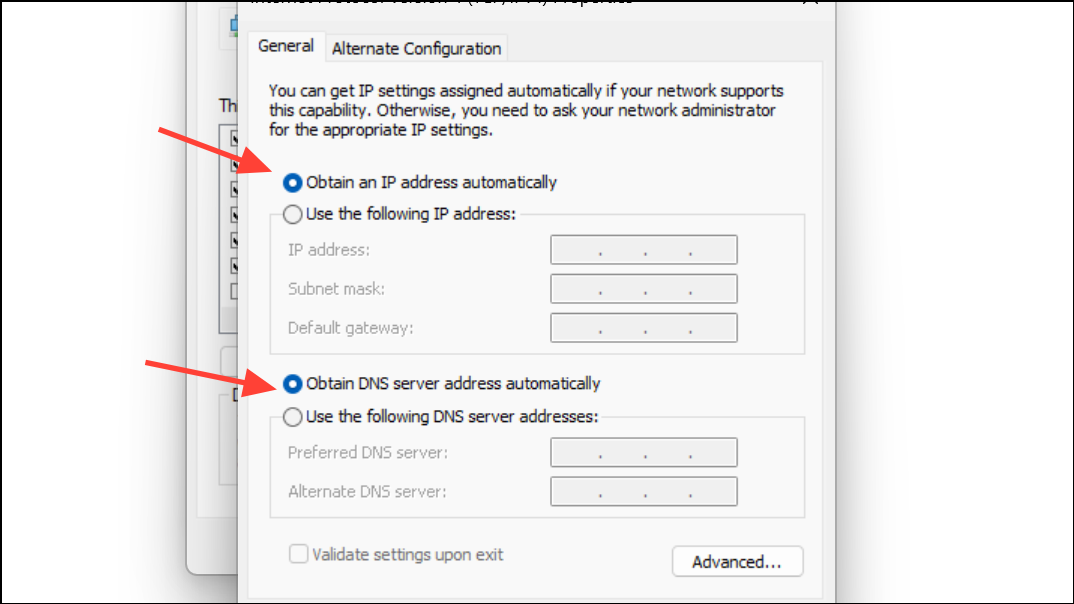
Manual IP or DNS configurations can prevent Windows from communicating properly with the network, especially if the assigned addresses are invalid or outdated.
Update or Reinstall Network Drivers
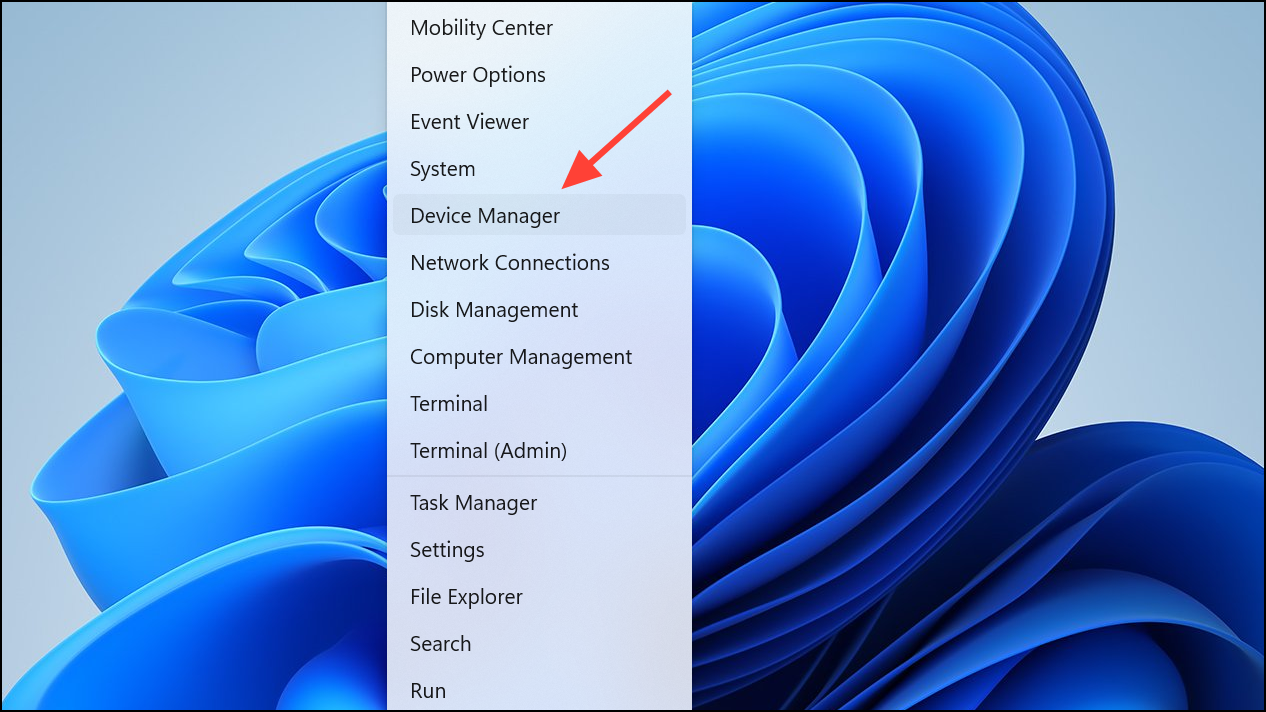
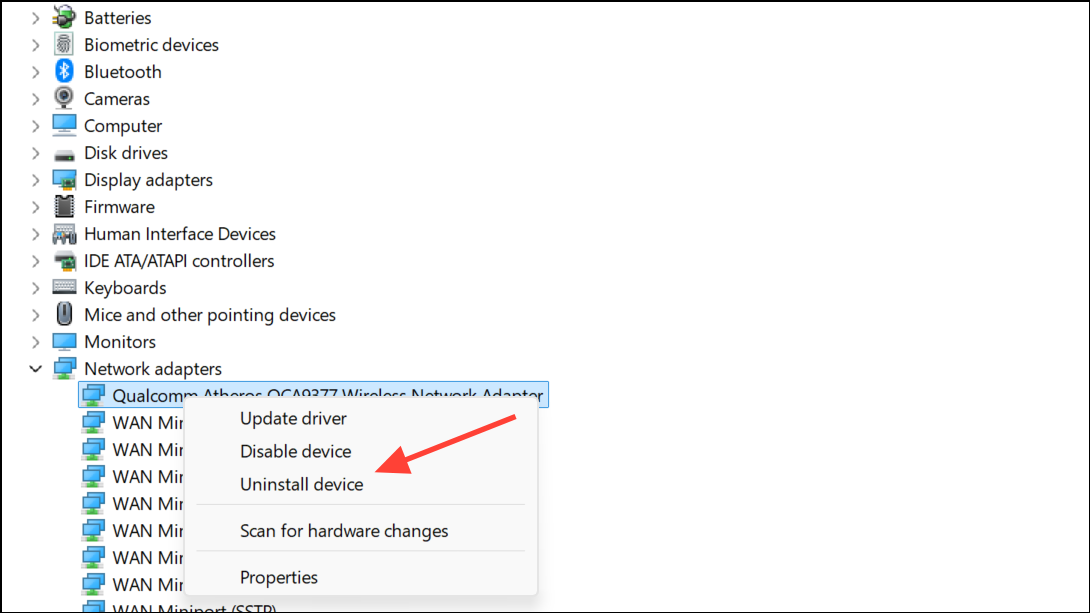
Step 1: Right-click the Start button and select Device Manager.
Step 2: Expand the Network adapters section, right-click your network device, and select Update driver. Choose Search automatically for drivers and follow prompts.
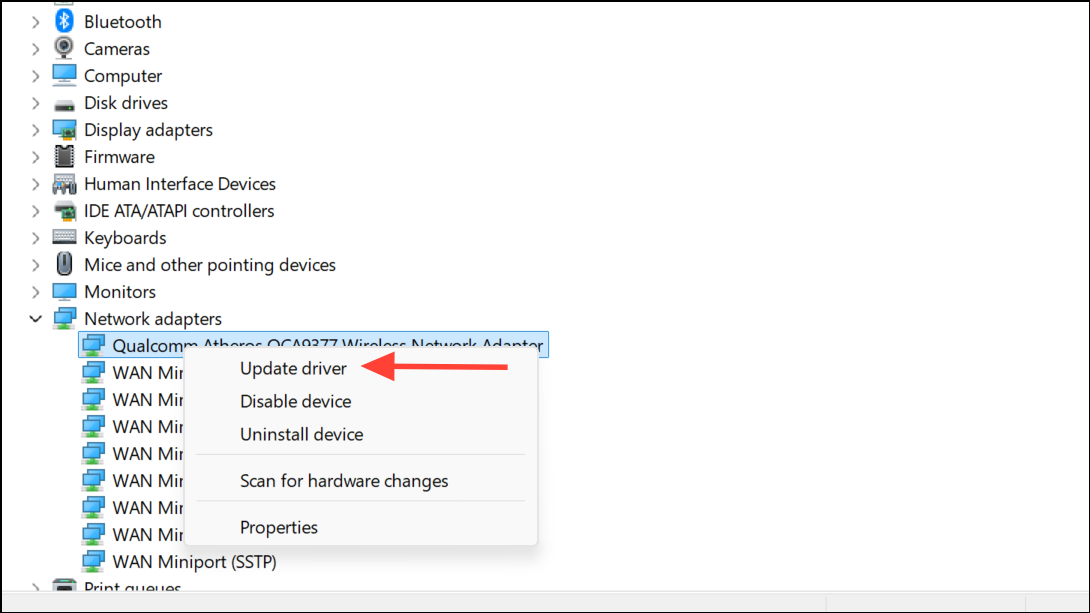
Step 3: If updating does not resolve the issue, right-click the adapter again and select Uninstall device. Restart your computer to allow Windows to reinstall the driver automatically.
Corrupt or outdated drivers often cause persistent connectivity issues. Updating or reinstalling ensures compatibility with the latest Windows 11 updates and resolves low-level communication errors.
Scan for Malware and Adware
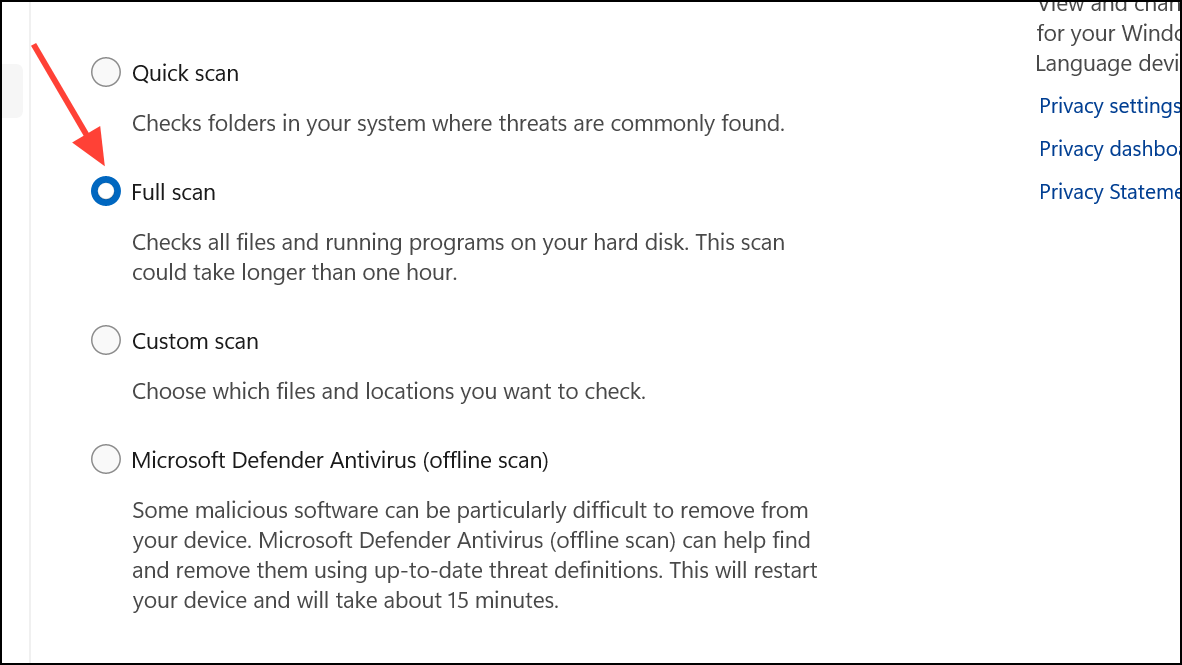
Step 1: Open Windows Security by searching from the Start menu. Select Virus & threat protection and run a Full scan.
Step 2: For an extra layer of detection, download and run a reputable anti-malware tool such as Malwarebytes. Remove any threats found and restart your computer.
Malicious software can alter proxy and network settings, redirecting traffic or blocking internet access. Scanning for and removing malware restores normal configuration and prevents recurrence of the proxy error.
Reset Winsock and TCP/IP Stack
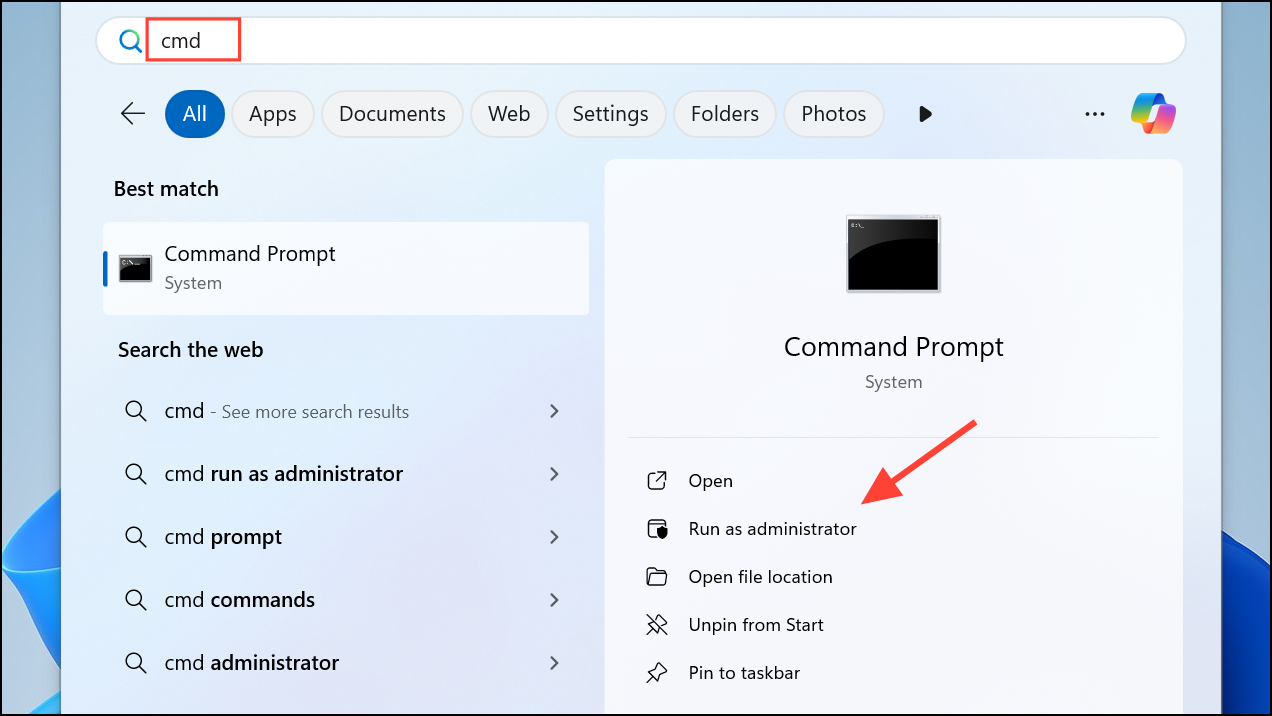
Step 1: Search for Command Prompt, right-click it, and select Run as administrator.
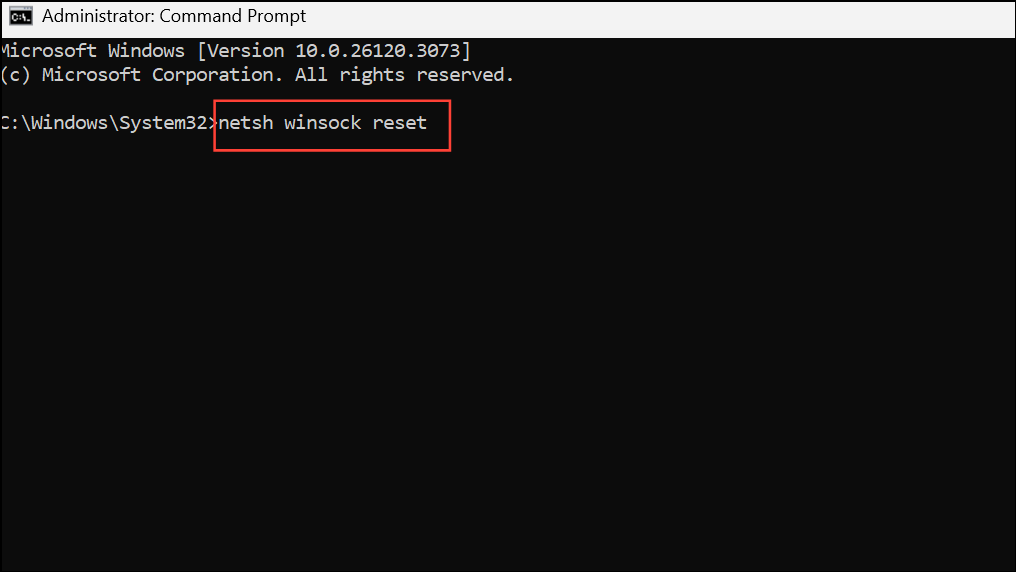
Step 2: Enter the following commands one at a time, pressing Enter after each:
netsh winsock reset
netsh int ip reset
ipconfig /flushdns
ipconfig /release
ipconfig /renew
Step 3: Restart your computer after completing the commands.
Winsock and TCP/IP stack resets clear out corrupt or misconfigured networking layers, restoring the default communication protocols Windows uses to access the internet.
Temporarily Disable VPN, Firewall, or Security Software
Step 1: If you recently installed or updated VPN, firewall, or antivirus software, temporarily disable them from their control panels.
Step 2: Reconnect to your network and check if the proxy error disappears. If it does, review the software’s settings or seek updates to resolve conflicts.
Overzealous security tools can inadvertently block or alter proxy settings, cutting off internet access. Isolating the issue to security software helps you adjust configurations or seek alternative solutions.
Restore Windows Using System Restore
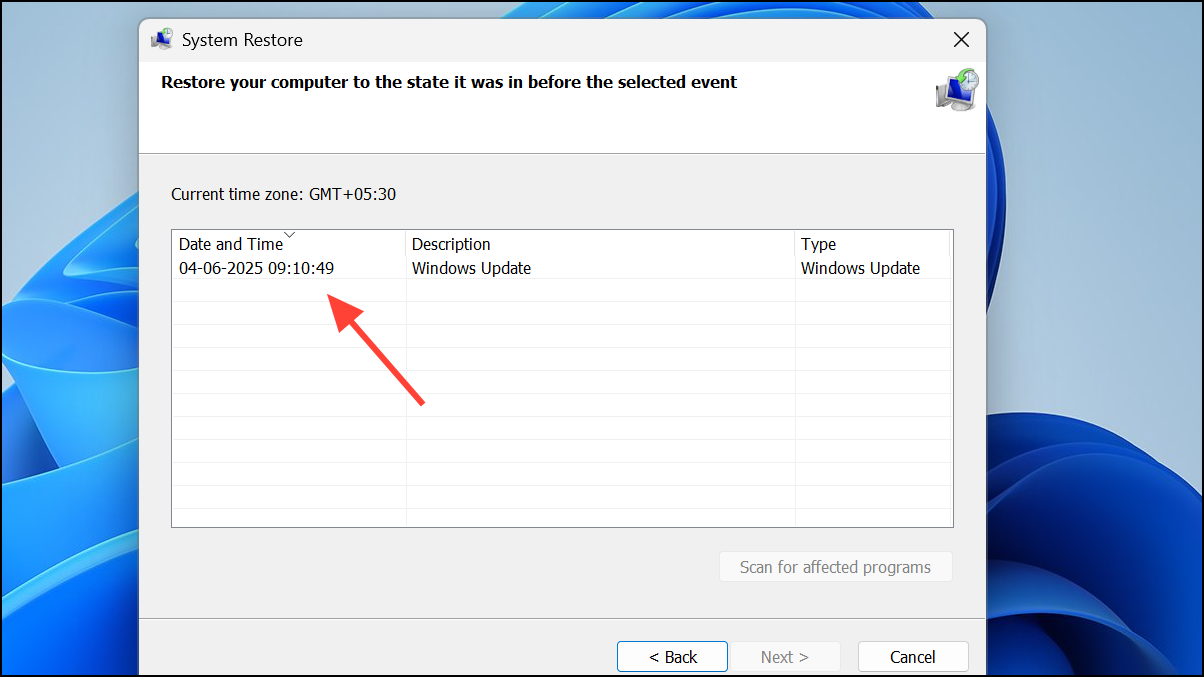
Step 1: Type rstrui in the Windows search box and press Enter to launch System Restore.

Step 2: Select a restore point dated before the error first appeared. Follow prompts to complete the restoration.
System Restore rolls back recent system changes, driver installations, or software updates that may have introduced the proxy error, without affecting your personal files.
Applying these targeted fixes will restore reliable internet access and resolve proxy detection errors in Windows 11. If none of these solutions work, contacting your network administrator or ISP for advanced troubleshooting may be necessary.