
Audio output switching between stereo and 5.1 surround sound after every Windows 11 restart disrupts everything from movie nights to gaming sessions. This persistent channel-flipping stems from a mix of driver issues, aggressive power management, and system confusion over default devices. Addressing these factors restores predictable, stable audio output and eliminates the need for daily manual reconfiguration.
Update or Reinstall Audio Drivers
Outdated or incompatible audio drivers often trigger unwanted channel switching. Installing the latest, manufacturer-approved drivers ensures Windows 11 communicates correctly with your hardware and retains your preferred audio setup.
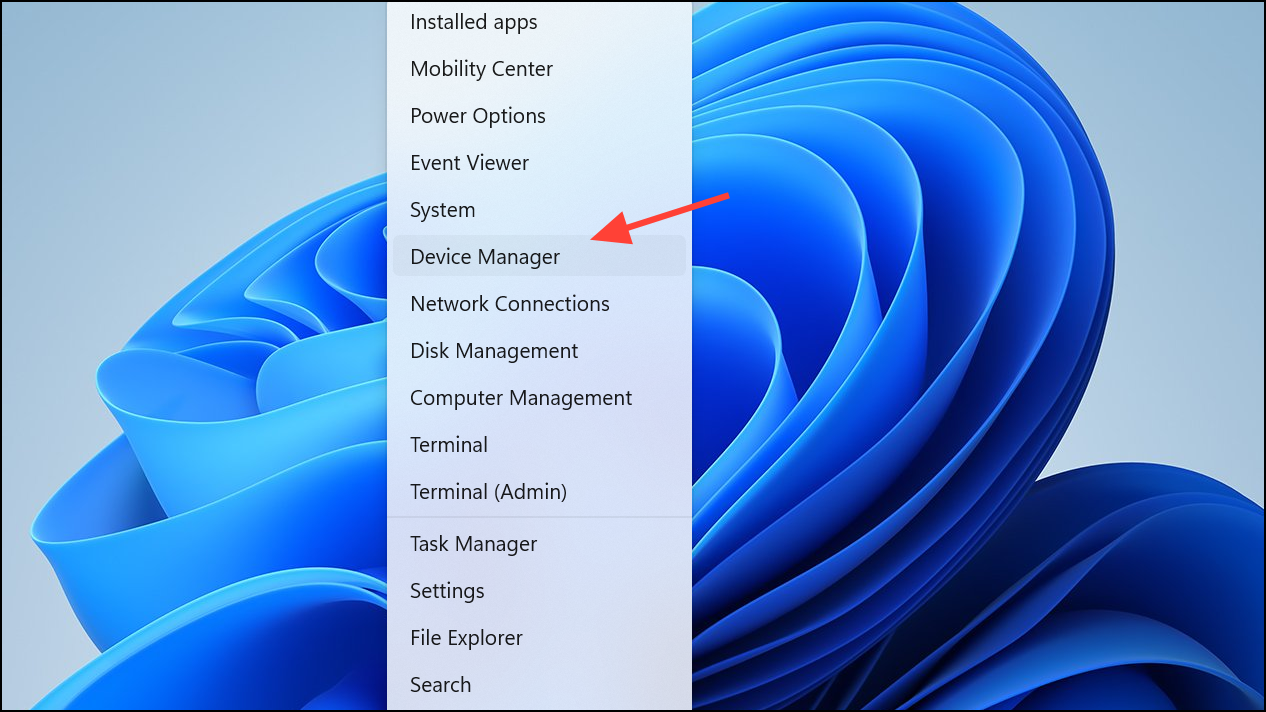
Step 1: Open Device Manager by right-clicking the Start button and selecting it from the menu.
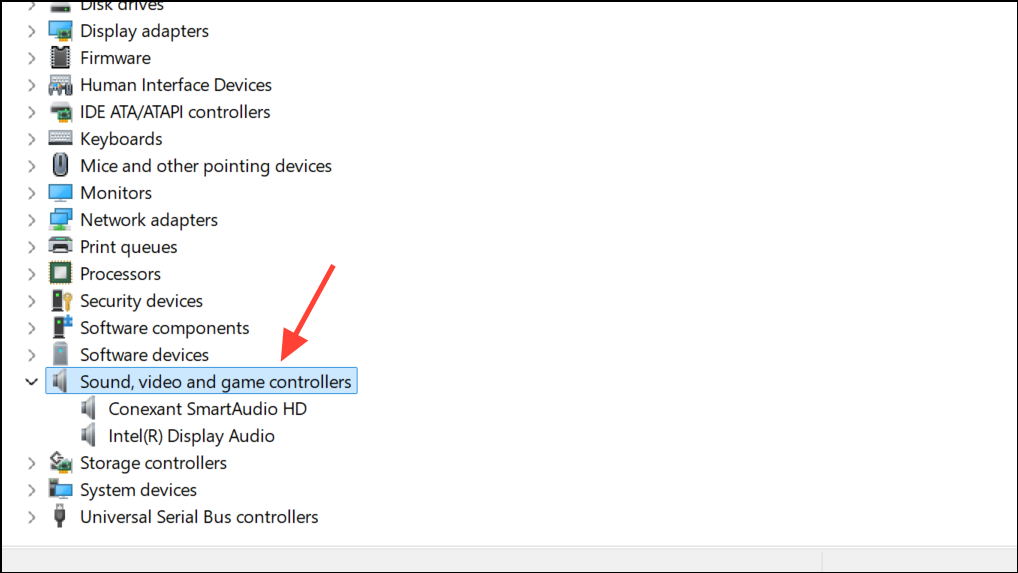
Step 2: Expand Sound, video and game controllers to view your audio device.
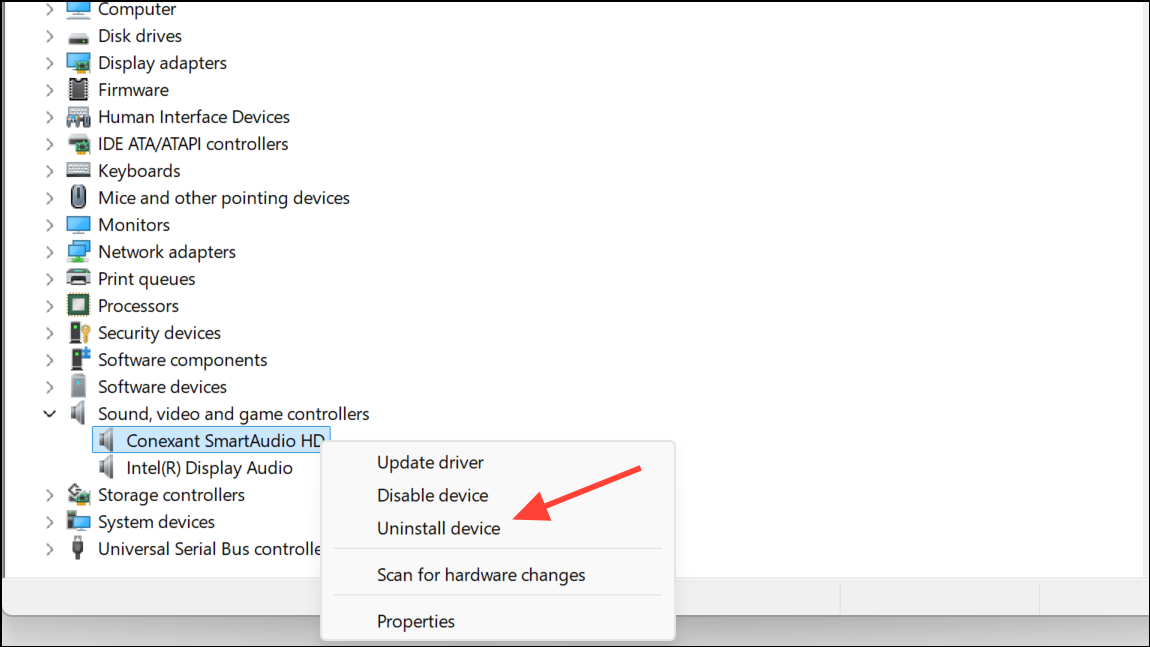
Step 3: Right-click your main audio device (such as Realtek, Creative, or your motherboard’s sound card) and select Uninstall device. Confirm the uninstallation. Restart your PC to fully remove the old driver.
Step 4: Download the latest driver directly from your audio device or motherboard manufacturer’s website. Avoid relying on Windows Update for this step, as it may install a basic or outdated driver. Install the downloaded package and reboot your system.
After installation, open the sound settings and set your preferred channel configuration. The updated driver should now preserve your choice across restarts.
Set and Confirm the Default Playback Device
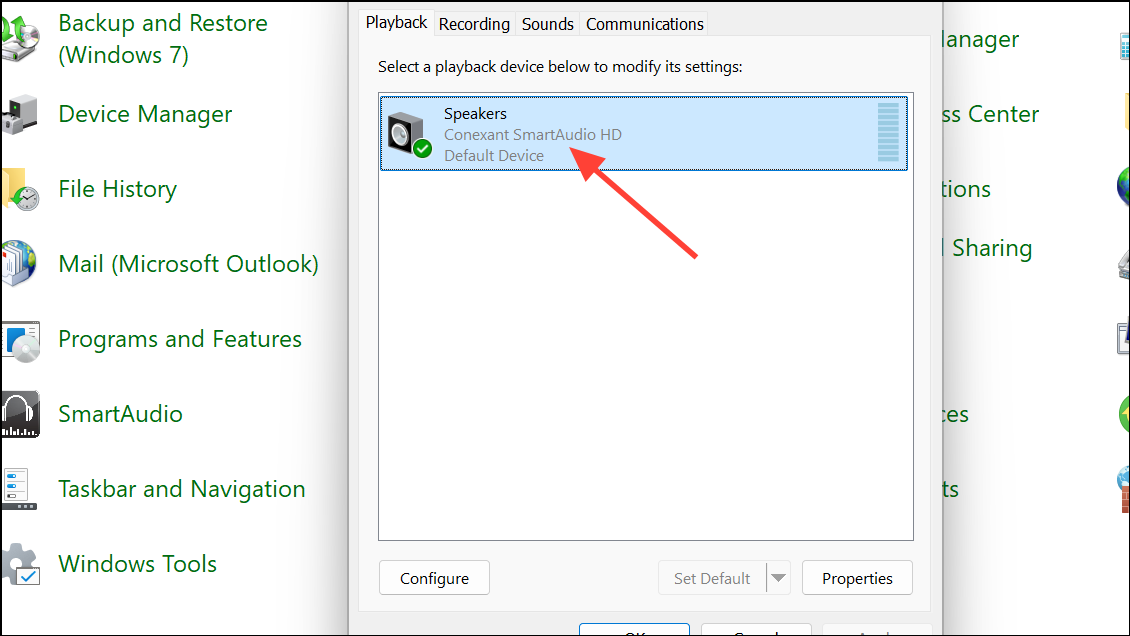
Windows 11 sometimes reverts to a different output device when multiple audio options are present, causing configuration resets. Ensuring your preferred device is set as default helps lock in your channel selection.
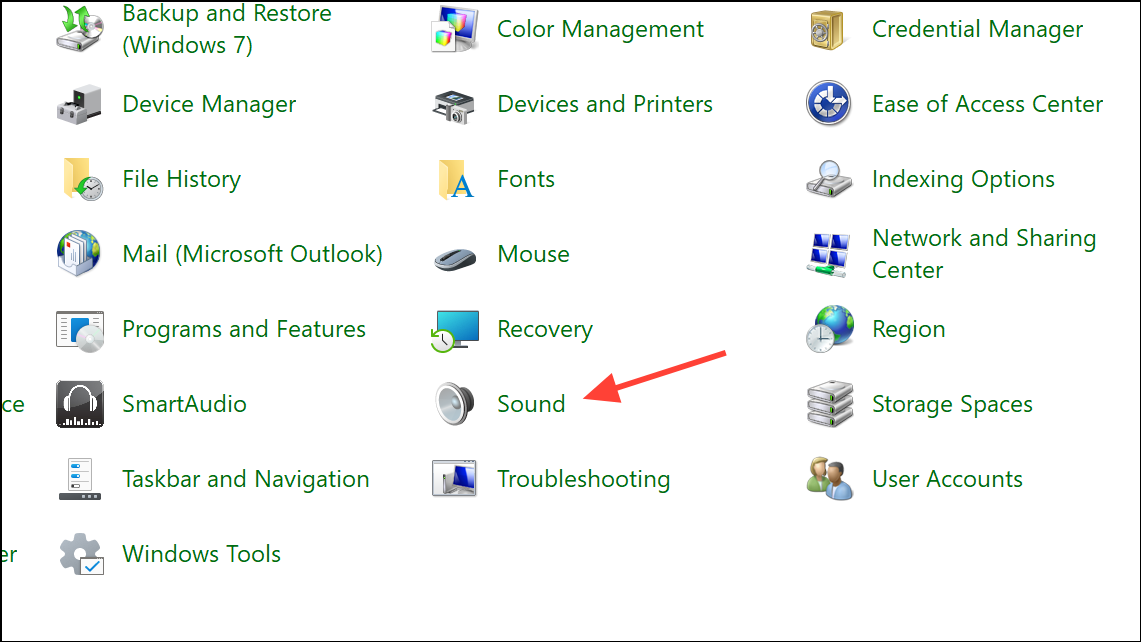
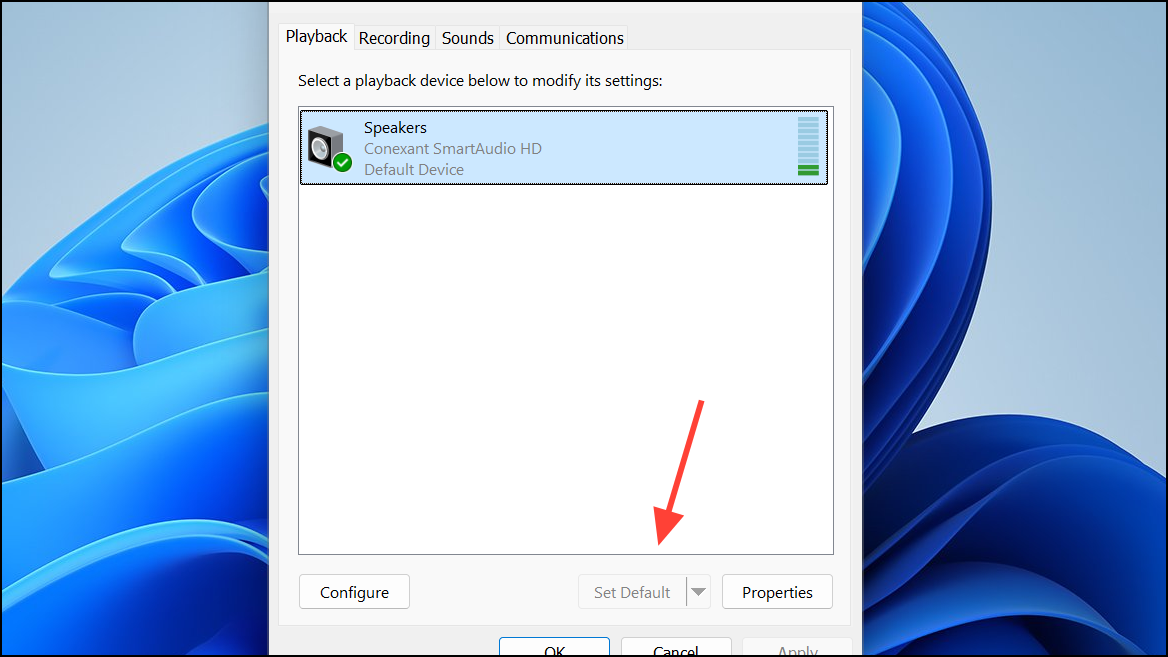
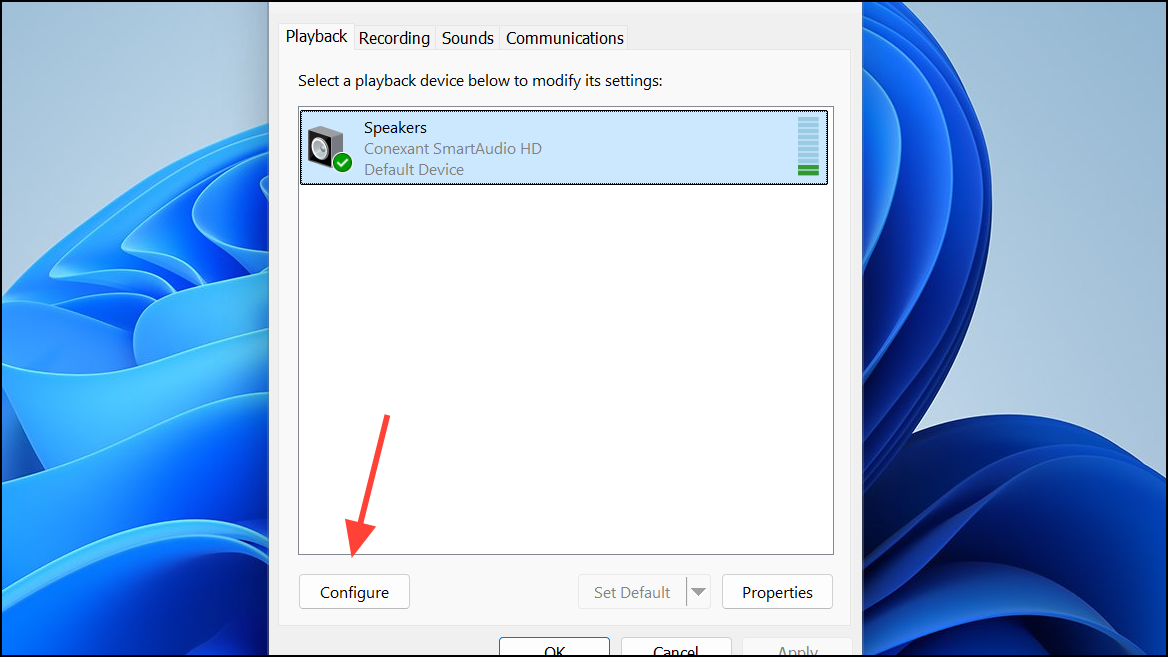
Step 1: Open Control Panel and navigate to Hardware and Sound > Sound.
Step 2: In the Playback tab, right-click your preferred speakers or home theater output and select Set as Default Device. If you see unused devices, such as HDMI monitors or virtual outputs, right-click and choose Disable to reduce conflicts.
Step 3: Click Configure with your default device selected, choose 5.1 Surround (or Stereo if you prefer), and complete the setup wizard. Click OK to save.
This process clarifies to Windows which device and channel layout to prioritize, minimizing unwanted changes after reboots or device reconnections.
Modify Registry Power Management Settings (Advanced)
Power management features in Windows 11 can reset audio configurations after sleep or restart. Adjusting specific registry values prevents the system from powering down or reinitializing your audio device, which often wipes out custom channel settings. Proceed cautiously—incorrect registry edits can destabilize your system.
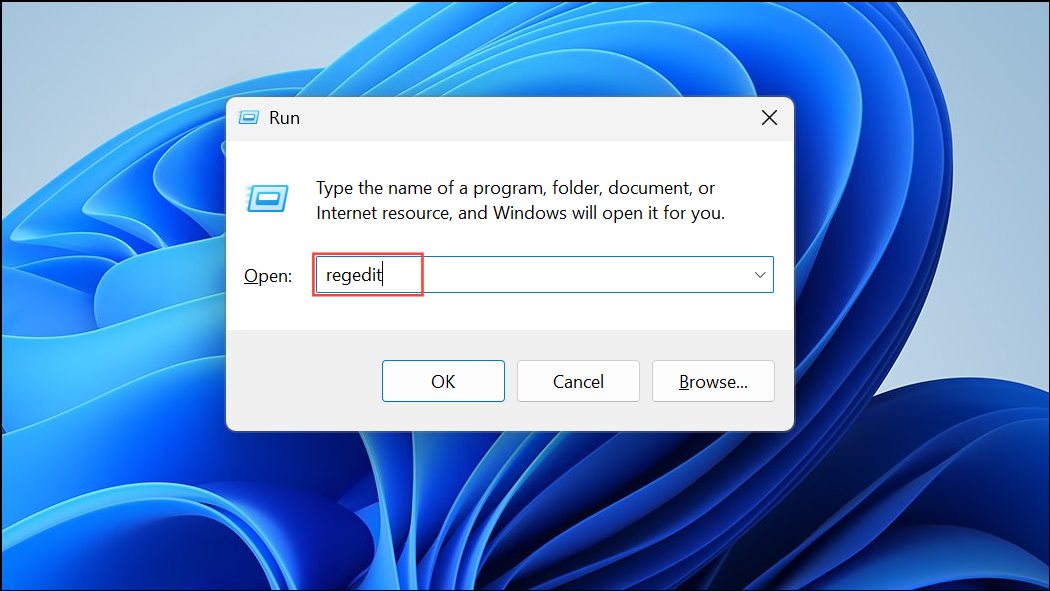
Step 1: Press Win + R, type regedit, and press Enter. Back up your registry before making changes.
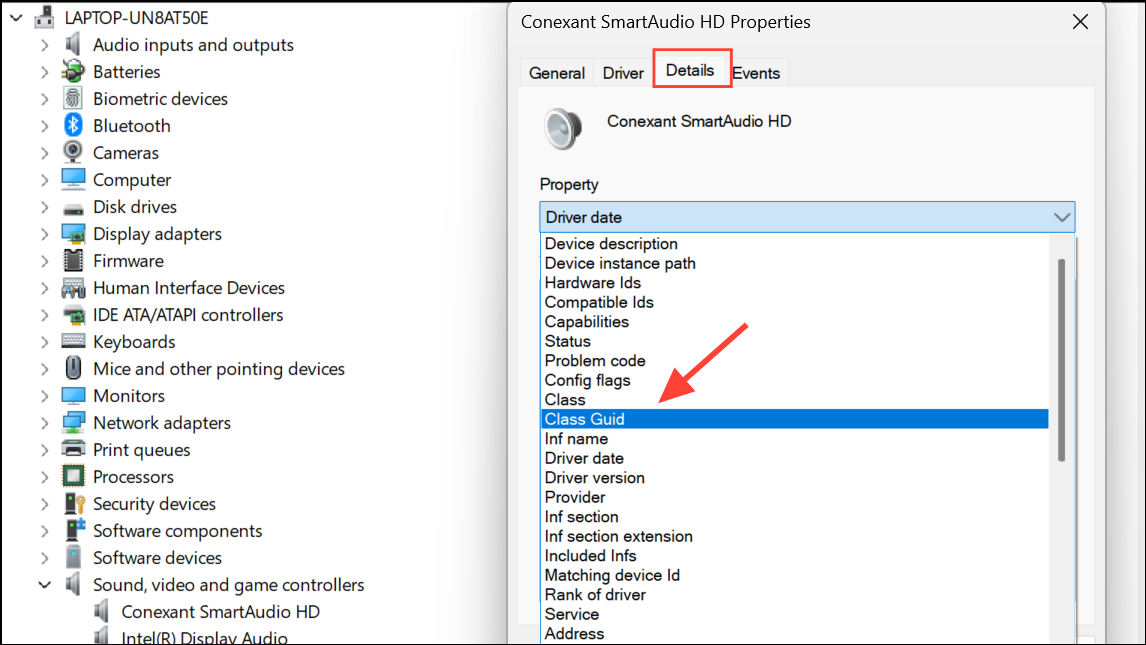
Step 2: Identify your audio device’s Class GUID. Open Device Manager, right-click your audio device, select Properties, go to the Details tab, and select Class GUID from the Property dropdown. Copy the value.
Step 3: In Registry Editor, navigate to:
Computer\HKEY_LOCAL_MACHINE\SYSTEM\CurrentControlSet\Control\Class\<YourClassGUID>\0000\PowerSettings
Step 4: Double-click each of these values—ConservationIdleTime, IdlePowerState, and PerformanceIdleTime—and set their data to 0. This disables aggressive power management for your audio device.
Step 5: Close the Registry Editor and restart your computer. Your selected audio channel configuration should now persist through reboots and sleep cycles.
Run the Windows Audio Troubleshooter
Microsoft’s built-in audio troubleshooter checks for common misconfigurations and missing drivers. While it may not resolve every channel-switching issue, it’s a quick way to identify obvious problems.
Step 1: Open Settings, go to System > Troubleshoot > Other troubleshooters, and find Playing Audio. Click Run.
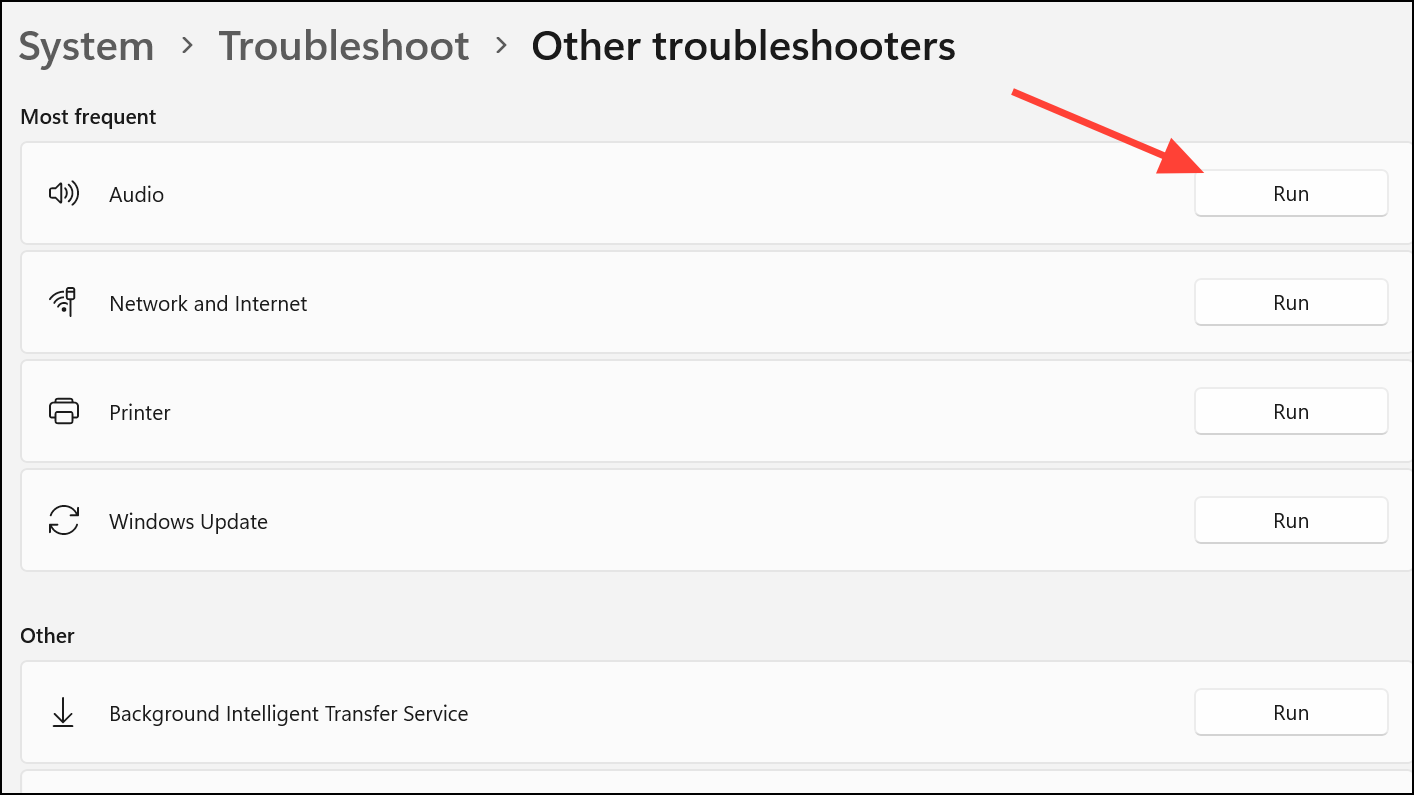
Step 2: Follow the on-screen prompts. The troubleshooter will scan for issues and may suggest fixes, such as resetting the audio device, updating drivers, or setting the correct default device.
Step 3: If the troubleshooter applies changes, test your audio output and reconfigure your preferred channel setup if needed.
Manual Channel Switching as a Temporary Solution
If none of the above solutions provide a lasting fix, manually switching audio channels remains a practical workaround until Microsoft releases a permanent patch.
Step 1: Open Control Panel > Hardware and Sound > Sound and select your playback device.
Step 2: Click Configure, choose your desired channel layout (such as 5.1 Surround or Stereo), and complete the wizard.
Step 3: Repeat this process after each restart or device reconnection until a more stable solution is available.
Staying current with Windows updates and checking your hardware manufacturer’s support site for new driver releases can further reduce the risk of recurring audio channel issues. With a systematic approach, you can restore consistent, reliable sound output on Windows 11.