
Mask Shards increase Hornet’s maximum health by one pip for every four shards collected. There are 20 shards in total (five full masks), and shards are consumed automatically when you reach four. Health is shown on the top-left bar and the upgrades persist for the entire playthrough.
Before you start, note the most common ability gates you’ll meet along the way: Swift Step (dash), Drifter’s Cloak (glide/wind riding), Cling Grip (wall jump), Clawline (grappling hook), Faydown Cloak (double jump), Needolin (Weavenest doors), and occasionally puzzle keys like the Key of Apostate.
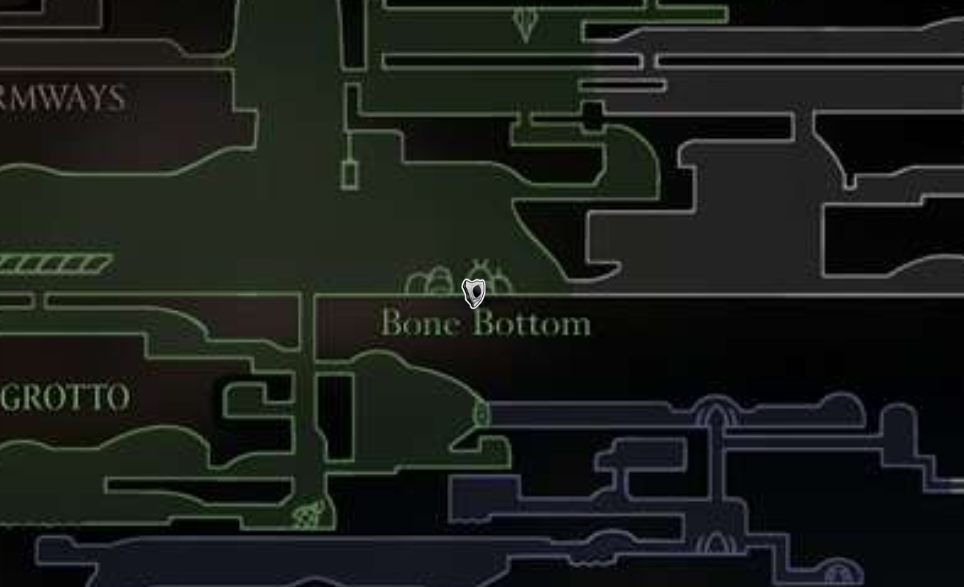
Bone Bottom — Pebb’s shop (300 Rosaries)
Step 1: Enter Bone Bottom and locate the vendor Pebb on the right side of town. This is near your early connection to The Marrow.
Step 2: Purchase the Mask Shard for 300 Rosaries. If you’re short, a brief currency farm in early rooms around Mosshome/Bone Bottom bridges the gap quickly.
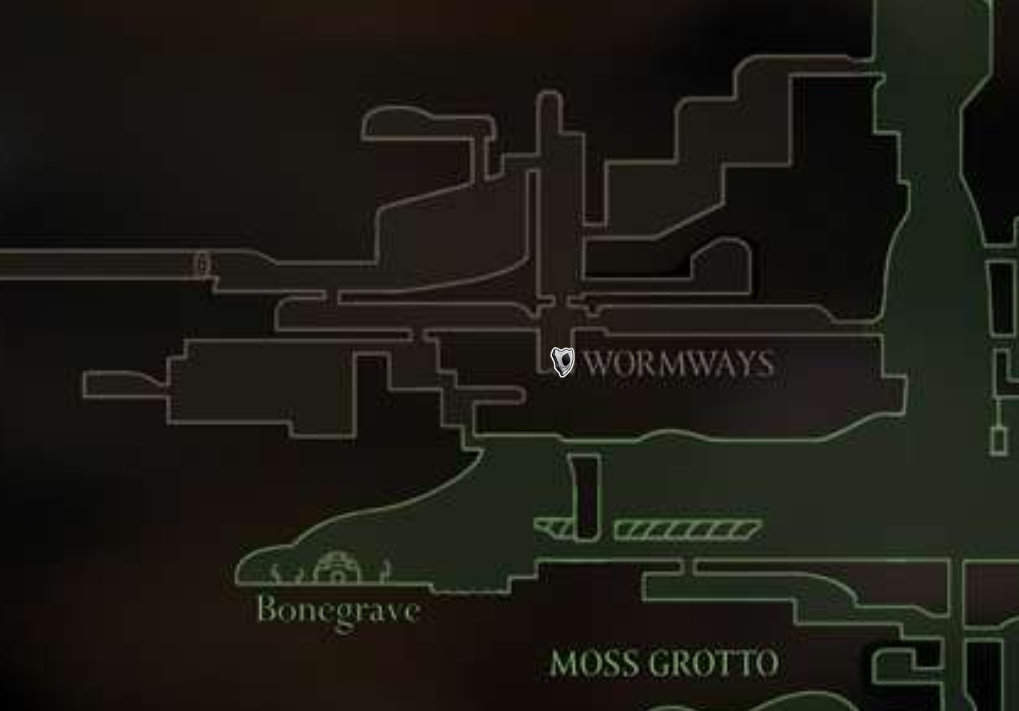
Wormways (from Mosshome/Moss Grotto approach)
Step 1: From the upper-left Mosshome/Moss Grotto exit into Wormways, head to the pit with water at the bottom.
Step 2: Drop into the pool and strike the right-hand wall to reveal a hidden alcove containing the Mask Shard. Swift Step makes reaching this room more reliable; advanced pogoing can sequence-break it earlier.
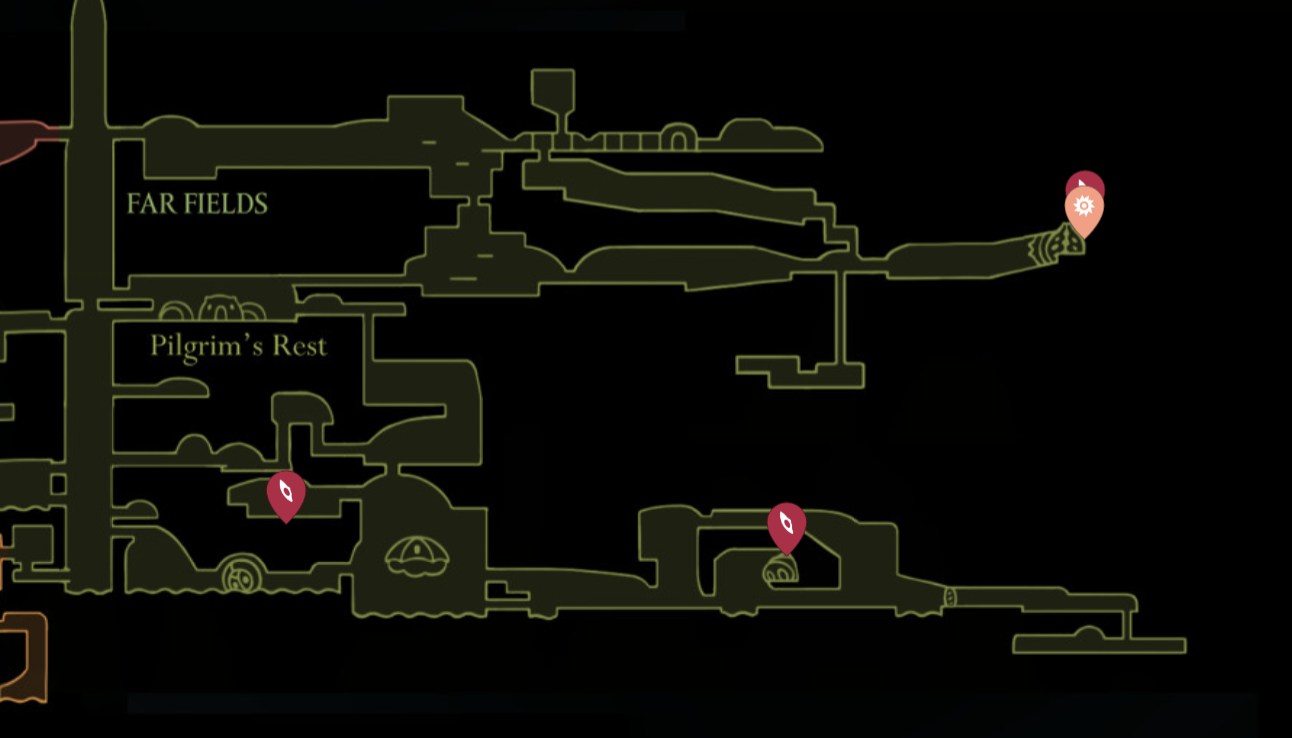
Far Fields — Updraft platforming (Drifter’s Cloak)
Step 1: Start at the Seamstress’ house. Ride the updrafts to the upper reaches by detonating the magma rocks that create additional wind currents.
Step 2: Take the top-left route and find a bomb lodged in the ceiling. Use the nearby wind to strike it safely so it drops and explodes.
Step 3: Drop to the newly opened crevice below to collect the Mask Shard.
Far Fields — Skull Cavern gauntlet (Clawline recommended)
Step 1: Move east from the Seamstress toward the giant skull cavern just before the Weavenest gate.
Step 2: Descend and clear waves of flying enemies while platforms phase in and out. Use Clawline and wall clings to stay safe between waves.
Step 3: When lava begins to rise, climb out quickly using lateral routes; at the entrance, a wind current forms.
Step 4: Ride that current to the cavern’s top niche and pick up the Mask Shard.
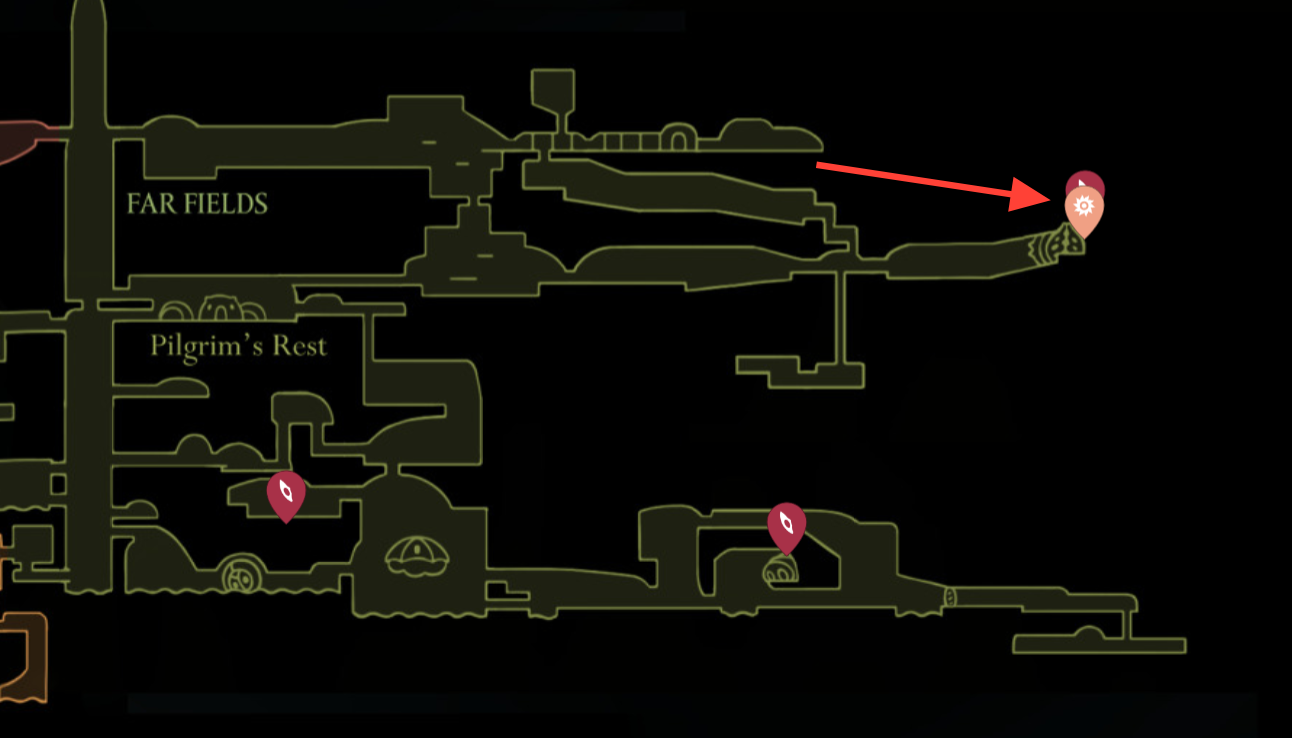
Far Fields — “Fastest in Pharloom” (Sprintmaster Swift)
Step 1: Find Sprintmaster Swift on the far east side near Pilgrim’s Rest. Sit at the nearby bench so you have a safe retry point.
Step 2: Complete Swift’s three races. The first two reward other items; the third awards a Mask Shard.
Step 3: Expect late-game mobility checks here; Faydown Cloak, Clawline, and speed gear make these races consistent.
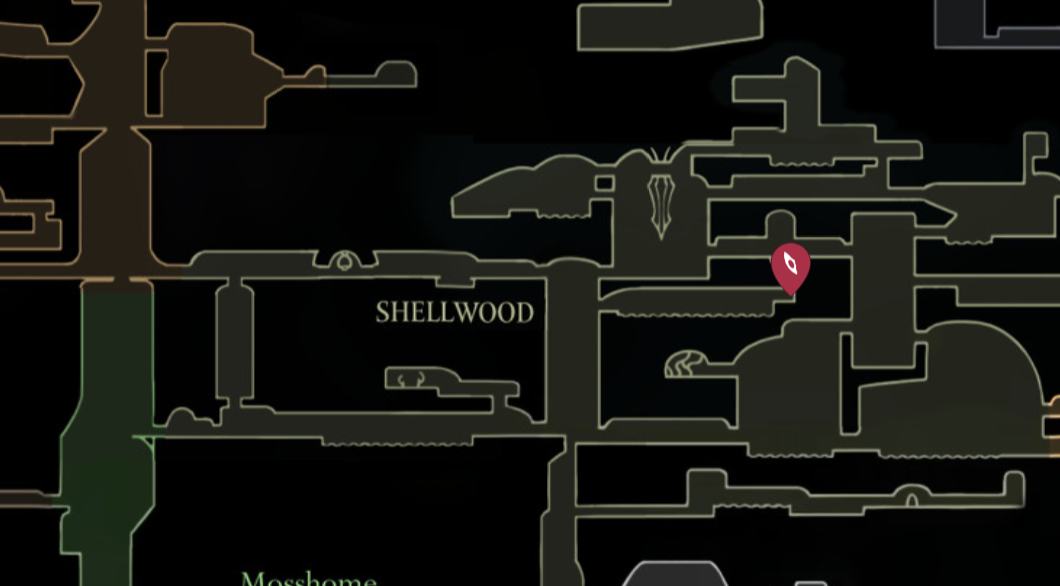
Shellwood — Flower pogo route
Step 1: From the west bench, head east to the tall central shaft with white blooming flowers that close on contact.
Step 2: Pogo on the flowers and avoid spikes as you climb; before the very top, head into the east transition.
Step 3: In the horizontal corridor, cut through vines or obstacles at the end to reveal the Mask Shard.
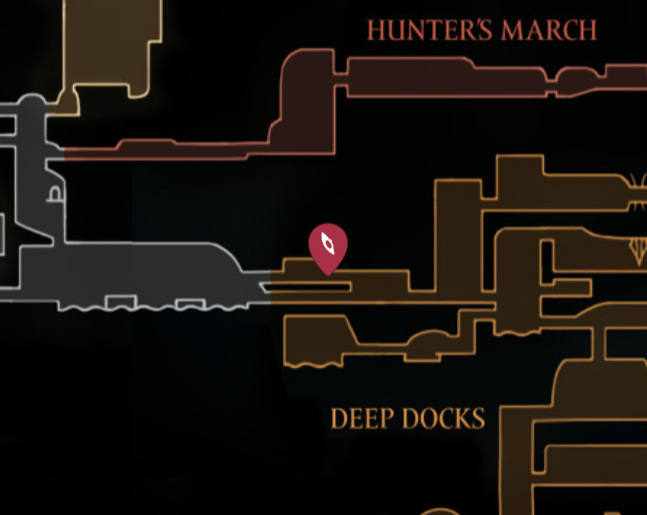
Deep Docks — Entry gauntlet (via The Marrow)
Step 1: From The Marrow’s eastern bench near the Deep Docks passage, drop into the pre-Docks room and clear enemies methodically.
Step 2: Enter Deep Docks proper and navigate east over staggered platforms; Cling Grip is strongly recommended for vertical control.
Step 3: Claim the Mask Shard at the end of the route. If short on abilities, you can lure a flying enemy to pogo up the first tricky platform as a backup tactic.
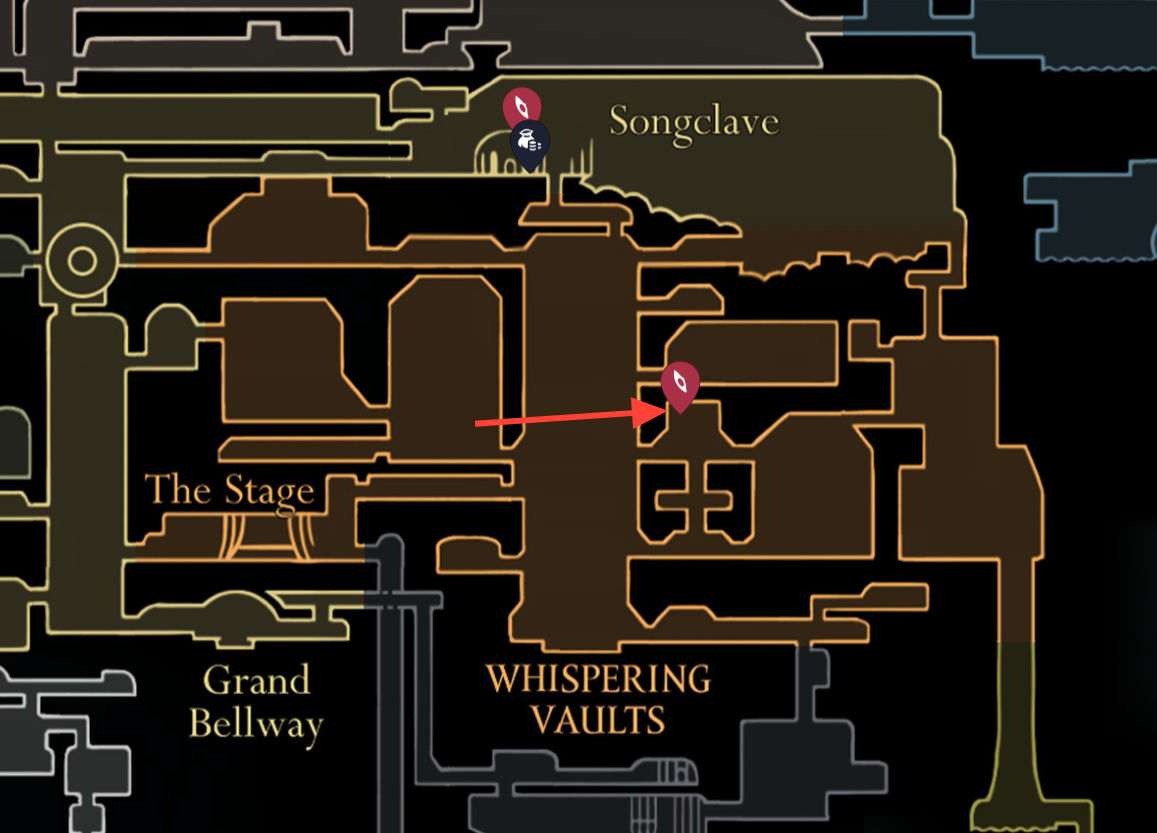
Whispering Vaults — Hidden ceiling latch (Clawline/Cling Grip)
Step 1: From the tall tower under Songclave, enter the second room from the bottom on the right.
Step 2: Solve the box orientation platforming and reach the small room above the Vaultkeeper icon on your map.
Step 3: Strike the disguised section of the ceiling to drop a climbable wall. Scale up to the caged Mask Shard.
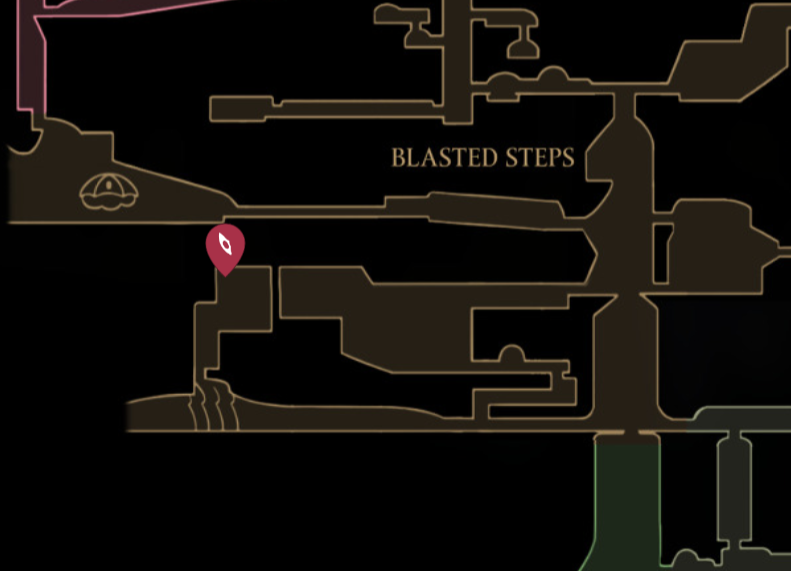
Blasted Steps — Bottom-to-top spike climb
Step 1: Start from the southern bench and head to the very bottom path. Move west to the marked climb section with spikes and falling rocks.
Step 2: Use Clawline, Faydown Cloak, and Drifter’s Cloak to chain jumps, grapples, and glides through tight hazards.
Step 3: The Mask Shard sits in the upper-left of the top room after this climb.
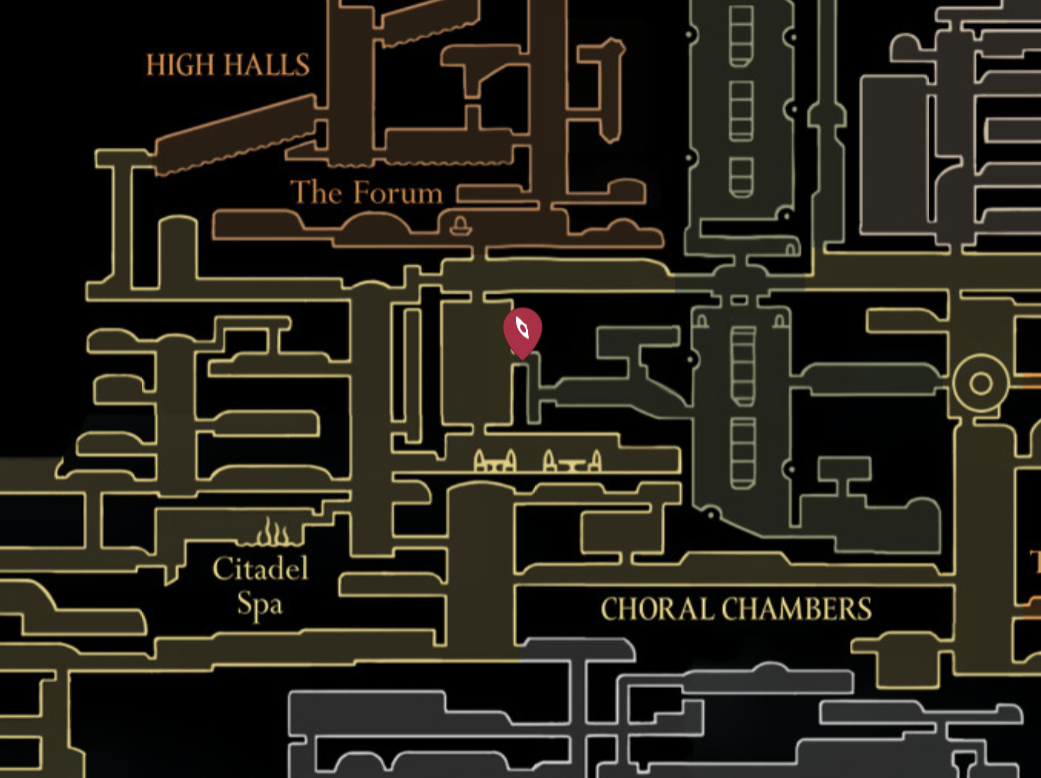
Choral Chambers (via Cogwork Core) — Ambush room
Step 1: Progress into the Citadel and defeat the Cogwork Dancers to open up traversal options around Cogwork Core.
Step 2: From the mid-left of Cogwork Core, enter the western ambush room and defeat all enemies while tracking moving platforms.
Step 3: Pull the lever on the west side, then climb using Cling Grip to the upper-left nook that holds the Mask Shard.
Songclave (Choral Chambers) — Jubilana’s shop (750 Rosaries)
Step 1: Build up Songclave activity and complete the “Wandering Merchant” wish to make Jubilana available as a merchant.
Step 2: Purchase the Mask Shard from Jubilana for 750 Rosaries.

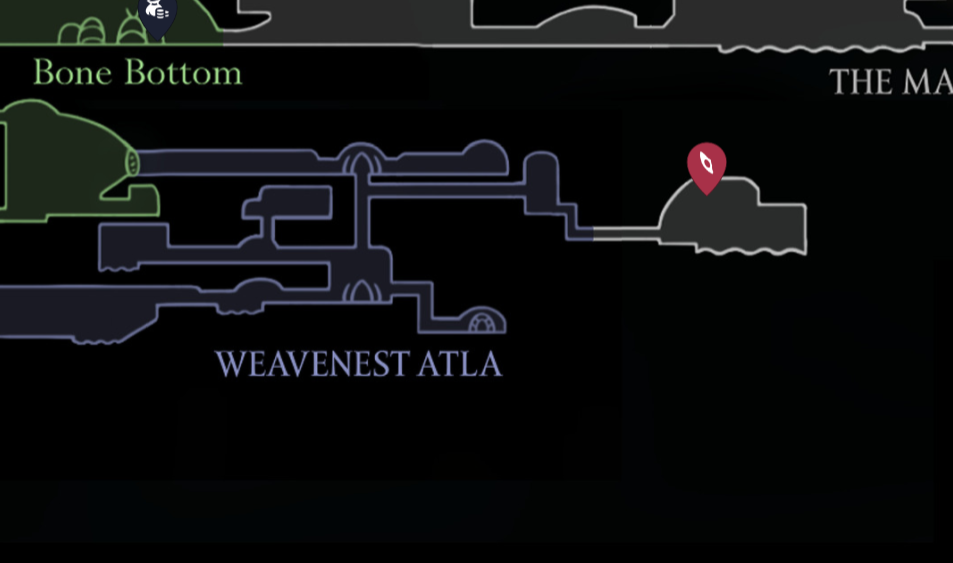
Weavenest Atla — Teleporter loop and lava geysers
Step 1: Open the Weavenest door in Moss Grotto using Needolin (earned from defeating Widow). Ensure you also have Cling Grip.
Step 2: Activate the map mechanism, use the teleporter to the lower level, then climb back up the central shaft to the east hall.
Step 3: Strike a hidden breakable wall on the right in the next room, then traverse the fragile platforms and timed lava geysers.
Step 4: Reach the top-left ledge to collect the Mask Shard.
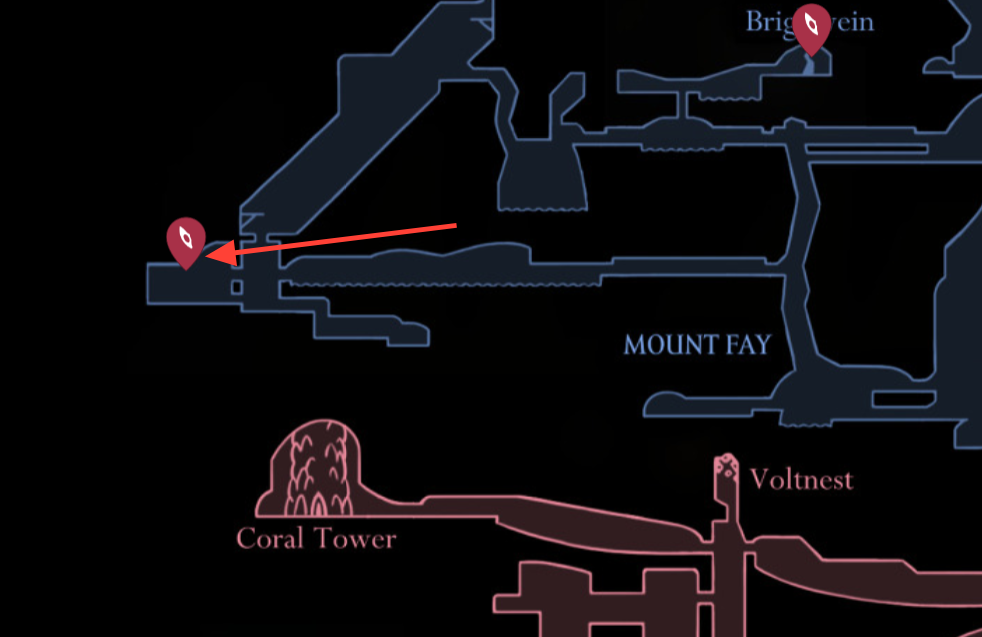
Mount Fay — Western bench hollow pillar
Step 1: From the west bench, break the nearby wall and proceed to the stone pillar with a hollow interior.
Step 2: Use Faydown Cloak to enter and Cling Grip to scale the inner surfaces safely.
Step 3: Retrieve the Mask Shard from the cavity at the top.
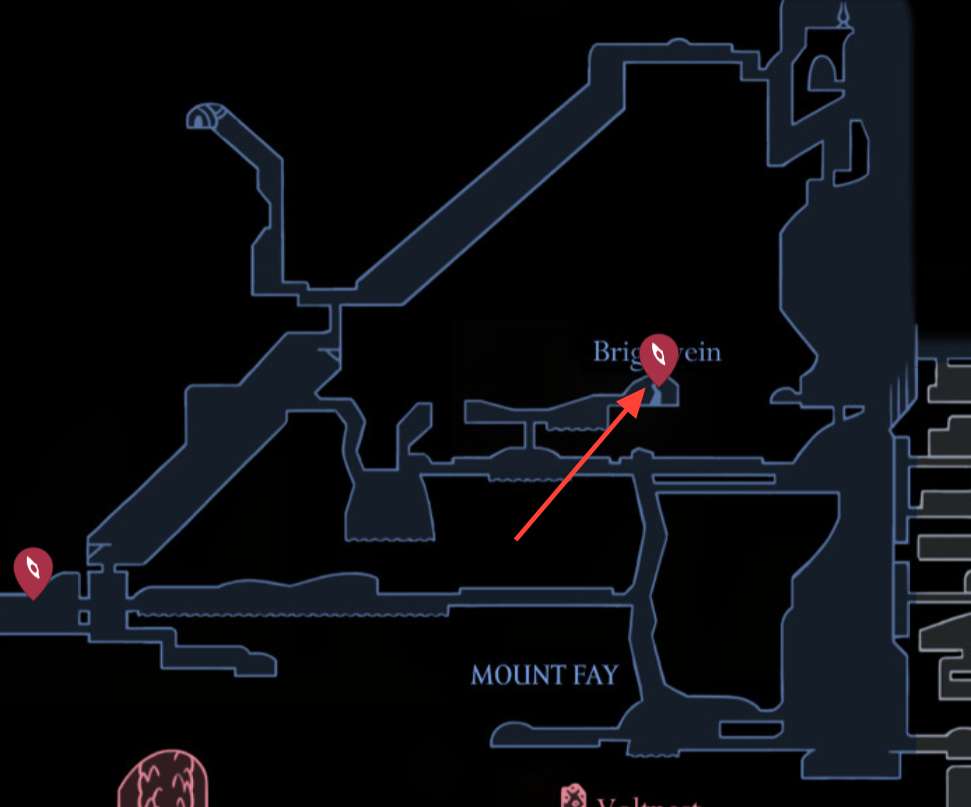
Mount Fay — Central ice tunnels (Clawline focus)
Step 1: In the mid-mountain region, stand on the square platform over frozen water and use Clawline to break through ice ceilings and walls above.
Step 2: Follow the rightward tunnel, grappling to pop additional ice barriers and open the vertical route.
Step 3: In the next chamber, combine wall climbs, grapples, and enemy pogo to scale to the top and break the hanging cocoon for the Mask Shard. Faydown Cloak and gliding smooth out several jumps.
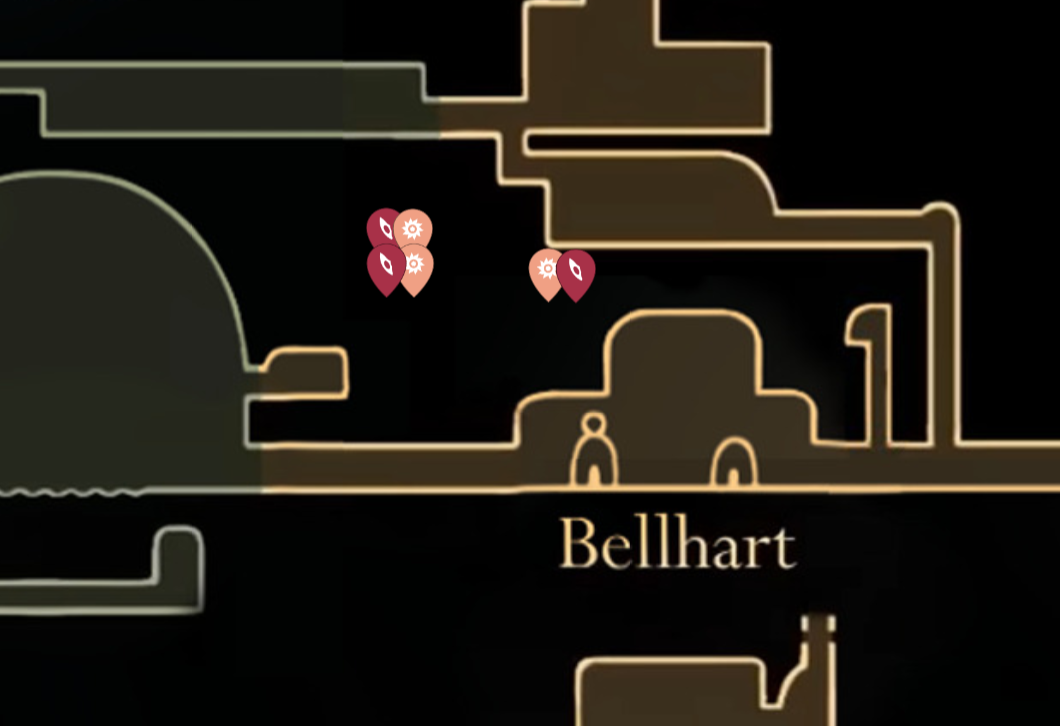
Bellhart — Grand Hunt: Savage Beastfly
Step 1: Accept the Savage Beastfly wish from the Bellhart board after restoring the town’s main condition.
Step 2: Fight the Savage Beastfly in Far Fields where you previously faced Fourth Chorus; avoid ground breaks after each slam.
Step 3: Turn in the Horn Fragment at the Bellhart board to receive the Mask Shard automatically.
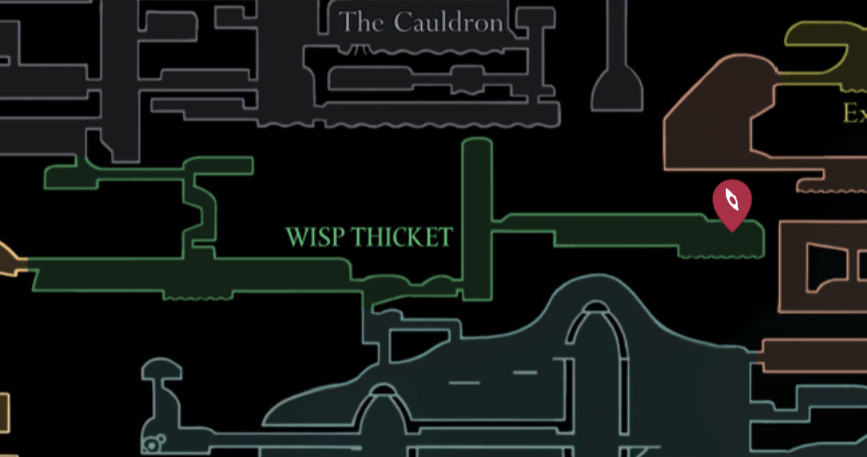
Wisp Thicket — Tall spike ascent
Step 1: From the bench, head east into the vertical hazard room filled with spikes and homing fire enemies.
Step 2: Use the hanging red sacks to gain height, then chain wall jumps and glides to the east exit.
Step 3: Loop upward through the next set of rooms to the Mask Shard on the upper path.
The Slab — Apostate door spinning-trap room
Step 1: From The Slab’s east bench, climb to the top lock and use the Key of Apostate to open the door.
Step 2: Step on the pressure plate to activate spinning spike traps and bounce between them while wall-jumping the right wall.
Step 3: Time a pogo on a passing trap to reach the upper-left ledge and collect the Mask Shard in the cage.

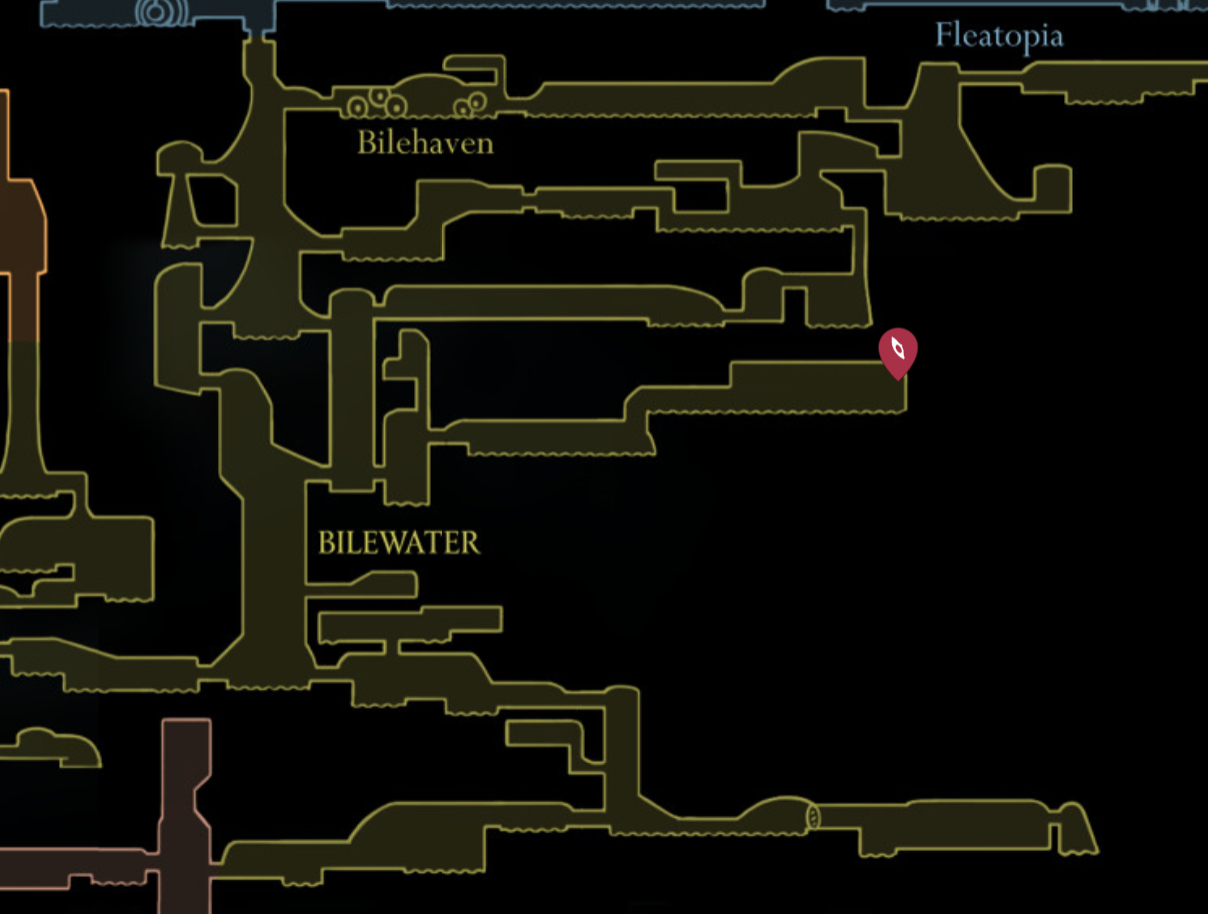
Bilewater — Central wooden scaffolds route
Step 1: From the paid bench southwest of the Exhaust Organ, head north into the tall shaft and take the highest right-hand passage.
Step 2: Move east across spike gaps, then ascend and traverse the wooden structures while avoiding leaping grubs and acid spitters.
Step 3: Climb the final scaffold on the right side to the top and claim the Mask Shard.
Bellhart — Hidden Hunters (Act 3)
Step 1: Accept “Hidden Hunters” from the Bellhart board in Act 3 and pursue the marked target in Far Fields.
Step 2: Defeat the hunter and retrieve the unique item they leave behind.
Step 3: Return to the wishboard to automatically receive a Mask Shard.
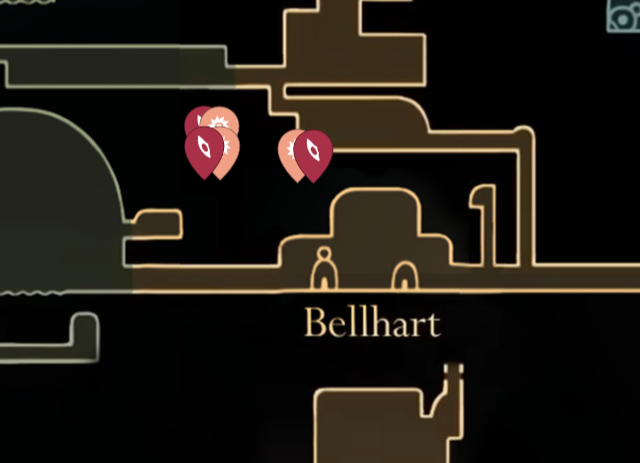
Bellhart — Dark Hearts (Act 3)
Step 1: Accept “Dark Hearts” from the Bellhart board in Act 3. Your task is to destroy Void Masses across Pharloom.
Step 2: Methodically clear each marked Mass, revisiting regions as needed once you have the required abilities.
Step 3: Turn in the completed wish at Bellhart to receive the Mask Shard.
Tips for staying on track: keep benches close for challenging gauntlets, check ceilings and suspicious walls for secrets, and return to earlier zones after each mobility upgrade—several shards only become reachable once you combine Clawline, Faydown Cloak, and Drifter’s Cloak.