Upgrading your storage drive, especially when replacing your system drive, can trigger Windows to request reactivation due to hardware changes. This issue occurs because Windows ties your activation key to your hardware configuration. Changing critical components like your primary drive can cause Windows to see your computer as a new device. Follow these straightforward steps to reactivate Windows smoothly after upgrading your storage.
Method 1: Reactivating Windows Using the Activation Troubleshooter
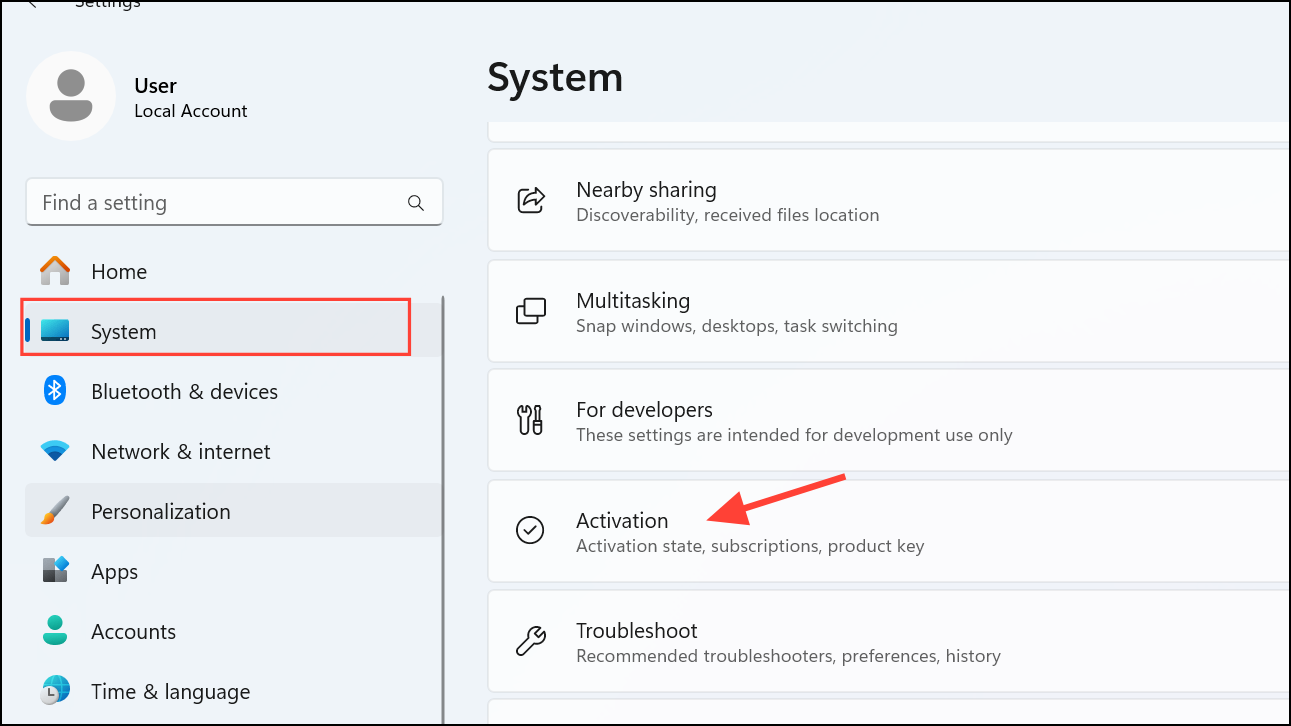
Step 1: First, ensure that your computer is connected to the internet. Click the Start button, select the gear icon to open Settings, and navigate to Update & Security on Windows 10. From the left sidebar, click on Activation. On Windows 11, open the Settings app, click System, and then click Activation.

Step 2: If your Windows 10 version detects a hardware change, you will see a message stating that Windows is not activated. Under this message, click on the option labeled Troubleshoot. On Windows 11, the system will check for activation as soon as you click Activation and will notify you accordingly.
Step 3: The Activation Troubleshooter will now run an automatic check. It may prompt you to sign in using your Microsoft account. Make sure you use the same Microsoft account linked to your digital license.
Step 4: After signing in, the troubleshooter will show a list of devices associated with your Microsoft account. Select the device you are currently using and click Activate. Windows will verify your digital license and activate automatically.
If this method successfully activates Windows, you can close the troubleshooter and continue using your computer normally.
Method 2: Reactivating Windows Using Your Product Key
If the troubleshooter does not resolve the activation issue, you can manually enter your product key to reactivate Windows.
Step 1: Open the Settings app (click Start > Settings), then navigate to Update & Security > Activation. On Windows 11, click System and then Activation, as before.

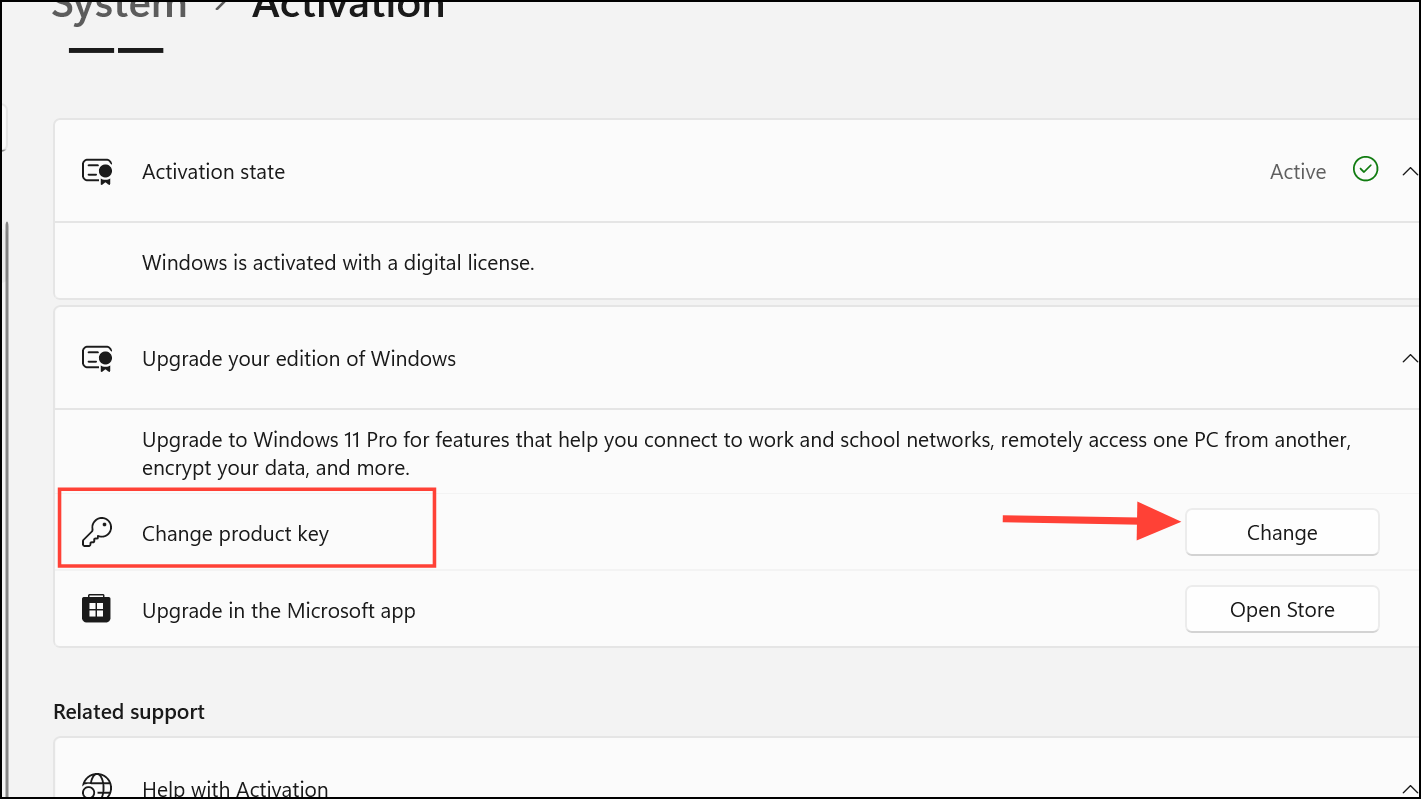
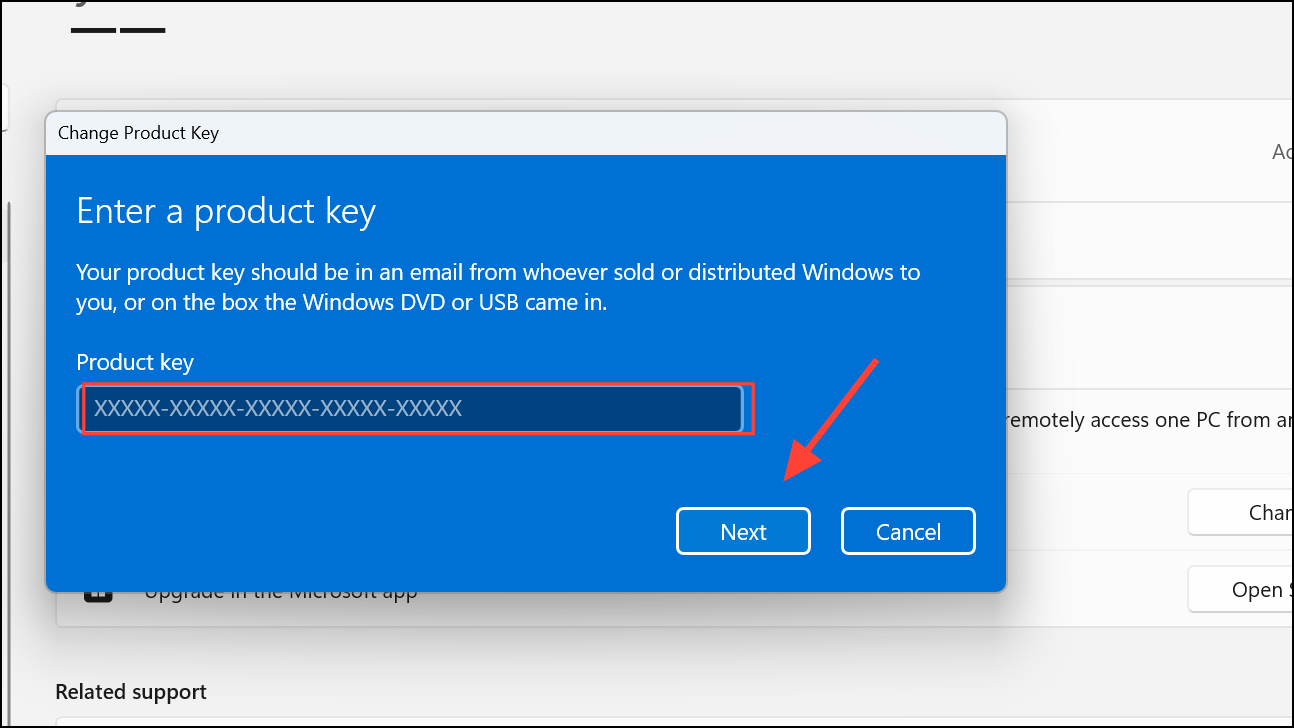
Step 2: On Windows 11, click the option labeled Change product key. You will find the same option under the Upgrade your edition of Windows dropdown on Windows 11 with the Change button to its right. A prompt window will appear, asking you to enter your 25-character product key.

Step 3: Carefully enter your Windows product key into the provided field, then click Next. Windows will connect to Microsoft's activation servers and validate your product key.

Step 4: Once validated, Windows will confirm activation. You can verify the activation status in the Activation settings menu, which should now indicate that Windows is activated.
Keep your product key stored safely for future reference, as you may need it again if you perform additional hardware upgrades.
Method 3: Contacting Microsoft Support for Activation Assistance
If neither of the above methods resolves your activation issue, you should contact Microsoft Support directly for assistance.
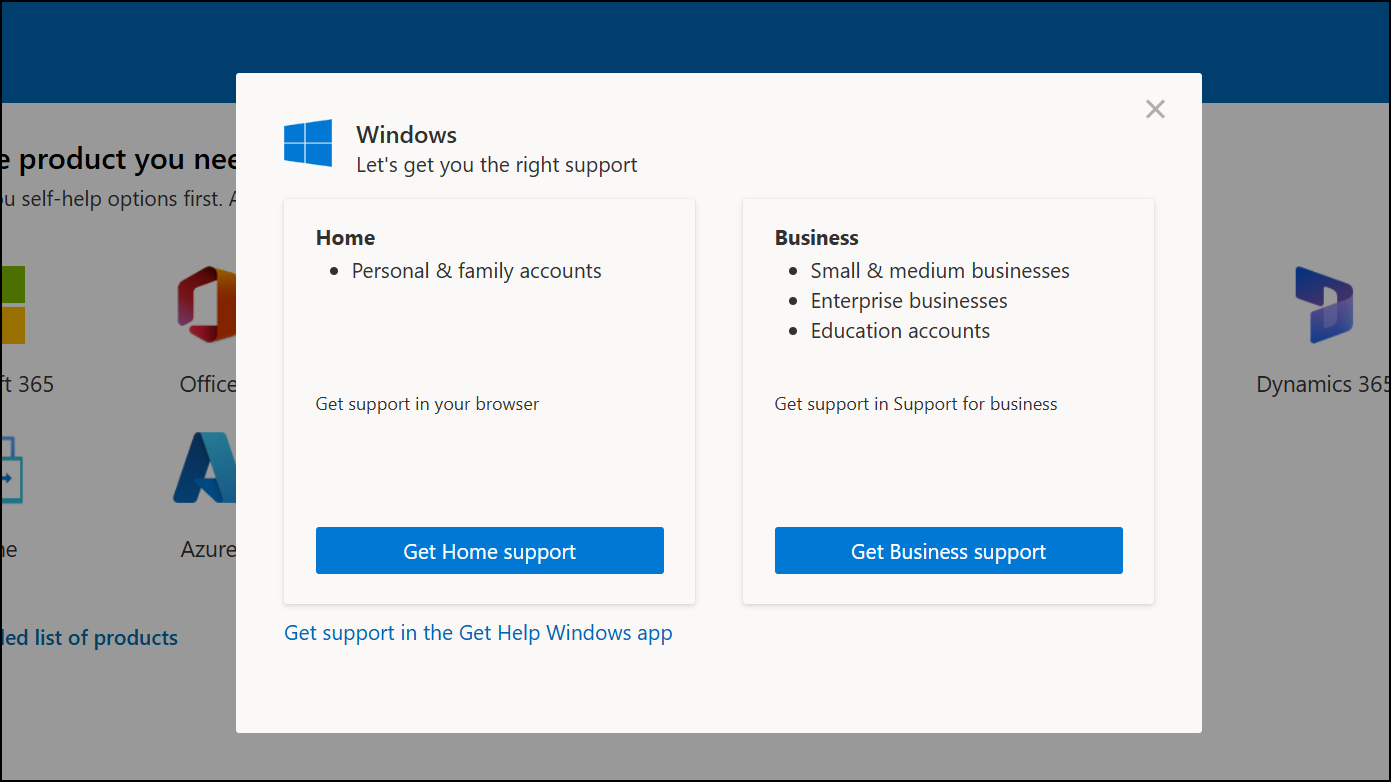
Step 1: Visit the official Microsoft Support contact page and choose the relevant options to reach the activation support team.

Step 2: Clearly explain your situation to the support representative, mentioning that you upgraded your storage drive and now Windows is requesting activation.
Step 3: The support representative may ask for proof of purchase or details about your previous hardware configuration. Provide this information accurately to expedite the process.
Step 4: Once verification is complete, the representative will guide you through manual activation steps or remotely activate Windows for you.
Contacting support usually resolves activation issues quickly, especially if you have legitimate proof of purchase or a digital license linked to your Microsoft account.
After reactivating Windows, consider regularly backing up your activation details and linking your digital license to your Microsoft account. This practice simplifies reactivation in case of future hardware upgrades or system reinstalls.


