macOS has always been the one to introduce features that are amazingly fresh and exceptionally useful. Many a time, it is not until Apple introduces a feature the users feel the need for it. Though, once we start using it, lines get real blurry on how were we surviving without it.
From the very start, Apple has been very subtle about blowing its own trumpet on features. Apple believes in a hands-on experience and lets the users discover as they go some of its utilitarian features.
Similarly, Apple has native support to schedule the launch and close of apps at a specified time and date.
Though it does involve a bit of Automator, and the Calendar app but it would be fun. Curious? Read along to know more about it!
Create a Workflow App Using Automator
First of all, we will be creating an application workflow in Automator which will automate the process the opening and closing the desired application.
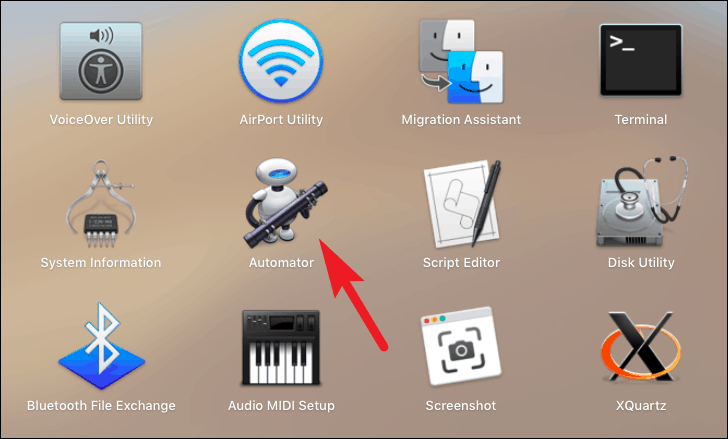
Now, launch the Automator app from the Launchpad or dock of your Mac.
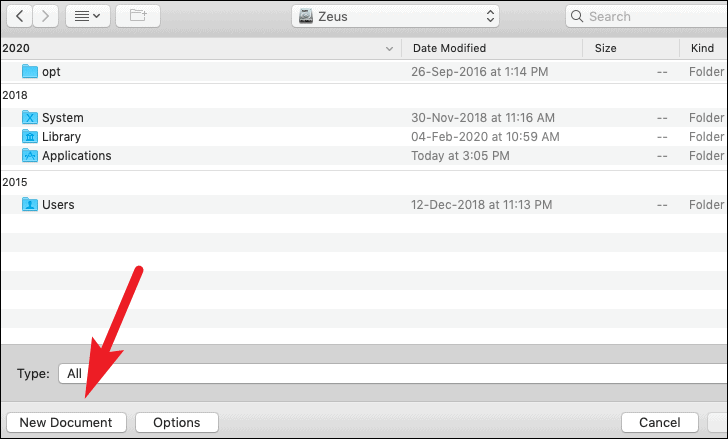
Next, click on ‘New Document’ button from the bottom left corner of the window.
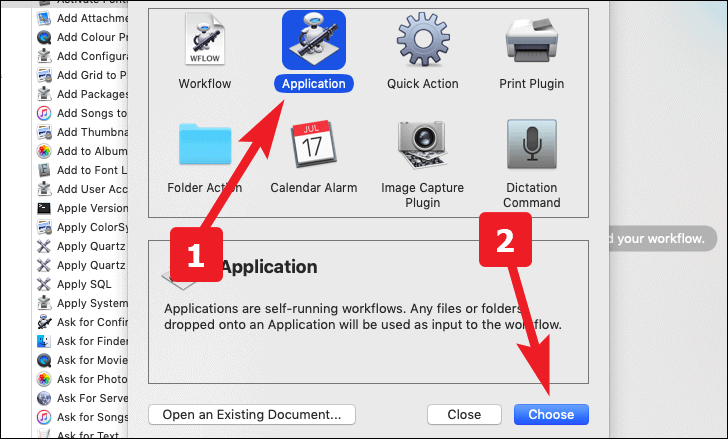
After that, click on the ‘Application’ option from the available list of options. Then, Click on the ‘Choose’ button.
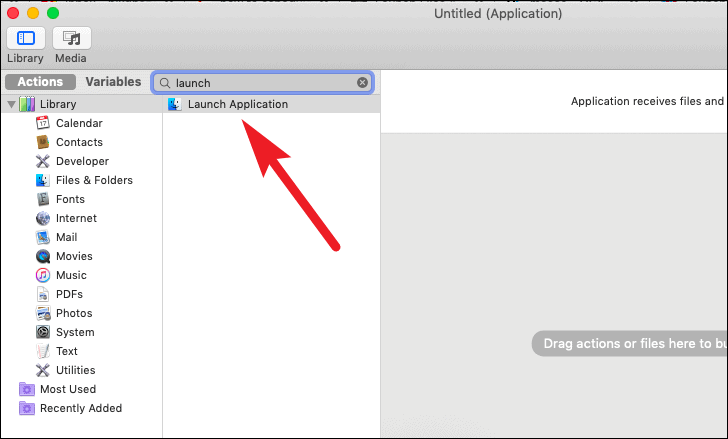
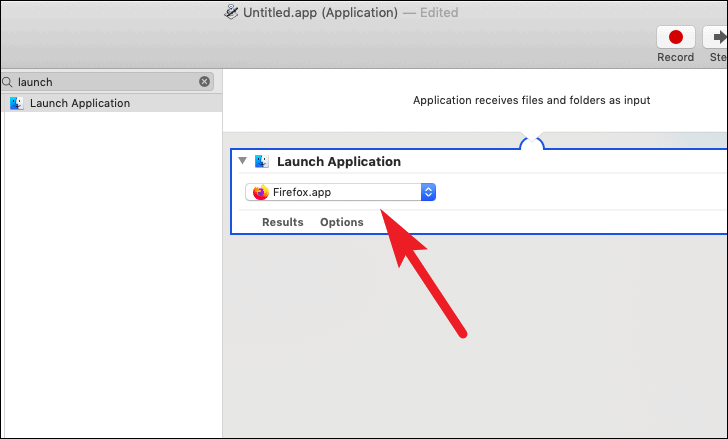
Now, from the search bar situated on the left section of the screen, search for ‘Launch application’. Now either double click it or drag and drop to the workflow section.
Now, select the desired application from the dropdown menu.
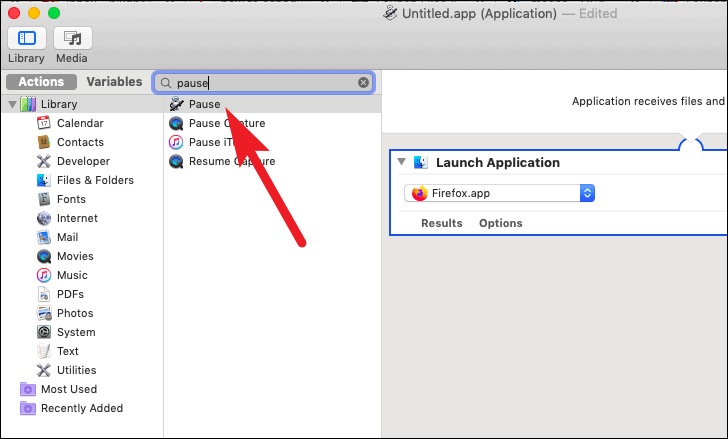
After that, search for ‘Pause’ from the left section of the screen. Then, either double click it or drag and drop to workflow section.
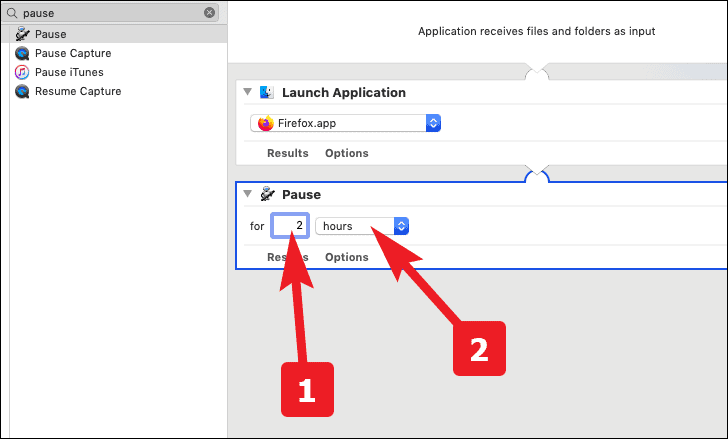
You can now type the duration you want to run the application. Units for durations can be selected in seconds, minutes, and hours.
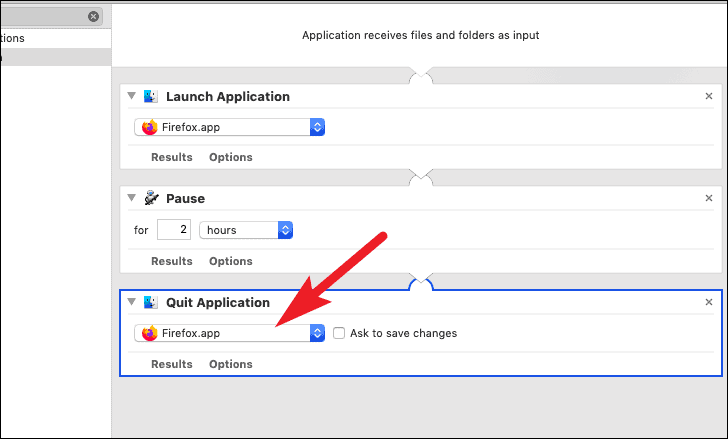
Once again go to the search bar from the left section of the window and search for the ‘Quit Application’. After that, either double-click it or drag and drop it to the workflow section.
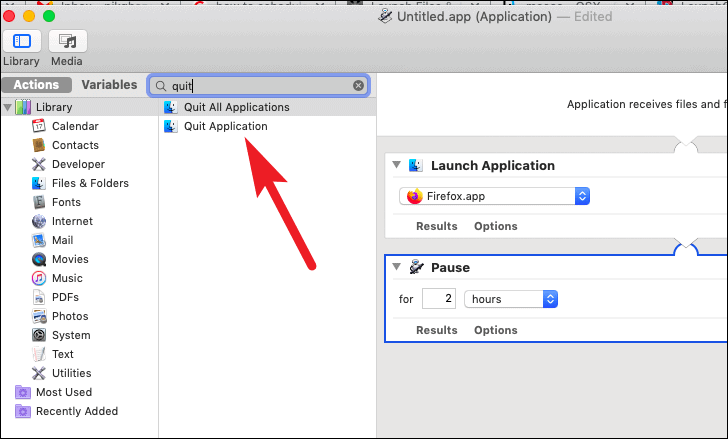
Now, select the same application you selected in ‘Launch Application’ step from the drop down menu.
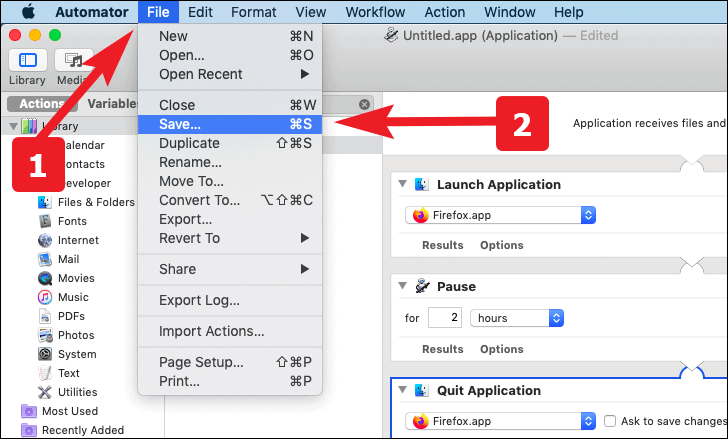
After that go to the ‘Files’ tab from the menu bar present on the top section of the screen. Then, click on the ‘Save…’ option. Alternatively, you can also press Command+S to save.
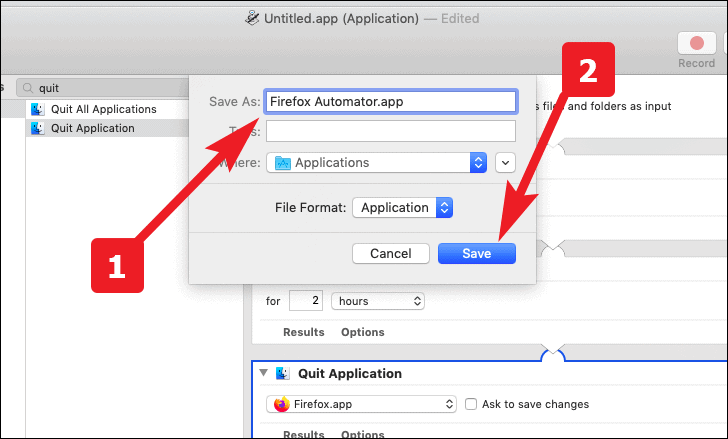
Now, enter a suitable name for the application and save it to your desired location on your Mac.
Create a Calendar Event to Launch and Close Automator Workflow
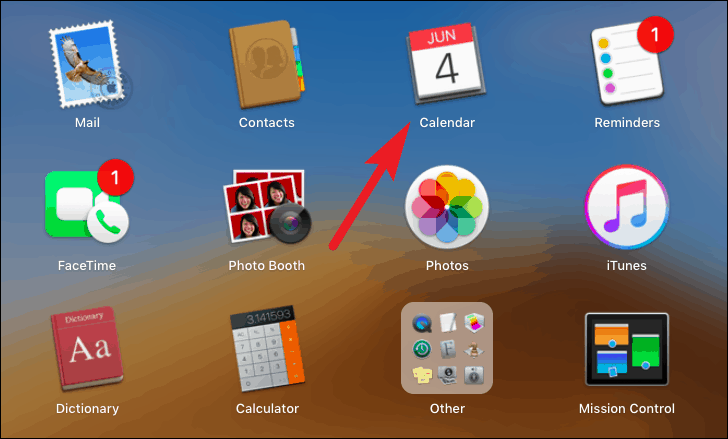
First launch the calendar app from the Launchpad or dock of your Mac.
Now, double-click to create an event on the day you want to schedule the launch and close an app. After that, give an appropriate name for the event. Then select the start time for the event run.
Note: Please remember the start time you set for the event will be the time your application will be launched.
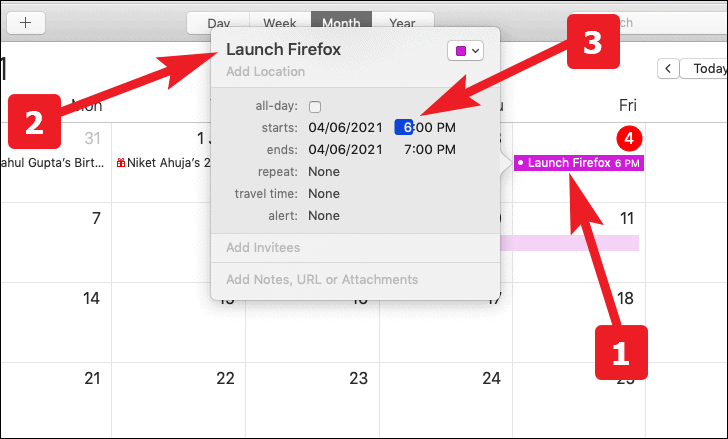
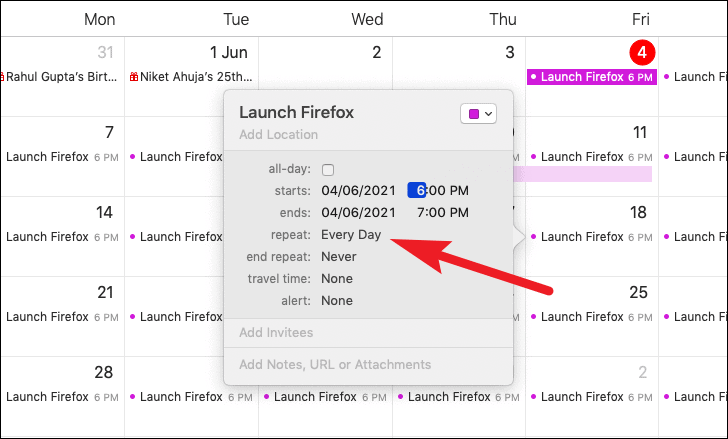
Next, choose your frequency for launching your application from the ‘Alert’ option. You can also create a custom frequency if the stock options do not fulfill your requirement.
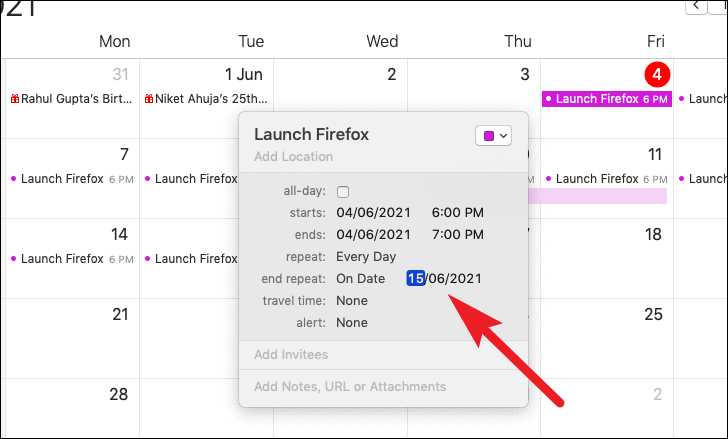
If you need to run the application for a temporary period and want to stop launching the application after a certain date or total number of runs. You can also configure that from the ‘end repeat’ option.
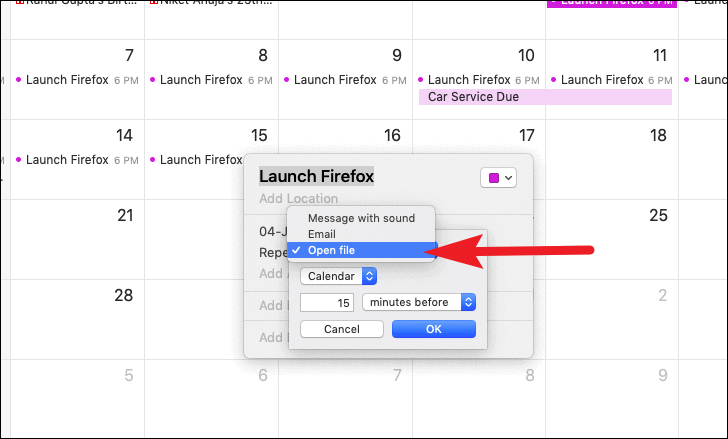
Now, select the ‘Custom…’ option from the dropdown list of the ‘alert’ option.
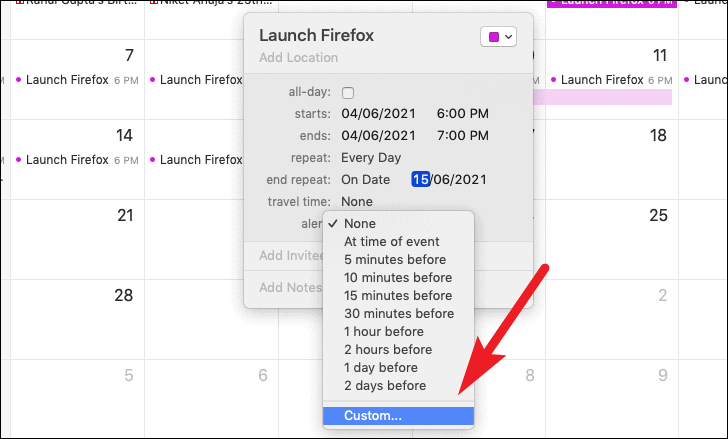
After that, select the ‘Open file’ option from dropdown list.
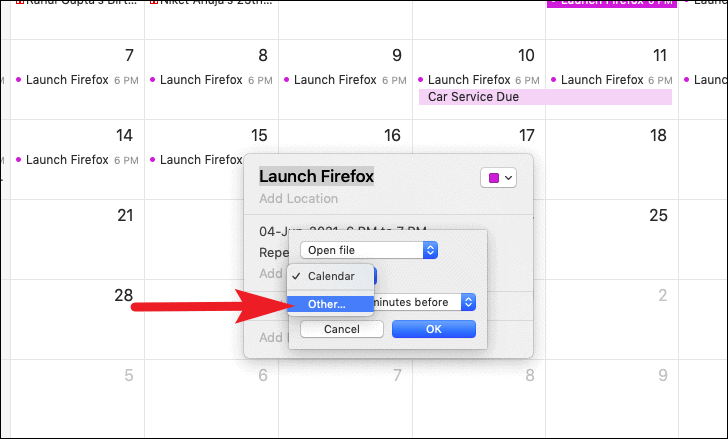
Then, click the ‘other’ option to browse and choose the automator file you created.
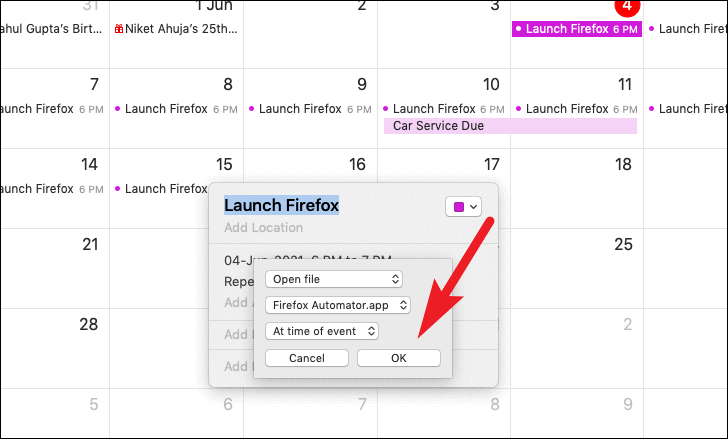
Once selected, click on the ‘OK’ button to confirm your selection. Now, your file will run at the selected time and frequency.
Well, now you know how to schedule a launch and close an app on your Mac. Let your Mac handle these mundane tasks, you sit back and relax.

