There are various errors that we encounter on Windows 10, some can be fixed with a simple restart while others require a full-fledged process. One of the errors that fall between the two, is the ‘Audio Renderer’ error. In the following sections, we will discuss the error and walk you through the various fixes to resolve it.
What is ‘Audio Renderer’ Error?
The ‘Audio Renderer’ error is generally encountered when playing a YouTube video, however, many users have reported encountering the error while using the built-in player or listening to iTunes. Also, the error is not specific to a particular version or iteration of the Windows, or to a specific browser. Users have encountered the error on all popular browsers, be it Chrome, Firefox, or Edge.
We now know what the error is, but haven’t yet pondered on the issues that lead to it.
- Outdated or Corrupt Drivers
- Hardware Acceleration Enabled on Browser
- Running an Old Version of Windows
- Malfunctioning BIOS (for Dell computers)
Let’s now move the fixes for the ‘Audio Renderer’ error. Also, it’s recommended that you execute the fixes in the order that they are mentioned for quick resolution of the error.
1. Replug the Audio Device
If you are using a wired audio device when you encounter the ‘Audio Renderer’ error, simply unplug and replug the device. This has worked for many users, however, it’s a temporary solution and does not fix the error for good.
Also, if you have connected multiple audio playback devices to the system, disconnect them and then replug only the one you want to use for playback. Connecting multiple audio devices also seems to cause the error.
2. Restart the Computer
When you encounter the ‘Audio Renderer’ error, it will be mentioned under the error message to restart the computer. Many users have reported that restarting the computer has fixed the error, temporarily for some while permanently for others. Therefore, it’s worth a try.
If you are still encountering the error after restarting the computer, try the following fixes for permanent resolution of the error.
3. Run Audio Troubleshooter
Windows 10 has built-in troubleshooters that help identify and fix a majority of errors. If the issue that’s leading to the ‘Audio Renderer’ error is common and known to Microsoft, running the ‘Playing Audio’ troubleshooter will fix the error.
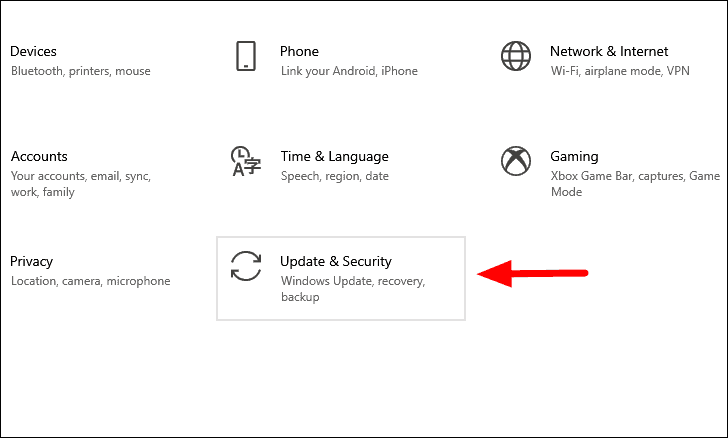
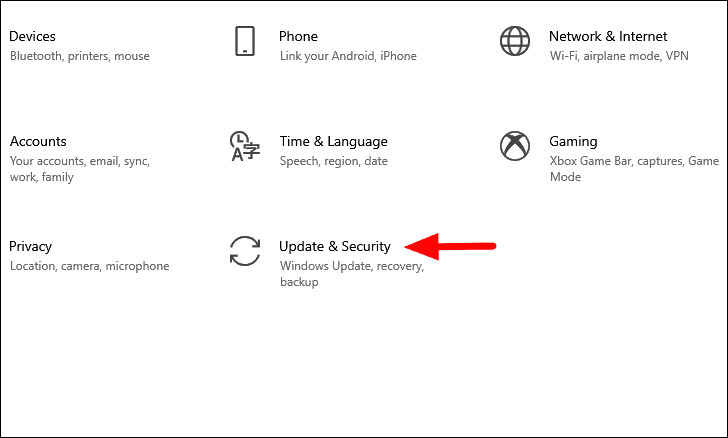
To run the troubleshooter, press WINDOWS + I to launch the ‘Settings’ and then select ‘Update & Security’ from the list of options.
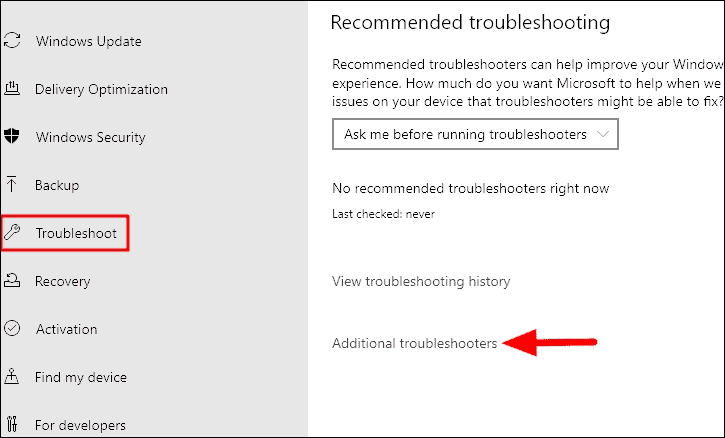
In the ‘Update & Security’ settings, you will find various tabs listed on the left. Select the ‘Troubleshoot’ tab, and then click on the ‘Additional troubleshooters’ option on the right side.
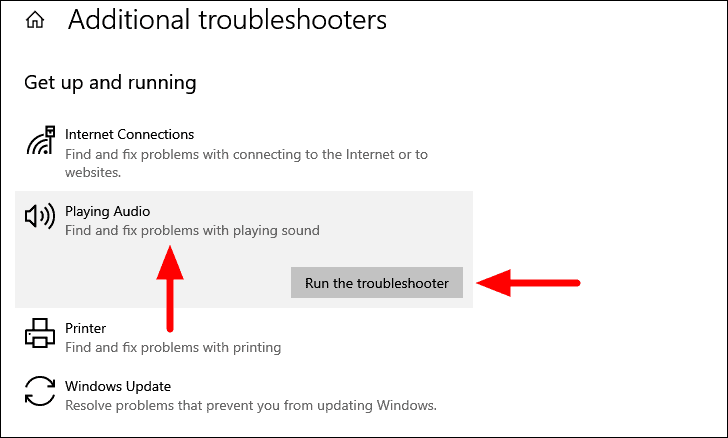
You will now find the ‘Playing Audio’ troubleshooter listed. Click on it and then select the ‘Run the troubleshooter’ option to start running the troubleshooter.
The troubleshooter will now scan the various audio devices connected to your system and display them on the screen. Select the one you are facing trouble with, and then click on ‘Next’ at the bottom.

Now, follow the on-screen instructions to complete the troubleshooting process. After the troubleshooter is successfully run, check if the error is fixed.
4. Clear Browser Cache
In case you are encountering the error only while playing YouTube videos, clearing the browser cache might help fix the error. It has fixed the error for many users. We will walk you through the steps to clear cache for all the four major browsers, Chrome, Firefox, Edge, and Opera.
Clearing Cache in Google Chrome
Google Chrome is one of the most popular browsers and has a straightforward user interface. So, you can easily clear the cache on Chrome. After you are done clearing the cache, restart Google Chrome and check if the error is fixed.
Clearing Cache in Mozilla Firefox
To clear the cache on Firefox, click on the ‘View history, saved bookmarks, and more’ option near the top-right and then select ‘History’ from the drop-down menu.
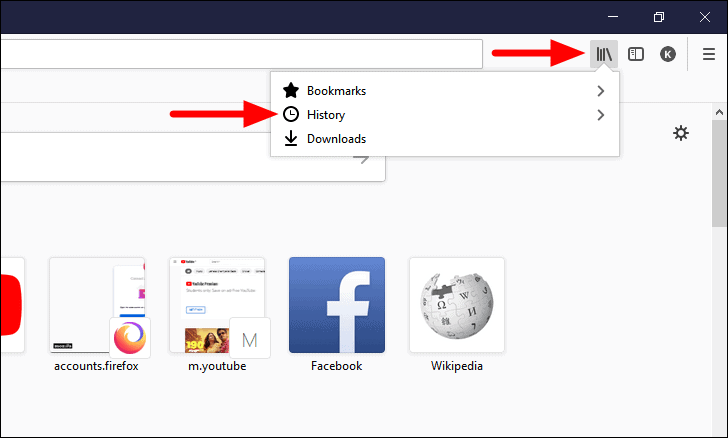
Next, click on ‘Clear Recent History’.

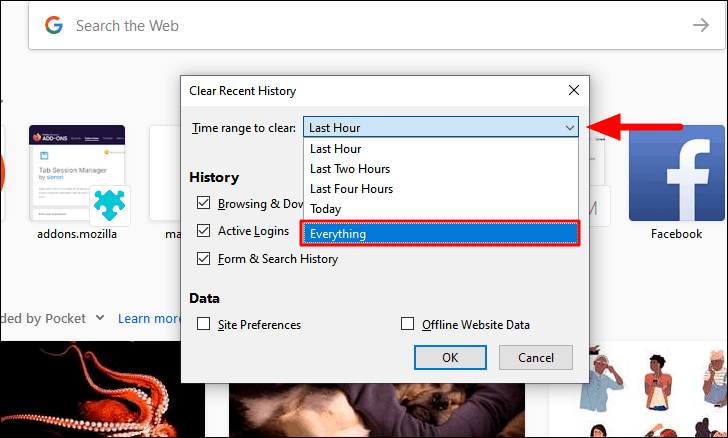
Now, the ‘Clear Recent History’ window will open. Click on the box next to ‘Time range to clear’ and then select ‘Everything’ from the drop-down menu.
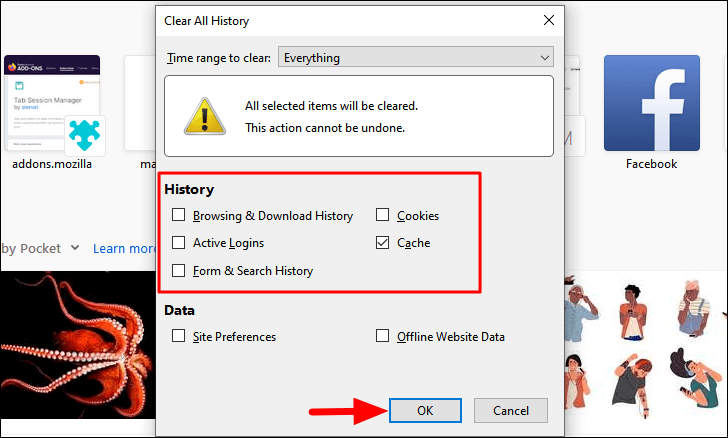
Now, make sure you have the ‘Cache’ option selected while clearing the other is optional. Finally, click on ‘OK’ at the bottom to clear the cache.
Clearing Cache in Microsoft Edge
The process to clear cache in Microsoft Edge is very similar to the other browsers and it wouldn’t take more than a minute to do so. If you watch YouTube videos on Edge, clear the cache and check if the ‘Audio Render’ error is fixed.
Clearing Cache in Opera
To clear cache in ‘Opera’, click on the ‘Hamburger’ icon at the top-right, and then click on ‘Clear’ next to ‘Browsing Data’ in the drop-down menu.

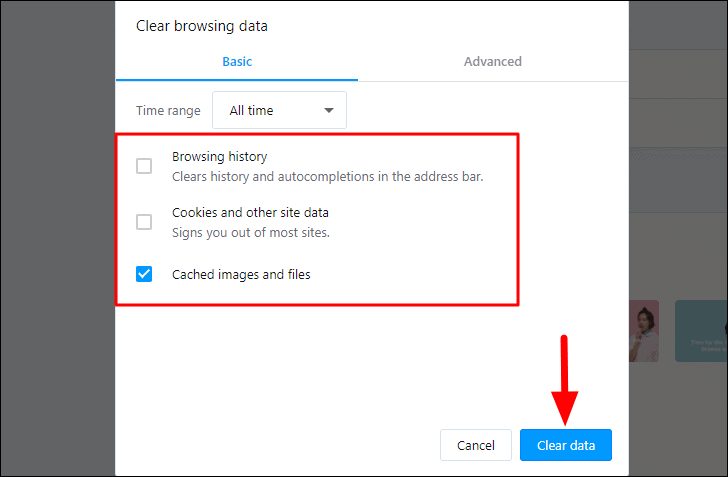
In the ‘Clear browsing data’ window, click on the box next to ‘Time range’ and select ‘All Time’ from the drop-down menu.
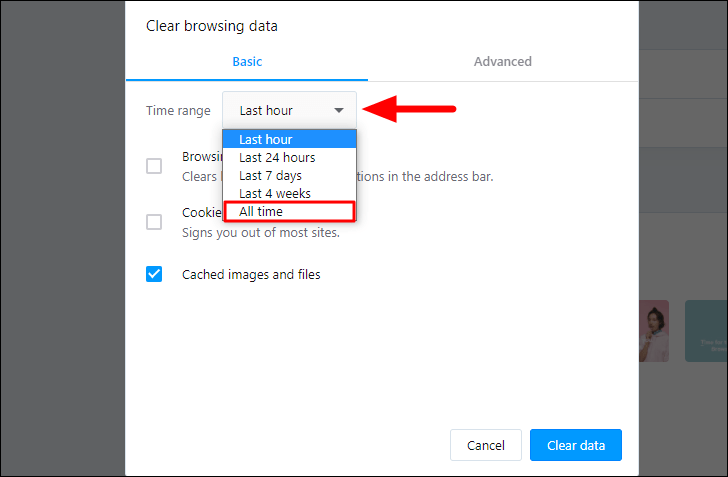
Next, make sure the checkbox for ‘Cached image and files’ is ticked while the others are optional. Finally, click on ‘Clear data’ at the bottom.
After you have cleared the cache for the browser, check if the ‘Audio Renderer’ error is fixed. If not, move to the next fix.
5. Update Windows
Running an older version of Windows can lead to the ‘Audio Renderer’ error, therefore, you must update the Windows to the latest version. Also, it’s recommended that you check for updates periodically and download and install them, if any are available.
To update the Windows, press WINDOWS + I to launch system ‘Settings’ and then click on the ‘Update & Security’ option.
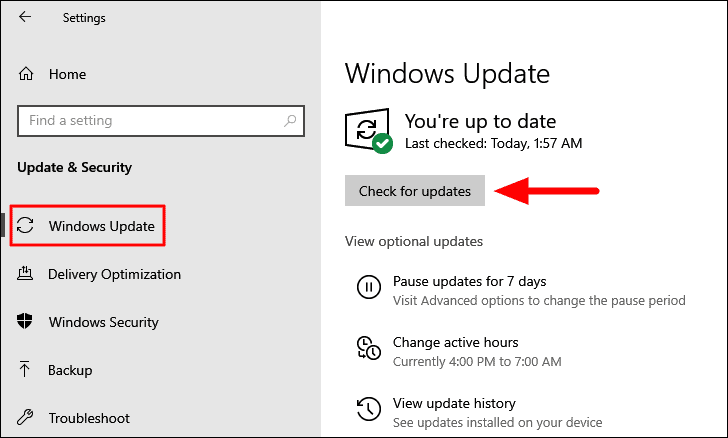
In the ‘Update & Security’ settings, the ‘Windows Update’ tab will launch by default. Now, click on ‘Check for updates’ option on the right to explore any available updates. If there are any, they will be downloaded and installed on your computer.
After you have installed the update, if any are found, check if the ‘Audio Renderer’ error is fixed. If not, move to the next method.
6. Roll Back Driver Update
In case you have recently updated the driver, the new version might not be compatible and conflict with the functioning of the system, thus, leading to the error. In this case, you can roll back the update and start using the previously installed version.
The error can be encountered due to ‘Audio Playback’ and ‘Sound Card’ related driver issues, therefore, we will walk you through the steps to roll back the update for both.
Roll Back Audio Playback Driver
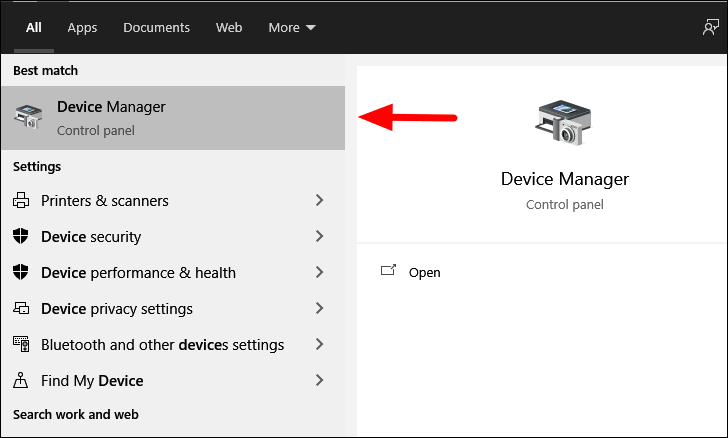
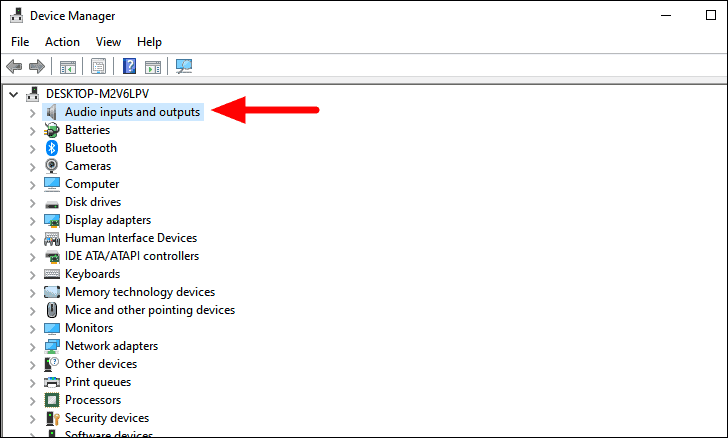
To roll back the audio playback driver, search for ‘Device Manager’ in the ‘Start Menu’ and then click on the search result to launch the app.
In the ‘Device Manager’ window, double-click on the ‘Audio inputs and outputs’ to expand and view the devices under it.
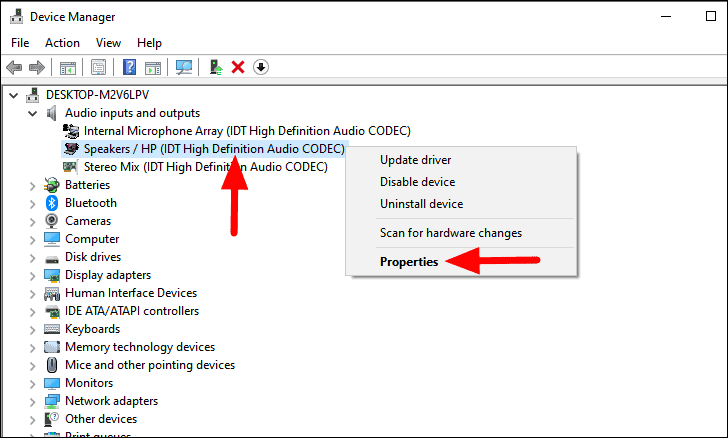
Now, right-click on the audio playback device and select ‘Properties’ from the context menu.
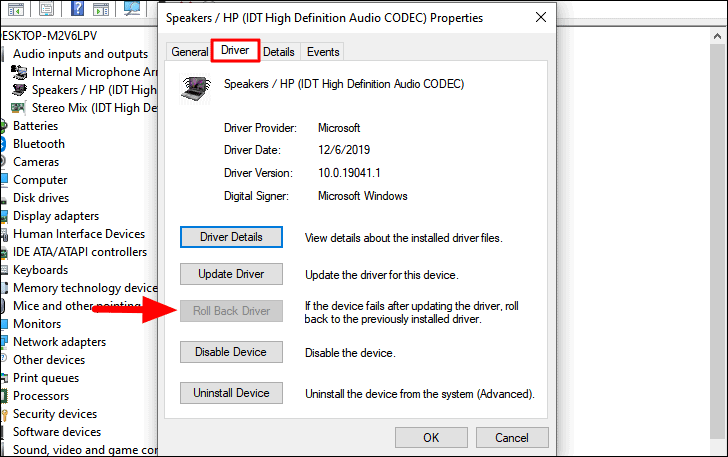
In the ‘Driver Properties’ window, the ‘General’ tab will open by default. Navigate to the ‘Driver’ tab and then click on the ‘Roll Back Driver’ option to revert to the previous version of it. Next, follow the on-screen instructions to complete the process.
Note: If you find the ‘Roll Back Driver’ option greyed out, it’s because either you have not updated the driver or the computer didn’t retain the driver files of the previous version.
After you have rolled back the ‘Audio Playback’ device driver, restart your computer, and check if the error is fixed. In case you still encounter it, it’s time you roll back the ‘Sound Card’ driver.
Roll Back Sound Card Driver
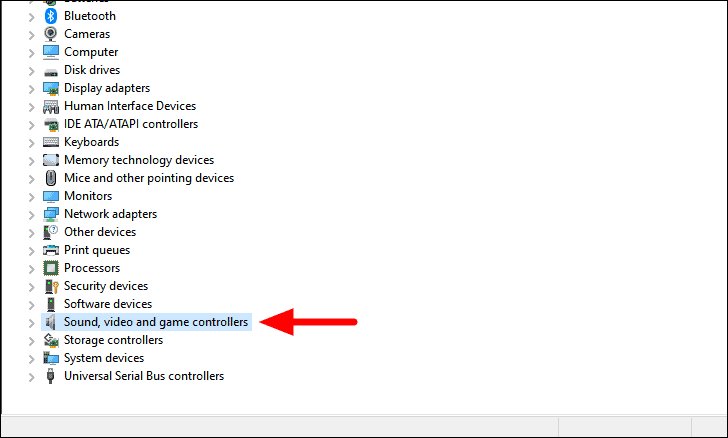
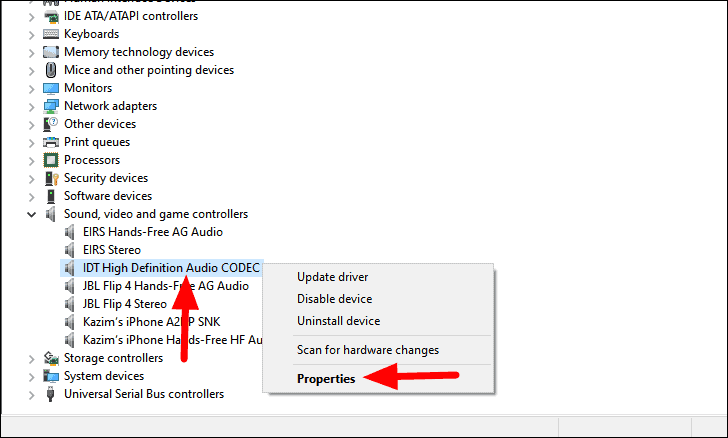
To roll back the sound card driver, locate the ‘Sound, video and game controllers’ option in the ‘Device Manager’, and double-click on it to expand and view the devices under it.
Next, right-click on the relevant driver, and select the ‘Properties’ option from the context menu.
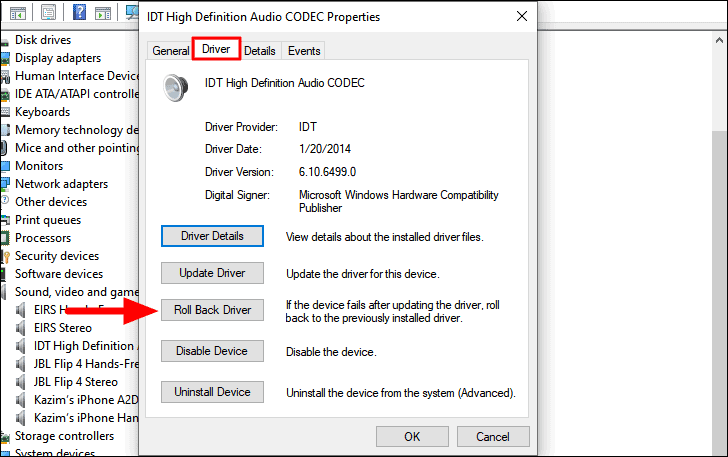
In the properties window, navigate to the ‘Driver’ tab, and click on the ‘Roll Back Driver’ option. Now, follow the on-screen instructions to complete the process.
7. Update Driver
If rolling back the driver update didn’t work or you haven’t updated the driver yet, it’s time you update them. Again, we will be doing it for both the ‘Audio Playback’ and ‘Sound Card’ drivers.
Update Audio Playback Driver
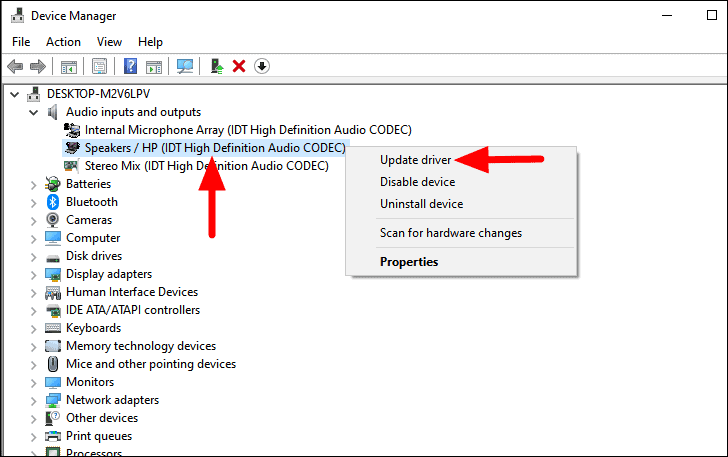
To update the audio playback driver, right-click on the driver listed under ‘Audio inputs and outputs’, and select the ‘Update Driver’ option from the context menu.
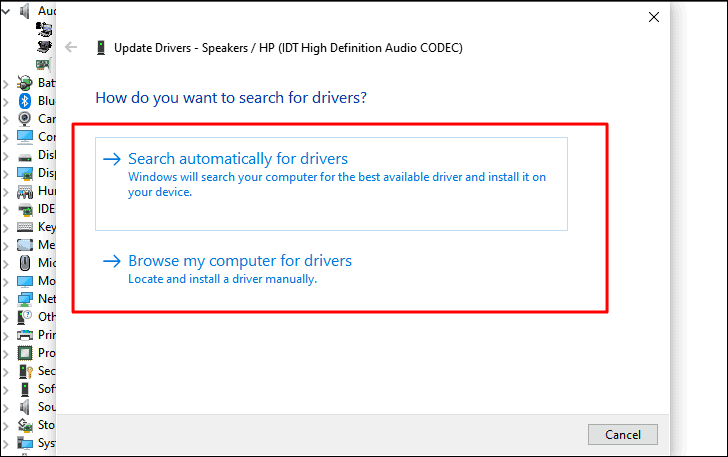
You will find two options in the ‘Update Drivers’ window, either to let Windows search for the best available driver and install it on the device or install it manually. It’s recommended that you let Windows do the job by selecting the first option since it’s safer. Follow the on-screen instructions to complete the process.
Many a time, Windows will not able to find an update, although one is available on the website. In this case, you will have to search the driver on the web, and then download and install it to your system. To search for the driver, you will have to use ‘Computer Model’, ‘Operating System’, and ‘Driver Name’ as the keyword. But before you search for it, you need to find out the current driver version to check if the one available online is a newer version.
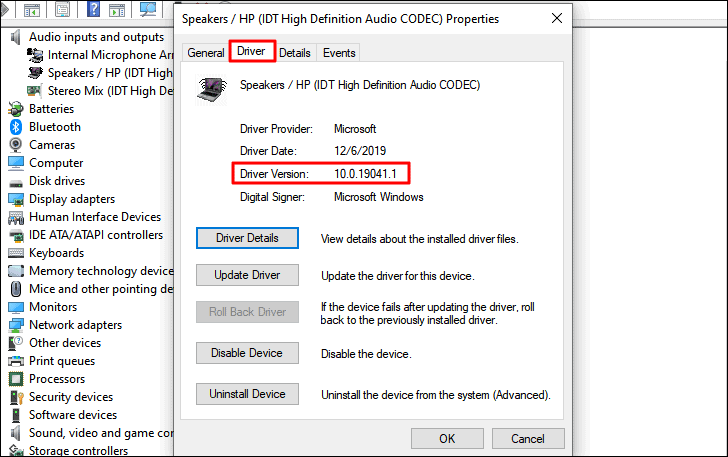
To check the current driver version, right-click on the driver, and then select ‘Properties’ from the context menu.

In the driver ‘Properties’ window, navigate to the ‘Driver’ tab at the top, and then note down the driver version.
After you have found the current driver version, search for the newer version and download it. It’s recommended that you download the driver file from the manufacturer’s official website. Next, double-click on the installed file to launch the installer and follow the on-screen instructions to complete the process. Now, restart your computer and check if the error is fixed.
Update Sound Card Driver
You now have a fair understanding of the process of updating the driver and can also easily identify the ‘Sound Card’ related driver that was discussed in the earlier fix. Next, update the ‘Sound Card’ driver as well and check if it fixes the ‘Audio Renderer’ error. If not, move to the next fix.
8. Re-enable Driver
If the above fixes have not worked for you, it’s time you re-enable the drivers. Re-enabling the driver is simply disabling it and then enabling it again. It might not sound very effective, but it has fixed the ‘Audio Renderer’ error for many users.
We will be discussing the re-enabling process only for the ‘Audio Playback’ driver and you could similarly do it for the ‘Sound’ driver as well.
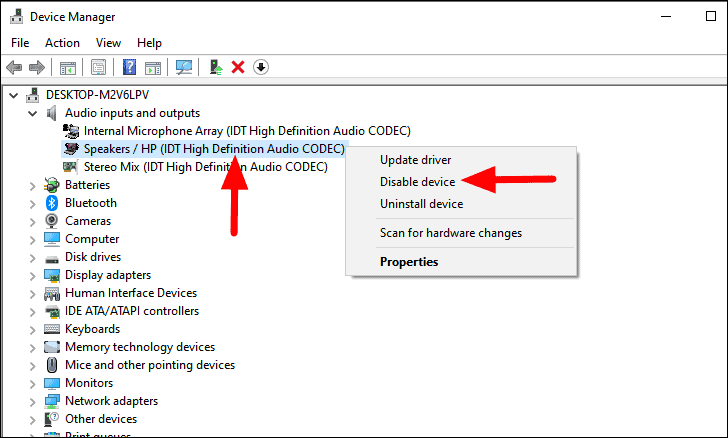
To disable the driver, right-click on the driver name, and then select ‘Disable device’ from the context menu.
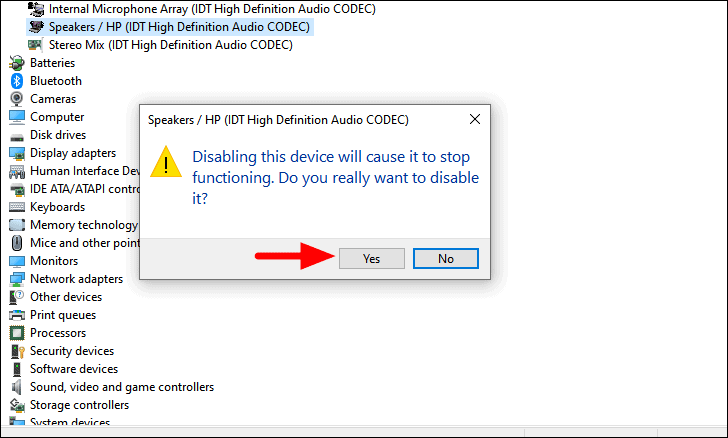
A warning box will pop up, click on ‘Yes’ to confirm the change.
After the driver is disabled, wait for a minute before you enable the driver.
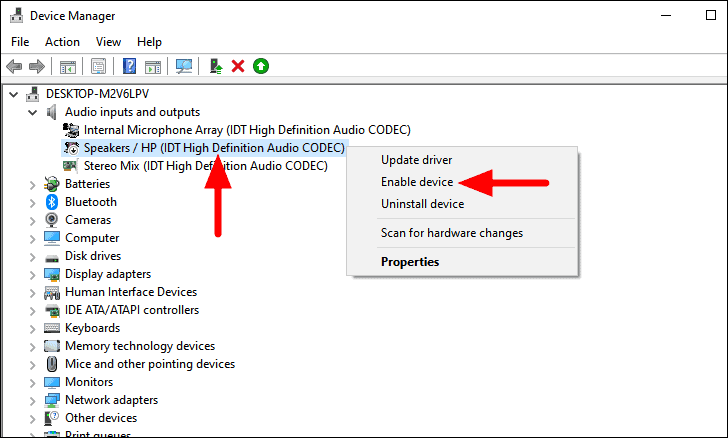
To re-enable the driver, right-click on it, and select ‘Enable device’ from the menu.
The driver has now been re-enabled. Try playing the video or application where you earlier encountered the ‘Audio Renderer’ error and check if it’s fixed. If not, follow the same process to re-enable the ‘Sound’ driver and then check if you still encounter the error.
9. Disable Hardware Acceleration
The ‘Hardware Acceleration’ setting in browsers is used to speed things up by offloading some of the tasks from the CPU to the GPU. However, the hardware acceleration may sometimes conflict with the video playing process, and thus lead to the ‘Audio Renderer’ error.
If you are encountering the ‘Audio Renderer’ error while playing videos on the browser, it’s time for you to disable ‘Hardware Acceleration’, in case it’s enabled. To disable it, go to ‘FIX: Video Lagging or Stuttering Issues on Windows 10’ and scroll to the section that mentions the steps to disable ‘Hardware Acceleration’ on all the major browsers.
After you have disabled ‘Hardware Acceleration’ for the browser, restart it and check if the error is fixed.
10. Update BIOS (For Dell Computers)
Many Dell users have reported that updating the BIOS has helped fix the ‘Audio Renderer’ error. Therefore, if you are using a computer manufactured by ‘Dell’ you can try updating the BIOS, if none of the above fixed have resolved the error. The effectiveness of the fix has not been verified for computers by other manufacturers.
Note: Updating the BIOS is an intricate process and any lapse could damage the system, therefore, it’s recommended that you practice great caution and also do thorough research before proceeding.
To update the BIOS, you have two options, either to download the file from the device manufacturer’s website and install it, or use a USB flash drive for the same. But before you proceed, you will need the current BIOS version to identify if a newer version is available. Now you can proceed and update the BIOS on Windows 10. After you have updated the BIOS, the error on your Dell computer will be fixed.
When an error is encountered on Windows 10, we tend to freak out. However, most of these errors are easily fixable with the right set of fixes, as seen with the ‘Audio Renderer’ error.


