
Backing up your Windows 11 PC is essential to prevent data loss due to hardware failures, software issues, malware attacks, or accidental deletions. Windows 11 offers several built-in backup methods, allowing you to safeguard your important files, personal settings, and even installed apps. The most effective backup method is using Windows Backup and OneDrive cloud storage, followed by creating a system image and, finally, using File History. Here’s how you can easily implement these methods to secure your data.
Method 1: Windows Backup with OneDrive
The Windows Backup app integrated with OneDrive is the most comprehensive and easy-to-use solution. It automatically backs up critical folders (Desktop, Documents, Pictures, etc.), installed apps, system preferences, and even Wi-Fi passwords to your cloud account. Here’s how to set it up:
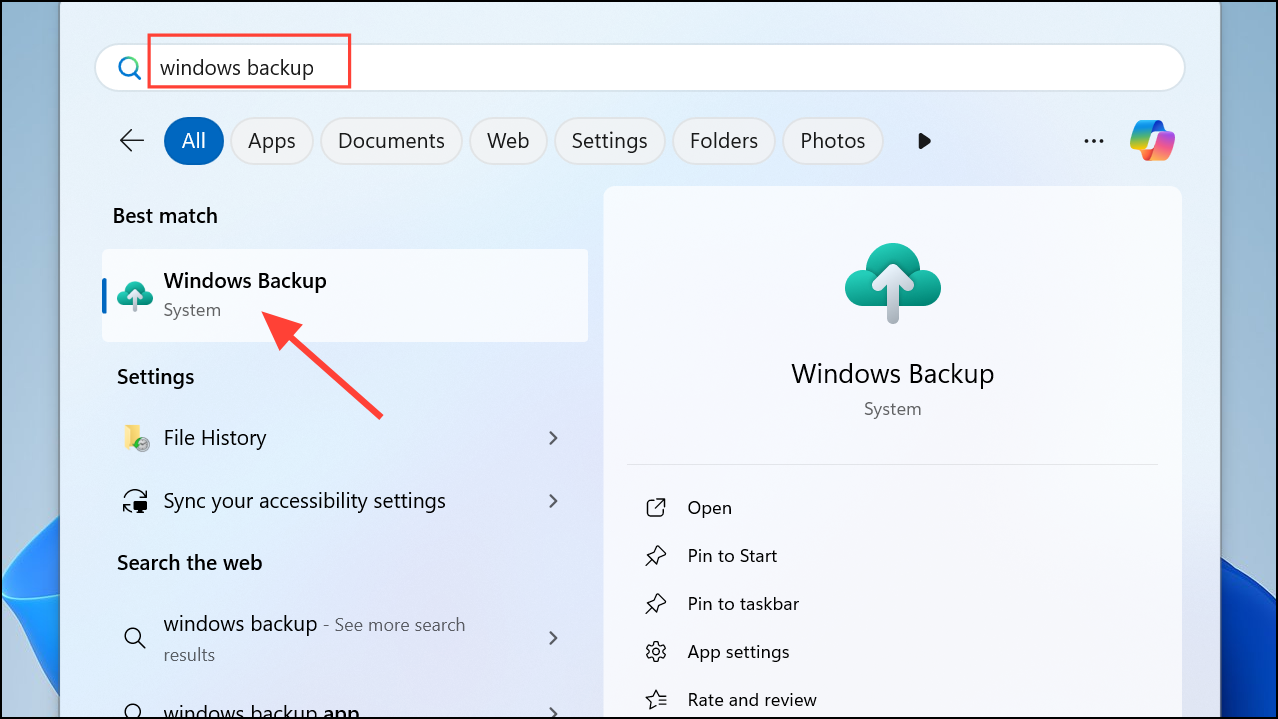
Step 1: Open the Windows Backup app by clicking the Start menu and typing Windows Backup, then select the app from the search results.
Step 2: Once the app opens, verify your available OneDrive storage in the bottom-left corner. If you require more storage, consider upgrading your OneDrive subscription.
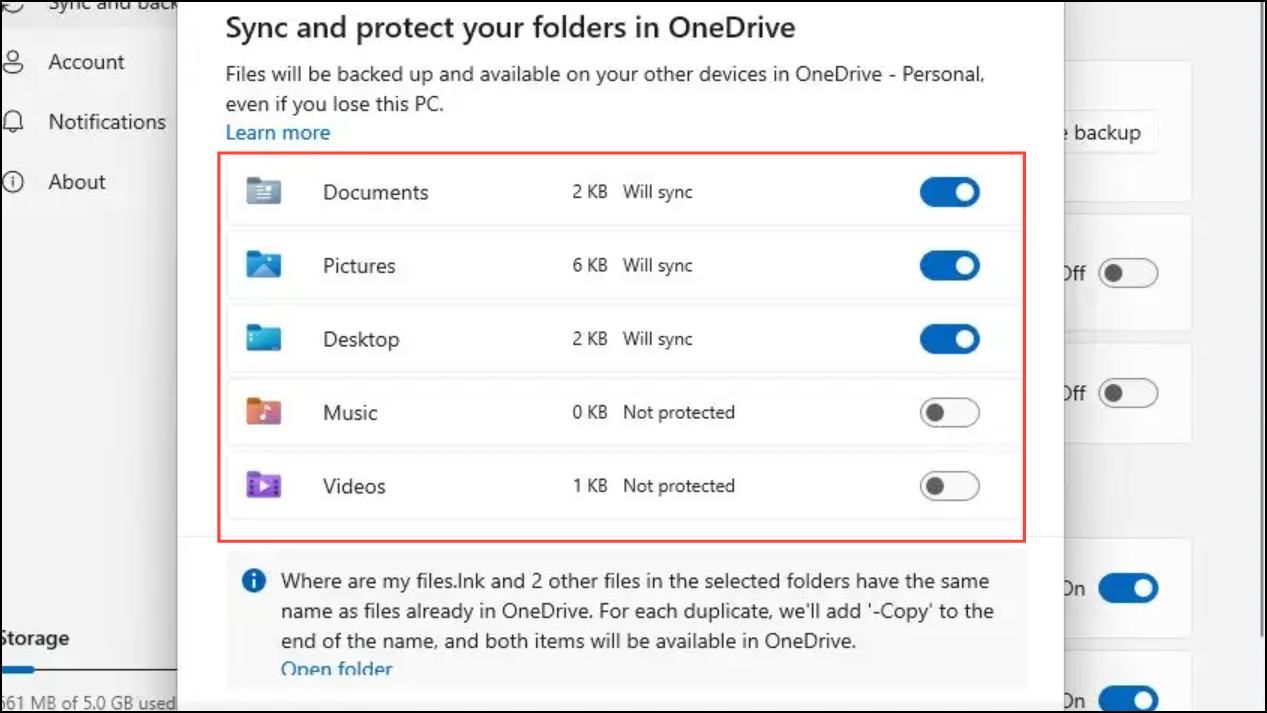
Step 3: Under the "Folders" section, select the folders you want backed up by toggling the switches to "On." Typically, these include Desktop, Documents, and Pictures.
Step 4: Click the "Backup" button to start the process. Windows will now automatically sync your selected folders and settings to OneDrive.
This method ensures your data is accessible from any device where you log in with your Microsoft account, making it convenient and secure.
Method 2: Creating a System Image Backup
A system image backup creates an exact snapshot of your entire Windows installation, including the operating system, installed applications, settings, and personal files. This is particularly useful if your system becomes unstable, corrupted, or if you need to restore your PC after a hardware upgrade.
Step 1: Connect an external hard drive (SSD or HDD) with sufficient storage space to your PC.
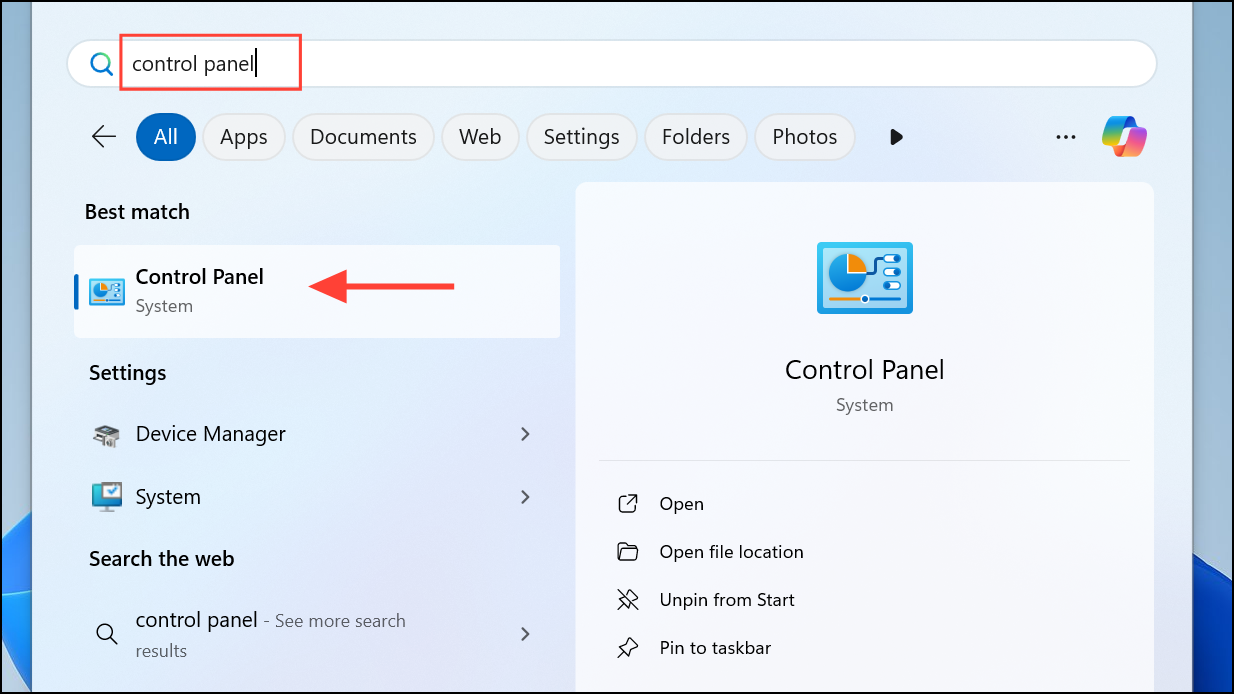
Step 2: Open the Control Panel by typing Control Panel in the Start menu search bar.
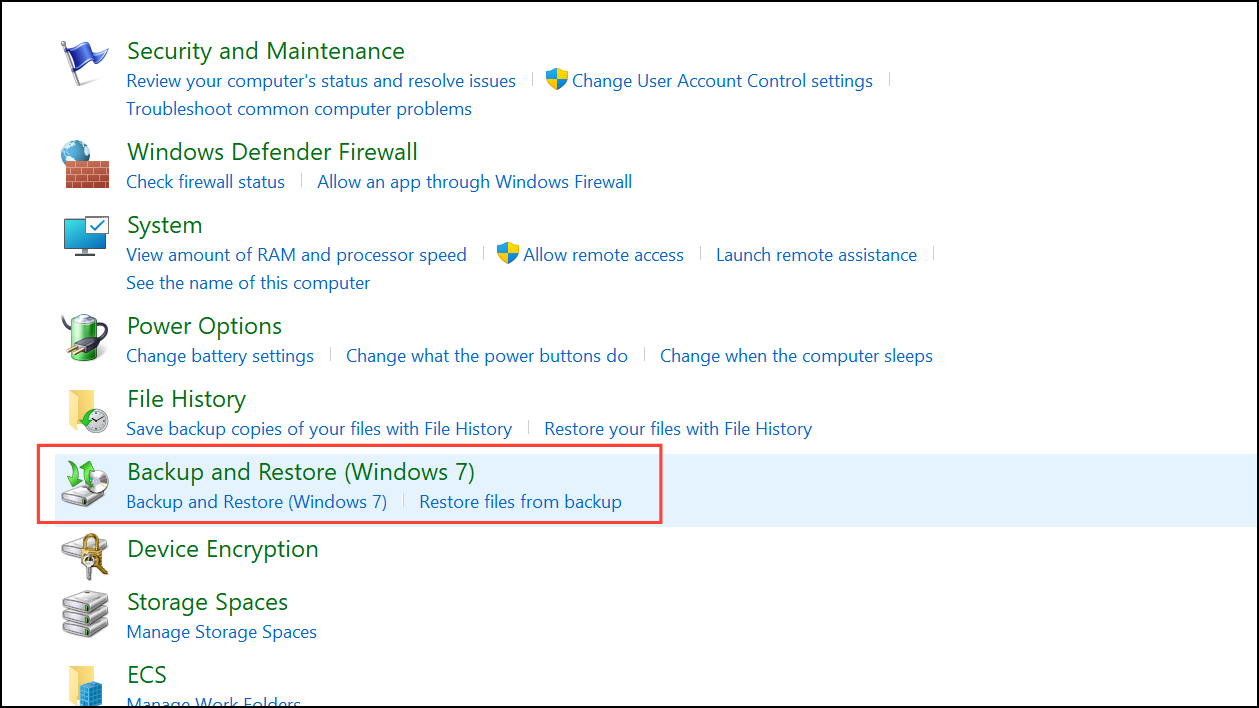
Step 3: In the Control Panel, click "System and Security," then select "Backup and Restore (Windows 7)."
Step 4: Click "Create a system image" from the sidebar, select your external drive as the backup destination, and click "Next."
Step 5: Confirm the drives you want to include in the backup (typically your main system drive) and click "Start backup."
The backup process may take some time, depending on your data size. Once complete, store this external drive safely. To restore from this backup, boot into the Windows recovery environment via the installation media or advanced startup options and follow the on-screen instructions.
Method 3: File History for Regular File Backups
File History is another built-in tool that regularly backs up specific files and folders to an external drive. It’s ideal for incremental backups, allowing you to restore previous file versions easily.
Step 1: Connect your external drive to your PC and open the Control Panel.
Step 2: Navigate to "System and Security," then select "File History."
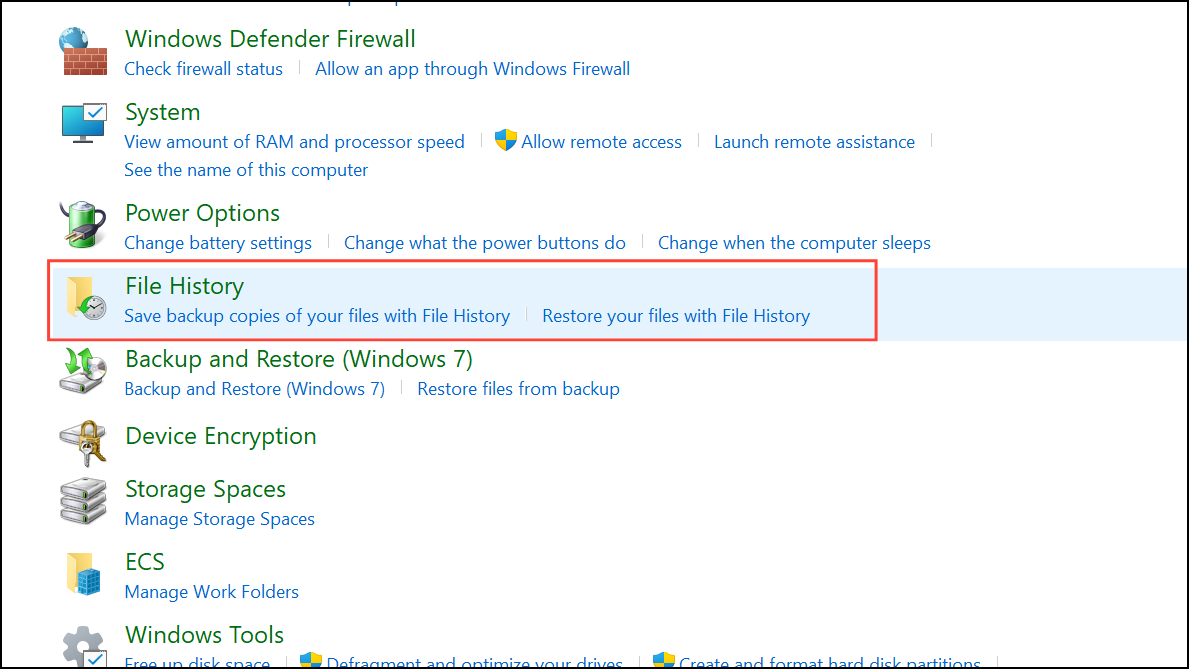
Step 3: Ensure your external drive is recognized, then click "Turn on" to activate File History.
Step 4: Optionally, click "Advanced settings" to set how frequently the backup occurs and how long previous versions are kept.
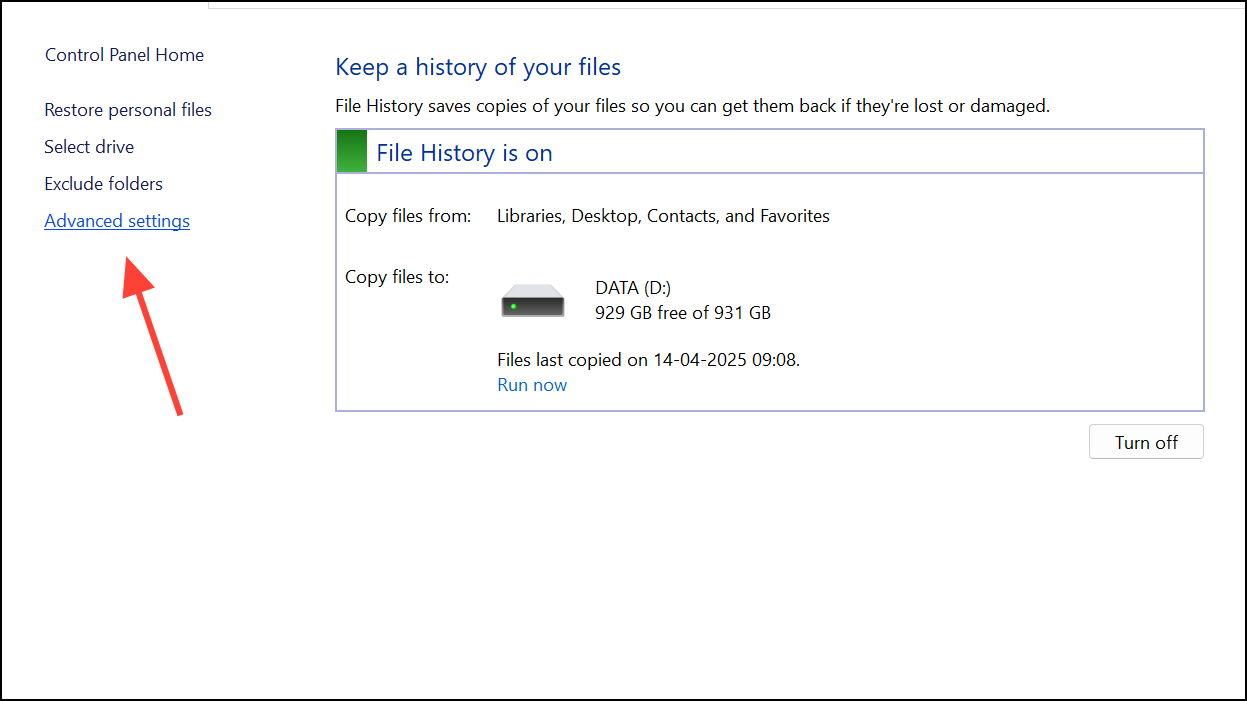
File History will now automatically save copies of files from your Documents, Pictures, Desktop, and other key folders. You can restore these files anytime through the File History interface.
Method 4: Manual Backup via OneDrive Folder Sync
If you prefer a simpler cloud-based approach without backing up apps or system settings, manually syncing folders with OneDrive is a reliable alternative.
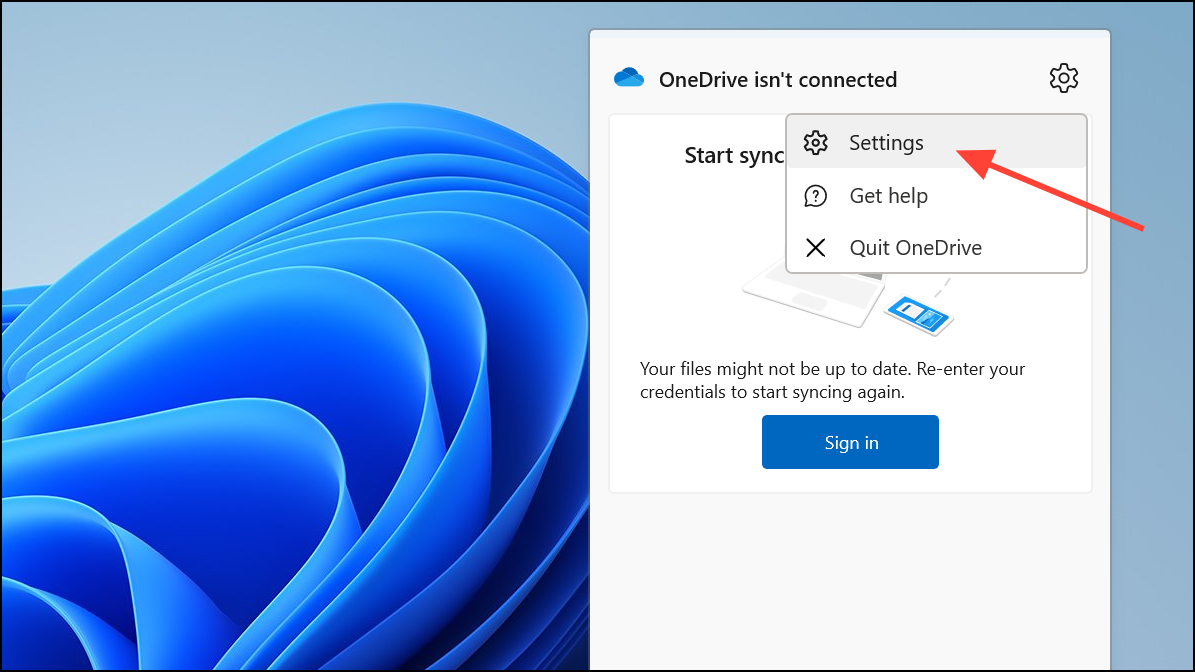
Step 1: Ensure OneDrive is installed and running. Click the OneDrive cloud icon in your taskbar, select "Help & Settings," and then click "Settings."
Step 2: Under the "Sync and backup" tab, click "Manage backup."
Step 3: Choose the folders you wish to sync (Desktop, Documents, Pictures) and click "Save changes."
Your selected folders will now sync automatically to OneDrive, accessible from any device with your Microsoft account.
Backing up your Windows 11 PC is straightforward and crucial for protecting your digital life. Whether you prefer comprehensive cloud backups, system images, or incremental file backups, these built-in methods ensure your important data remains safe and recoverable.