
Being able to share your best gaming moments with others is one of the core aspects of modern gaming. It can help you connect with friends and family even when far away, making your favorite titles even more enjoyable. However, it is a common misconception that you need expensive hardware and complicated software for recording games.
Fortunately, that’s not the case in reality. There are a few video-capturing apps that do not require costly hardware to run and are quite easy to use. One of the best ones is Outplayed by Overwolf. Let’s look at how you can use it to record your game highlights easily and quickly.
Downloading And Installing The Outplayed App
The Outplayed app can be used on any modern computer with reasonable specs. This means you do not need the latest GPU or processor, and can even use it on a laptop.
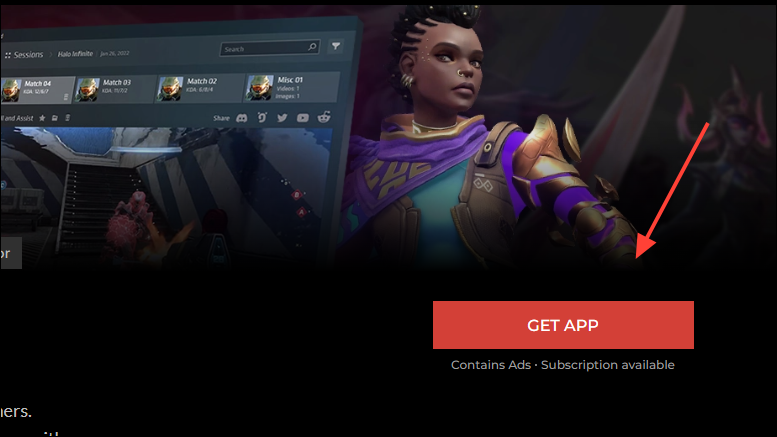
- First, visit the official Overwolf website to download the Outplayed app on your system.
- Click the ‘Get App’ button on the right side to start downloading the app installer.
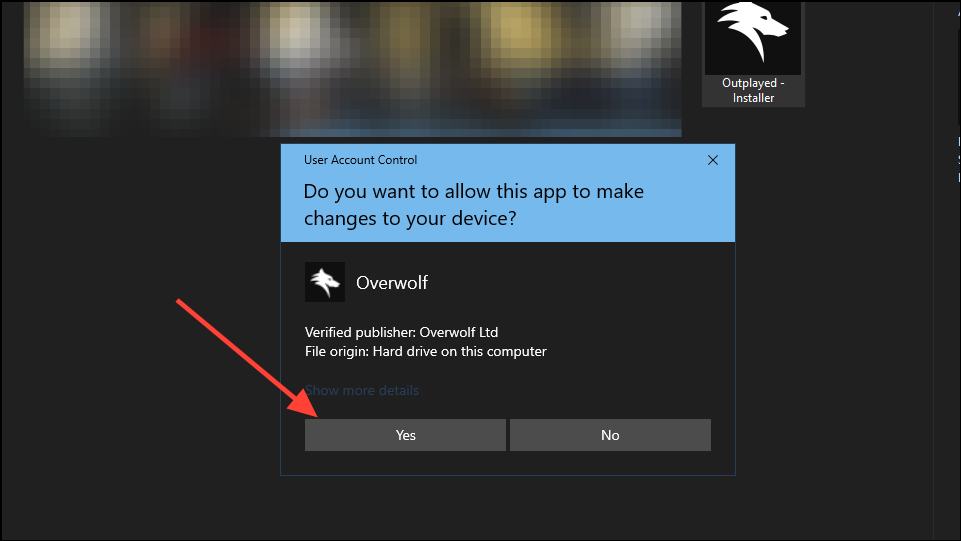
- Once the installer is downloaded, double-click it, and you will get the User Account Control pop-up asking you whether you want to run it. Click on ‘Yes’ to proceed.
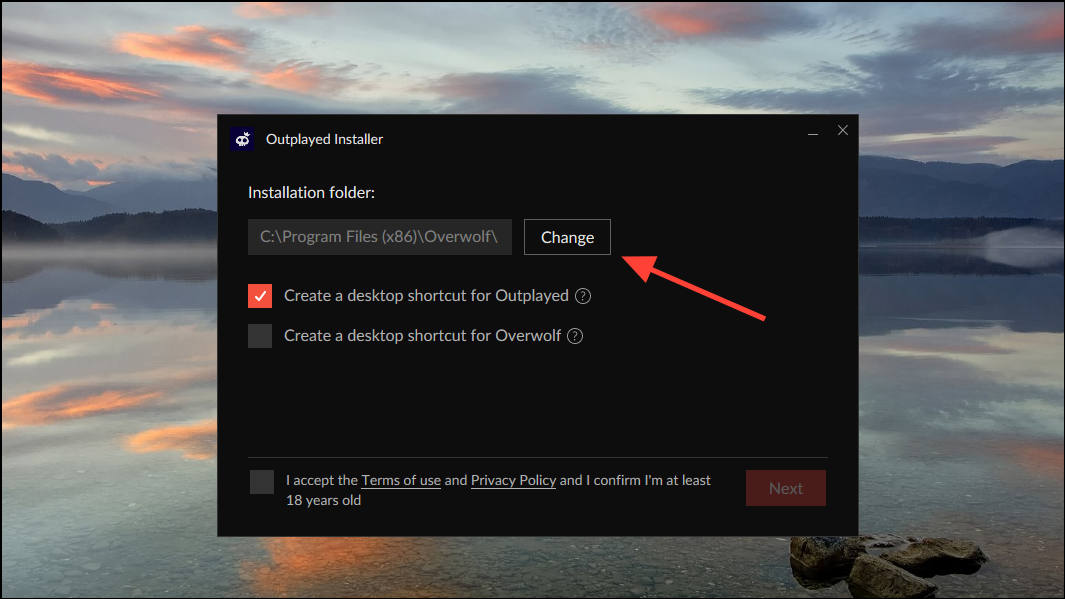
- While installing the app, you can select the language in which you want to install the app and choose where to install the app. Follow the onscreen prompts to proceed.
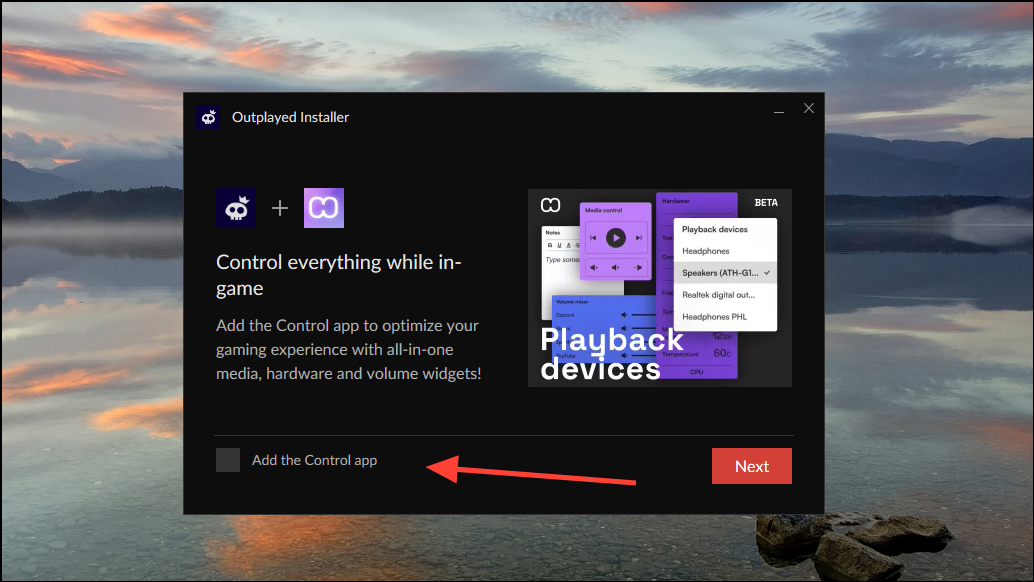
- Then, you’ll reach the page that gives you the option to add the Control app to your PC or laptop, through which you can control the app in-game. Click the provided box if you want to do so, then click the ‘Next’ button.
- Clicking the ‘Next’ button will allow the installer to start downloading the app from the internet.
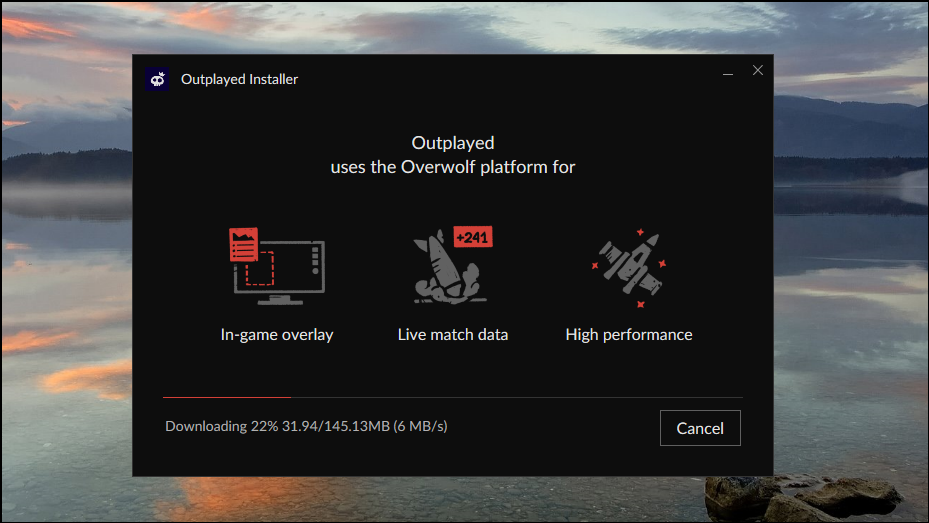
- Once the app finishes downloading, you can launch it using the ‘Launch’ button.

Now you are ready to record your game highlights on any GPU using Outplayed.
Setting Up The App
When the Outplayed app is launched for the first time, it will take a few seconds to get things up and running.
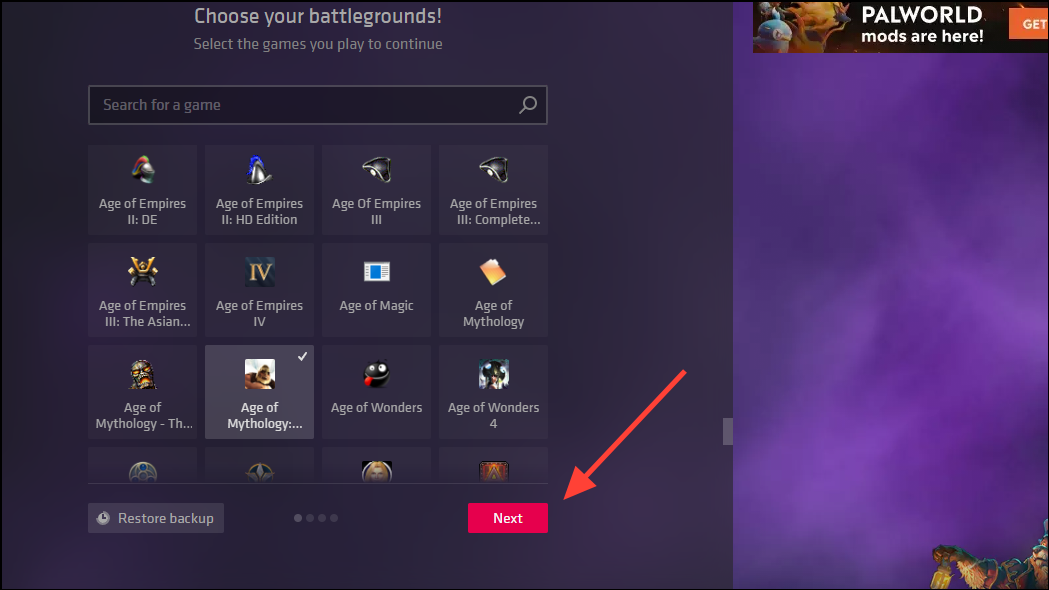
- Once it launches, you will see a dashboard with some of the most popular games that the app supports. Use the search bar at the top to search for a particular game.
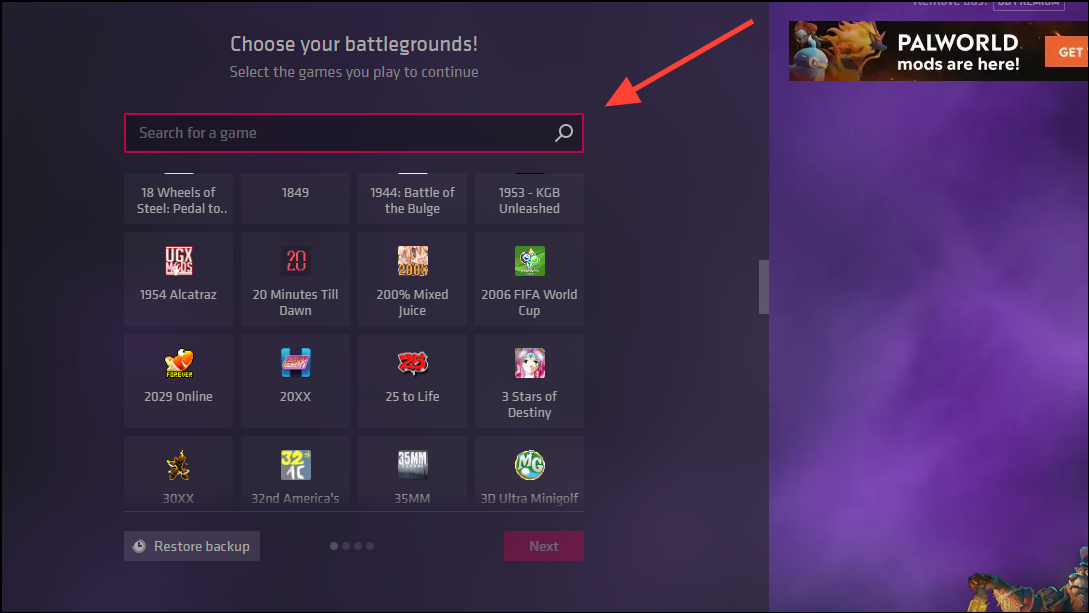
- After locating the game you want to record, click on its icon to select it and then click the ‘Next’ button.
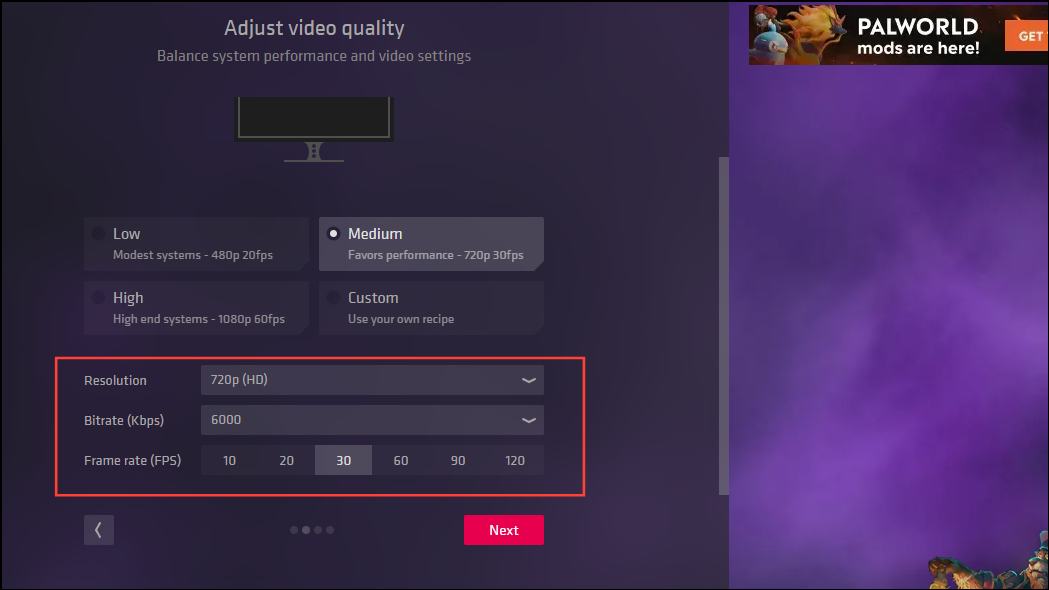
- On the next page, you get a few options to customize your app settings that affect how it performs. At the top, there are three presets, along with a custom option that you can choose between, depending on your system.
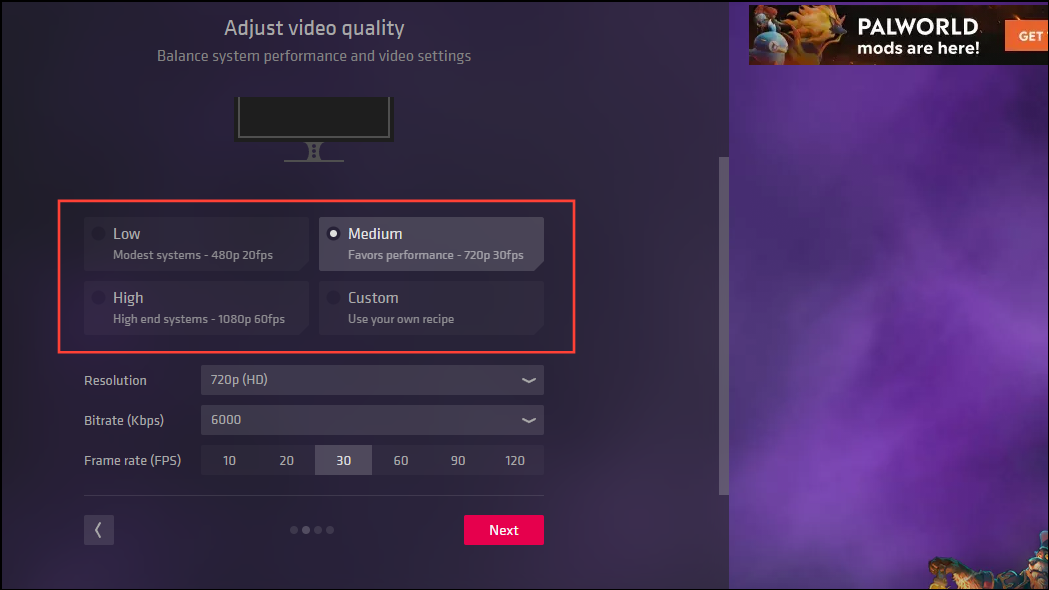
- Below that are the video capture settings. You can click on any of these to change the default resolution, bitrate, and frame rate at which videos are recorded.
The resolution can be changed from 480p to 2160p, while the bitrate can be changed from 2000 to 100000. Similarly, the minimum FPS allowed by the app is 10, and the maximum is 120.
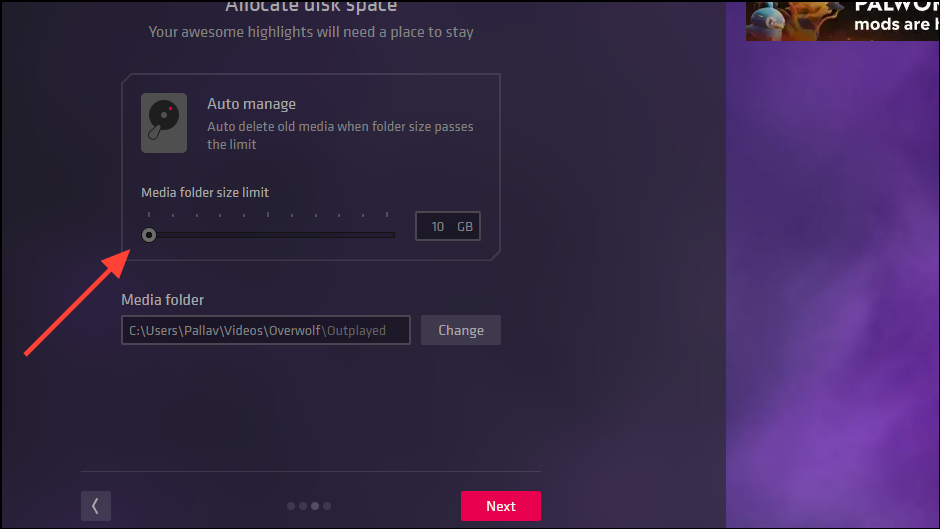
- Moving to the next page, here you will be able to determine where the highlights recorded by the app are stored and how much space to allocate for that.
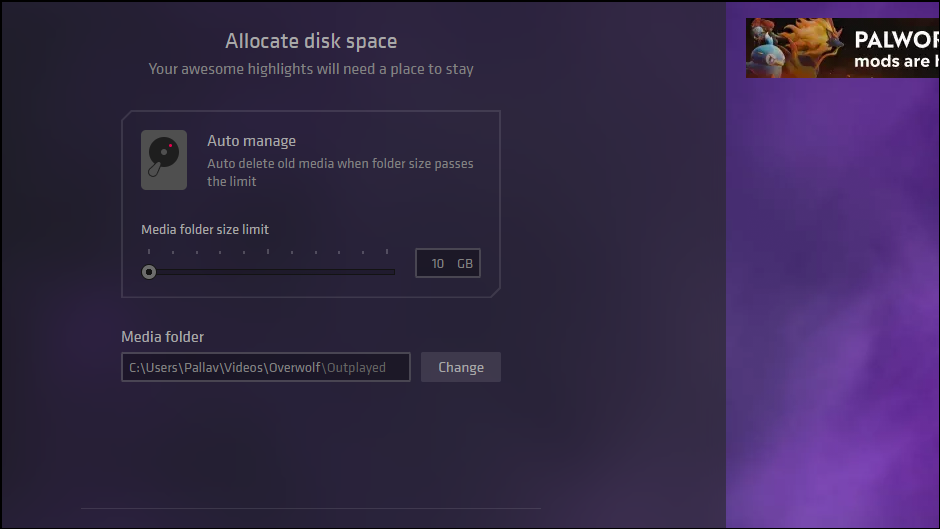
- Use the slider to control how much space to provide the app for storing highlights. When this limit is reached, Outplayed will automatically delete old recordings.
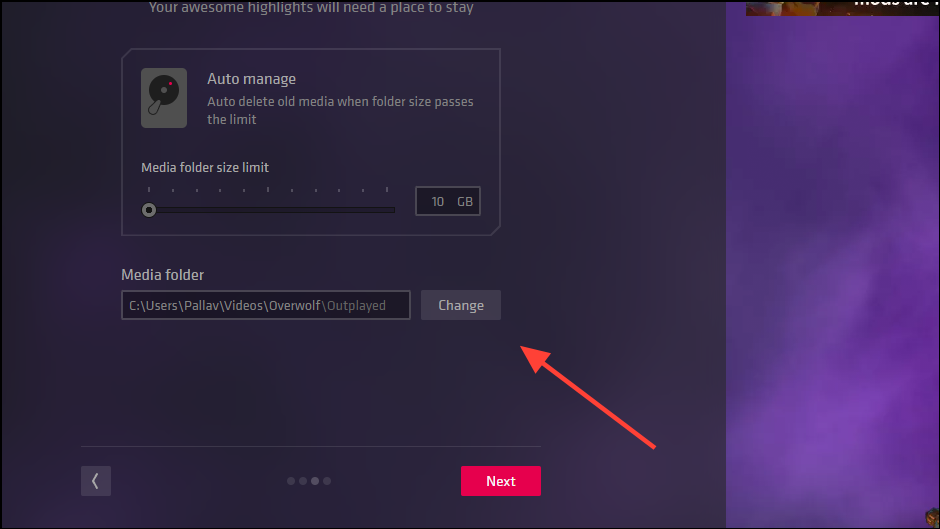
- If you want to change the location where the recordings are stored, click the ‘Change’ button and select a new location. Then, click the ‘Next’ button.
- The last page contains settings for setting up shortcut keys for capturing video and screenshots while playing games. There are three shortcuts available, and you can customize more by clicking the ‘Open Settings’ button at the bottom.
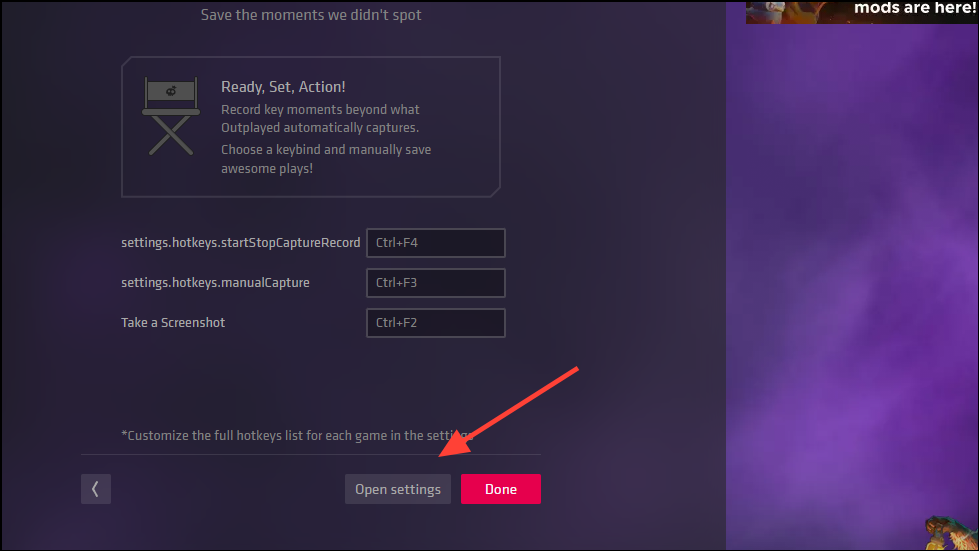
- After customizing the hotkeys as needed, click the ‘Done’ button to visit the Outplayed dashboard.
Recording Game Highlights
With the Outplayed dashboard open, you can launch your game to start recording it.
- The Outplayed app will show a pop-up when you launch the game for the first time after adding it to the app.
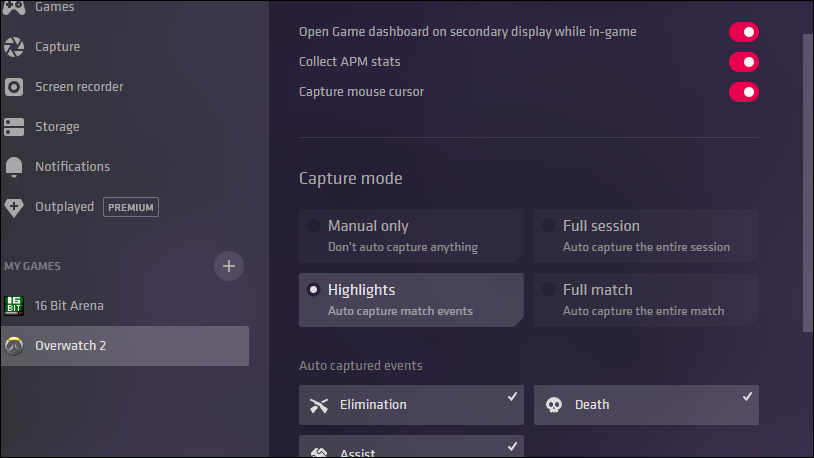
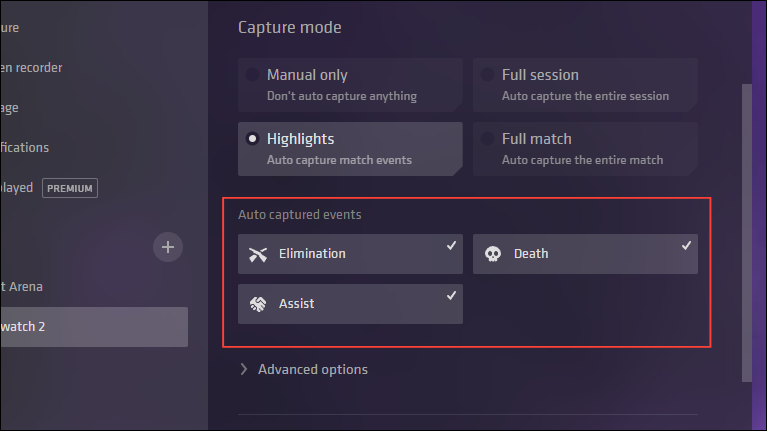
- The ‘Capture Mode’ section contains the settings for controlling game recordings. It has four different game capture settings.
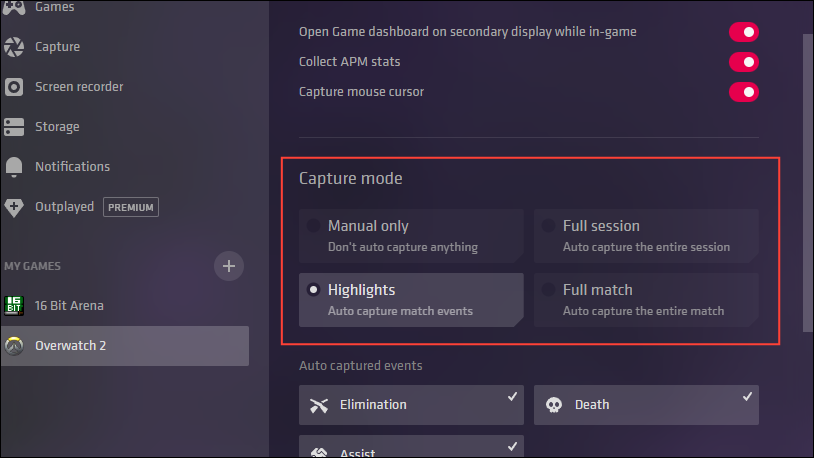
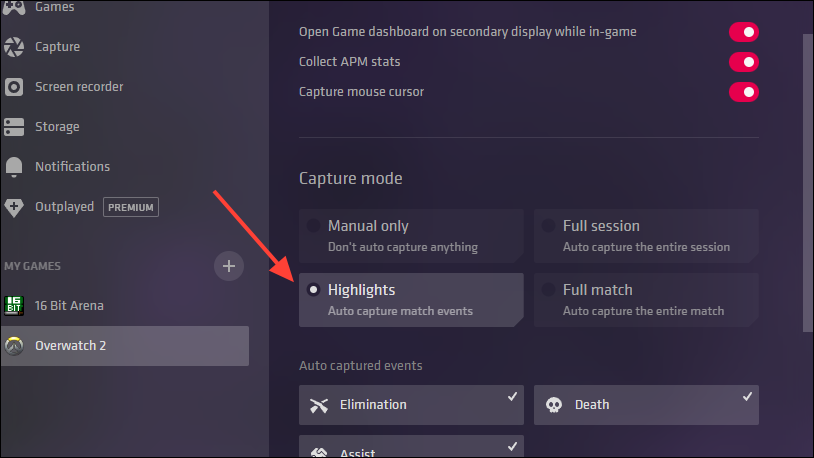
- The ‘Manual Only’ mode allows you to record videos manually, while the ‘Full Session’ mode records the entire sessions. To record highlights of your match, click the ‘Highlights’ option.
- With the ‘Highlights’ option selected, the app will automatically capture events like Death, Assist, and Elimination, depending on the game. These are visible in the ‘Auto-Captured Events’ and can be turned on or off by a mouse click.
Customizing Highlight Events
With Outplayed, customizing highlight events is not only possible but also quite easy. It allows controlling what happens before and after the event to be recorded.
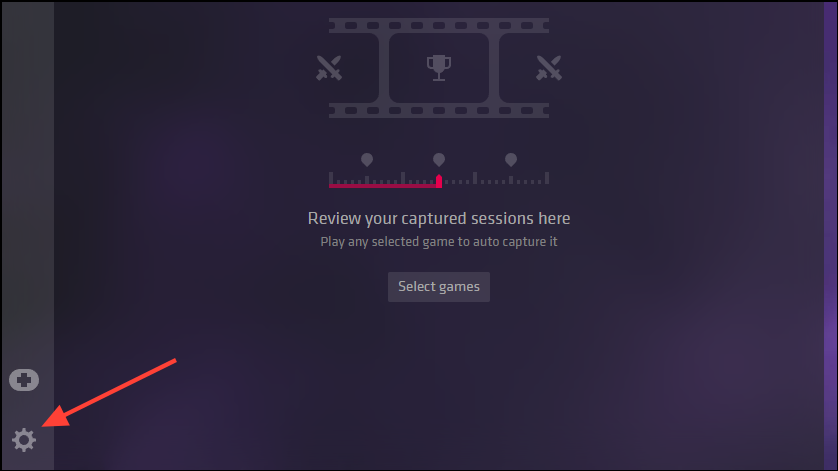
- To customize your highlight events, click the gear icon on the lower left corner of the app to open the settings page.
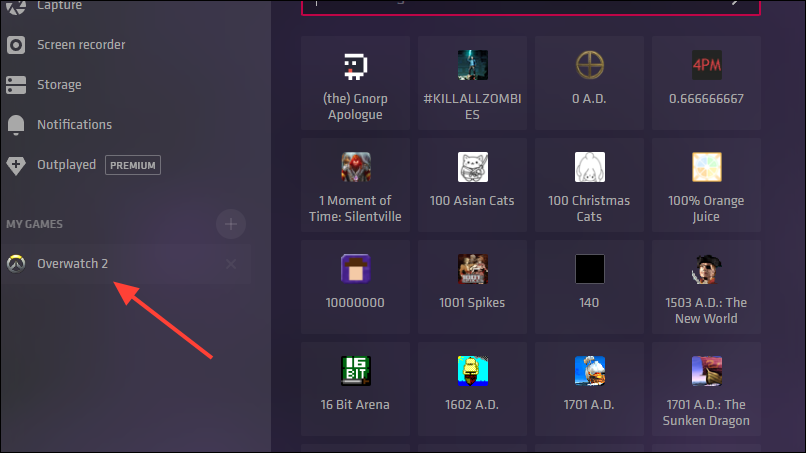
- Then, from the left panel, click on the game icon for which you want to customize the highlights.
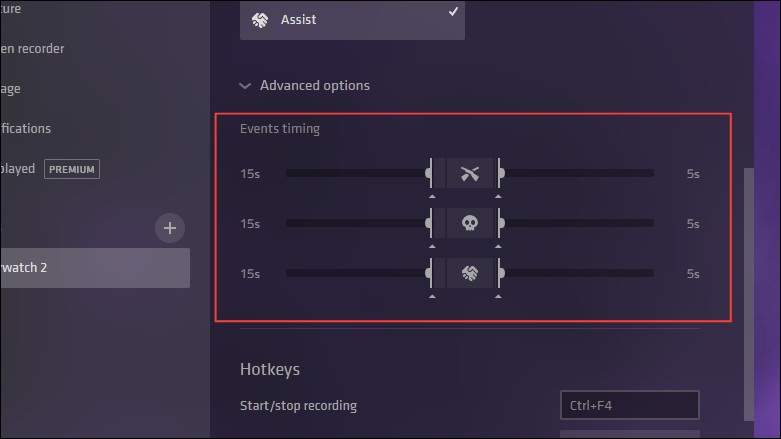
- With the game selected, you will see all related settings, such as those related to the capture mode. Click the ‘Advanced Options’ button below that.

- This will show you a few sliders that control the duration of the video capture before and after the event. Move the sliders left or right as needed to customize the duration as needed.
With that, you are ready to start recording your game highlights with Outplayed. After your match ends, the Outplayed window will open so you can review, edit, and save the recordings.
If you’re someone who loves to share the most epic moments of their gaming journey with others, Outplayed is the perfect tool for you. It lets you quickly capture and share game highlights irrespective of the GPU you have. You can even edit the recordings before sharing, which is another reason it is a highly recommended option.


