Adjusting the size of icons on your Windows 11 desktop can greatly enhance your user experience, especially if you spend a lot of time in front of your computer. Whether you prefer larger icons for better visibility or smaller ones to keep your workspace organized, Windows 11 offers several ways to customize icon sizes to your liking.
Changing desktop icons in Windows 11
Change desktop icons with mouse scroll
One of the easiest ways to adjust the size of your desktop icons is by using the scroll wheel on your mouse. This method allows you to set the icon size precisely to your preference.
Step 1: Click on an empty space on your desktop to ensure it's active. Then, hold down the Ctrl key on your keyboard.
Step 2: While holding the Ctrl key, scroll the wheel on your mouse upward to increase the icon size, or downward to decrease it. You'll see the icons resizing in real-time as you scroll. Release the Ctrl key when you are satisfied with the size.
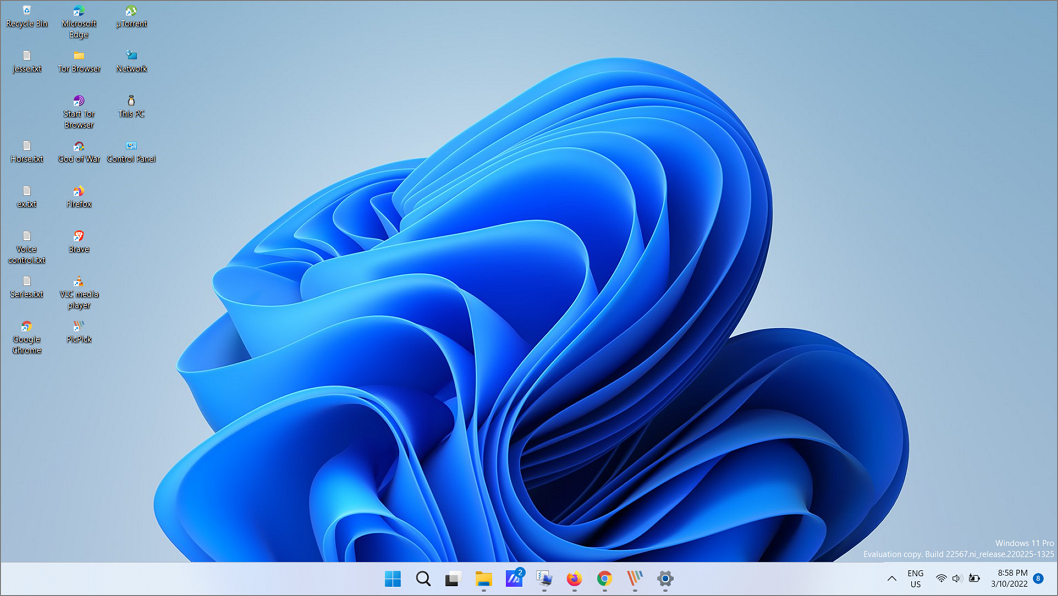
Changing desktop icons using context menu
Windows 11 also provides predefined sizes for desktop icons—small, medium, large, and extra-large—which you can select through the context menu.
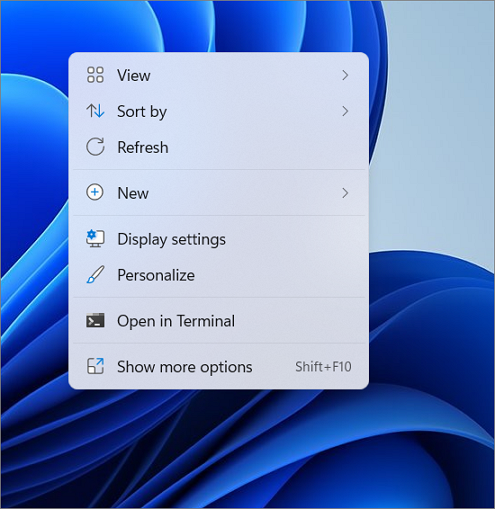
Step 1: Right-click on an empty area of your desktop to open the context menu. Hover over the 'View' option.
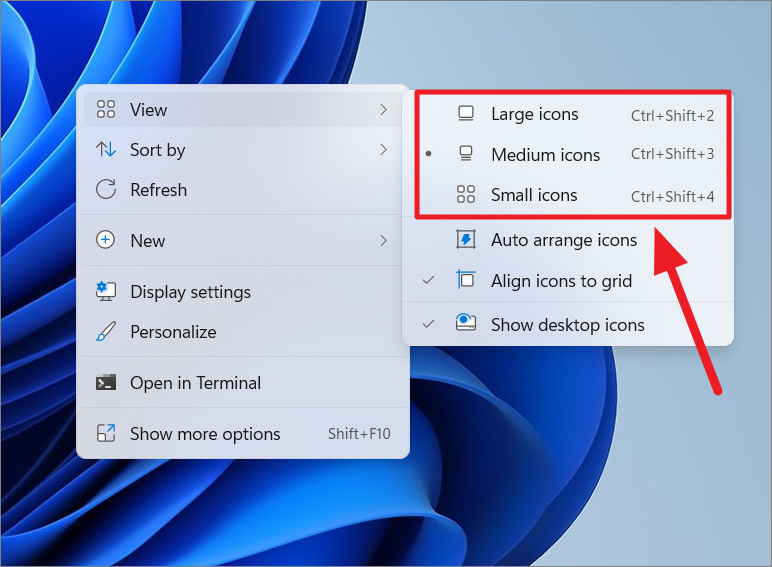
Step 2: From the expanded menu, select your preferred icon size: 'Large icons', 'Medium icons', or 'Small icons'. Alternatively, you can use the following keyboard shortcuts by pressing them while on the desktop:
- Large icons –
Ctrl+Shift+2. - Medium icons –
Ctrl+Shift+3. - Small icons –
Ctrl+Shift+4.
Though 'Extra large icons' isn't listed in the context menu, you can still access it by pressing Ctrl+Shift+1. Remember to use the number keys at the top of the keyboard for these shortcuts.
Once you've made your selection, the desktop icons will adjust accordingly.
Extra Large Icons
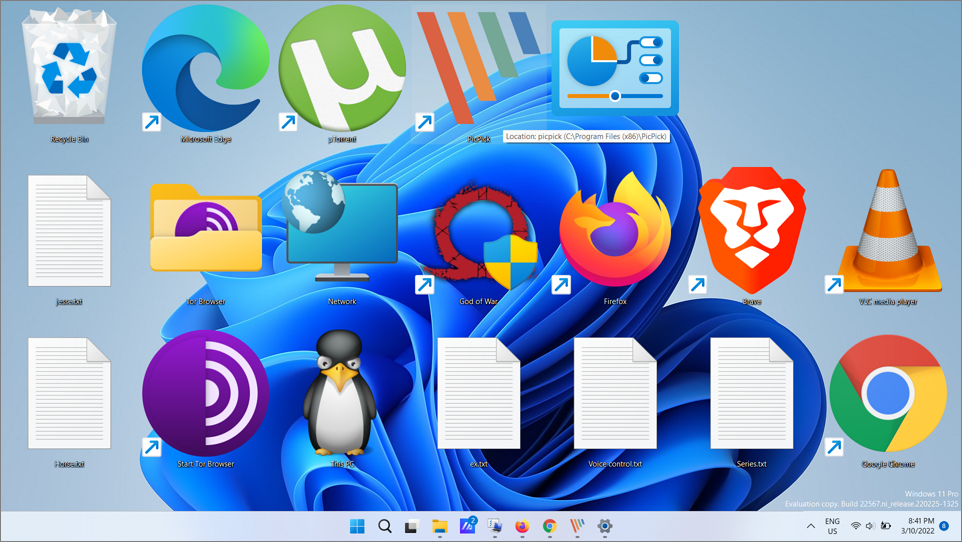
Large Icons
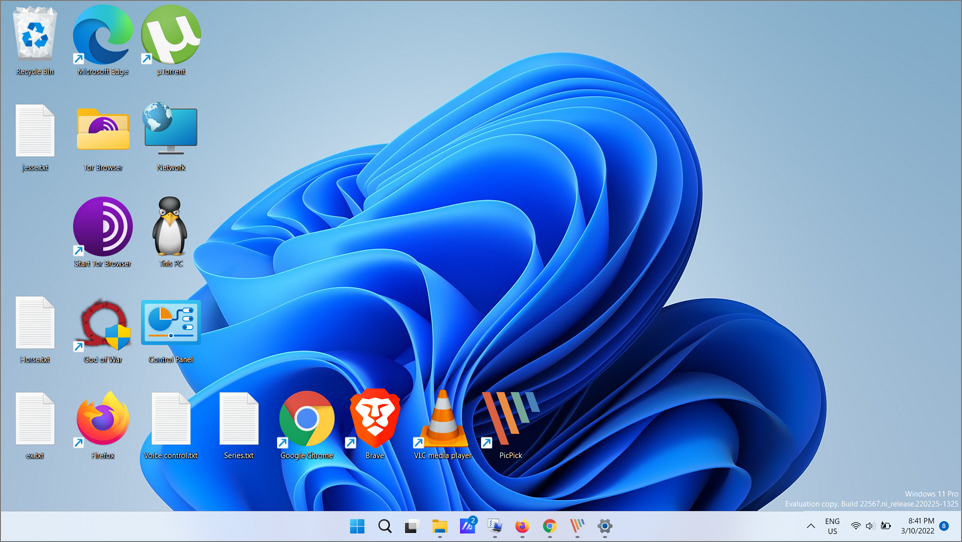
Medium Icons
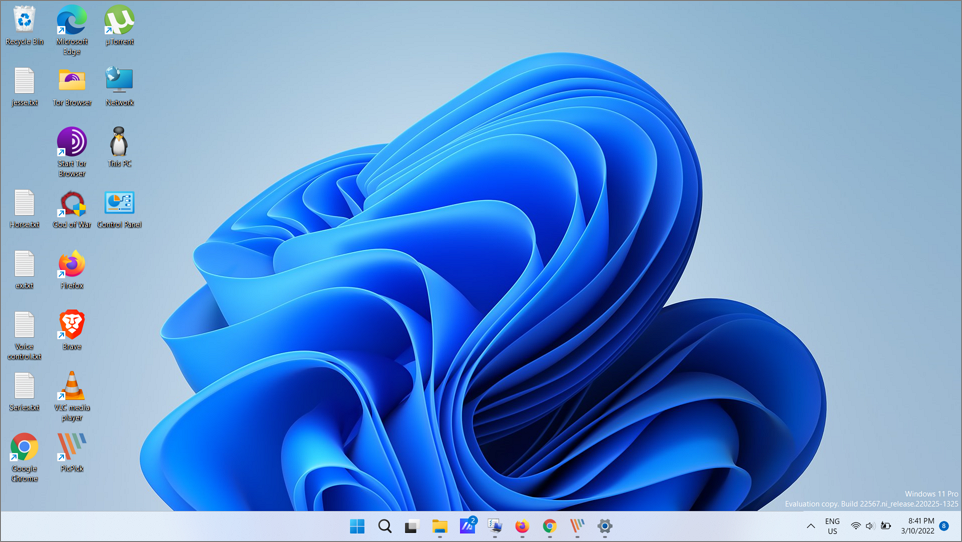
Small Icons
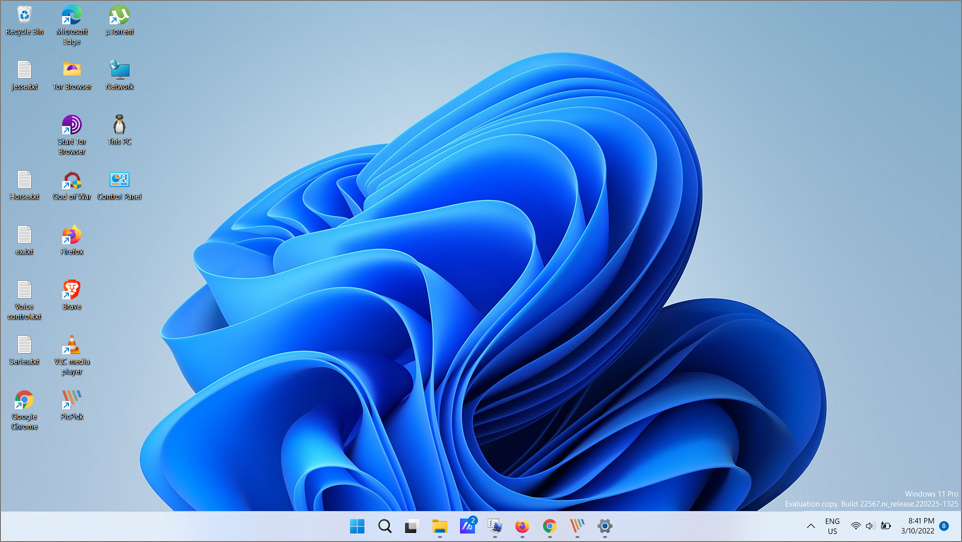
If you prefer a clean desktop without any icons, you can easily hide them. Right-click on the desktop, hover over 'View', and then uncheck 'Show desktop icons'.
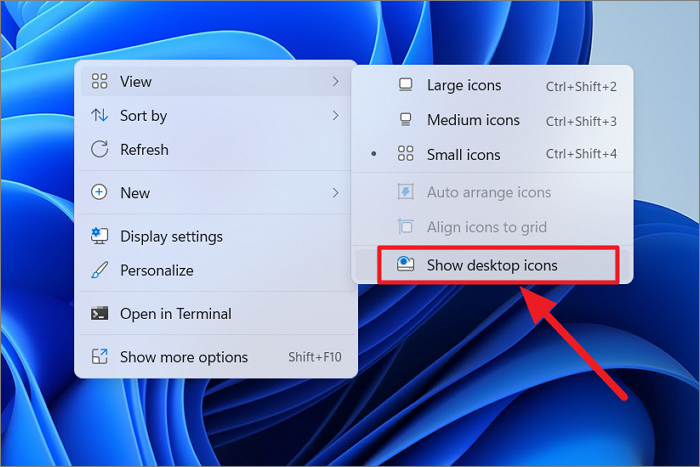
To make the icons visible again, repeat the same steps and re-select 'Show desktop icons'.
Change desktop icon spacing using Registry Editor
If you want to adjust the spacing between desktop icons, you can modify the horizontal and vertical spacing through the Windows Registry. Be cautious when editing the registry, as incorrect changes can affect system stability.
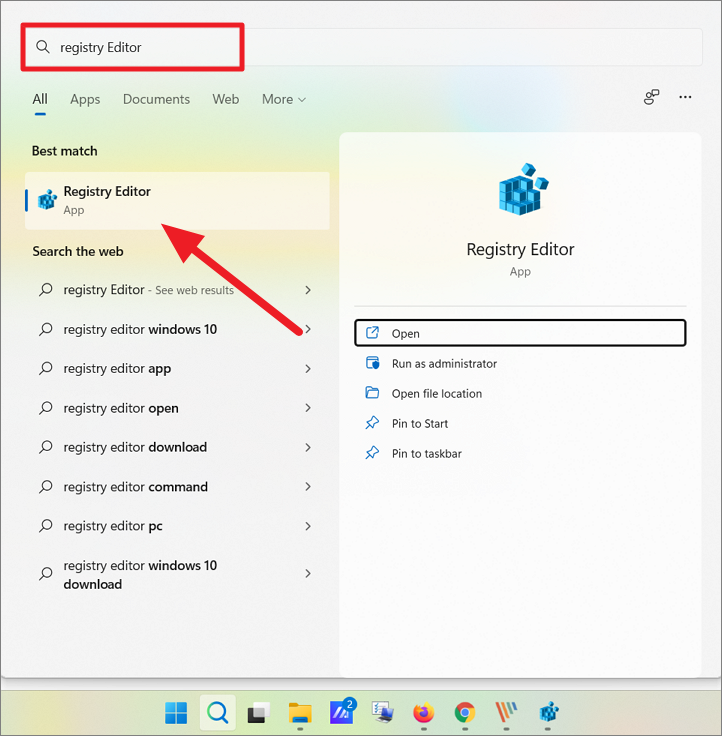
Step 1: Open the Registry Editor by typing regedit in the Windows search bar and selecting the application. Alternatively, press Windows+R, type regedit, and press Enter.
Step 2: In the Registry Editor, navigate to the following path by copying and pasting it into the address bar and pressing Enter:
HKEY_CURRENT_USER\Control Panel\Desktop\WindowMetrics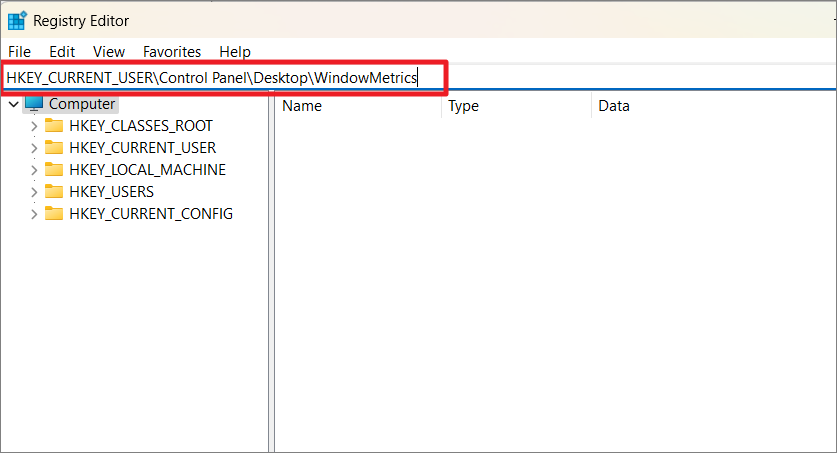
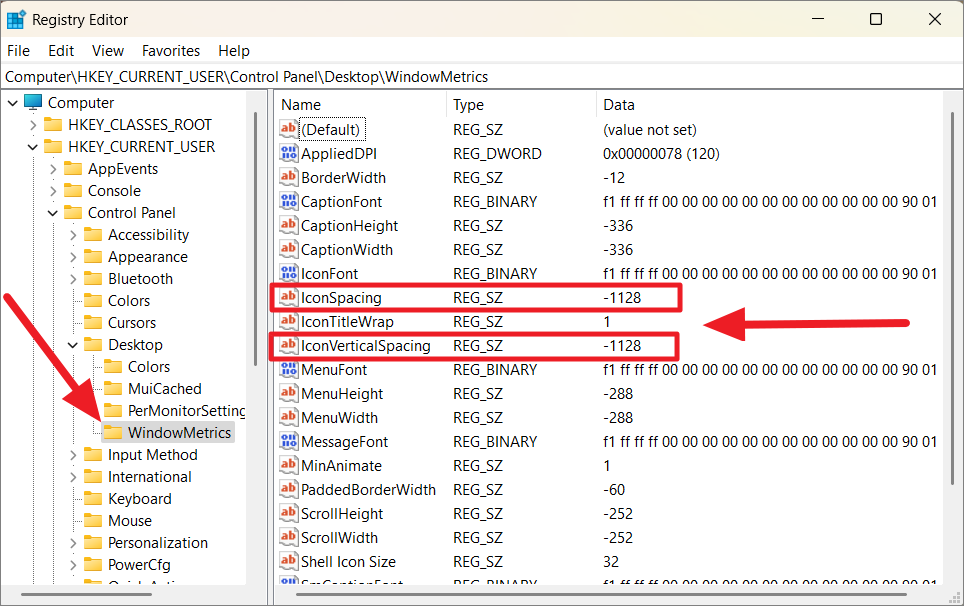
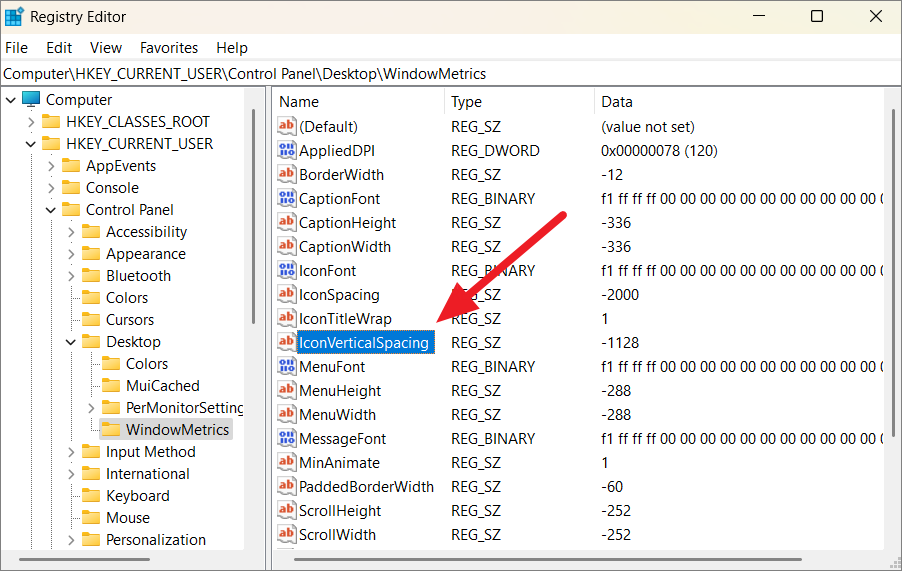
Step 3: In the 'WindowMetrics' folder, find the entries named 'IconSpacing' and 'IconVerticalSpacing' on the right pane.
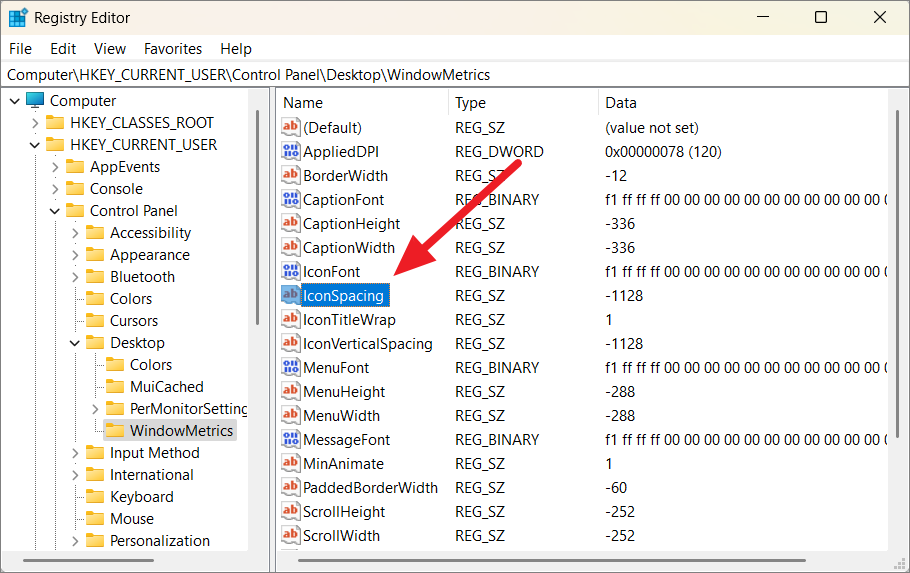
Step 4: To adjust the horizontal spacing, double-click on 'IconSpacing'. In the 'Value data' field, enter a value between '-480' and '-2730'. The default value is '-1128'. A higher value (closer to -480) reduces spacing, while a lower value (closer to -2730) increases it. Click 'OK' when done.
Step 5: To modify the vertical spacing, double-click on 'IconVerticalSpacing' and set a value within the same range. Click 'OK' to save.
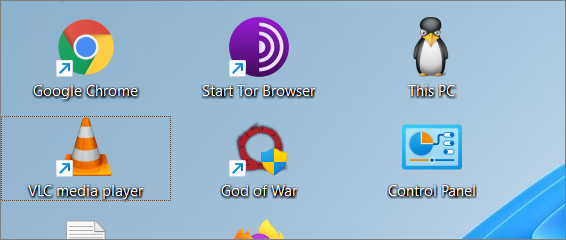
Step 6: Restart your computer to apply the changes. Upon reboot, the desktop icons will reflect the new spacing settings.
Change file and folder icon sizes
In File Explorer, you can adjust the size of file and folder icons to improve visibility or fit more items on the screen.
Step 1: Open File Explorer and navigate to the folder where you want to change the icon size.
Step 2: Click on the 'View' button (represented by an icon with layout squares) in the toolbar to open a dropdown menu.
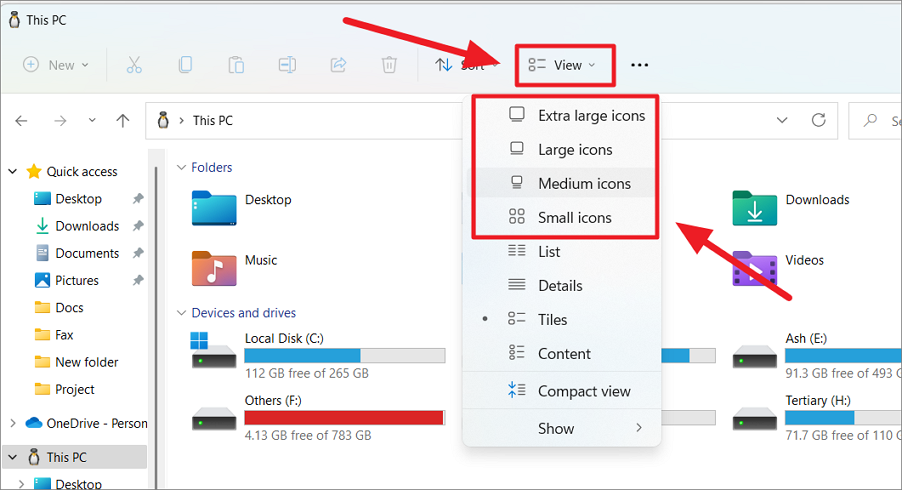
Step 3: Under 'Layout', select the desired icon size: 'Extra large icons', 'Large icons', 'Medium icons', or 'Small icons'. The icons will resize immediately upon selection.
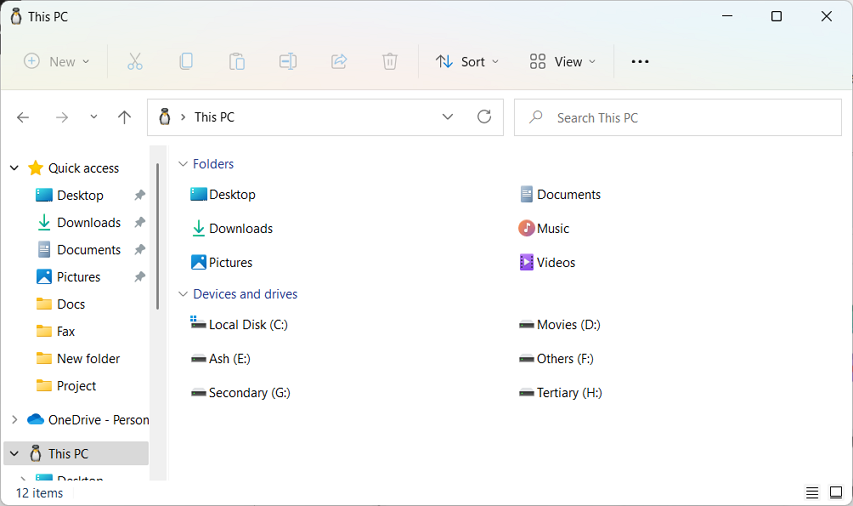
Apart from icon sizes, you can also choose different layouts such as 'List', 'Details', 'Tiles', or 'Content' to change how files and folders are displayed.
By default, changes to the icon size or layout affect only the current folder. If you want to apply these settings to all subfolders within a folder, you can do so using the Folder Options.
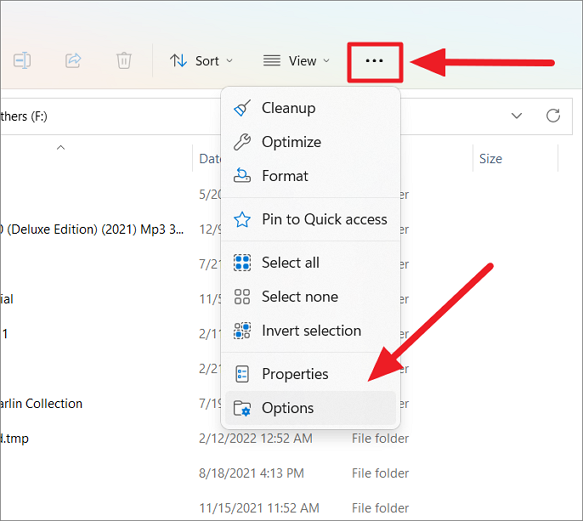
Step 4: After setting your preferred view, click on the 'See more' button (three dots) in the toolbar, and select 'Options' from the dropdown menu.
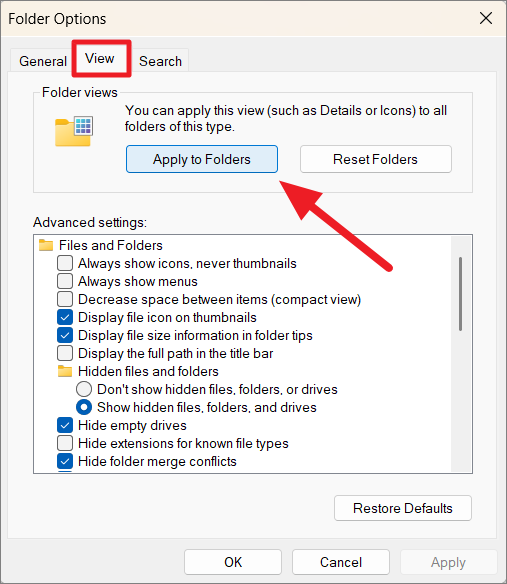
Step 5: In the 'Folder Options' window, switch to the 'View' tab and click on 'Apply to Folders'. A confirmation dialog will appear.
Step 6: Click 'Yes' to confirm applying the view settings to all subfolders. Then, click 'OK' to close the window.

The new icon size and layout will now apply to all subfolders within the selected directory.
Reset folder view
If you wish to revert the folder view settings to their default state, you can reset them.
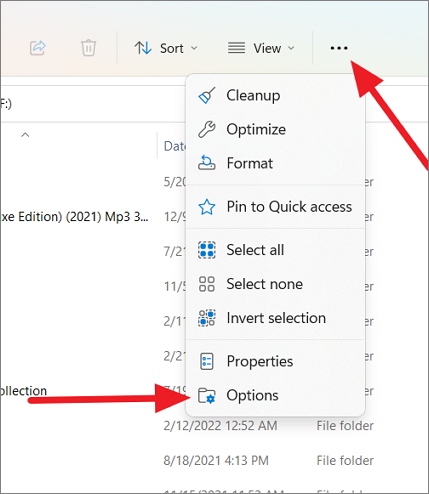
Step 1: In File Explorer, click on the 'See more' button (three dots) and select 'Options'.
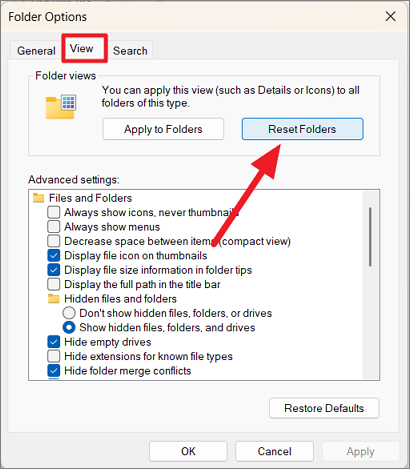
Step 2: Go to the 'View' tab in 'Folder Options' and click 'Reset Folders'.
Step 3: Confirm the action by clicking 'Yes' in the prompt, then click 'OK' to close the window.

Change taskbar height and icon size in Windows 11
Windows 11 does not offer a direct setting to change the taskbar size and the icons on it. However, you can modify the registry to adjust the taskbar's height and icon sizes.
Step 1: Open the Registry Editor by pressing Windows+R, typing regedit, and pressing Enter.
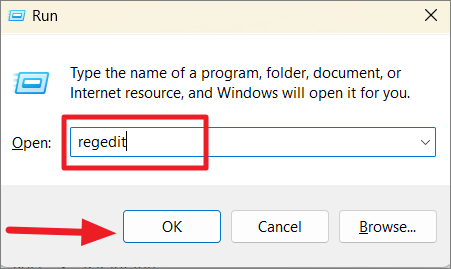
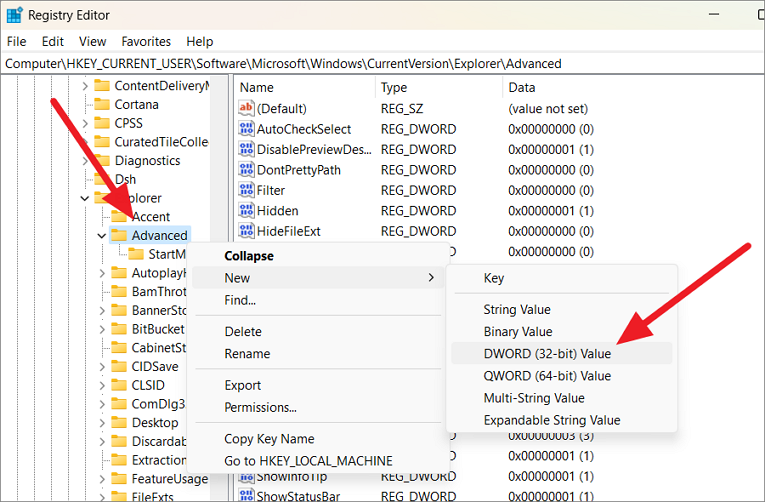
Step 2: Navigate to the following path:
HKEY_CURRENT_USER\Software\Microsoft\Windows\CurrentVersion\Explorer\AdvancedStep 3: Right-click on the 'Advanced' folder in the left pane, select 'New', then choose 'DWORD (32-bit) Value'. Name the new value TaskbarSi.
Step 4: Double-click on 'TaskbarSi' and set its 'Value data' to one of the following:
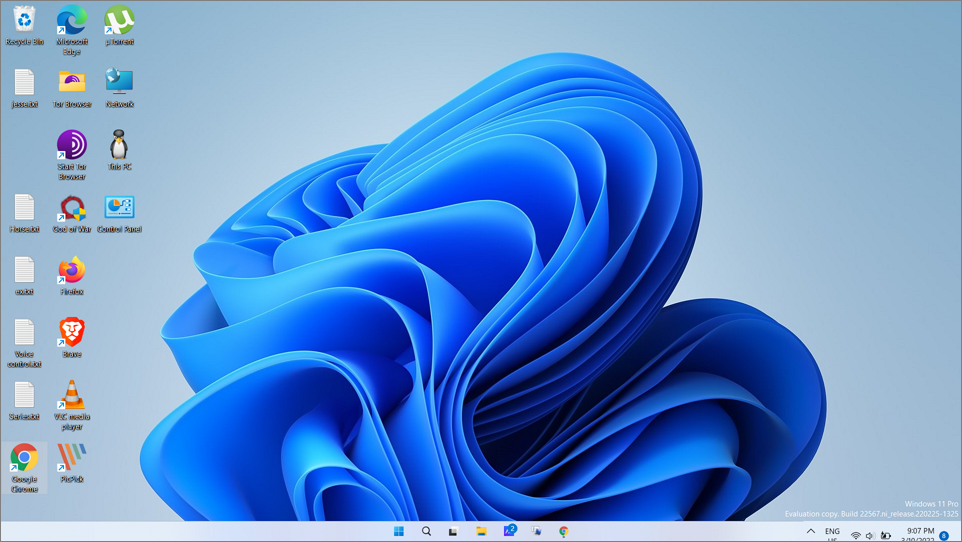
- 0 – Small size.
- 1 – Medium size (default).
- 2 – Large size.
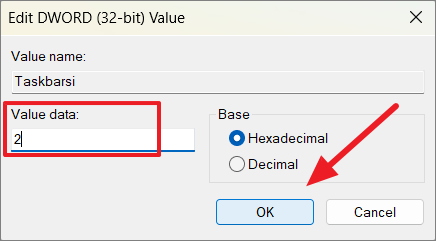
Step 5: Click 'OK' to save the changes and close the Registry Editor. Restart your computer to apply the new taskbar size.
Medium-Sized Taskbar
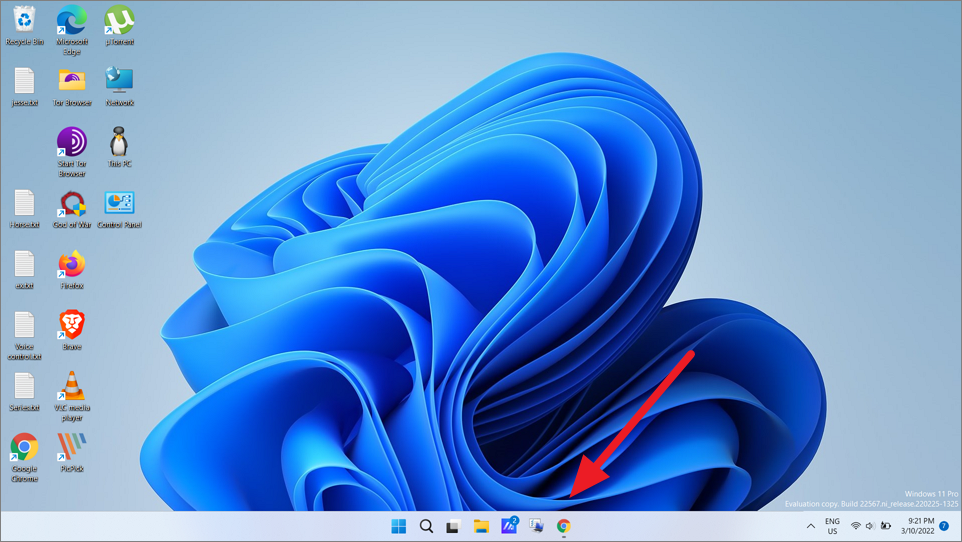
Large Taskbar
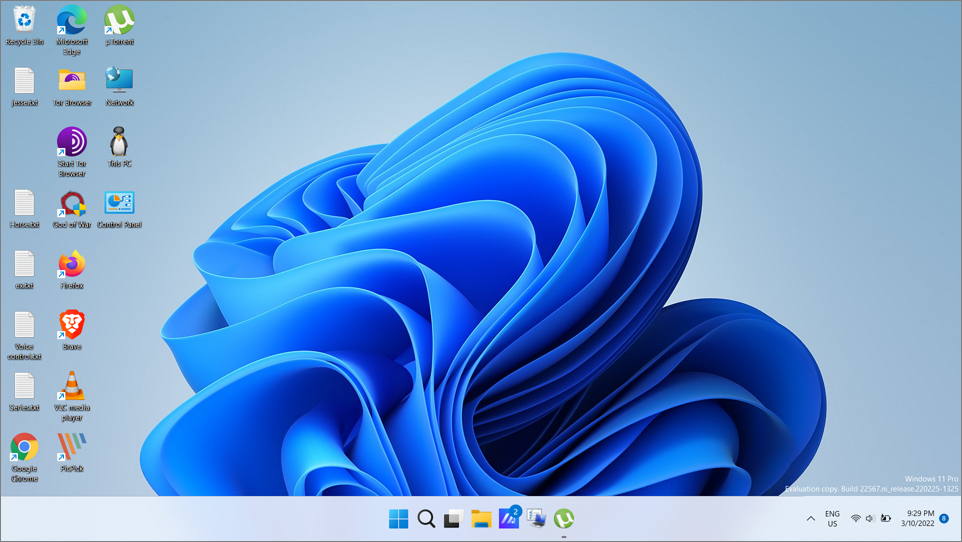
Small Taskbar
Quickly resize taskbar using '.bat' files
If you're uncomfortable editing the registry manually, you can use pre-made batch files to change the taskbar size quickly.
Step 1: Download the zip file containing the batch files for resizing the taskbar.
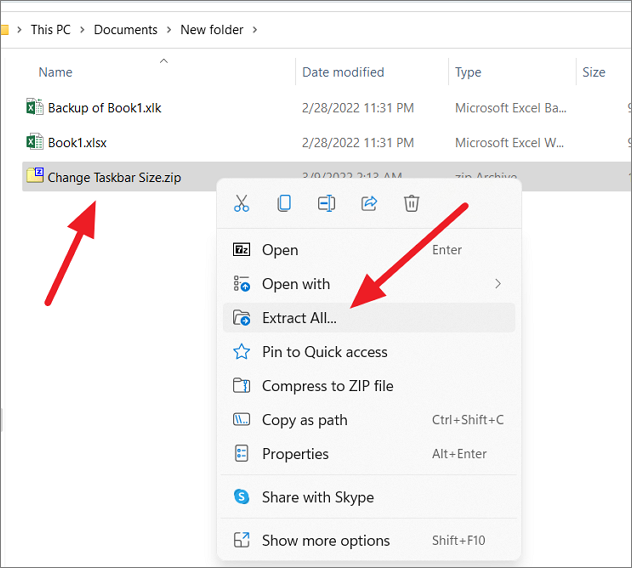
Step 2: Right-click the downloaded zip file and select 'Extract All...'. Choose a destination folder and click 'Extract'.
Step 3: In the extracted folder, locate the batch file corresponding to the desired taskbar size.
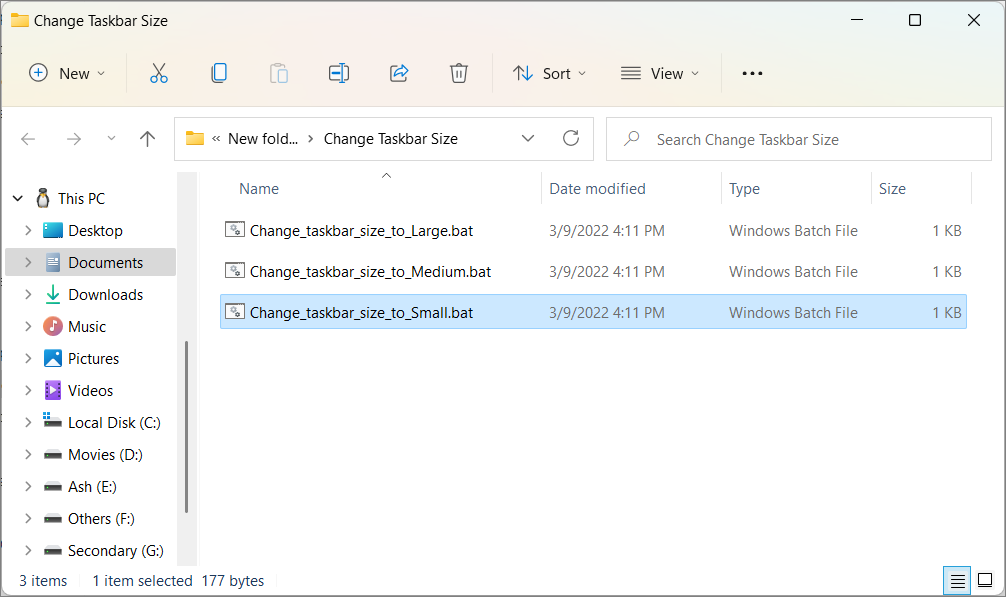
Step 4: Double-click the batch file or right-click and select 'Run as administrator'. If prompted by Windows Defender SmartScreen, click 'More info' and then 'Run anyway'.
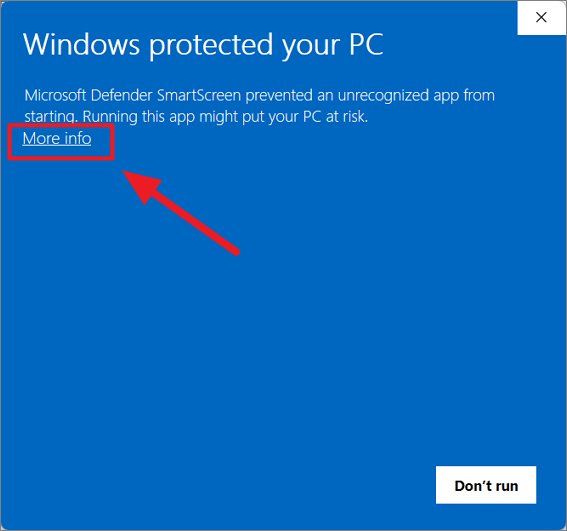
Step 5: The batch file will modify the registry and prompt you to restart your computer. After rebooting, the taskbar will adjust to the new size.
Change the size of all icons using display scaling in Windows 11
You can adjust the size of all elements on your screen, including icons, text, and apps, by changing the display scaling settings.
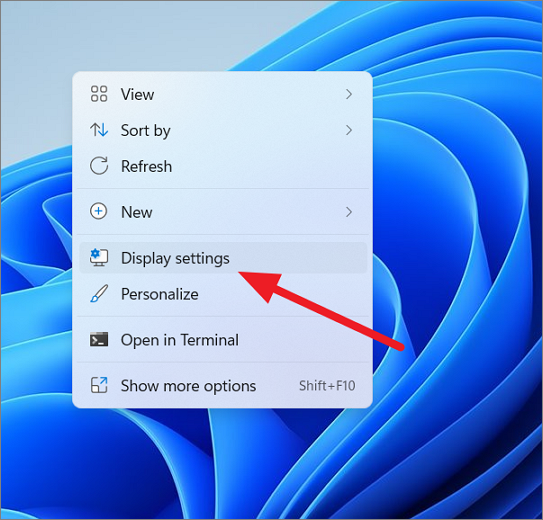
Step 1: Right-click on the desktop and select 'Display settings' from the context menu. Alternatively, open the Settings app and navigate to 'System' > 'Display'.
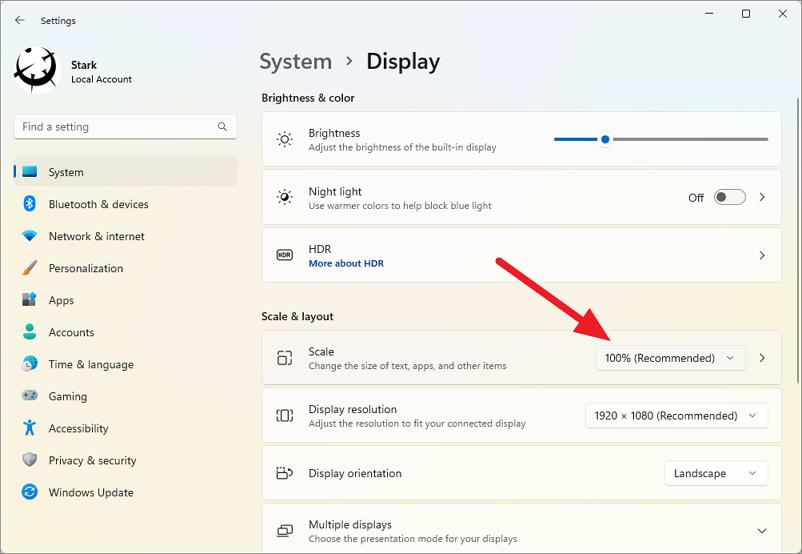
Step 2: In the 'Scale & layout' section, click on the dropdown menu next to 'Scale'.
Step 3: Select the scaling percentage that suits your needs. Options typically include '100%', '125%', '150%', and '175%'. For example, choosing '125%' will enlarge all interface elements by 25%.
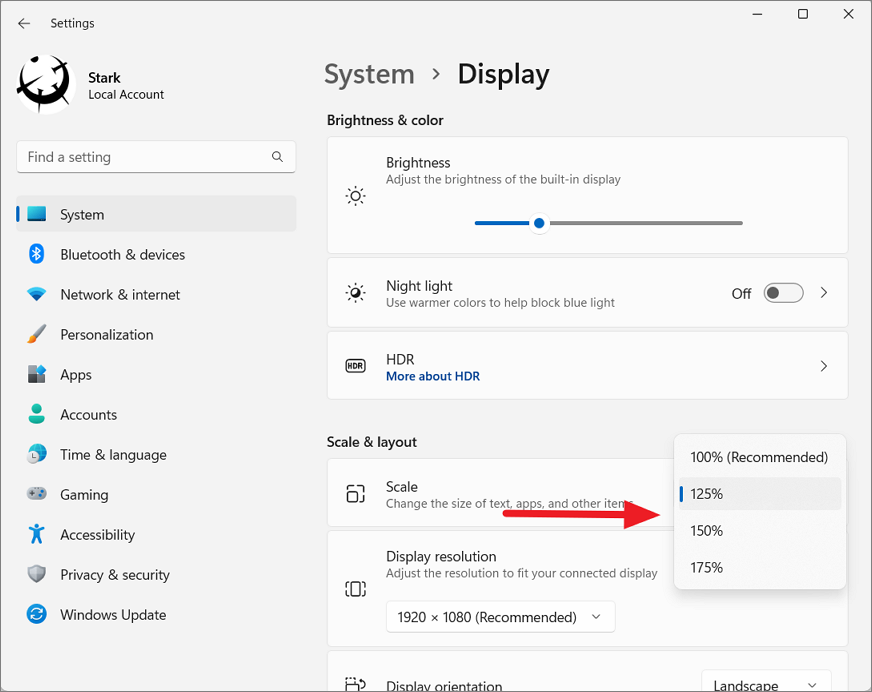
The changes will take effect immediately, resizing icons, text, and apps across the system.
By utilizing these methods, you can customize your Windows 11 experience by adjusting the size of icons and other interface elements to better suit your preferences.


