
Windows's built-in File Explorer provides basic functionality for managing files and folders, but third-party file explorers often offer faster navigation, additional customization options, and improved productivity tools. Changing the default File Explorer allows you to launch your preferred tool automatically, streamlining your file management tasks.
Method 1: Changing the Default File Explorer via Registry Editor
Step 1: Open the Registry Editor by pressing the Windows + R keys, typing regedit, and pressing Enter. If prompted by User Account Control, click Yes.

Step 2: In the Registry Editor window, navigate to the following path:
HKEY_CLASSES_ROOT\Folder\shell\open\command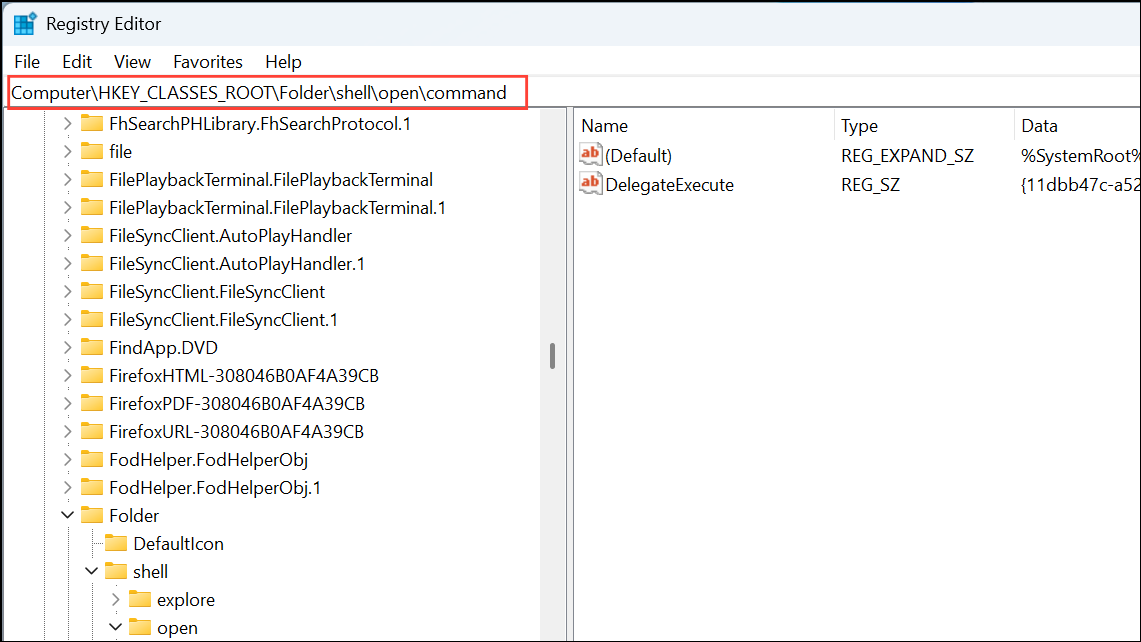
If the open or command keys do not exist, you can create them by right-clicking on shell, selecting New > Key, and naming them accordingly.
Step 3: After selecting the command key, double-click the (Default) value in the right pane. In the Value data field, enter the full path of your preferred file explorer executable followed by "%1". For example:
"C:\Program Files\ExplorerAlternative\ExplorerAlternative.exe" "%1"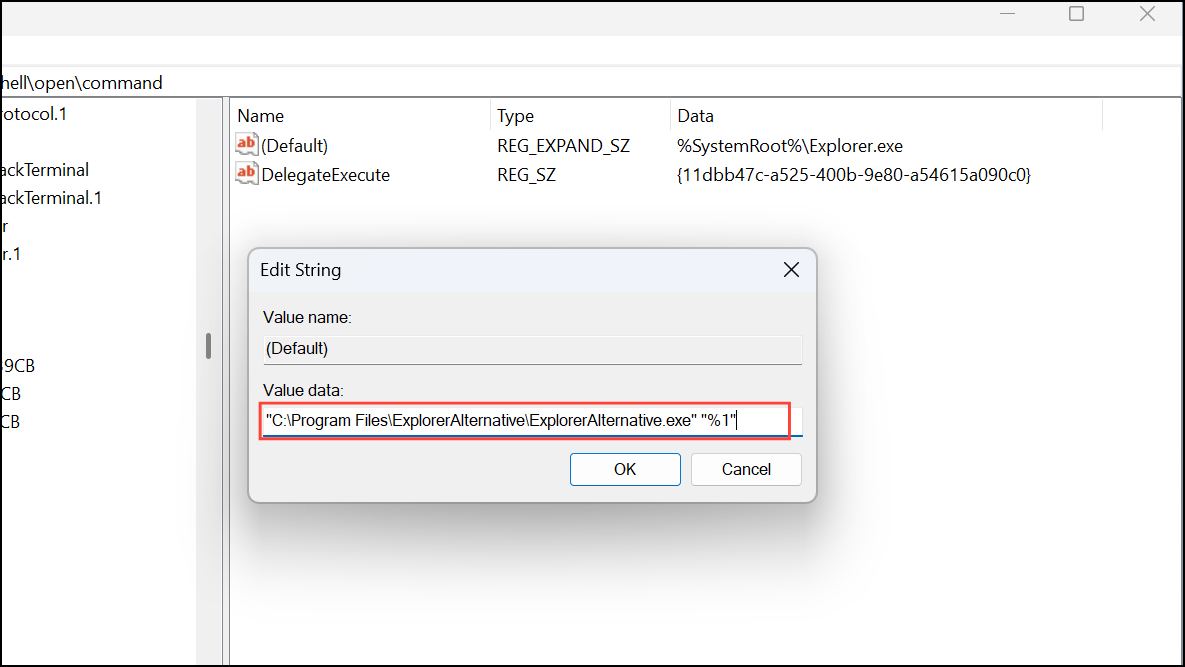
Ensure the path is correct and includes quotation marks as shown, then click OK.
Step 4: Close the Registry Editor and restart your computer to apply the changes. Now, clicking folders will automatically open them in your chosen file explorer.
Method 2: Using Third-Party Tools to Set Default File Explorer
If modifying the registry seems complex, third-party tools can simplify the process.
Step 1: Download and install a utility specifically designed to manage default apps, such as FileTypesMan or Default Programs Editor. These tools provide user-friendly interfaces for changing default applications without manual registry edits.
Step 2: Launch the utility and locate the file type or protocol associated with opening folders (usually labeled as Folder or Directory). Select it, then choose the option to edit or change the associated program.
Step 3: Browse and select the executable file of your preferred file explorer. Confirm your selection, apply the changes, and close the utility.
Step 4: Restart your computer to ensure the changes take effect fully. Now, your selected file explorer should launch automatically when you open folders.
Method 3: Creating a Manual Shortcut for Quick Access
If you prefer not to alter registry settings or use third-party tools, creating a manual shortcut provides a straightforward alternative.
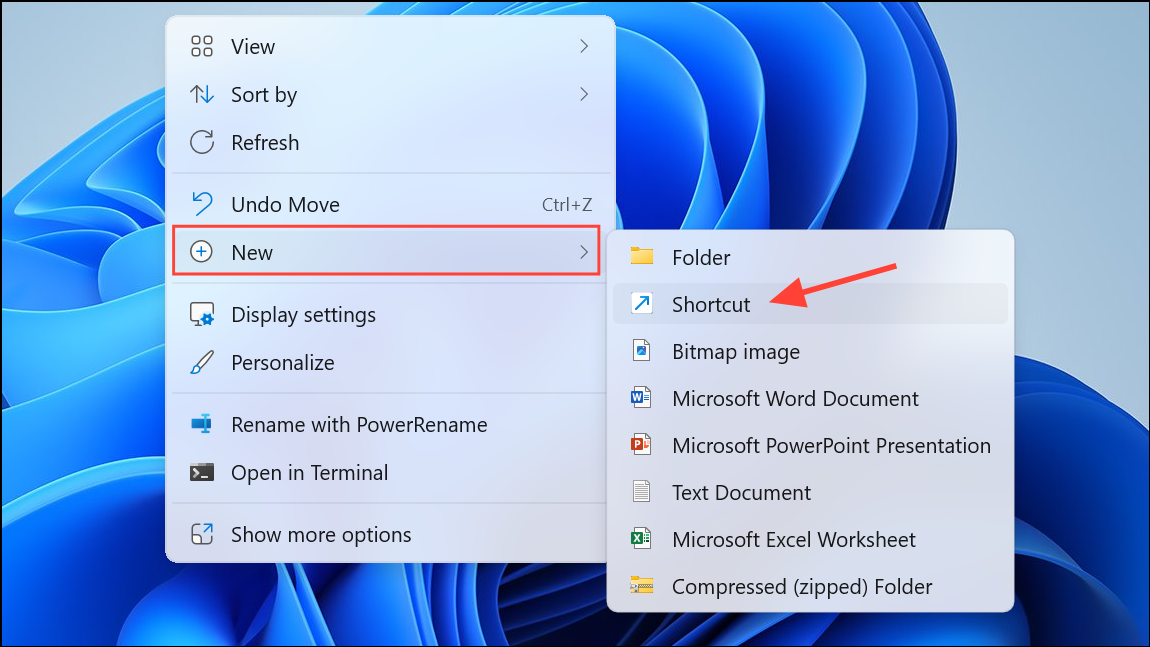
Step 1: Right-click on your desktop or preferred location, select New > Shortcut. In the shortcut creation window, browse to your preferred file explorer executable file and select it.
Step 2: After selecting the executable, add a space followed by "%windir%\explorer.exe" to specify that the shortcut opens your custom explorer in place of the default Windows Explorer. Your shortcut target should look similar to:
"C:\Program Files\ExplorerAlternative\ExplorerAlternative.exe" "%windir%\explorer.exe"Step 3: Name your shortcut clearly, such as "My File Explorer," and click Finish. You can now use this shortcut to quickly open your preferred file explorer directly.
Changing your default file explorer can significantly speed up file management tasks and offer more convenient features tailored to your workflow. Remember to periodically update your chosen file explorer to benefit from performance improvements and new features.