
Finder, the default file management application on macOS, does not include a built-in "New File" option in the right-click context menu. This can be particularly inconvenient for users accustomed to creating new files directly within folders, especially those transitioning from Windows. Fortunately, there are several practical ways to add this functionality to Finder on macOS Sequoia. We'll explore four effective methods you can use to streamline your workflow.
Method 1: Using Shortcuts and AppleScript
The most effective and integrated method involves using the Shortcuts app combined with AppleScript. This method allows you to add a convenient "New File" action directly into Finder's context menu or menu bar.
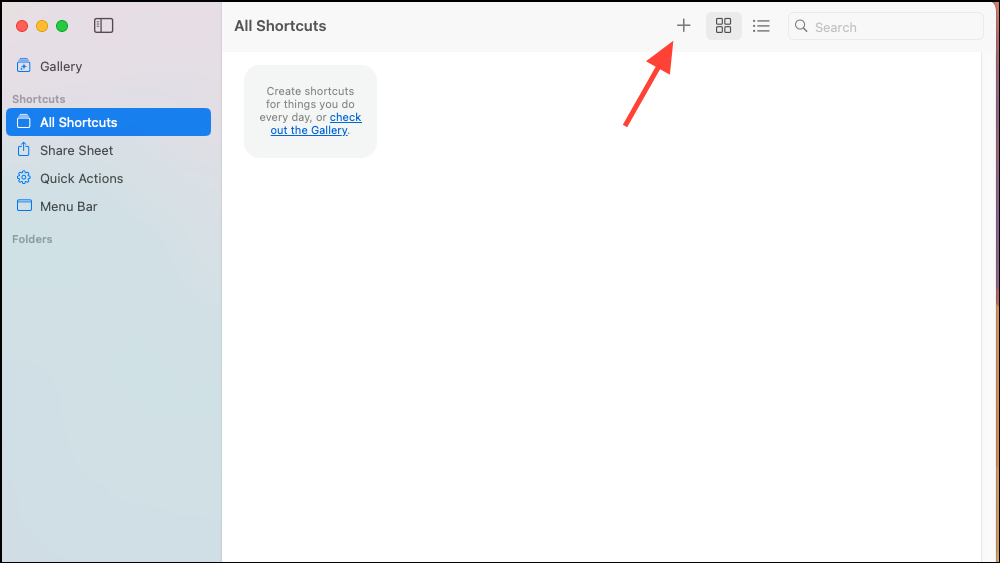
Step 1: Open the Shortcuts app from Launchpad or Spotlight Search (press Command + Space and type "Shortcuts").
Step 2: Create a new shortcut by clicking the + icon or selecting File > New Shortcut.
Step 3: Search for "Run AppleScript" in the actions sidebar and drag the action into the main workflow area.
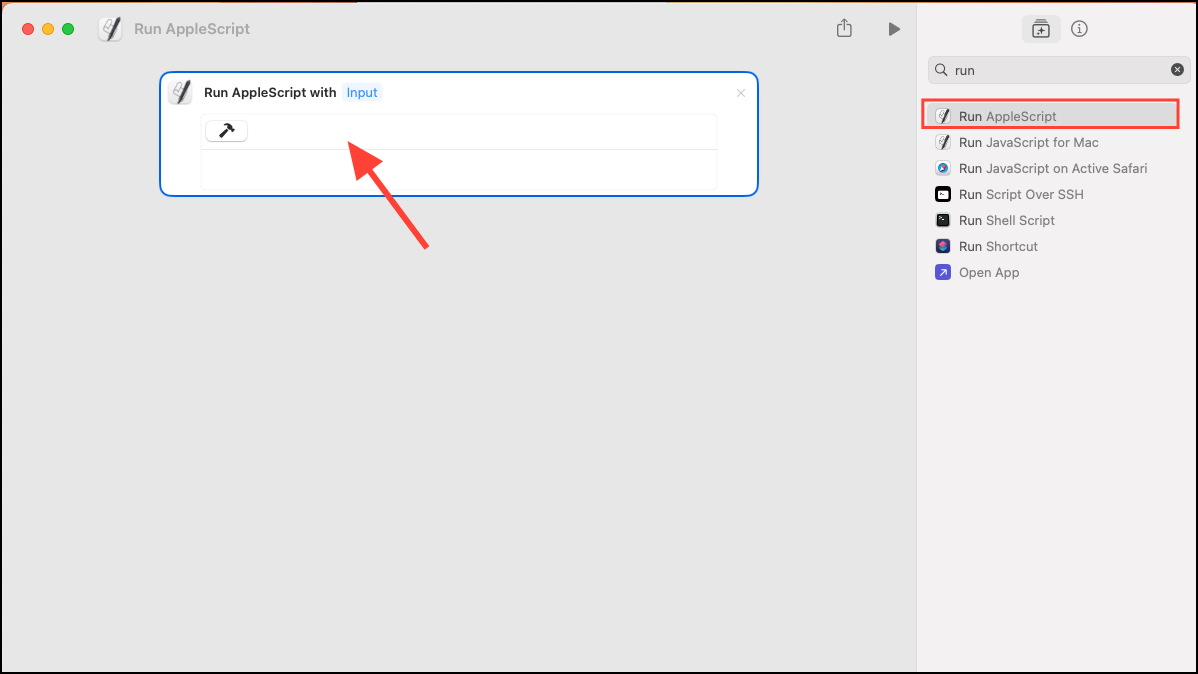
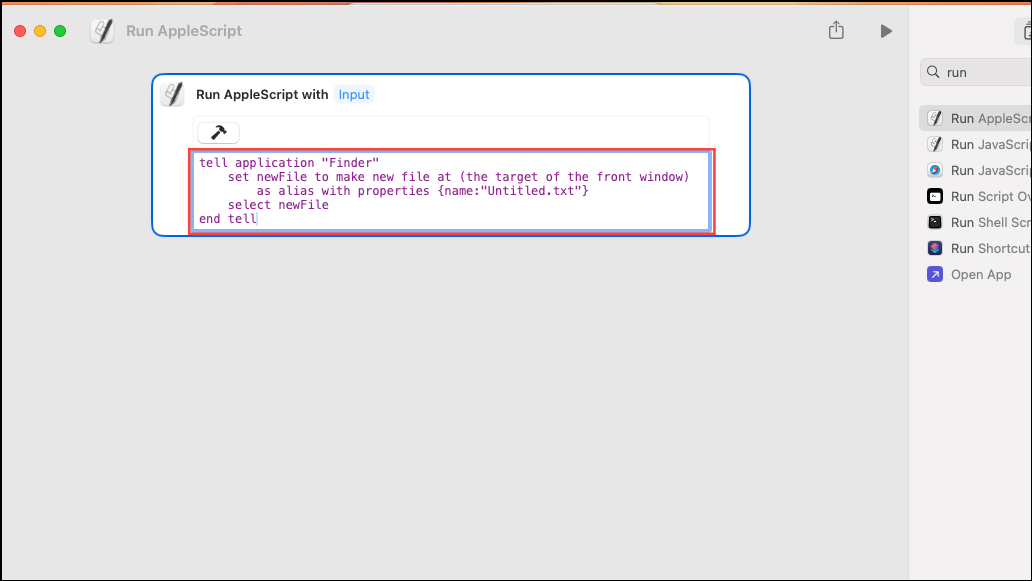
Step 4: Replace the default AppleScript with the following code:
tell application "Finder"
    set newFile to make new file at (the target of the front window) as alias with properties {name:"Untitled.txt"}
    select newFile
end tell
This script creates a new text file named "Untitled.txt" in the currently open Finder window and selects it for immediate renaming.
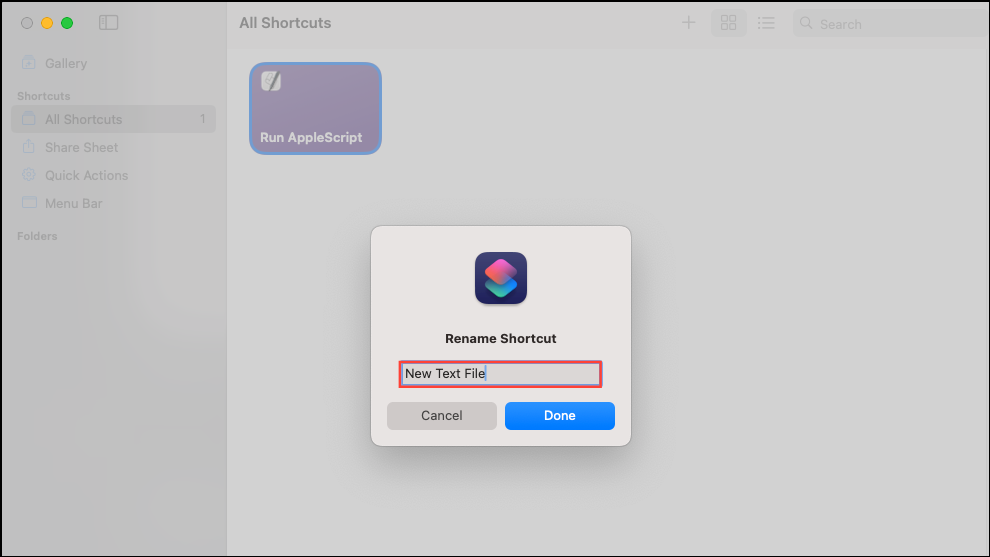
Step 5: Save the shortcut with a descriptive name like "New Text File".
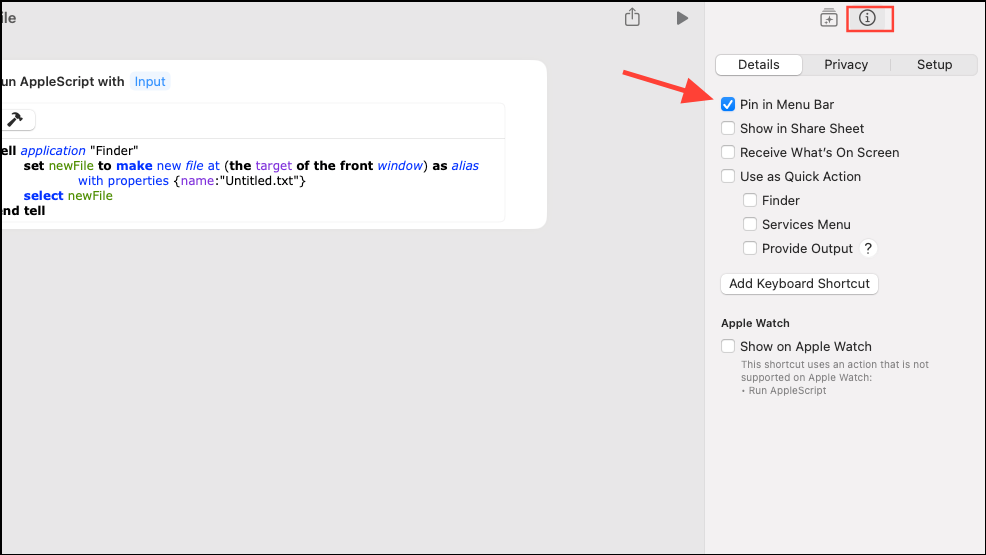
Step 6: To easily access this shortcut, pin it to the menu bar. Click the shortcut's details icon (i), then select "Pin in Menu Bar".
You can now create a new file directly from Finder by clicking the Shortcuts icon in the menu bar and selecting your shortcut.
Method 2: Using Automator Quick Action
Another effective way to add a "New File" option is by using Automator, a built-in macOS automation tool.
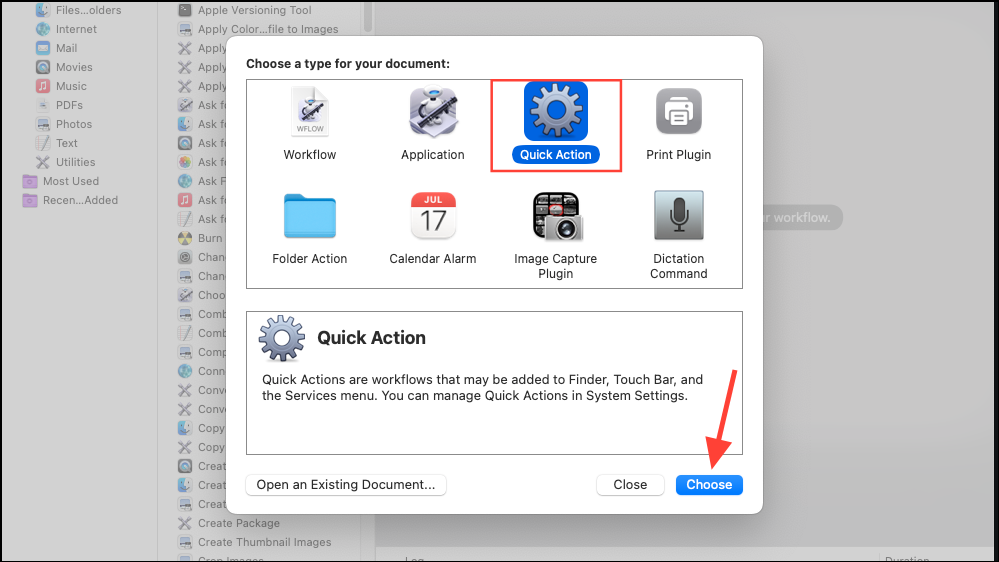
Step 1: Launch Automator from Spotlight or the Applications folder.

Step 2: Select "Quick Action" and click "Choose".
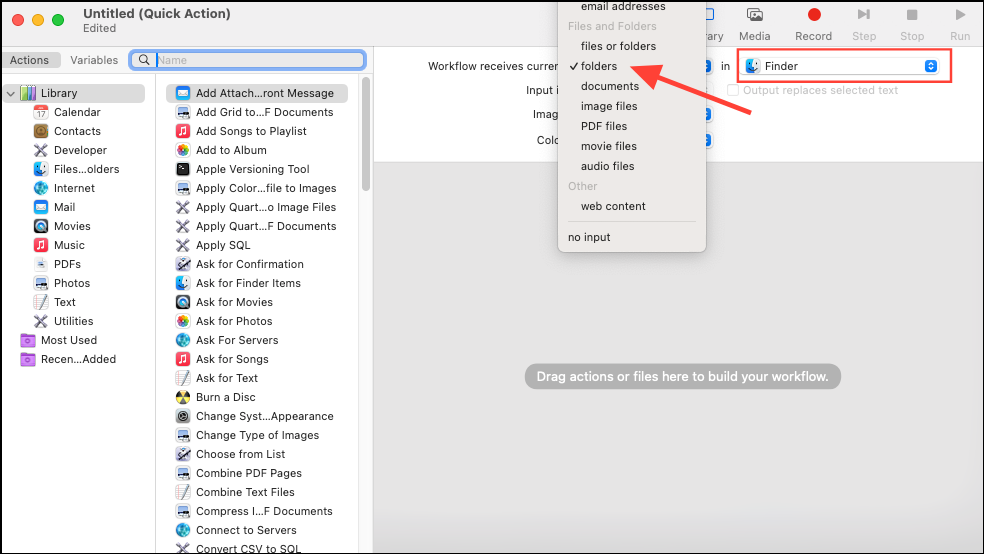
Step 3: Configure the workflow to receive "folders" in "Finder".
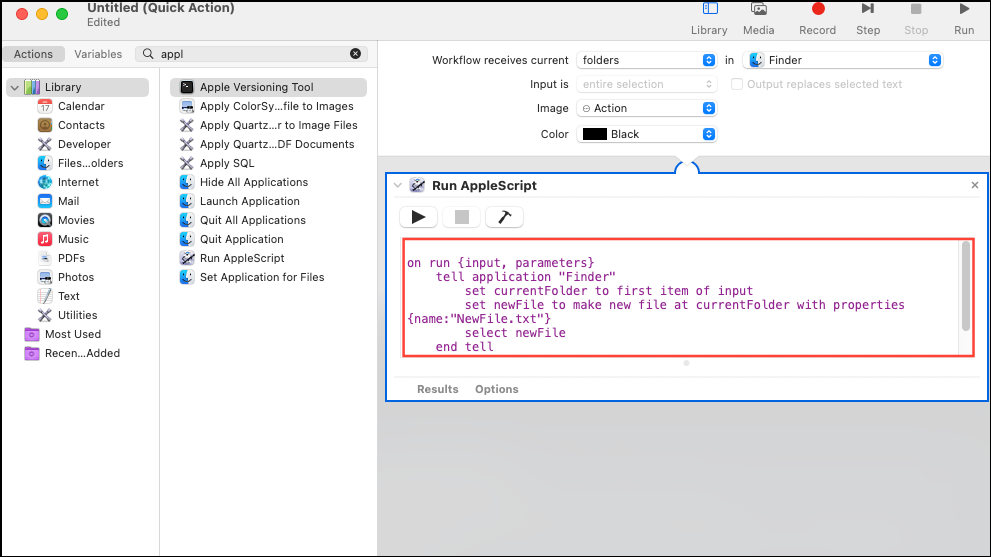
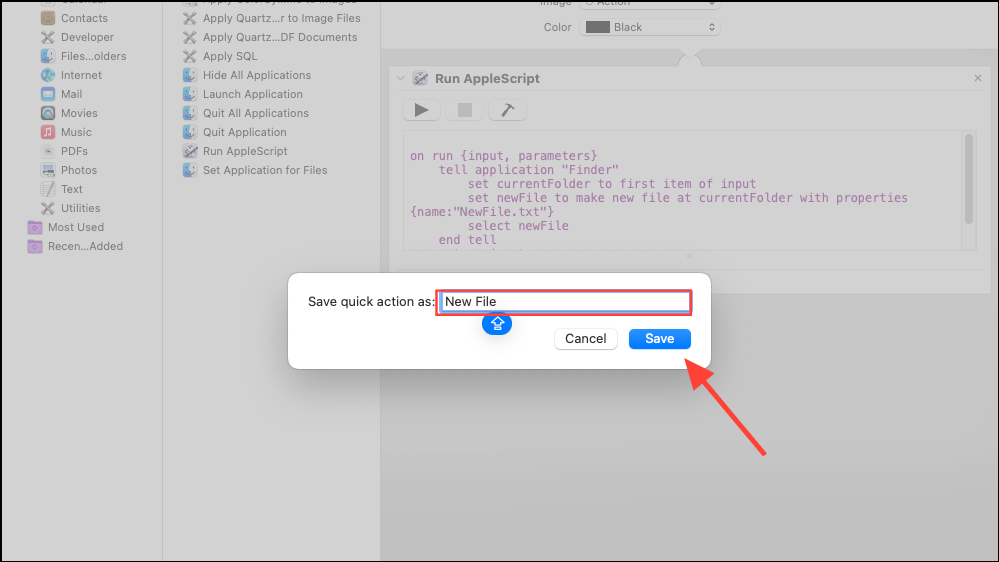
Step 4: Search for "Run AppleScript" and drag it into the workflow area. Replace the script with:
on run {input, parameters}
    tell application "Finder"
        set currentFolder to first item of input
        set newFile to make new file at currentFolder with properties {name:"NewFile.txt"}
        select newFile
    end tell
    return input
end run
Step 5: Save the Quick Action as "New File".
Step 6: Enable this Quick Action by navigating to System Settings > Keyboard > Keyboard Shortcuts > Services. Check the box next to "New File".

Step 7: Now, right-click any folder in Finder, select "Services", then click "New File" to instantly create a new file.
Method 3: Terminal Command
If you prefer using Terminal, you can quickly create a new file using the command line.
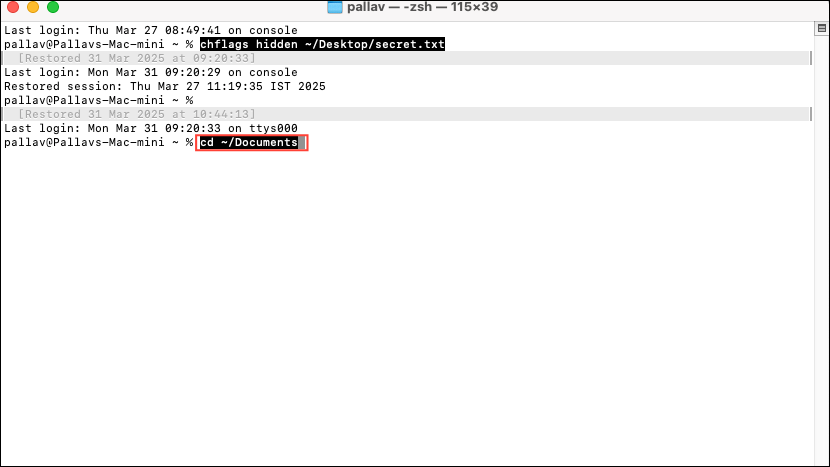
Step 1: Open Terminal from Spotlight or Applications > Utilities.
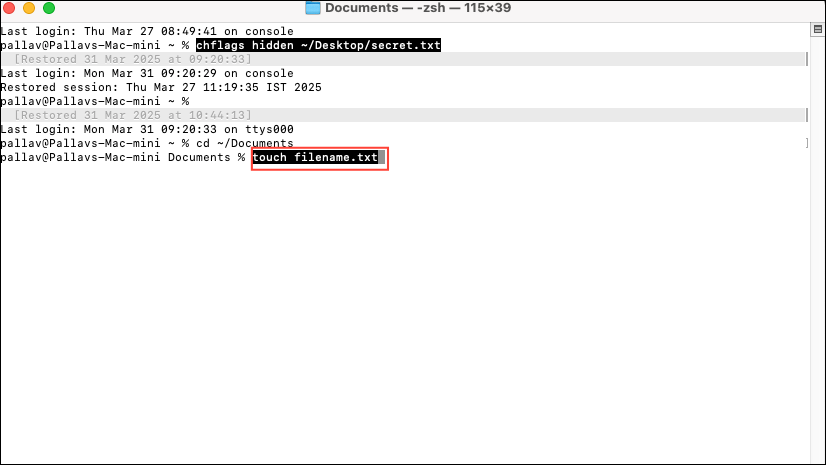
Step 2: Navigate to the desired folder using the cd command. For example, cd ~/Documents navigates to your Documents folder.
Step 3: Create a new file by typing touch filename.txt, replacing "filename.txt" with your desired file name.
This method is quick for those comfortable with Terminal but requires manual navigation to the folder.
Method 4: Using a Third-Party Finder Extension
For users who prefer a straightforward graphical solution, third-party apps like "New File Menu" can add a convenient right-click option directly in Finder.
Step 1: Open the App Store and search for "New File Menu Free".
Step 2: Install the app and enable its extension in System Settings > Extensions > Finder Extensions.
Step 3: Now, right-click any Finder window or desktop space, and you'll see a "New File" option in the context menu, allowing quick file creation.
This method is simple and user-friendly but may limit file type options in the free version.
By implementing any of these methods, you can significantly simplify your workflow on macOS Sequoia. Choose the one that best fits your comfort level and use case, and you'll no longer miss the convenience of a built-in "New File" option.