In Gmail, you can set up your own custom signature that will be added to all the emails you send. Your signature can include your name, job title, phone number, social media details, and other information you wish. Here is how you can add a signature in Gmail on the web and mobile devices.
Create and change the signature on Gmail web
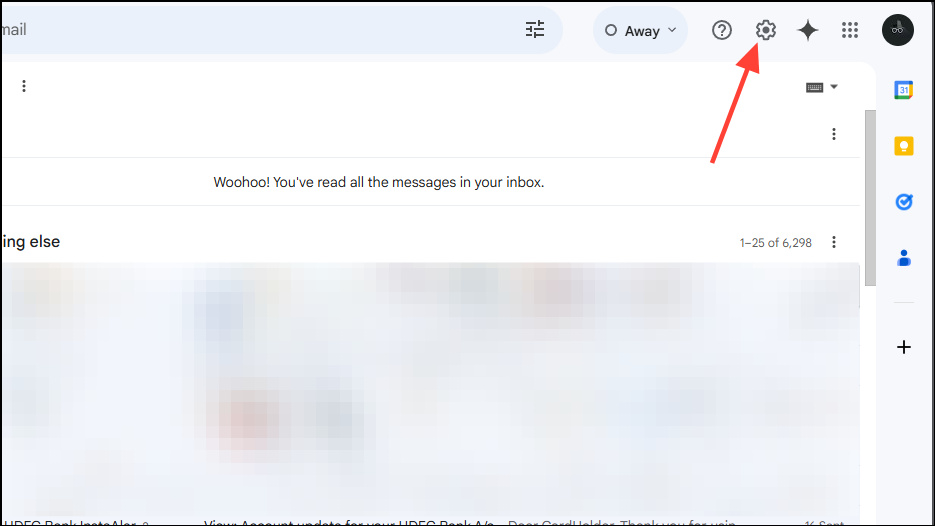
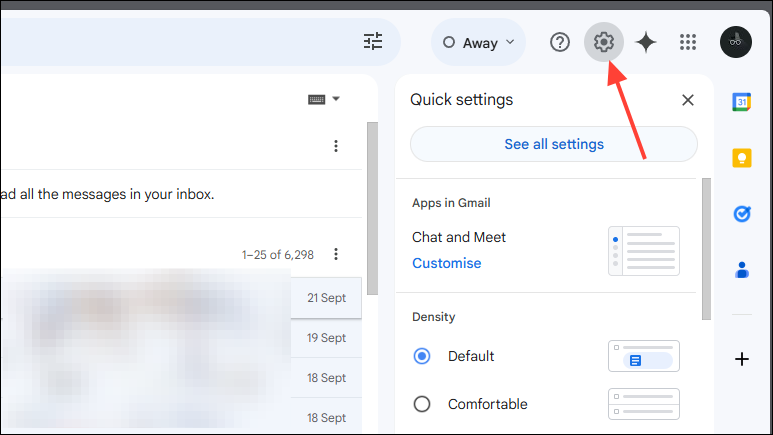
- Open Gmail and click on the gear icon at the top to access Gmail settings.
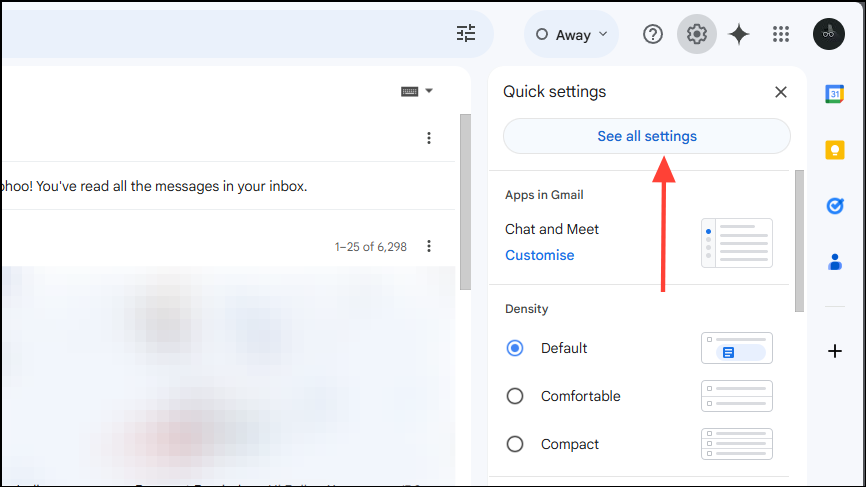
- In the dropdown menu that appears, click on 'See all settings'.
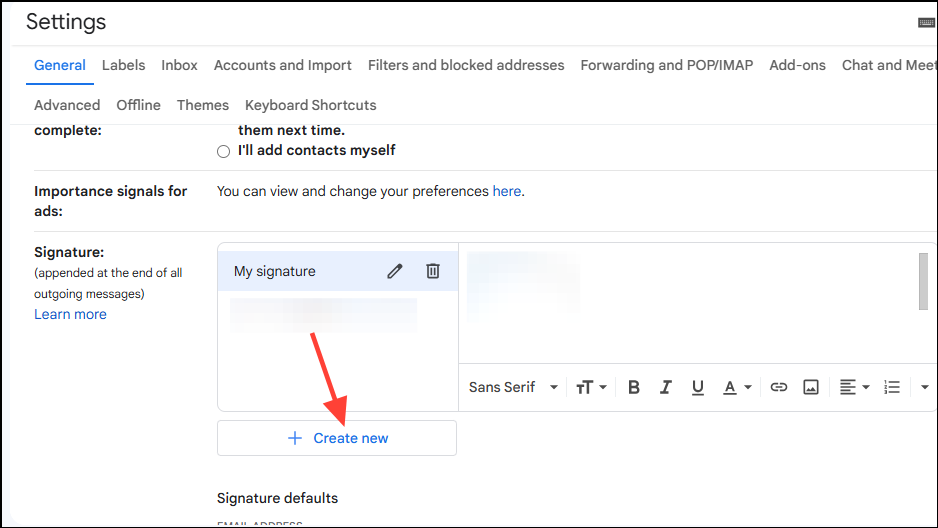
- When the Settings page opens, scroll down to the 'Signature' option and click on 'Create new'.
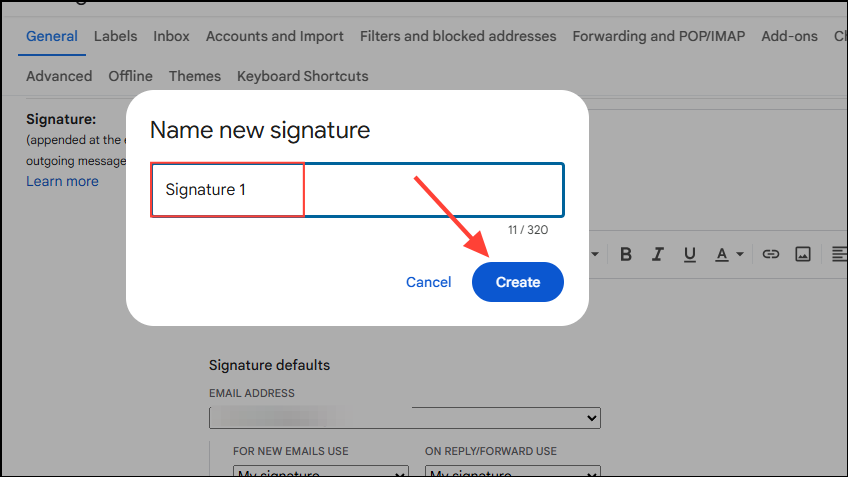
- In the pop-up that appears, type the name of your signature and then click on the 'Create' button.
- Now, type in the text you want to appear as your signature on the right.
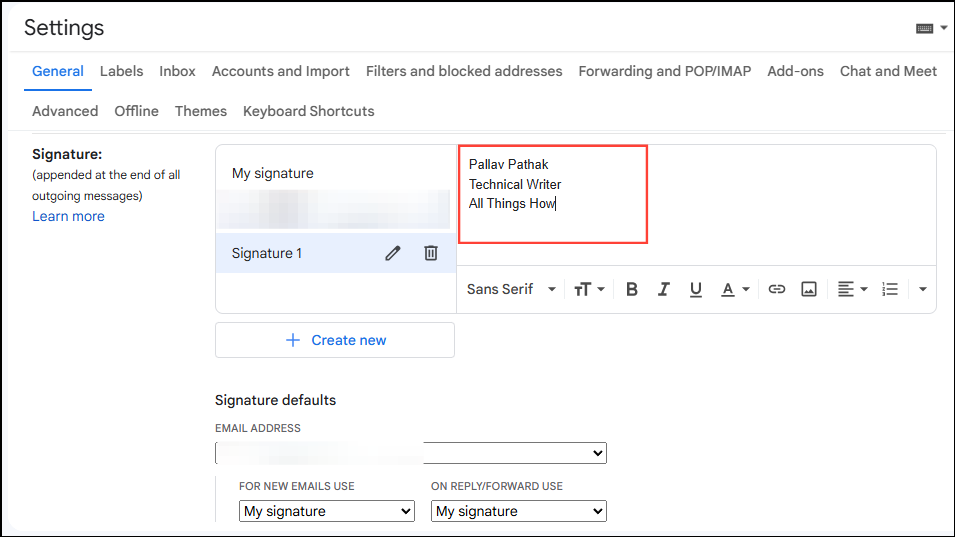
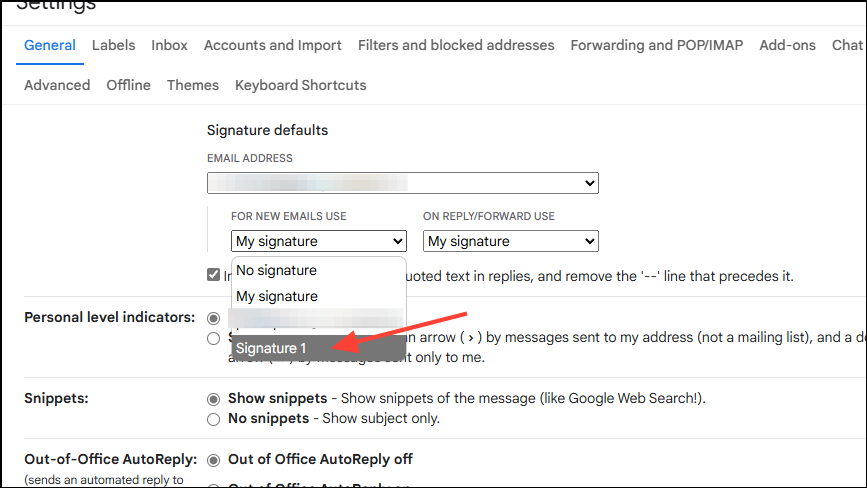
- Now scroll down to the 'Signature default' section and select the email signature you created from the drop-down menu to set it as the default signature for all new emails. You can also set it for the 'Reply/Forward' option on the right.
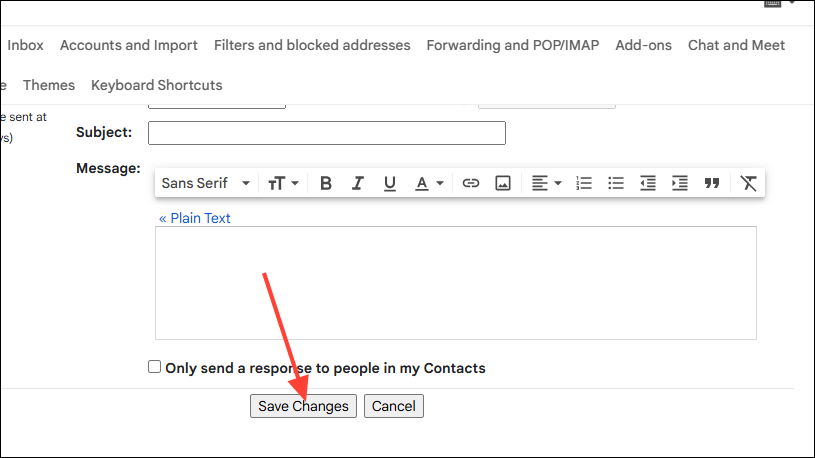
- Finally, scroll down to the bottom of the page and click on the 'Save changes' button.
- To change your signature on Gmail web, click on the gear icon and then on 'All settings' as before.
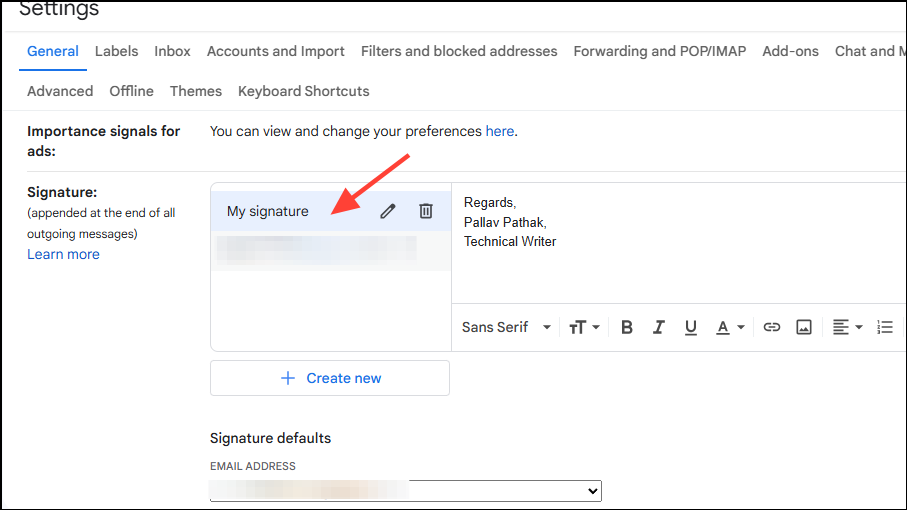
- Scroll down to the Signature section and click on the Signature you want to change.
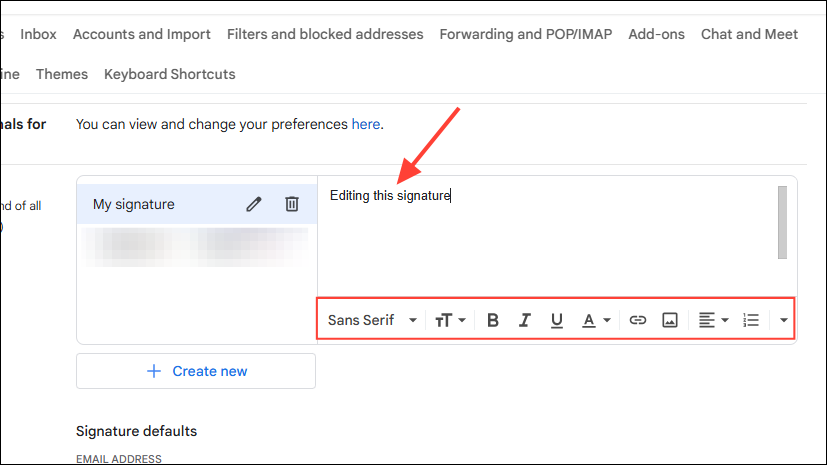
- Now you can click on the right and edit your signature as you want. You can even use the various formatting options at the bottom to change the font of your signature, make it bold, italicized, or underlined, and even add an image.
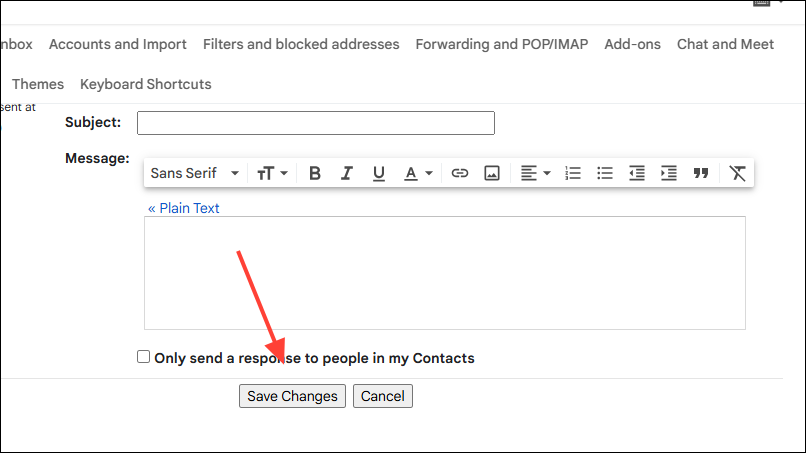
- When you've edited your signature as you want, scroll down and click on the 'Save changes' button.
Create and change signature on the Gmail mobile app
If you want, you can set mobile-specific signatures in Gmail which will override the web versions when you send emails from your mobile device.
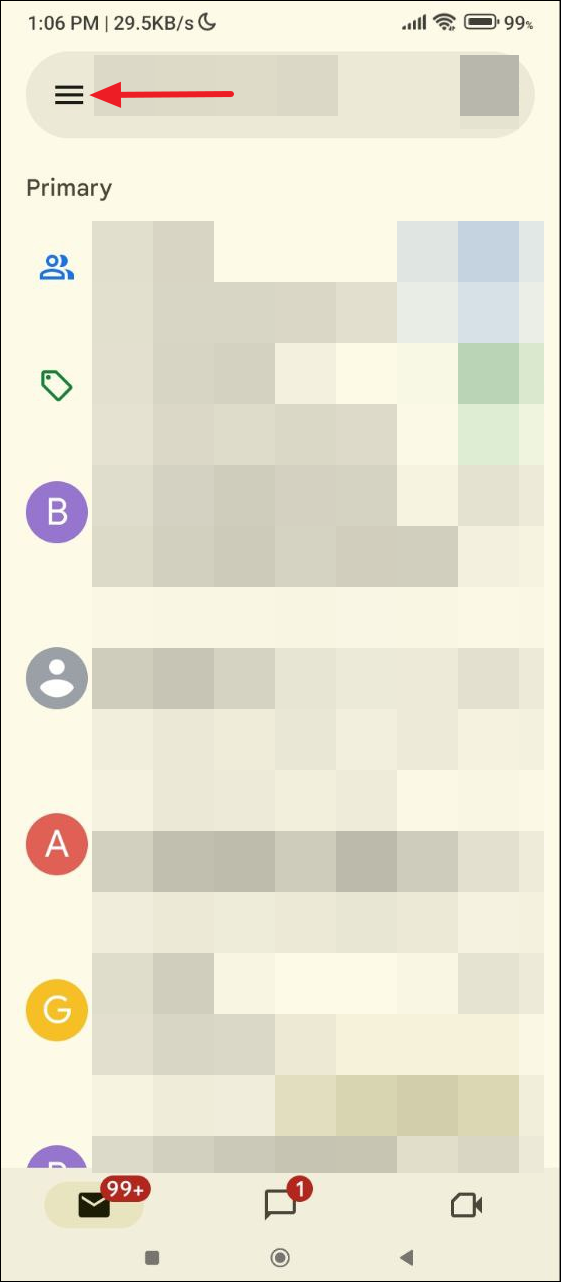
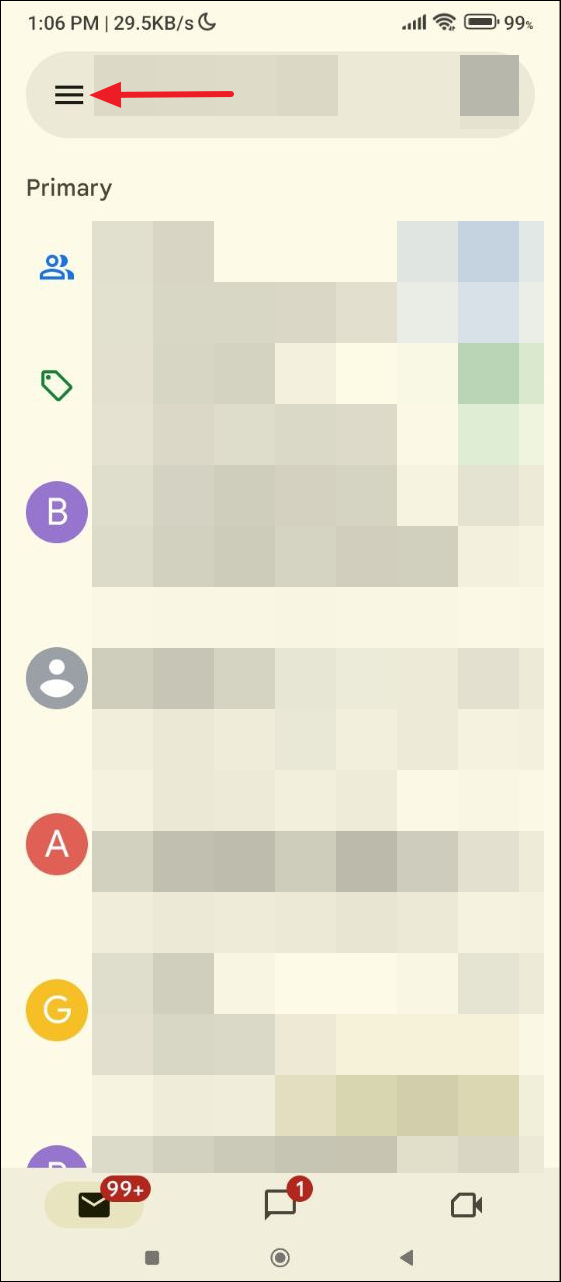
- Open Gmail on your mobile device and tap on the hamburger menu that appears as a set of three horizontal lines on the top left.
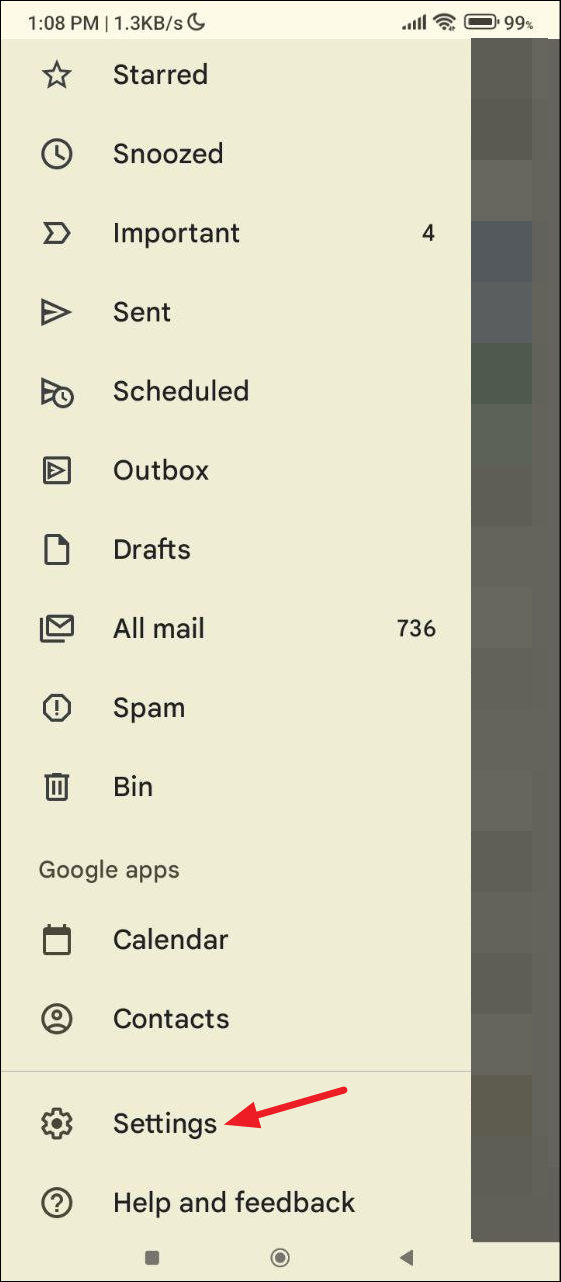
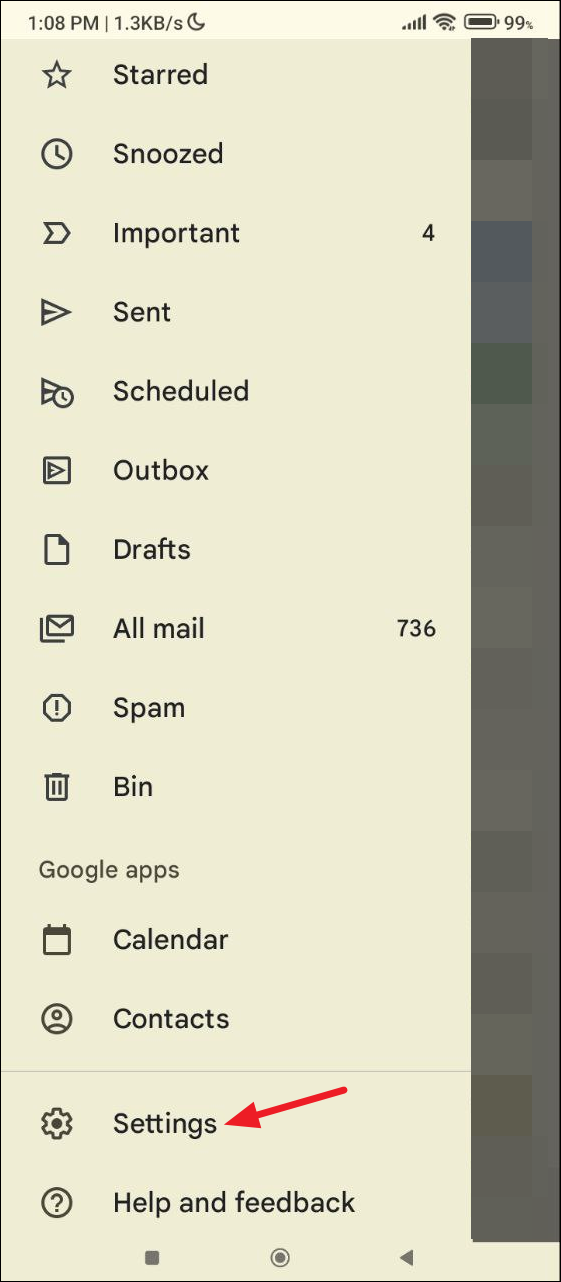
- Then tap on 'Settings'.
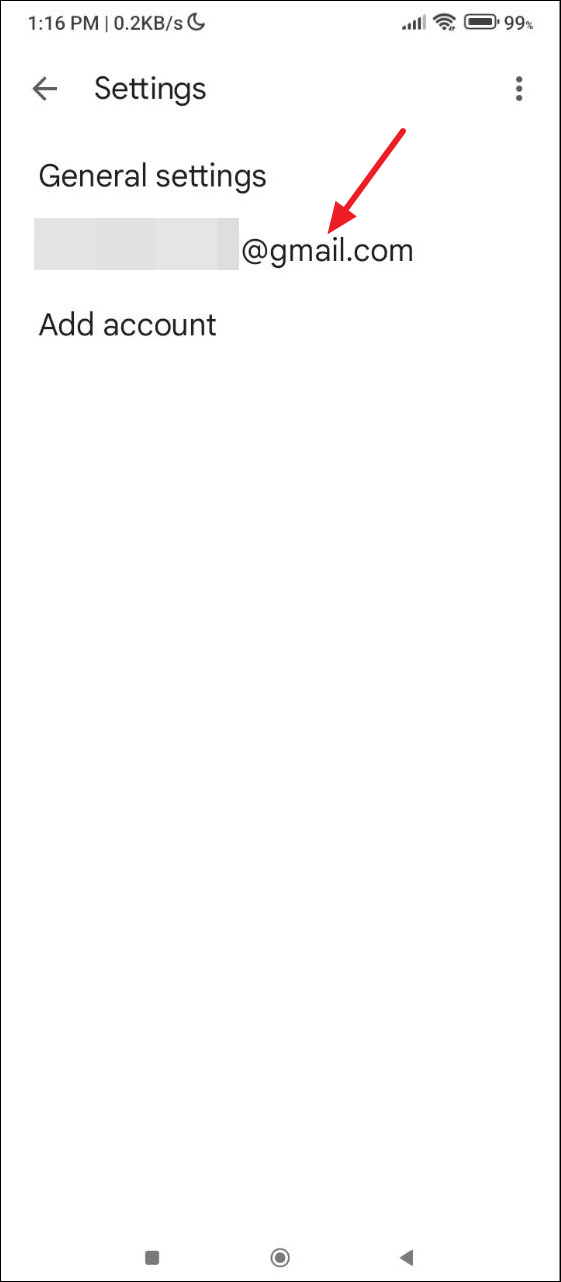
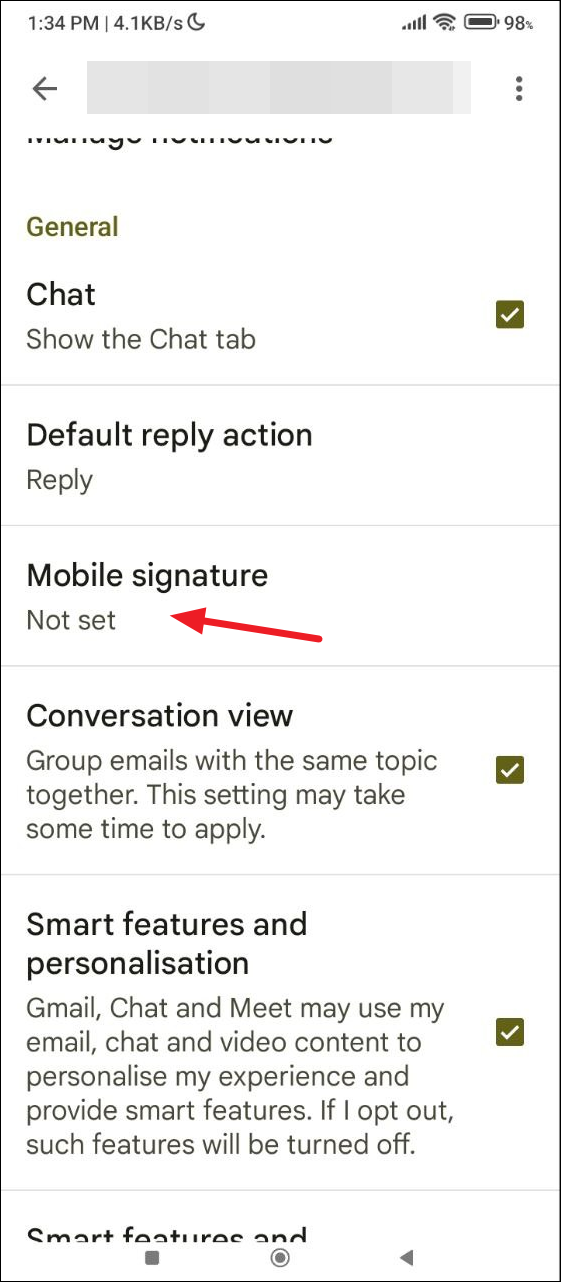
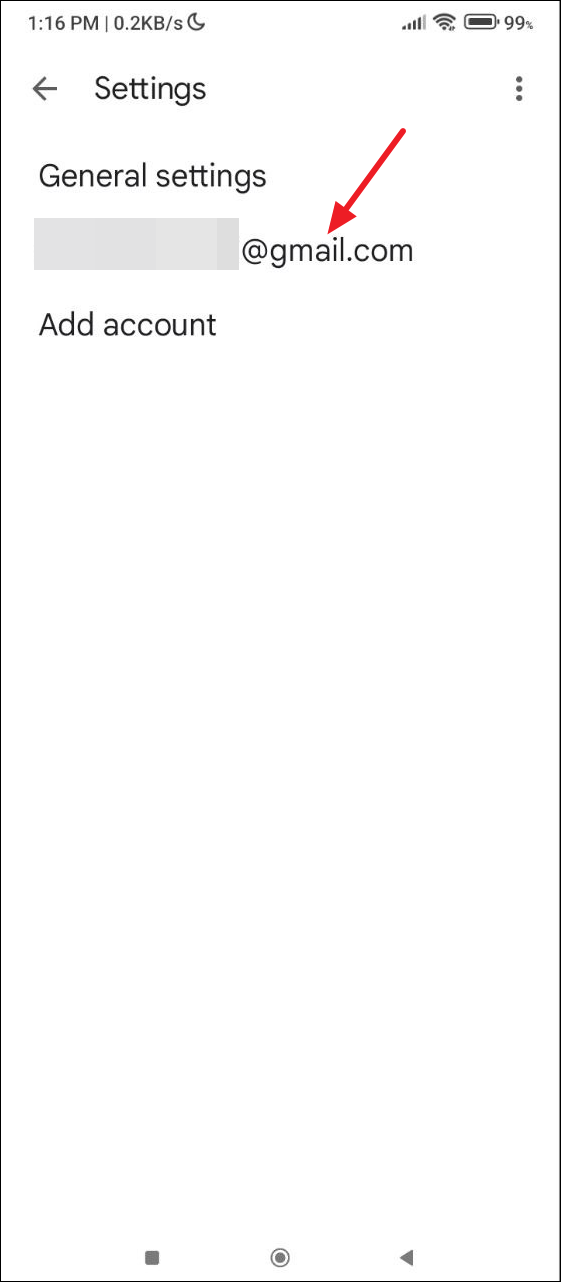
- On Android, tap on your email address or profile picture to access the Signature settings, then tap on the 'Mobile signature' option
- On iPad or iPhone, tap on 'Signature Settings' from the Settings menu and turn on the toggle for 'Mobile Signature'.
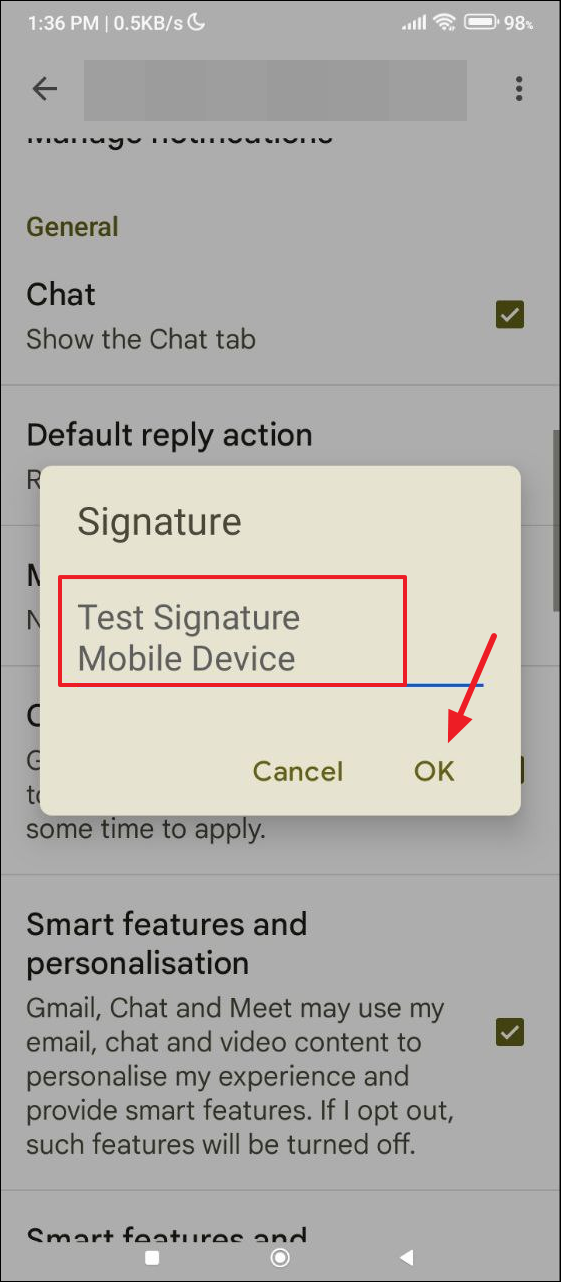
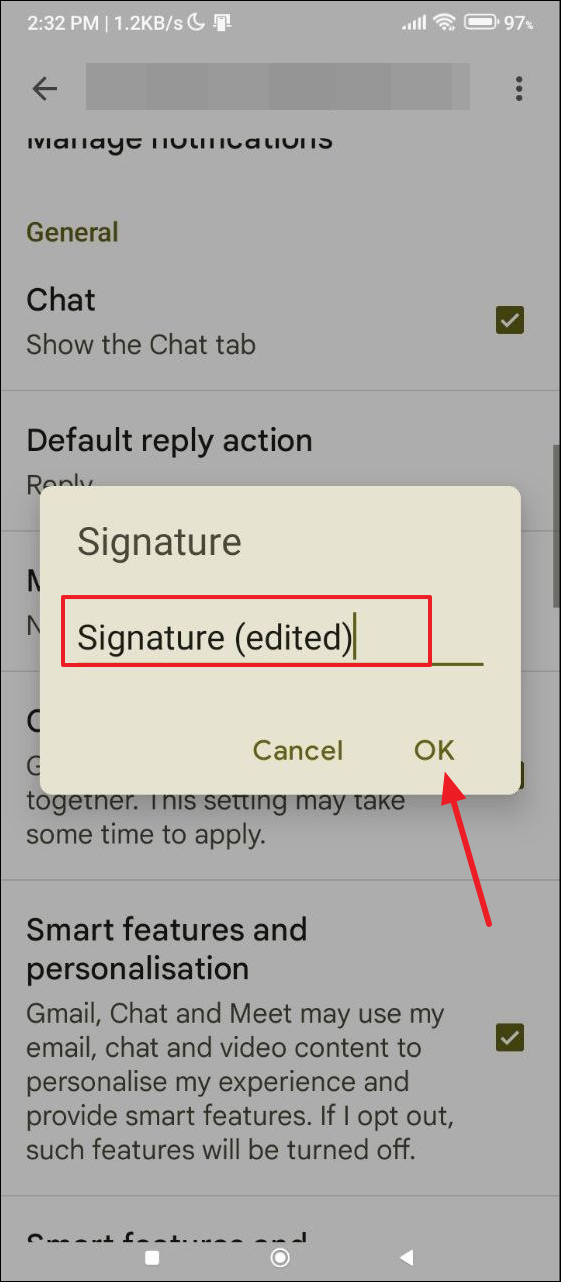
- Finally, type in your signature and tap on 'OK'.
Change Signature on Android
- To change your signature on a mobile device, open Gmail and tap on the hamburger menu at the top.
- Then tap on 'Settings' in the dropdown menu.
- Now tap on your email address.
- Scroll down and then tap on 'Mobile signature'.
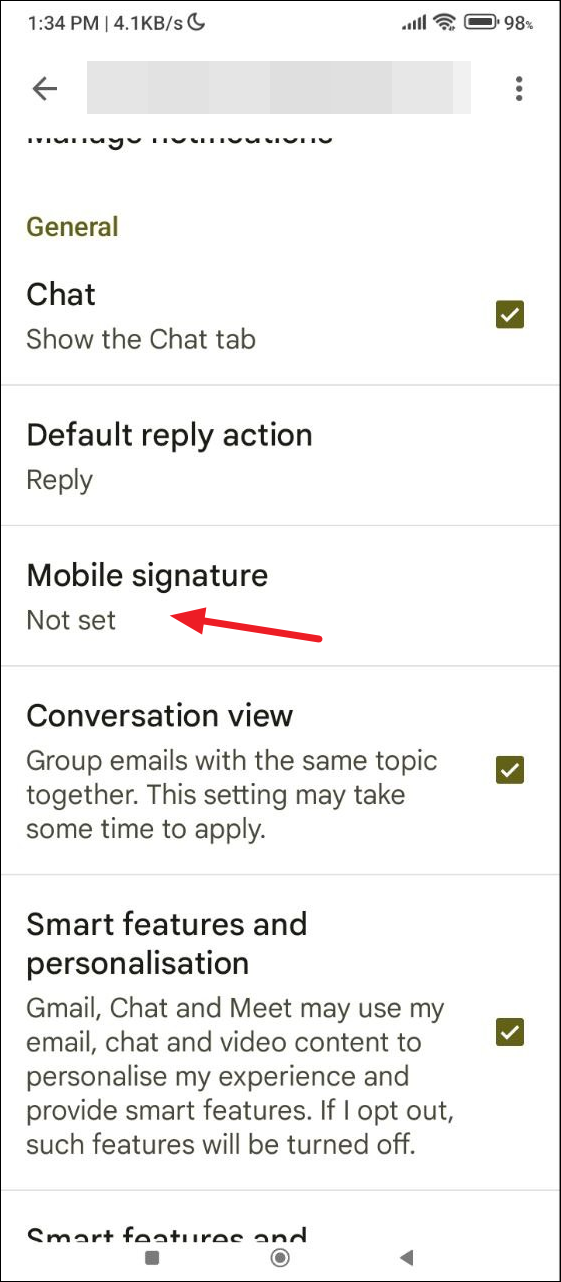
- Now you can type your new email signature in the box that appears.
Change Signature on iPhone and iPad
The process of editing your signature in Gmail on an iPhone or iPad is slightly different than on Android.
- Open the Gmail app and navigate to Settings from the hamburger menu.
- Next, tap on 'Signature settings'.
- Tap on your existing signature and edit it.


Things to know
- If you do not set a mobile signature for Gmail, the signature you set using the web version of the app will appear when you send emails.
- The signature you set using your mobile device will only appear when you send emails using a mobile or tablet; otherwise, the signature you created using the web version will appear.
- You can also set up multiple signatures in Gmail for different purposes and customize them using the provided options.
- By default, there is no signature set in Gmail on the web and mobile version and you can also remove all the signatures you created at any time if you do not wish outgoing emails to contain them anymore.


