Microsoft Lists, often called the evolution of SharePoint lists, is a Microsoft 365 power tool for organizing and tracking information. You can use Lists as an independent Microsoft app or within Microsoft Teams for efficient tracking of your work.
With Microsoft Lists, you can track your assets, issues, routines, events, to name a few. Columns are the backbone of Microsoft Lists that help you group, categorize, and track the information in your list.
But when a column becomes obsolete, it’s just as easy to get rid of it. Whether you’re using Lists in Microsoft Teams or independently from the app, the process for deleting a column is the same for both despite some other differences.
Where to access the List from?
If it’s in Microsoft Teams, open the list in either the desktop app or the web app. The mobile app only supports viewing the list and editing its contents. You cannot create lists nor make structural changes to them from the mobile app.
Lists are added in Microsoft Teams as tabs in a channel. So, go to the team channel where the list is present to access it.
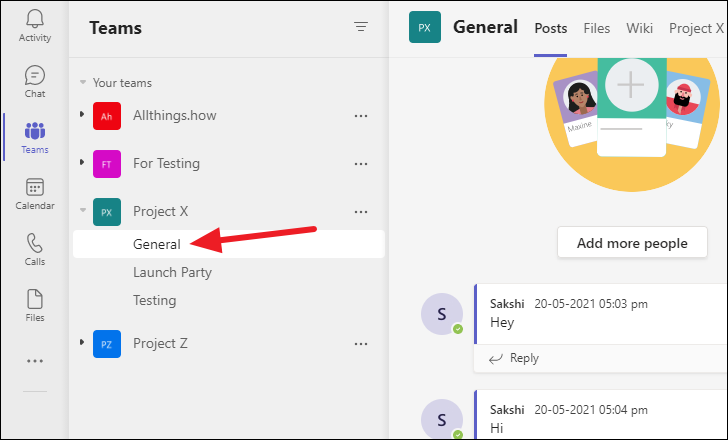
Then, click the tab that is the list you want to open. The tab won’t say “List”, instead, it will say the name of the list.
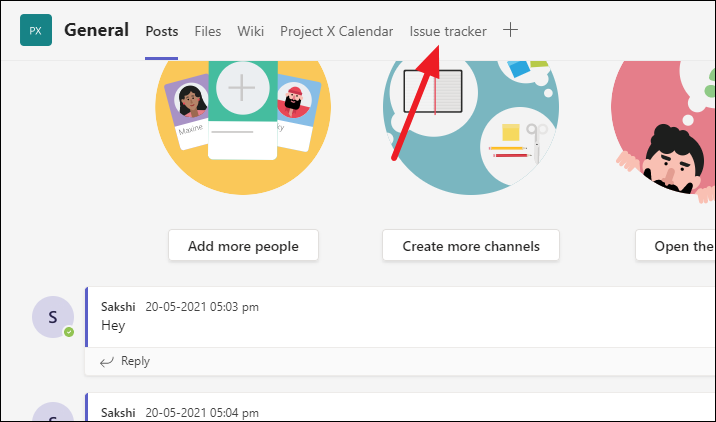
Any lists you create in Microsoft Teams are saved to SharePoint, so you can also make changes from the Microsoft Lists app. But the vice versa is not true.
If you create a list in the Lists app, it’s only available there unless you add it to a team channel explicitly. Go to the Microsoft Lists web or desktop app and sign in to your Microsoft account to access the list. You can also access all lists from the SharePoint site. All your lists will be available; click the one you want to access.
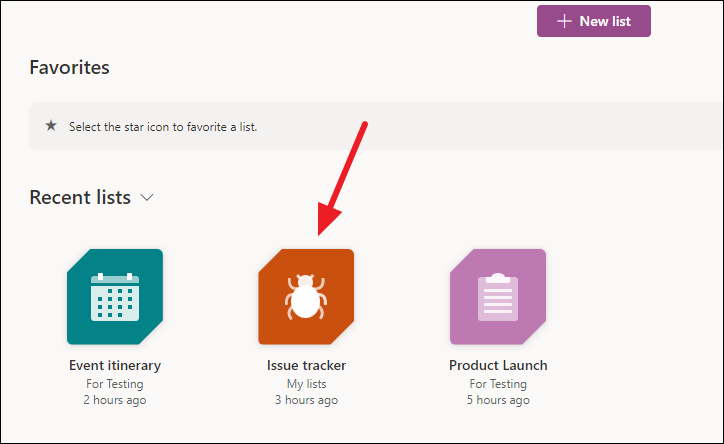
Nevertheless, all changes are synced for any lists that are present in both Teams and Lists app. So, no matter where you make the changes from, they’ll be reflected in both apps.
Only personal lists cannot be added to Microsoft Teams and they are only available from the Microsoft Lists app.
Deleting a Column
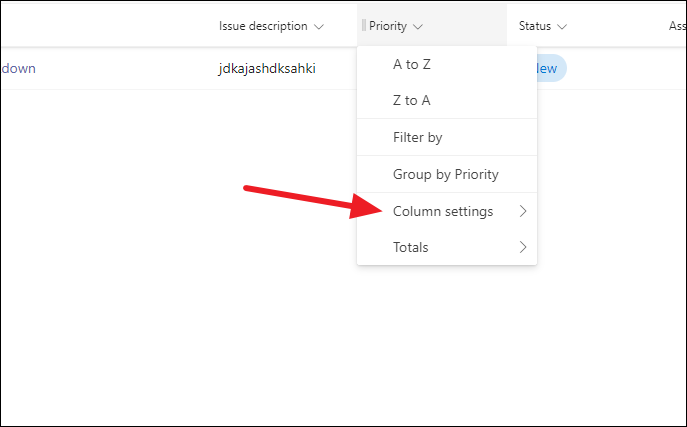
Open the list where you want to delete the column. Once you’ve opened the list, go to the column you want to delete. Then, click the ‘Column Header’ for the column you want to delete.
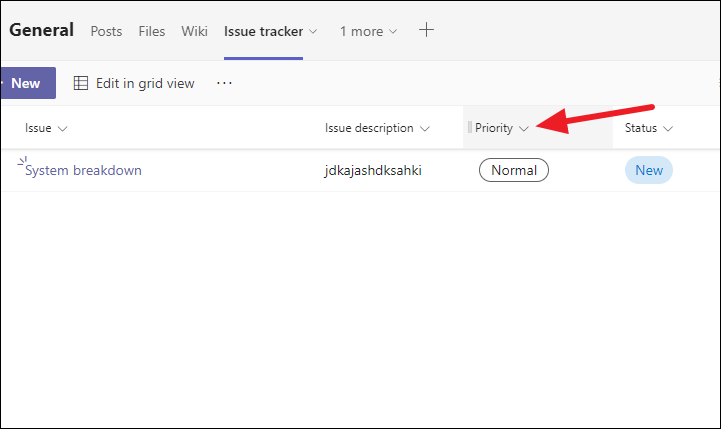
From the menu that appears, go to ‘Column Settings’.
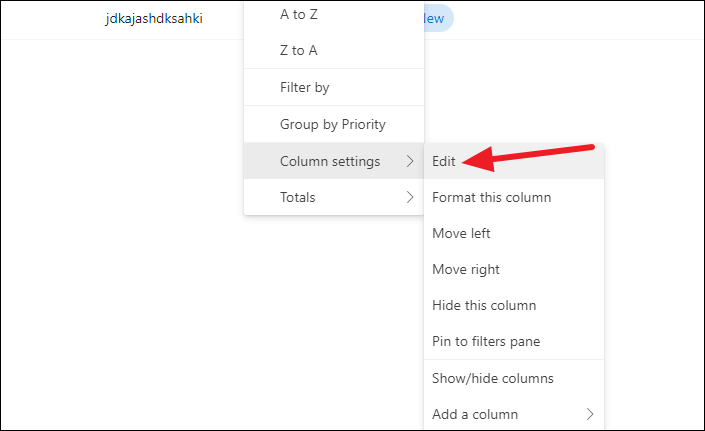
Then, go to ‘Edit’ from the sub-menu.
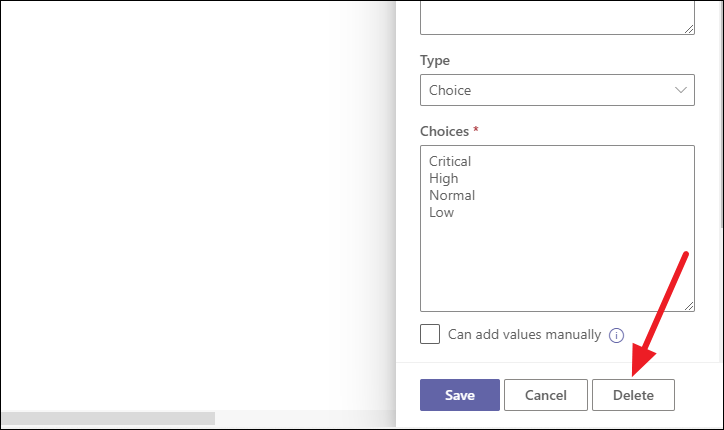
The pane to edit the column will open on the right side of the screen. Click the ‘Edit’ button at the bottom of the pane.
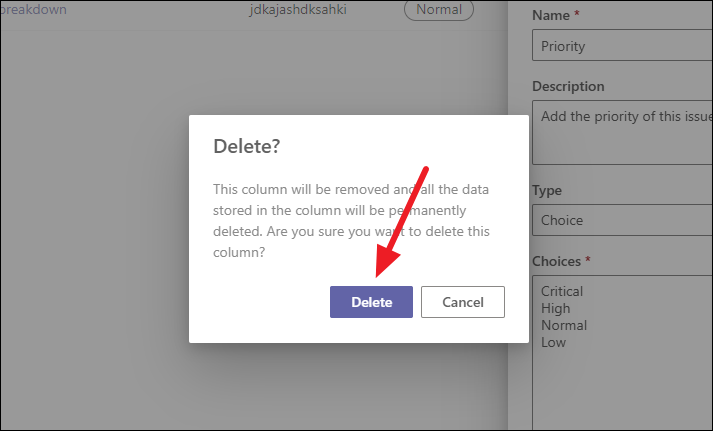
A confirmation prompt will appear on the screen. Click ‘Delete’ to permanently delete the column and the data in it.
Why Can’t I Delete a Column?
When you go on to delete some columns, you’ll find that there is no option to delete them. Lists have certain columns, such as Title, Name, Issue, etc. that are essential. As such, you can’t delete these columns.
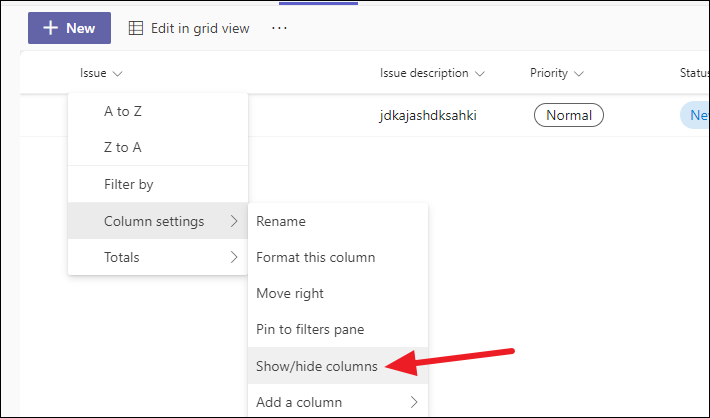
If you want to be rid of these columns, you can instead hide them. Go to the column header you want to hide and click the ‘Column Settings’ option from the menu. Then, go to the ‘Show/ Hide Columns’ option in the sub-menu.
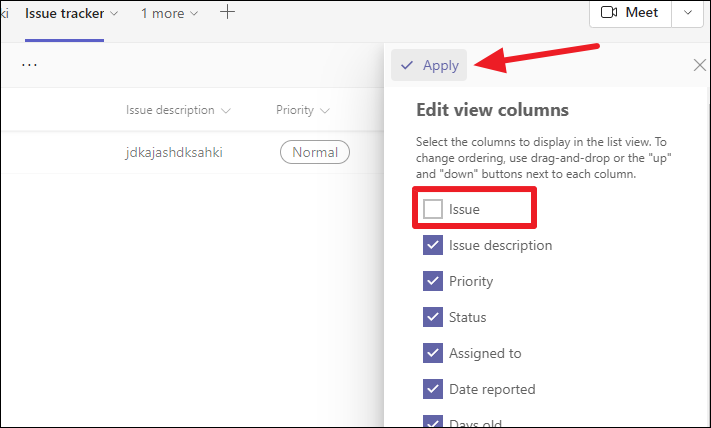
The Edit view columns pane will appear on the right. The columns that are selected are the ones that appear on the list. Deselect the column you want to hide and click ‘Apply’ to save the changes.
Microsoft Lists makes it very easy to use lists in Microsoft 365 with its intuitive and user-friendly interface. Even if you were a SharePoint Lists user, getting used to Microsoft Lists isn’t a challenge because of the similarities it shares with the former. If anything, it only makes it easier to use the whole platform. Moreover, no matter where you are using Lists to organize and keep track of your information, the experience is uniform throughout.

