
Windows 11 and 10 accumulate thousands of files across various folders over time. While many of these files are essential for system operations, others are temporary files that can be safely removed to free up disk space and potentially improve performance.
Temporary files can include application data, error logs, browsing data, Windows update files, and more. While these files serve a purpose initially, they often linger unnecessarily, taking up valuable storage space. Before deleting temporary files, it’s wise to identify which ones you may still need.
Common temporary file types in Windows
-
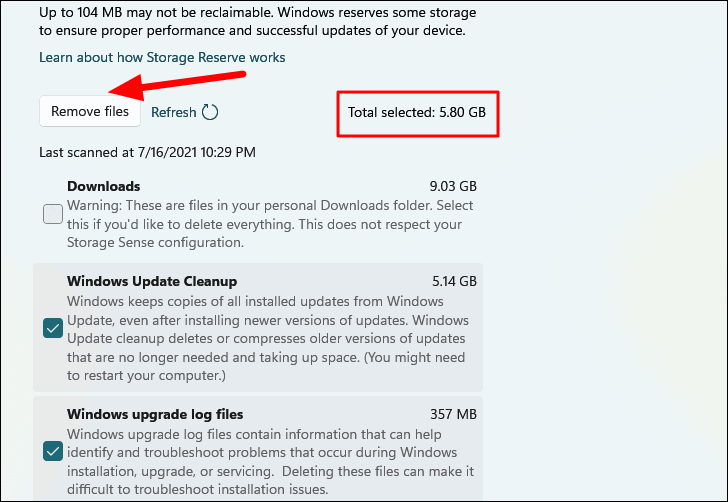
Windows Update Cleanup: Files from previous Windows updates, stored in case you need to revert. Safe to delete if your current Windows version is stable.
-
Windows Upgrade Log Files: Created during Windows upgrades to help troubleshoot issues. Can be deleted if your current version is working properly.
-
Windows ESD Installation Files: Used for resetting Windows. Takes up significant space but recommended to keep unless you’re critically low on storage.
-
Temporary Files: Created by apps during tasks. Usually cleared automatically, but can be manually deleted if not.
-
Temporary Internet Files: Browser cache for faster page loading. Deleting may impact browsing speed initially.
-
Thumbnails: Help Windows quickly load image previews. Safe to delete as Windows will recreate them when needed.
-
Microsoft Defender Antivirus: Non-critical files used by Windows’ built-in antivirus. Safe to remove.
-
Device Driver Packages: Copies of previously installed drivers. Can be deleted if current drivers are functioning well.
Now let’s explore the most effective methods to delete these temporary files and reclaim disk space.
Delete temporary files through Storage Sense
Storage Sense is a built-in Windows feature that can automatically or manually clear temporary files:
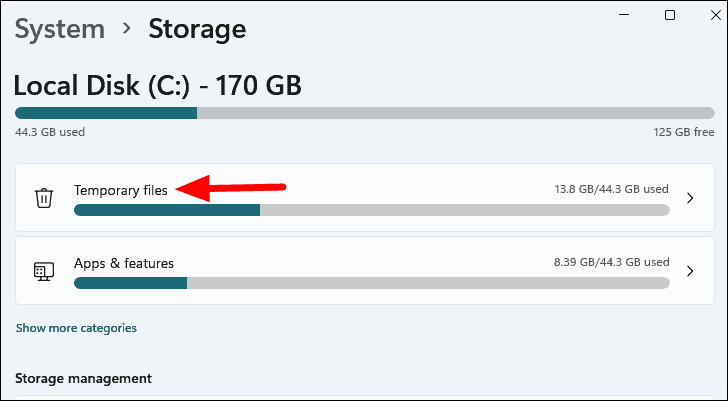
- Open Settings by pressing Windows key + I
- Go to System > Storage
- Click on “Temporary files”
- Select the file types you want to remove
- Click “Remove files”
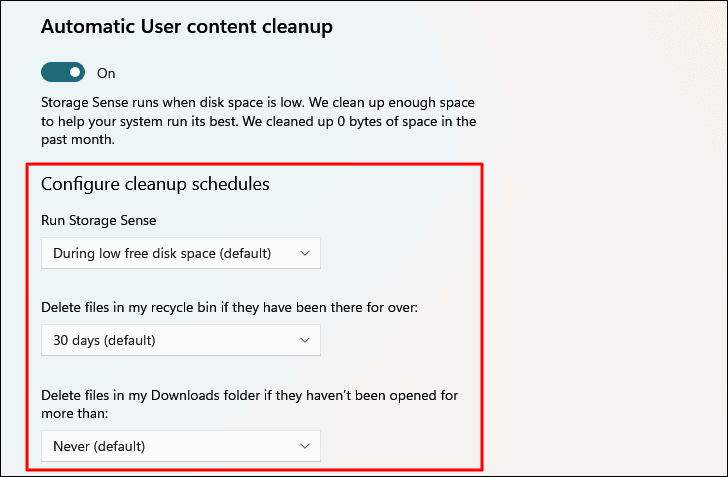
To enable automatic cleanup:
- Toggle on “Storage Sense” in the Storage settings
- Click on “Storage Sense” to configure cleanup schedules
Use Disk Cleanup utility
Disk Cleanup is another built-in Windows tool for removing temporary files:
- Search for “Disk Cleanup” in the Start menu and run as administrator
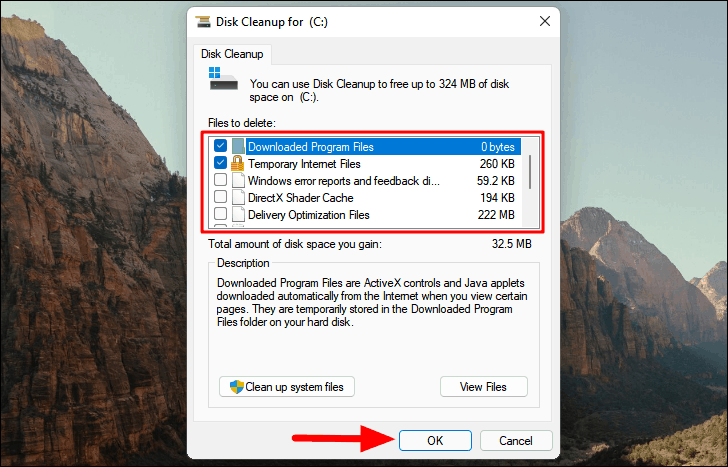
- Select the drive to clean and click OK
- Choose the file types to delete and click OK
To include system files in the cleanup:
- Click “Clean up system files”
- Select the drive again
- Choose additional file types to remove
Delete temporary files using Command Prompt
For a more direct approach:
- Open Command Prompt as administrator
- Enter the command:
del /q/f/s %TEMP%\* - Press Enter to execute
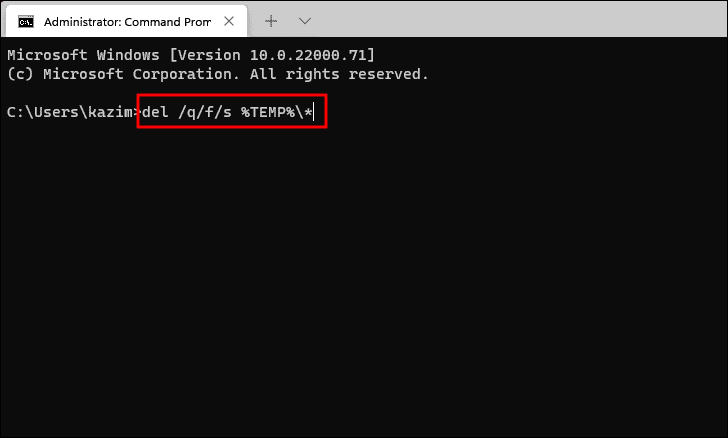
This will remove files from the Windows temporary folder that aren’t currently in use.
Clear browser temporary files
Browsers store significant amounts of temporary data:
- Open your browser’s settings
- Navigate to the privacy or history section
- Choose to clear browsing data
- Select temporary internet files, cookies, and other site data
- Click to clear the data
Remember to repeat this process for each browser you use regularly.
By implementing these methods, you can effectively manage temporary files on your Windows system, potentially improving performance and freeing up valuable disk space. Try these techniques and see the difference in your system’s storage. If you have any questions or additional tips, feel free to share them in the comments below.